Wheel spacers can work safely on a Toyota 4Runner, but safety depends on exact vehicle fitment, compatible wheels, correct hardware, careful installation, and regular inspection. A spacer that fits a 1996–2024 4Runner may not fit a 2025 or newer model. Tire size, wheel offset, suspension changes, and local regulations also affect whether spacers are a sensible choice.
Quick Answer
Wheel spacers can be safe on a 4Runner when they are made for your exact model year, hub bore, bolt pattern, studs, wheels, and load requirements. Use documented hardware, follow the spacer and Toyota torque instructions, verify full clearance, and recheck the fasteners. A spacer is not safe merely because it is hub-centric.
Key Takeaways
- Confirm the 4Runner generation first. Many 1996–2024 kits use different studs and thicknesses than 2025-and-newer kits.
- Choose a spacer that matches the hub bore, bolt pattern, stud size, wheel seat, load requirements, and intended wheel type.
- A wider track does not lower the vehicle’s center of gravity or automatically enlarge the tire contact patch.
- Spacers can change effective wheel offset, scrub radius, steering feel, bearing loads, and where the tire rubs.
- Use a calibrated torque wrench, follow both manufacturers’ instructions, and inspect the assembly after the initial drive and at every wheel service.
Are Wheel Spacers Safe on a Toyota 4Runner?
Yes, a properly engineered and correctly installed spacer can be used safely. However, no thickness, brand, or centering style is universally safe for every 4Runner. The correct part must match your model year, wheel, hub, studs, and intended use.
Hub-centric and wheel-centric features help the spacer and wheel seat concentrically. That can reduce runout and vibration when the dimensions match correctly. These features do not compensate for dirty mounting faces, damaged studs, incorrect lug seats, inadequate thread engagement, incompatible wheels, or low clamping force.
Installation quality matters as much as the part. Clean mating surfaces, verify that every component sits fully flush, hand-start the fasteners, and tighten them in stages with a calibrated torque wrench. Use the torque and thread-locking instructions supplied for your exact spacer system and the wheel specifications for your exact 4Runner.
Warning: Stop driving immediately if you feel new vibration, hear clicking or clunking, find a loose fastener, see a cracked spacer, or notice the wheel contacting brakes, suspension, bodywork, or a protruding factory stud.
How Do Spacers Actually Work?
A wheel spacer sits between the hub and wheel mounting face. Its thickness moves the wheel outward by approximately the same amount, reducing the wheel’s effective positive offset. For example, adding a 25 mm spacer has a similar offset effect to choosing a wheel with 25 mm less positive offset, although a bolt-on spacer also introduces another joint and another set of fasteners.
Basic Spacer Function
Moving the wheel outward can create inner clearance between the tire or wheel and components such as the upper control arm, frame, or suspension link. It can also bring the tire closer to the outer fender, flare, mud flap, body mount, and bumper liner. You are moving the entire steering arc, not simply creating clearance everywhere.
- Bolt-on spacers attach to the factory studs and provide a second set of studs for the wheel.
- Slip-on spacers sit over the factory studs and normally require enough remaining thread engagement or properly installed longer studs.
- Wheel adapters may also change the bolt pattern or hub bore and need their own verified load and fitment data.
Never stack spacers. Do not grind, drill, cut, or otherwise modify a spacer unless the manufacturer’s written instructions specifically permit that work. If factory studs protrude beyond a bolt-on spacer, the wheel must have suitable relief pockets or the system must provide another approved solution.
Track Width Effects
Spacers increase track width and change effective wheel offset. They do not lower the 4Runner’s center of gravity, and they do not automatically increase the tire contact patch. Tire load, inflation pressure, construction, and road conditions control the contact patch far more directly.
The offset change can alter scrub radius, steering kickback, self-centering feel, and the bending moment applied at the hub and bearing. The size of the real-world effect depends on the original wheel offset, tire dimensions, suspension geometry, spacer thickness, vehicle load, road impacts, and driving style. You cannot predict bearing life from spacer thickness alone.
What Benefits and Risks Come With 4Runner Spacers?
Spacers can solve a specific inner-clearance problem or move the tires closer to the fender edge. They can also create new outer-clearance problems and add maintenance points. The useful question is not whether all spacers are good or bad. It is whether a documented spacer solves your measured fitment problem without introducing unacceptable clearance, handling, legal, or reliability concerns.
Visual Stance Appeal
A wider stance can make the tires look less tucked inside the wheel wells. That cosmetic change is immediate, but appearance should come after fitment and safety checks. A wheel that looks flush while parked can still contact the fender liner, body mount, bumper edge, or flare during steering, braking, compression, or off-road articulation.
- Measure the current tire position relative to both inner suspension parts and outer bodywork.
- Check clearance at full left and right steering lock.
- Repeat the check with the suspension compressed and the vehicle loaded.
- Allow room for tire flex, snow chains if used, mud buildup, and off-road articulation.
Mechanical Stress Risks
| Area | Possible Effect | Risk Control |
|---|---|---|
| Wheel bearings and hubs | A larger offset change can increase bending moment and alter bearing loading. | Use the minimum offset change that solves the fitment problem and inspect for play or noise. |
| Steering | Scrub-radius changes may increase kickback, tramlining, or steering effort. | Road-test carefully and correct any unsuitable wheel, tire, or spacer combination. |
| Fasteners | Incorrect torque, seat shape, thread engagement, or dirty faces can reduce clamping force. | Follow the exact spacer, wheel, and Toyota instructions with a calibrated torque wrench. |
| Tires and bodywork | The tire may clear an inner part but rub the body mount, liner, flare, or fender. | Perform loaded, compressed, and full-lock clearance checks before normal driving. |
Hub-Centric vs. Lug-Centric: Which Spacer Type Is Safer?
A hub-centric spacer has a center bore that fits the vehicle hub and usually a raised lip that fits the wheel center bore. A lug-centric system centers through the wheel fasteners and lug seats. Neither label, by itself, proves that a part is safe.
For a 4Runner that uses hub-centered wheels, a correctly machined hub-centric and wheel-centric spacer is normally the most straightforward way to preserve concentric seating. However, the spacer still needs the correct bolt pattern, hub dimensions, stud size, fastener seats, thickness, wheel compatibility, and load capability.
| Check | What to Confirm |
|---|---|
| Vehicle-side centering | The spacer sits flush on the hub with no rocking, debris, rust scale, or interference. |
| Wheel-side centering | The wheel center bore and mounting face fit the spacer without bottoming on a lip or stud. |
| Fastener seats | The nut or bolt seat matches the wheel and spacer hardware exactly. |
| Thread engagement | The system meets the spacer manufacturer’s minimum engagement specification. |
Identify Your 4Runner Generation Before Buying Spacers
The 2025 model year introduced a new 4Runner generation with different wheel-fastener hardware from many earlier models. Do not assume a kit listed for a fifth-generation 4Runner fits a 2025 or newer vehicle.
| Model Years | Verified Example | Why It Matters |
|---|---|---|
| 1996–2024 | Spidertrax WHS007K is listed as a 1.25-inch, 6-on-5.5-inch, M12x1.5 system for these 4Runner years. | This example shows why older-generation listings must include the exact stud and hub specifications. |
| 2025 and newer | Spidertrax WHS034G is listed as a 1-inch, 6-on-5.5-inch, M14x1.5 system for the new generation. | The different stud size and listed thickness show why “4Runner spacer” is not a complete fitment description. |
Note: These are verified fitment examples, not universal recommendations. Confirm your VIN, model year, wheel type, hub dimensions, and spacer manufacturer’s current application guide before buying.
What Spacer Thickness Fits Your 4Runner: 1.25″, 1.5″, or 1.75″?
No single thickness is automatically safest. Choose thickness by measurement and verified application, not by appearance alone. The smallest approved spacer that provides the needed clearance usually creates the least offset change, but it still must be thick enough for its mounting system and factory-stud clearance.
[Products Worth Considering]

The Trivd Frol 1/2" air impact wrench delivers high performance torque up to 1500 ft-lbs with a twin hammer impact mechanism for strong, balanced blows. It features an ergonomic grip, compact lightweight design, and quick-stop control with 3 forward speeds up to 8000 RPM plus a reverse speed. Built for demanding automotive repair and tire shop work, the rear exhaust helps keep debris away from the surface.

The 22800 wheel stud installer makes replacing wheel studs quick and secure, saving time and effort during tire service. It uses a ratchet or impact wrench to pull new studs firmly into place, helping when existing studs are too long. Compatible with most automotive wheels and light-duty truck wheel studs, it’s designed for easy, tool-assisted installation.

These M14x1.5 closed-end chrome lug nuts are a one-piece replacement designed for secure fitment on compatible GM, Ford, and select Chrysler/Dodge models. Featuring a 60-degree conical seat and anti-rust chrome plating, they help resist corrosion and maintain a bright look for everyday driving. Built for long-term durability, they include OEM-style part references and are backed by 12 months of support.
Stock Wheel Fitment
With stock wheels, identify the current wheel offset, hub bore, bolt pattern, stud size, lug-seat type, and available relief pockets behind the wheel. Measure how far the tire can move outward before it reaches the fender, flare, liner, or body mount through the full steering and suspension range.
A 1.25-inch spacer is a documented option for some 1996–2024 4Runners, while a verified current example for 2025-and-newer models is 1 inch. That does not mean every wheel on those model years accepts those spacers. Aftermarket wheels may have different center bores, mounting-pad shapes, and pockets.
Aftermarket Clearance Needs
| Thickness Range | Typical Reason to Consider It | Main Checks |
|---|---|---|
| About 1 inch | A model-specific bolt-on system or modest outward movement. | Generation, stud size, hub lip engagement, wheel pockets, brake and fender clearance. |
| About 1.25 inches | A common documented size for some 1996–2024 Toyota applications. | Exact part listing, effective offset, outer rubbing, steering feel, and tire coverage. |
| 1.5 inches or more | A larger stance change or a specific clearance target. | Greater offset change, body and liner contact, scrub radius, bearing load, legal coverage, and manufacturer approval. |
Do not assume that 1.75-inch spacers automatically require a body-mount chop, or that 1.25-inch spacers automatically prevent rubbing. Tire width, actual measured diameter, wheel offset, caster, lift height, bumper and liner position, and suspension travel all change the outcome.
Will Spacers Make Your 4Runner Rub on Body Mounts or Fenders?
They can. Moving the wheel outward changes the path the tire follows while steering. This may improve clearance from an upper control arm or frame rail but reduce clearance at the body mount, rear of the front fender liner, bumper edge, flare, or outer fender.
Rubbing is not inevitable, and the contact point cannot be predicted from spacer thickness alone. Check the vehicle in the conditions that create the least clearance:
- full left and right steering lock;
- forward and reverse movement;
- braking while turning;
- suspension compression and droop;
- passenger or cargo load;
- off-road articulation, if applicable.
Inspect the tire sidewall and tread shoulder for polished areas, cuts, or missing rubber. Also inspect liners, mud flaps, body mounts, and brake hoses. Correct the fitment before the contact damages the tire or another component.
Which Spacer Brands and Features Deserve Attention?
Do not select a spacer only because owners mention the brand in a forum or because the listing says “aircraft grade.” Look for a current, vehicle-specific application, documented material and hardware, clear installation instructions, replacement parts, and technical support.
Spidertrax publishes separate Toyota/Lexus systems for 1996–2024 and 2025-and-newer 4Runners. Its listed examples use 6061-T6 aluminum, installed chromoly studs, supplied nuts, and model-specific hardware. H&R publishes detailed installation and safety documents for several spacer systems, including cleaning, fit, thread engagement, torque, clearance, and re-tightening requirements.
Other manufacturers may also produce suitable parts, but verify each product rather than transferring trust from one application to another. A brand’s correct Tacoma or older 4Runner part does not prove that another kit fits your wheel or model year.
- Exact model-year and trim application
- Correct bolt pattern, hub bore, stud size, and wheel-side pilot
- Compatible lug-seat shape and supplied fasteners
- Published torque, thread-locking, and recheck instructions
- Material specification and traceable part number
- Enough thickness or wheel-pocket depth to clear factory studs
- Customer support and replacement hardware availability
[Products Worth Considering]

Upgrade your wheels with MIKKUPPA closed-end lug nuts designed for reliable fit and corrosion resistance. The one-piece, cold-forged and heat-treated steel construction helps resist rust and stripping, while the integrated finish delivers a durable black appearance. Built to OEM standards with a conical 60-degree seat, these nuts provide a secure solution for compatible Ford, Honda, Jeep, and Chevrolet models.

This 1/2-inch drive breaker bar delivers powerful leverage for loosening and tightening stubborn lug nuts and automotive fasteners. The 180-degree flex head helps you reach tight spaces at the angle you need, making tire and brake jobs easier. A spring-loaded ball detent design holds 1/2-inch sockets securely while the chrome-moly head provides durable strength for everyday use.

This professional wheel and rim cleaning brush set lifts brake dust, grime, and dirt with soft, scratch-free microfiber and synthetic wool fibers. The rim brush bends up to 360 degrees for easy access to hard-to-reach areas around spokes, lips, and faces. Ideal for thorough cleaning of car, truck, motorcycle, bicycle, RV, and more wheel and tire surfaces.
How Do You Install 4Runner Spacers Correctly?
At a Glance
| Time Required | About 1–2 hours for four wheels, plus a careful clearance check and later torque recheck |
| Difficulty | Intermediate; professional installation is safer if you cannot verify fitment, lifting points, torque, or clearance |
| Tools Needed | Wheel chocks, jack, correctly rated jack stands, breaker bar, correct sockets, wire brush, calibrated torque wrench, light, and the supplied hardware |
| Cost | Varies by spacer system, quantity, replacement hardware, and professional labor |
- Verify the application. Match the spacer part number to your exact 4Runner model year, hub, studs, bolt pattern, and wheel type. Read the complete spacer instructions before lifting the vehicle.
- Park and support the vehicle safely. Use level, solid ground, apply the parking brake, chock the wheels, use Toyota’s approved lifting points, and support the vehicle with correctly rated jack stands.
- Remove the wheel and inspect the hardware. Replace damaged, stretched, corroded, or cross-threaded studs and nuts. Do not install a spacer over a damaged hub or wheel mounting face.
- Clean the mounting faces. Remove dirt, rust scale, paint buildup, and debris from the hub and mating surfaces. Keep friction surfaces and threads in the condition specified by the manufacturer.
- Dry-fit the spacer and wheel. Confirm that the spacer sits fully flush, the center pilot does not bottom out, the factory studs do not interfere with the wheel, and the wheel mounting pad has complete contact.
- Install the spacer hardware. Hand-start every fastener. Apply thread locker only when the spacer instructions require it, and use the specified type and amount. Tighten progressively in a crisscross pattern to the spacer manufacturer’s value.
- Install the wheel. Hand-start the wheel nuts, lower the tire enough to prevent rotation without fully loading it, and tighten in stages using the wheel or vehicle manufacturer’s specified value and pattern.
- Check static and dynamic clearance. Rotate each unloaded wheel, then inspect brake, ABS-wire, suspension, stud, hub, and wheel clearance. Check full steering lock and suspension movement before normal driving.
- Perform a cautious road test and recheck. Stop if you feel vibration, pulling, unusual steering, clicking, or rubbing. Re-tighten the fasteners at the interval stated by the spacer manufacturer. H&R’s DR instructions specify approximately 100 km for its system.
Pro Tip: Mark each spacer nut and adjacent spacer surface with a small torque-stripe line after final tightening. A broken alignment mark gives you a fast visual warning that a nut may have moved, but it does not replace a torque-wrench inspection.
Warning: Never crawl under a 4Runner supported only by a jack. Never use an impact wrench for final torque. Do not lubricate threads, reuse damaged hardware, stack spacers, or cut factory studs unless the exact product instructions expressly authorize the procedure.
What Maintenance Keeps Spacers Safe Long-Term?
Inspect spacers whenever a wheel is removed and after hard impacts, deep-water exposure, severe off-road use, or a new vibration. Follow the spacer maker’s first re-tightening interval, then check the assembly at normal wheel and tire service intervals.
- Verify torque with the correct procedure and a calibrated wrench.
- Inspect the spacer, studs, nuts, hub pilot, and wheel mounting pad for cracks, fretting, deformation, corrosion, or polished movement marks.
- Check wheel-bearing play, humming, grinding, or temperature differences between hubs.
- Inspect tires for uneven wear, sidewall contact, cuts, and outer-shoulder damage.
- Confirm that no brake hose, ABS wire, caliper, suspension part, or body panel contacts the wheel or tire.
- Replace damaged hardware with the spacer manufacturer’s specified parts, not generic look-alikes.
Do not apply thread locker as a universal maintenance fix. Some bolt-on spacer systems specify it for the spacer-to-hub fasteners, while other designs use different instructions. Mixing procedures can change torque-tension behavior and make later inspection difficult.
Warning Signs That Mean You Should Remove the Spacers
Remove the spacers and inspect the complete wheel-end assembly if you notice any of the following:
- new steering-wheel or seat vibration;
- clicking, clunking, or a repeating metallic sound;
- loose nuts or torque-stripe movement;
- visible cracks, deformation, corrosion pitting, or elongated holes;
- fretting dust or shiny movement marks between mounting faces;
- tire, wheel, stud, brake, ABS-wire, suspension, or body contact;
- new wheel-bearing play, humming, grinding, or overheating;
- uneven tire wear that began after the fitment change.
Do not keep driving to “see whether it gets worse.” A qualified technician should inspect the hub, bearings, studs, wheels, tires, brakes, and suspension before the vehicle returns to service.
Should You Run Spacers or Swap to Proper-Offset Wheels?
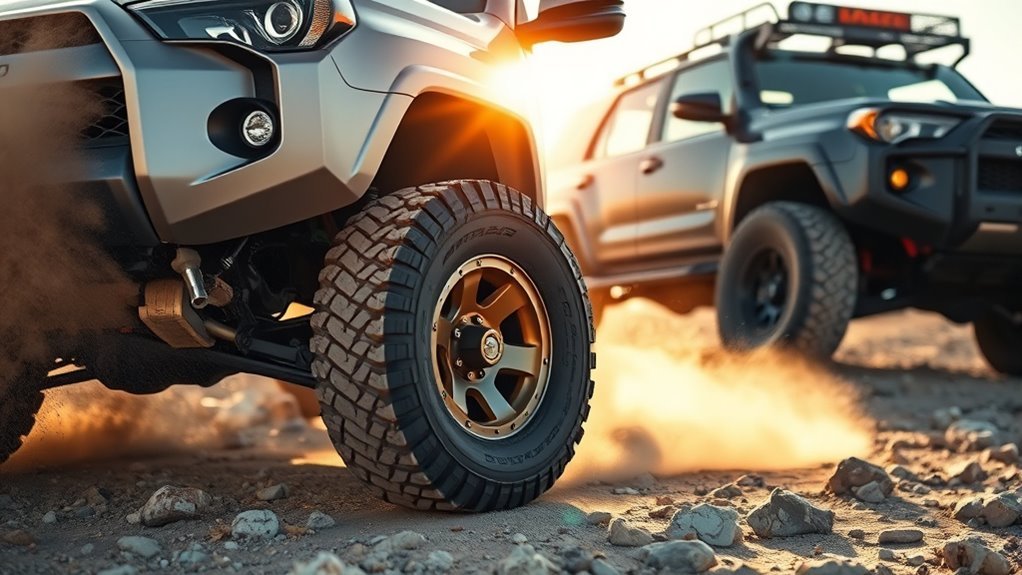
A wheel with the correct width, offset, load rating, hub bore, brake clearance, and lug-seat design can be a cleaner long-term solution because it removes the extra spacer-to-hub joint. However, a lower-offset wheel changes effective offset, scrub radius, outer clearance, and hub loading in much the same geometric direction as a spacer.
Only a wheel that stays close to the factory offset preserves the original offset-related geometry. “Proper-offset” should mean an offset chosen for your measured tire, suspension, brake, and body clearances, not simply a wheel that produces the desired stance.
| Option | Advantages | Trade-Offs |
|---|---|---|
| Vehicle-specific spacer | Keeps current wheels, may solve a measured inner-clearance issue, and can be reversible. | Adds parts, fasteners, inspection needs, and possible stud or wheel-pocket constraints. |
| Correctly specified replacement wheel | Eliminates the spacer joint and can combine the desired width and offset in one component. | Costs more and still requires load, hub, brake, tire, offset, and body-clearance verification. |
| Factory wheel and offset | Maintains the original validated fitment and minimizes modification variables. | May not clear a changed suspension or larger tire and may not provide the desired appearance. |
[Products Worth Considering]

Monitor tire tread wear with a smart, color-coded depth gauge that shows clear condition ranges at a glance. The bar is range marked for fast, easy readings, helping you maintain safer traction and performance. Each gauge is portable with a pocket clip, and the set includes 20 units for daily use and sharing.

This 3-piece wheel brush set makes it easy to clean wheels and tires with soft, scratch-free brushes designed for lifting brake dust and grime. The flexible rim brush bends up to 360 degrees to reach hard-to-access areas for a thorough clean, while the comfortable grip helps control during detailing. A dedicated detailing brush supports gentle cleaning for sensitive surfaces, including interior use.

Upgrade your wheels with MIKKUPPA M12x1.5 mag seat lug nuts built for secure, corrosion-resistant performance. These closed-end chrome lug nuts are a direct replacement for select Toyota models, including Camry, Corolla, RAV4, Sienna, Avalon, Highlander, Matrix, Venza, and Prius. Triple-chromium plating and cold-forged, heat-treated steel help deliver strength for daily driving and replacement needs.
Legal, Warranty, and Insurance Considerations
Wheel-spacer rules vary by country, state, province, inspection program, and intended road use. Some jurisdictions require tire coverage, approved parts, documentation, or a post-installation inspection. Confirm local rules before driving on public roads.
An aftermarket part does not automatically cancel an entire vehicle warranty, but damage linked to an incompatible or incorrectly installed modification may not be covered. Keep the product instructions, part numbers, receipts, installation record, and torque-check record. Tell your insurer about material wheel, tire, or suspension modifications when your policy requires disclosure.
Frequently Asked Questions
Are wheel spacers safe on a 4×4?
They can be safe when the part is approved for the exact vehicle and wheel, all mounting faces and fasteners are compatible, installation follows the written instructions, and clearance and torque are checked regularly. Off-road impacts and articulation make inspection especially important.
Will 1.5-inch wheel spacers cause problems?
Not automatically, but they create a larger effective-offset change than thinner spacers. That can increase outer rubbing, alter steering feel and scrub radius, and change hub and bearing loads. Use them only when a verified application and full clearance check support that thickness.
Do wheel spacers require an alignment?
A spacer alone does not directly adjust caster, camber, or toe. However, alignment should be checked when you also change suspension height, control arms, wheels, or tire size, or when the vehicle pulls, the steering wheel is off-center, or tire wear becomes uneven.
Do spacers wear out wheel bearings?
Changing effective offset can change the bending moment and load distribution at the hub and bearing. It does not guarantee immediate failure, and service life cannot be predicted from thickness alone. Larger offset changes, heavier tires, impacts, existing wear, and hard use can increase concern.
Can I use the same spacers on a 2024 and 2025 4Runner?
Do not assume so. Verified current Spidertrax examples list a 1.25-inch M12x1.5 system for 1996–2024 4Runners and a separate 1-inch M14x1.5 system for 2025-and-newer models. Check the exact manufacturer application and your wheel specifications.
Should I use thread locker on wheel spacers?
Use it only when the exact spacer instructions require it, and follow the specified type, amount, surface preparation, and curing procedure. Some bolt-on kits include thread locker, while other systems rely on different hardware and installation methods.
Conclusion
Wheel spacers can be a workable 4Runner modification when they solve a measured fitment need and match the exact vehicle, wheel, and hardware. They are not made safe by a brand name, a “hub-centric” label, or a popular thickness alone. Verify the generation, choose the smallest suitable documented system, install it precisely, inspect full clearance, and maintain the fasteners.
For a long-term setup, compare the spacer with a correctly specified wheel that provides the needed width and offset without an extra mounting joint. Whichever route you choose, stop and correct any vibration, looseness, rubbing, noise, or bearing symptoms before continuing to drive.
Sources
- Spidertrax Toyota/Lexus 1.25-inch Wheel Spacers — verified 1996–2024 4Runner application, dimensions, materials, supplied hardware, and installation-tool information.
- Spidertrax Toyota/Lexus 1-inch Wheel Spacers — verified 2025-and-newer 4Runner application and M14x1.5 hardware.
- H&R TRAK+ DR Wheel Spacer Safety and Installation Instructions — cleaning, fit, thread engagement, torque-wrench use, clearance inspection, and re-tightening guidance.
- SEMA Wheel, Tire, Suspension & Brake Council Installation Guidance — industry installation checks and wheel-hardware best practices.
- Toyota Owners Manuals and Warranties — model-year-specific lifting, wheel installation, and wheel-nut specifications.