

You can fix a small tread puncture yourself if it’s in the central repair zone, under 1/4 inch, and the tire hasn’t been driven flat or underinflated. Use a proper plug kit for simple holes, or patch from the inside for larger punctures. Never repair sidewall, shoulder, bead, or cord damage, or tires with repeated leaks. If air loss continues after repair, call a pro. The next steps show how to verify safety.
Key Takeaways
- Repair only small tread punctures in the central repair zone, usually 1/4 inch or less.
- Do not DIY repair sidewall, shoulder, bead, bulges, cuts, or exposed cord damage; call a pro.
- Use a plug for clean tread punctures, or a patch-plug for larger interior repairs after demounting the tire.
- Reinflate, check with soapy water, and test drive; persistent leaks or vibration mean the repair failed.
- Inspect tires regularly, maintain proper pressure, and avoid potholes, curb strikes, and overloading to prevent future punctures.
[Products Worth Considering]

Monitor tire tread wear with a smart, color-coded depth gauge that shows clear condition ranges at a glance. The bar is range marked for fast, easy readings, helping you maintain safer traction and performance. Each gauge is portable with a pocket clip, and the set includes 20 units for daily use and sharing.

This self-service tire repair nail kit includes 60 pieces (30 small + 30 large) to help seal punctures quickly without needing an auto shop visit. The nails are designed to fit different hole sizes and provide a tight connection with sealing glue to help prevent air and water intrusion. Suitable for cars, motorcycles, trucks, and other vehicles, it’s an easy, efficient way to patch roadside tire damage.

MetFun’s 40-piece tire repair screw plugs kit provides a fast DIY fix for tubeless punctures with two tubes of black tire sealant glue. The rubber repair screws are pre-coated and designed for a secure grip and double seal to help stop air leaks. With 2 screw sizes for small and larger punctures, it’s suitable for cars, motorcycles, trucks, tractors, lawnmowers, ATVs, and more—so you’re prepared for road trips and emergencies.
Can This Tire Be Repaired?
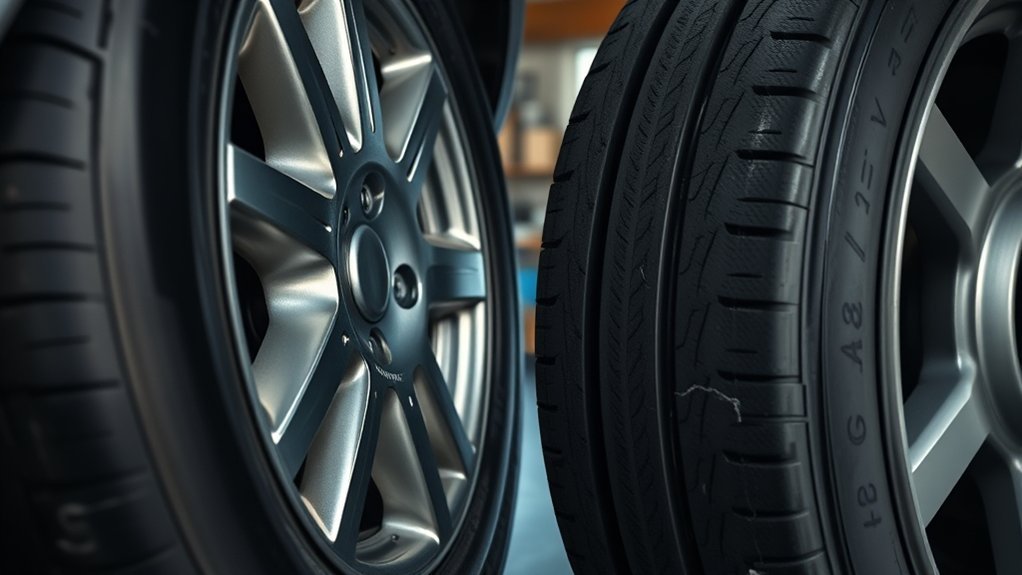
Before you start a DIY tire repair, you need to determine whether the damage is actually repairable. Inspect the tread for punctures in the central repair zone, usually no larger than 1/4 inch, and check the sidewall, shoulder, and bead for cuts, bulges, or separations.
Check the tread for small punctures, and inspect the sidewall, shoulder, and bead for damage.
If the damage reaches the sidewall or exposes cords, you can’t safely restore structural integrity, regardless of repair costs. Tire types matter: many passenger and light-truck radial tires may be patched or plugged when the injury is minor, but run-flat, high-performance, and some load-range models often require professional evaluation or replacement.
You should also confirm the tire hasn’t been driven underinflated long enough to overheat the casing. Multiple punctures, uneven wear, or previous repairs can also disqualify the tire.
When you’re unsure, compare the cost of replacement with the risk of failure; a sound judgment now protects your vehicle, your safety, and your wallet.
Tire Repair Tools You’ll Need
Once you’ve confirmed the tire is repairable, gather the right tools before you start the job. A complete set of tire repair kits should include a reamer, insertion tool, rubber plugs, vulcanizing cement, and a sharp utility knife.
Add a tire pressure gauge, needle-nose pliers, and chalk or a marker for locating the puncture. These essential tools let you clean the injury site, manage the repair material, and verify inflation accurately.
You should also have a portable air compressor or access to a reliable inflator, plus a tread depth gauge if you want to assess remaining tire life.
Keep gloves, safety glasses, and wheel chocks nearby to control risk while you work. If your vehicle uses a spare-tire jack or lug wrench for access, stage those as well.
Lay everything out before beginning so you can work efficiently, maintain cleanliness, and avoid unnecessary interruptions during the repair process.
When a Tire Plug Makes Sense
A tire plug makes sense when the puncture is in the tread area, the hole is small, and the injury hasn’t damaged the sidewall or shoulder. You can use a plug for a straight, clean puncture from a nail or screw when the tire still holds air and the carcass isn’t compromised.
Under those conditions, tire plug effectiveness is highest because the plug can seal the channel and restore short-term serviceability. Before you install one, inspect for belt separation, irregular tearing, or multiple punctures; if you see any of those, don’t proceed.
Tire plug effectiveness is highest in clean tread punctures, but only if the tire shows no hidden structural damage.
Follow basic plug installation tips: ream the hole to clean it, keep the insertion tool aligned, and trim the excess flush after the rubber sets. Then inflate the tire to spec and verify that it holds pressure.
A properly placed plug can get you back on the road safely, but it’s a repair decision, not a blanket fix.
How to Patch a Tire From the Inside
When the puncture is larger, less clean, or you want a more durable repair, patching the tire from the inside is the better option. You must demount the tire, inspect the liner, and mark the injury from both sides.
Then you’ll roughen the inner liner with a buffing tool, clean away dust, and apply vulcanizing cement. Use a patch-plug or a dedicated internal patch sized to cover the injury with adequate overlap. Press it firmly from the center outward to expel air and guarantee full adhesion. Trim any protruding stem flush with the tread.
These tire patching techniques restore the air barrier and help the repair flex with the carcass. Proper interior tire repairs also require inflation, leak testing with soapy water, and a final balance check before reinstalling the wheel.
If the liner is contaminated, improperly prepared, or the hole exceeds the patch system’s limits, don’t proceed.
Tire Damage You Should Never Repair
You should never repair any tire with sidewall damage, exposed cords, a bulge, or a puncture in the shoulder area, because these conditions indicate structural failure beyond a safe patch or plug.
Once the carcass is compromised, no DIY repair restores original strength, even if the tread still holds air. You also shouldn’t repair tires with large punctures, multiple injuries, severe dry rot, or impact breaks that deform the casing.
Different tire types react differently to damage, but none of them tolerate structural separation. Run-flat, low-profile, and load-rated tires can hide internal harm, so inspect them carefully after any strike.
Avoid improvising repair techniques on beads, sidewalls, or tread separations, since plugs and patches only work on approved tread punctures. If the injury reaches the steel belts or shoulder, the tire’s integrity is gone.
In those cases, replacement is the only technically sound option for maintaining control, load capacity, and safety.
[Products Worth Considering]

Measure tire tread depth quickly and accurately with this LUMITECO dial gauge that reads in 1/32" increments up to 14/32". The color-coded green/yellow/red zones make it easy to judge tire wear and know when replacement is needed. A rugged, compact design with a protective pouch helps keep the gauge ready for use on cars, trucks, motorcycles, and more.

Wykodra tire plugs provide quick vulcanizing repairs for tubeless tires, helping you seal punctures and get back on the road. The industrial-strength rubber creates a long-lasting, leak-resistant bond and is designed for emergency fixes without removing the tire. Choose between two standard plug sizes with color-matched options for small to larger damage across many vehicles and off-road uses.

KEVWR self-service tire repair nails are made to firmly fix punctures with strong bite and reliable sealing, helping prevent water from entering the wound. The spiral rubber screws are easy to insert without removing the tire, providing a simple DIY repair for many vehicle and tire types. Suitable for cars, motorcycles, trucks, bikes, buses, and agricultural tires with two size options for different puncture nails.
When to Call a Tire Repair Pro
You should call a tire repair pro immediately if you see sidewall damage, because that area carries critical structural loads and isn’t safe to patch.
If your tire keeps losing air after a repair or inflation check, you’re dealing with persistent air loss that needs professional diagnosis.
A technician can inspect the casing, valve stem, bead, and puncture path to determine whether the tire is serviceable or must be replaced.
Sidewall Damage
Sidewall damage is a serious tire defect because the sidewall flexes constantly and carries critical structural load. Once it cracks, bulges, or tears, the tire can fail without warning.
You should treat any visible cut, scuff, or blister in this area as a professional-level issue, not a DIY fix. Unlike tread punctures, sidewall defects compromise sidewall integrity and exceed normal repair limitations.
Even a small gouge can expose cords, weaken the carcass, and reduce the tire’s ability to support vehicle weight and cornering loads. You need a tire repair pro to inspect the injury and decide whether replacement is the only safe option.
Don’t patch, plug, or seal sidewall damage yourself, because temporary fixes can hide structural failure and increase the risk of a sudden blowout.
Persistent Air Loss
Not all tire problems show up as visible cuts or bulges; sometimes the issue is a slow, stubborn pressure loss that keeps returning after you’ve inflated the tire.
When you see repeated drops in air pressure, inspect the valve stem, bead seal, tread, and sidewall for punctures or corrosion. If soap solution doesn’t reveal a clear leak, you likely need professional leak detection with submersion tanks or electronic tools.
Don’t keep topping off a tire that loses pressure overnight; that can indicate an internal failure or wheel damage. Call a tire repair pro when the leak is intermittent, the source is hidden, or the tire loses more than a few psi in a day.
Quick patches won’t solve unresolved pressure loss.
How to Check a Tire Repair for Safety
Before you return a repaired tire to service, inspect the patch or plug from both the inside and outside to confirm it seats flush, seals cleanly, and shows no signs of bulging, tearing, or contamination.
Verify the repair sits in the puncture’s repairable zone and that the liner isn’t wrinkled or lifted. Check the surrounding tire tread for cuts, exposed cords, or irregular wear that could indicate structural damage beyond the repair.
Verify the repair is within the safe repair zone and inspect for liner damage, cuts, cords, or abnormal tread wear.
Inflate the tire to the manufacturer’s specified air pressure, then spray the repaired area with soapy water and watch for bubbles. Recheck valve stem leakage if you removed the wheel.
After a short test drive, feel for vibration, pull, or noise, then measure air pressure again after the tire cools. If the pressure drops, the patch or plug likely isn’t sealing properly, and you should remove the tire and have it evaluated by a professional.
How to Prevent Future Tire Punctures
You can reduce future punctures by inspecting your tires regularly for embedded debris, sidewall cuts, uneven wear, and low tread depth.
You should check inflation pressure often and verify that the valve stems and tread area stay free of damage.
You’ll also lower risk by avoiding potholes, curb strikes, and overloading the vehicle, since smart driving habits protect the tire carcass from impact-related failure.
Regular Tire Inspections
Regular tire inspections help you catch small problems before they turn into punctures, blowouts, or uneven wear. You should check each tire monthly and before long trips, using a gauge to verify tread depth and comparing all four tires for tire wear patterns.
Look for embedded nails, cuts, bulges, sidewall cracks, and exposed cords. Inspect valve stems for cracking and confirm caps seal properly. Verify that pressure matches the manufacturer’s specification when the tires are cold.
Rotate your attention to the inner shoulder, where damage often hides. If you find uneven tire wear, frequent pressure loss, or cord exposure, replace the tire or consult a professional immediately.
Consistent inspections let you identify damage early, preserve traction, and reduce the risk of roadside failure.
Smart Driving Habits
Drive defensively to reduce the chance of tire damage and punctures. You should scan the road 10 to 15 seconds ahead, then steer around potholes, shards, and debris before your tires load up. Keep a smooth following distance so you can brake without skidding over hazards. Slow down in construction zones and on gravel, where impact force climbs fast. This is safe driving paired with disciplined tire maintenance.
| Habit | Benefit | Action |
|---|---|---|
| Avoid curb strikes | Protects sidewalls | Park with clearance |
| Reduce speed | Lowers impact | Ease off in rough areas |
| Check pressure | Improves durability | Verify monthly |
| Rotate tires | Promotes even wear | Follow schedule |
If you feel vibration, stop and inspect immediately.
Frequently Asked Questions
How Long Does a Tire Repair Usually Take?
A tire repair usually takes 20 to 45 minutes, depending on repair methods, puncture location, and inspection needs. You’ll spend more time if you remove the wheel, patch from inside, or re-balance it.
Can a Repaired Tire Be Used on the Highway?
Yes, if you’ve repaired it properly, you can use it on the highway, but only if it meets tire safety standards and highway regulations. Unlike a steam-powered chariot, you must verify inspection, placement, and speed rating first.
Does Tire Repair Affect Fuel Efficiency?
Yes—if you restore proper tire pressure and use sound repair methods, you usually won’t see meaningful fuel-economy loss. You can lose efficiency when leaks persist, patches deform the tread, or imbalance increases rolling resistance.
Should I Balance My Tire After a Repair?
Yes—you should balance your tire after a repair; it’s the difference between a smooth ride and a runaway washing machine. Different repair methods can shift weight slightly, so proper tire balancing helps prevent vibration, uneven wear, and stress.
Can Tire Sealant Be Used Instead of a Plug?
No, you shouldn’t use sealant instead of a plug for a puncture; sealant effectiveness is temporary, and plug comparison favors plugs for structural repair. You can use sealant only for short-term inflation, not a proper fix.
Conclusion
If you think a plug always fixes a puncture, think again: that’s only true for small tread-area damage. You can repair a tire safely when the hole is minor, the structure is intact, and you use the right method. But if you see sidewall cuts, shoulder damage, or belt exposure, don’t gamble. You should inspect every repair carefully, then inflate, test, and recheck pressure. When in doubt, call a pro and protect your safety.
[Products Worth Considering]

The SAFELIFE dial tire tread depth gauge measures tread depth in 1/32 inch increments with clear, easy-to-read 2-inch dial face. Color zones using a traffic light system help you quickly judge whether tread is low, marginal, or ample for safer driving. Built with a durable zinc cast body and a metal detect probe for precise, comfortable use across cars, motorcycles, trucks, and buses.

This 61-piece tire repair screw kit helps you fix punctures quickly by aligning the screw plugs and twisting clockwise, finishing the repair in seconds. The self-sealing plugs create a reliable seal for many roadside situations without needing a jack, wrench, or glue. It includes two plug sizes and a screwdriver in a portable case, making it a convenient option for cars, motorcycles, trucks, bikes, ATVs, and tractors.

Steelman white tire marking crayons provide high-contrast, semi-permanent marks for repairing and inspecting tires and equipment. They write on wet or dry, smooth or coarse surfaces including rubber, metal, glass, and wood, making them ideal for puncture location and damage outlining. The lead- and zinc-free crayons resist weather and fading yet wipe away when you no longer need the marks.
