

Use the exact wheel bolt torque or lug nut torque specified for your vehicle and wheel setup. Find that value in the owner’s manual, manufacturer service information, or approved wheel documentation, then use a suitable torque wrench and a crisscross pattern for final tightening. Do not choose a torque value from thread size alone.
Quick Answer
Wheel bolt torque is vehicle-specific. Look up the exact manufacturer specification, hand-start every fastener, snug them evenly in a star or crisscross pattern, and finish with a properly set torque wrench. Keep the threads and mounting surfaces in the condition required by the manufacturer, and follow its instructions for any post-installation torque check.
Key Takeaways
- Use the exact torque specification for your vehicle and wheel application; thread size alone does not determine the correct value.
- The driver-door tire placard normally provides tire and loading information, not a universal wheel-fastener torque specification.
- Hand-start wheel nuts or bolts, then tighten progressively in a crisscross or star pattern.
- Use a torque wrench for final tightening instead of relying on an impact wrench.
- Keep wheel-to-hub mating surfaces and fasteners clean and in the condition specified by the manufacturer.
- Follow the vehicle or wheel manufacturer’s instructions for any required post-installation retorque.
At a Glance
| Time Required | About 10–20 minutes per wheel when the wheel is already installed and only the torque is being checked or set |
| Difficulty | Easy to moderate, provided you have the correct specification and tools |
| Tools Needed | Correct-size 6-point socket, suitable torque wrench, and a breaker bar or approved hand tool if a fastener must first be loosened |
| Cost | No additional service cost if you already own the correct tools; torque-wrench prices vary by type and range |
Wheel Bolt Torque Basics
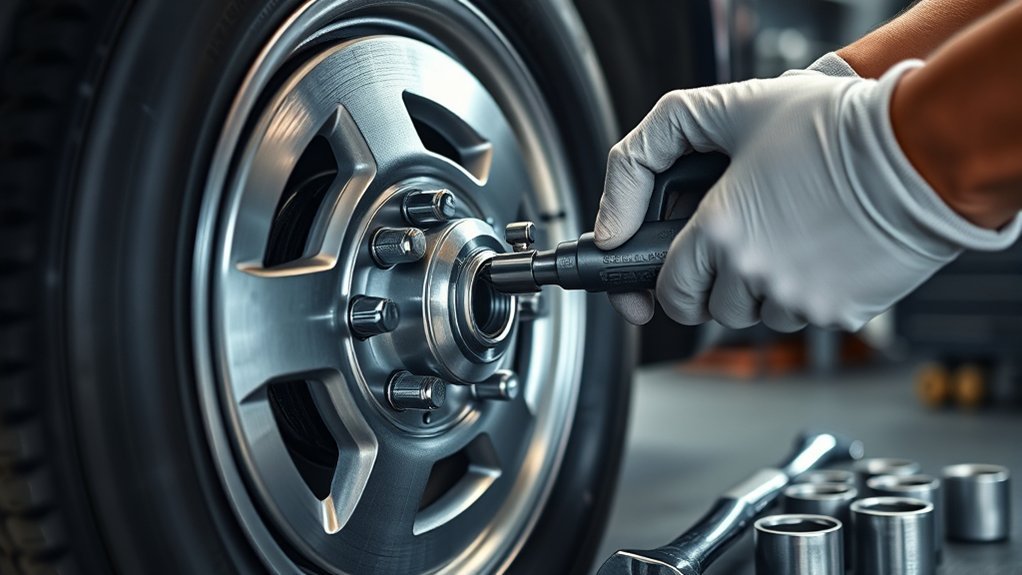
Wheel fastener torque is the specified twisting force applied to the hardware that secures a wheel to the hub. Passenger vehicles may use lug nuts that screw onto wheel studs or wheel bolts that pass through the wheel and thread directly into the hub.
The purpose of the specified torque is to create the clamping force the vehicle and wheel designers intended. Too little tightening can allow movement or loosening. Too much can overstress studs, bolts, nuts, wheel seats, or other components.
Warning: Never guess a wheel-fastener torque value. A wheel that is incorrectly installed can loosen or be damaged. Stop and verify the exact specification before driving if you cannot confirm it.
Torque also depends on the condition for which the specification was published. For example, a manufacturer may specify clean, dry threads. Adding oil or anti-seize changes friction and can increase fastener tension at the same torque-wrench setting. Follow any lubrication instruction exactly rather than applying lubricant automatically.
Find Your Torque Spec
Start with the owner’s manual or manufacturer service information for the exact year, model, wheel setup, and fastener design. This should take priority over a generic internet chart.
If the vehicle has aftermarket wheels, also verify that the wheel, fastener seat style, bolt or stud dimensions, and hardware are approved for the application. When wheel-manufacturer instructions specify a particular installation procedure, follow them together with the vehicle manufacturer’s requirements.
Owner’s Manual Specs
The owner’s manual is normally the best first source for wheel-fastener specifications. Look in sections such as changing a road wheel, wheels and tires, emergency wheel replacement, or specifications.
A useful reminder of why vehicle-specific data matters is the 2026 Ford Bronco Sport owner’s manual. It lists its own fastener size and torque requirement and also gives installation-surface and retorque instructions for that application.
Do not copy that value to another vehicle. The example demonstrates that the manufacturer, not a generic thread-size chart, determines the specification.
Door Jamb Sticker
The driver-side door jamb or B-pillar usually carries a Tire and Loading Information label. According to NHTSA TireWise guidance, that label is used for information such as tire size, loading, and recommended cold tire pressure.
Note: Do not assume the door-jamb tire placard contains wheel bolt torque. If the torque value is not clearly published there by your vehicle maker, check the owner’s manual or official service information instead.
Aftermarket Wheels and Hardware
Aftermarket wheels may require different fastener shapes or application-specific installation instructions. Check the wheel manufacturer’s documentation rather than selecting torque from a broad chart.
Confirm all of these before tightening:
- The wheel is approved for the vehicle and hub.
- The stud or bolt thread matches the vehicle.
- The lug nut or wheel bolt uses the correct seat shape for the wheel.
- The fastener provides the required engagement.
- The manufacturer’s torque and lubrication instructions are known.
A cone-seat nut, ball-seat fastener, and flat-seat fastener are not interchangeable simply because their threads fit. Incorrect seat geometry can prevent the wheel from clamping correctly.
Tools for Wheel Bolt Torque
You need a torque wrench whose working range includes the required specification and the correct socket for the wheel fastener. A click-type wrench is common, but an appropriate calibrated beam or electronic torque wrench can also be used if its manufacturer approves it for the task.
Useful tools include:
- Torque wrench: for final tightening to the published specification.
- 6-point wheel socket: provides solid engagement with a conventional hex fastener and reduces the risk of rounding compared with a poorly fitting socket.
- Breaker bar: useful for loosening a stubborn fastener, but not a substitute for a torque wrench during final tightening.
- Short socket extension: useful where access requires it, provided the torque-wrench maker permits the setup.
- Crowfoot or offset adapter: may require a corrected wrench setting if it changes the effective lever length.
Tesla’s current Model Y service procedure, for example, specifies a 6-point socket, hand-starting the fasteners, and final tightening in a crisscross pattern. That procedure applies to the vehicle covered by that manual, but the workflow illustrates why manufacturer instructions matter.
Pro Tip: A normal straight socket extension does not lengthen the torque wrench’s lever arm in the same way as an inline crowfoot adapter. If an offset adapter extends the wrench length, use the torque-wrench or vehicle manufacturer’s correction method rather than guessing.
[Products Worth Considering]

The 22800 wheel stud installer makes replacing wheel studs quick and secure, saving time and effort during tire service. It uses a ratchet or impact wrench to pull new studs firmly into place, helping when existing studs are too long. Compatible with most automotive wheels and light-duty truck wheel studs, it’s designed for easy, tool-assisted installation.

The SEESII cordless impact wrench delivers high tightening and loosening power for fast wheel bolt and industrial bolt work. Its brushless motor and variable-speed 3 forward/2 reverse modes help you control precision installs and stubborn nut removal. A dual-battery system with rapid charging and an included storage case make it ready for home, car, and jobsite use.

This 1/2-inch drive breaker bar delivers powerful leverage for loosening and tightening stubborn lug nuts and automotive fasteners. The 180-degree flex head helps you reach tight spaces at the angle you need, making tire and brake jobs easier. A spring-loaded ball detent design holds 1/2-inch sockets securely while the chrome-moly head provides durable strength for everyday use.
Torque Wheel Bolts the Right Way
Once you have the correct specification, use a controlled installation sequence rather than tightening one fastener fully while the others remain loose.
- Inspect the hardware. Stop if a bolt, stud, nut, or wheel seat is cracked, stretched, badly corroded, cross-threaded, or otherwise damaged.
- Clean the mounting surfaces. Remove loose rust, dirt, and debris from the wheel-to-hub contact surfaces as required by the vehicle maker.
- Prepare the threads correctly. Keep them in the clean, dry, or otherwise specified condition. Do not add oil or anti-seize unless the manufacturer calls for it.
- Position the wheel fully against the hub. Make sure it is seated correctly.
- Start every fastener by hand. Each nut or bolt should engage smoothly. Resistance at the first few turns can indicate cross-threading or incorrect hardware.
- Snug the fasteners progressively. Use a crisscross pattern so the wheel seats evenly.
- Set the torque wrench. Use the exact published value and correct units.
- Final-torque in a crisscross pattern. Pull smoothly until a click-type wrench signals the target; stop at the first clear click rather than repeatedly pulling past it.
- Complete a verification pass. Revisit every fastener once in the same pattern to make sure none was missed.
The U.S. Tire Manufacturers Association Care and Service Manual recommends identifying the correct lug torque specification and using a torque wrench for final tightening.
[Products Worth Considering]

Upgrade your wheels with MIKKUPPA closed-end lug nuts designed for reliable fit and corrosion resistance. The one-piece, cold-forged and heat-treated steel construction helps resist rust and stripping, while the integrated finish delivers a durable black appearance. Built to OEM standards with a conical 60-degree seat, these nuts provide a secure solution for compatible Ford, Honda, Jeep, and Chevrolet models.

These M14x1.5 closed-end chrome lug nuts are a one-piece replacement designed for secure fitment on compatible GM, Ford, and select Chrysler/Dodge models. Featuring a 60-degree conical seat and anti-rust chrome plating, they help resist corrosion and maintain a bright look for everyday driving. Built for long-term durability, they include OEM-style part references and are backed by 12 months of support.

This car D-wheel lock nut key provides an anti-theft solution for D-shaped wheel lock bolts, helping keep your wheels secure. It features a flower-shaped internal pattern that resists micro-adjustment theft while allowing removal and mounting of compatible locking nuts. Made for reliable performance under high torque, it’s easy to use with standard socket wrench turning for quick tire maintenance and emergency repairs.
Use a Star Tightening Pattern
A star or crisscross pattern spreads clamping force across the wheel instead of concentrating it on one side.
Hand-start all fasteners first. Then snug and final-torque them by moving across the hub rather than simply tightening clockwise around the wheel.
The goal is not merely to reach the torque number—it is to seat the wheel evenly while every fastener reaches the manufacturer’s specification.
On a four-lug wheel, move to the fastener opposite the one you just tightened. On a five-lug wheel, continue diagonally in the familiar star sequence. Wheels with six or more fasteners also use an opposing or crisscross sequence appropriate to their layout.
If the vehicle manufacturer provides a numbered tightening diagram, that diagram takes priority.
Avoid Common Torque Mistakes
Most wheel-torque errors come from using the wrong specification, changing the friction conditions, using damaged hardware, or finishing with an uncontrolled power tool.
- Do not use a generic torque chart as your primary specification. Thread diameter and pitch are only part of the fastener design.
- Do not lubricate threads by habit. Follow the exact dry or lubricated condition specified for the application.
- Do not install the wrong seat style. A fastener can have the correct thread but the wrong contact surface for the wheel.
- Do not cross-thread a fastener. If it will not turn smoothly by hand at the start, stop and inspect it.
- Do not rely on an impact wrench for final torque. A power tool may be allowed for part of the procedure on some vehicles, but final tightening should follow the manufacturer’s controlled torque procedure.
- Do not use a breaker bar to estimate final torque. It provides leverage, not a calibrated torque setting.
- Do not ignore a dirty wheel-to-hub interface. Corrosion or debris can interfere with proper seating.
Warning: If a wheel fastener spins, binds, will not hand-thread, shows damaged threads, or cannot reach the published torque normally, do not force it. Have the stud, bolt, nut, wheel seat, and hub inspected before relying on the wheel.
[Products Worth Considering]

The Trivd Frol 1/2" air impact wrench delivers high performance torque up to 1500 ft-lbs with a twin hammer impact mechanism for strong, balanced blows. It features an ergonomic grip, compact lightweight design, and quick-stop control with 3 forward speeds up to 8000 RPM plus a reverse speed. Built for demanding automotive repair and tire shop work, the rear exhaust helps keep debris away from the surface.

Upgrade your wheels with MIKKUPPA M12x1.5 mag seat lug nuts built for secure, corrosion-resistant performance. These closed-end chrome lug nuts are a direct replacement for select Toyota models, including Camry, Corolla, RAV4, Sienna, Avalon, Highlander, Matrix, Venza, and Prius. Triple-chromium plating and cold-forged, heat-treated steel help deliver strength for daily driving and replacement needs.

The Park Tool TL-1.2 tire lever set is narrow, strong, smooth, and versatile for easy tire removal and reliable work on bike tires. It includes a spoke hook design to help when multiple levers are needed. With Park Tool’s industry-standard reputation, this set is ideal for fast flat-fix repairs.
Recheck Torque After Wheel Installation
Some vehicle and wheel manufacturers require wheel fasteners to be checked again after a wheel has been removed, replaced, or disturbed. Follow the interval written for your specific application instead of treating 50 or 100 miles as a universal rule.
For example, the current 2026 Ford Bronco Sport manual instructs owners to retighten its wheel nuts to specification within 100 miles after a wheel disturbance. Other vehicles or aftermarket wheels may have different instructions.
Why Retorque Matters
During early use after installation, the wheel and mating surfaces can finish seating. A manufacturer-required torque check confirms that the fasteners still satisfy the intended installation procedure.
A click-type torque wrench should not be treated as a machine that tells you the fastener’s exact existing torque. When you set it to the required value and a fastener turns before the wrench clicks, that fastener was below the target at that moment.
If the wrench clicks immediately without movement, you know the wrench reached its threshold, but you have not measured the exact existing preload or proved that the fastener was previously installed correctly.
How the Assembly Seats
The wheel face, hub, fastener seats, and mating surfaces must make solid contact. Dirt, corrosion, paint buildup, incorrect hardware, or uneven initial tightening can interfere with that contact.
This is why proper preparation matters before the wheel is torqued. A later torque check cannot compensate for damaged or incompatible hardware.
Safe Recheck Timing
Use the interval stated by the vehicle or wheel manufacturer. When a recheck is required:
- Park safely on a firm, level surface.
- Set the torque wrench to the exact published specification.
- Check the fasteners in the correct crisscross sequence.
- If a fastener turns before reaching the target, tighten it smoothly to specification.
- If you find significant looseness, damaged hardware, or repeated loss of torque, have the assembly inspected rather than repeatedly tightening it.
Also perform the required procedure after future wheel removal, tire rotation, or other service whenever the manufacturer calls for it.
Common Lug Bolt Sizes: Why Size Alone Is Not Enough
Common wheel-fastener threads include metric sizes such as M12 x 1.5 and M14 x 1.5, along with SAE formats such as 1/2-20 and 7/16-20.
The first number describes diameter, while the second part describes thread pitch. Those dimensions help identify compatible hardware, but they do not establish a universal wheel torque.
| Example thread | Safe torque guidance |
| M12 x 1.5 | Use the exact vehicle/wheel specification; do not infer torque from the thread size |
| M14 x 1.5 | Use the exact vehicle/wheel specification; applications using this thread can have very different torque requirements |
| 1/2-20 | Confirm the vehicle, wheel, and fastener specification |
| 7/16-20 | Confirm the vehicle, wheel, and fastener specification |
This approach avoids one of the most dangerous shortcuts in wheel installation: assuming every fastener with the same thread receives the same torque.
Get a Torque Check When Needed
A professional torque and hardware inspection is appropriate when you cannot verify the specification or something feels abnormal during installation.
Get the wheel checked before relying on it if:
- You do not know which lug nuts or wheel bolts belong with an aftermarket wheel.
- A fastener will not start or turn smoothly by hand.
- Threads or seats appear damaged.
- A stud spins in the hub.
- The wheel does not sit flush against the hub.
- A fastener repeatedly becomes loose.
- You suspect the wheel was heavily over-tightened with an impact wrench.
- You feel new vibration or wheel movement after installation.
A shop can inspect the studs or wheel bolts, seating surfaces, wheel condition, and hardware instead of simply applying more torque to a questionable assembly.
Frequently Asked Questions
What are the recommended torque specs for wheel bolts?
There is no safe universal wheel-bolt torque. Use the exact specification for your vehicle, wheel, and fastener setup from the owner’s manual, manufacturer service information, or approved wheel documentation.
What is the correct order to tighten lug nuts?
Hand-start all fasteners, then snug and final-torque them in an opposing crisscross or star sequence. Use the numbered pattern in the vehicle manual if one is provided.
What is the correct pattern for torquing a wheel?
Move across the wheel rather than tightening each fastener clockwise around the hub. A four-lug wheel uses opposing positions, while a five-lug wheel normally follows a star-shaped sequence. Follow the manufacturer’s diagram when available.
What is the recommended torque for a 7/16 lug nut?
The 7/16-inch thread size is not enough to determine a safe torque value. Check the specification for the exact vehicle, stud, wheel, nut design, and installation condition.
Can I tighten lug nuts with an impact wrench?
A manufacturer may allow a power tool during an initial stage, but do not use an impact wrench as a substitute for the specified final torque procedure. Finish with the appropriate torque wrench unless the manufacturer explicitly directs otherwise.
Should I lubricate wheel studs or wheel bolts before torquing?
Not unless the vehicle or wheel manufacturer specifically calls for lubrication. Adding oil or anti-seize changes thread friction and can change the clamping force produced at a given torque setting.
How soon should I recheck lug nut torque?
Follow the interval specified by your vehicle or wheel manufacturer. Some manufacturers require a check after wheel removal or installation; for example, Ford specifies a check within 100 miles for certain current applications.
What if a lug nut or wheel bolt will not turn smoothly by hand?
Stop instead of forcing it. Check for cross-threading, damaged threads, dirt, corrosion, or incorrect hardware. A damaged fastener or stud should be repaired or replaced before the wheel is put back into normal service.
Conclusion
Correct wheel bolt torque starts with the right specification, not a generic torque chart. Confirm the vehicle and wheel requirements, use compatible hardware, clean the mounting surfaces, hand-start every fastener, and tighten in a crisscross pattern with a suitable torque wrench. If the manufacturer requires a post-installation torque check, perform it at the specified interval. Stop and inspect the assembly whenever a fastener binds, will not hold torque, or shows signs of damage.
Sources
- National Highway Traffic Safety Administration — TireWise — tire/loading placard location and information.
- Ford — 2026 Bronco Sport Owner’s Manual, Wheel Nuts — application-specific torque, clean mounting surfaces, fastener condition, and post-service retorque guidance.
- Tesla — Model Y Service Manual, Wheel Assembly — hand-starting, 6-point socket guidance, crisscross sequence, and controlled final tightening.
- U.S. Tire Manufacturers Association — Care and Service of Passenger and Light Truck Tires — exact torque specifications and torque-wrench final-tightening guidance.
