
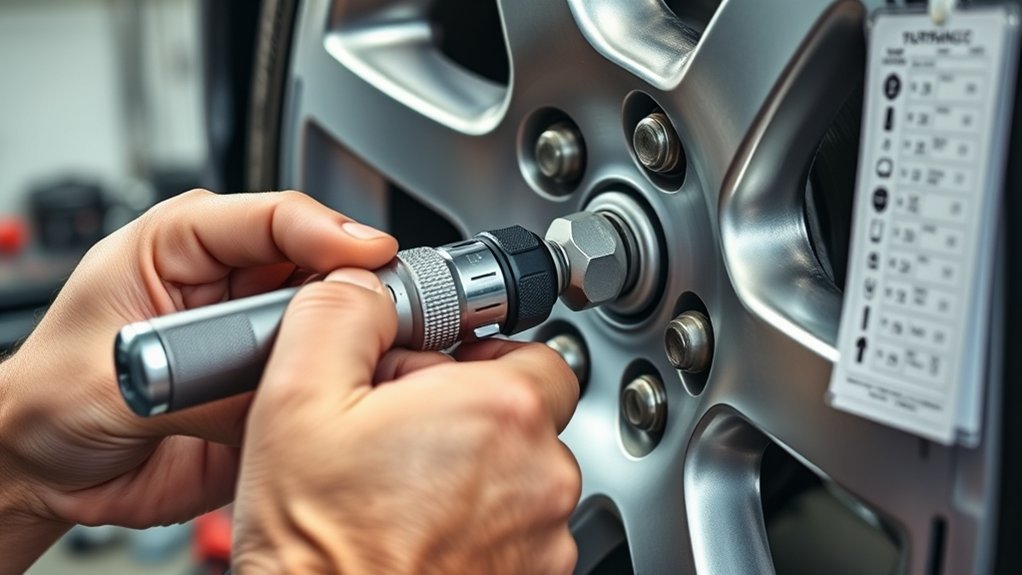
Using a torque wrench correctly is more than choosing a number and pulling until you hear a click. You need the correct torque specification, socket, wrench range, thread condition, hand position, and tightening sequence. For a click-type wrench, set the target carefully, pull smoothly from the designed grip area, stop as soon as you hear or feel the click, and store the tool according to its manufacturer’s instructions.
Quick Answer
To use a click-type torque wrench, confirm the fastener’s exact torque specification, set and lock that value, attach the correct socket, and pull slowly from the proper handle position. Stop immediately when you hear or feel the click. For adjustable micrometer wrenches, return the tool to its lowest marked setting before storage.
Key Takeaways
- Use the exact torque value, units, tightening sequence, and thread condition specified by the vehicle, equipment, or fastener manufacturer.
- Choose a torque wrench whose rated and calibrated range includes the target value, then set and lock it correctly.
- Hand-start fasteners, use the correct socket, keep the wrench square, and pull slowly from the intended grip area.
- On a click-type wrench, stop as soon as you hear or feel the click; continuing to pull can over-tighten the fastener.
- A crowfoot or offset adapter that changes effective wrench length may require a corrected wrench setting.
- Store, inspect, and calibrate the wrench according to its specific manufacturer instructions rather than relying on one universal schedule.
At a Glance
| Time Required | Usually a few minutes per fastener group once the correct specification and tools are ready |
| Difficulty | Easy to moderate; critical assemblies may require a service procedure, tightening sequence, or torque-angle step |
| Tools Needed | Correct torque wrench, properly fitting socket or bit, application-specific service information, and optional extension or adapter when required |
| Cost | No additional cost if you already have the correct tools; wrench purchase, rental, or professional calibration costs vary |
Warning: Torque specifications are application-specific. For wheel, brake, suspension, steering, engine, structural, or other safety-critical fasteners, follow the exact manufacturer procedure. Do not substitute a generic torque value, lubricate threads unless instructed, or replace a specified torque-angle procedure with a simple torque setting.
Know Which Type of Torque Wrench You Have
The instructions below focus mainly on the common adjustable click-type torque wrench. Other designs work differently, so identify your wrench before you begin.
- Micrometer click wrench: You set a value on the handle. The wrench clicks when the target is reached, and you stop pulling.
- Split-beam wrench: You set the target, but its internal mechanism and storage requirements can differ from a micrometer click wrench.
- Beam wrench: A beam and pointer show the torque being applied in real time. There is usually no preset click.
- Dial wrench: A dial displays applied torque as you pull.
- Electronic wrench: A display, light, sound, or vibration indicates torque and may also measure angle.
Always read the instructions for your exact model because operating direction, rated range, hand position, storage, batteries, calibration, and warning signals can differ.
[Products Worth Considering]

This manual duck head tire changer kit makes tire installation and removal simpler by letting you embed the duck head into the tire with applied pressure. The integrated design and durable steel construction help reduce friction and improve efficiency and safety during use. Suitable for 16–21 inch wheels, it’s convenient for cars, trucks, SUVs, and ATV tires, with 24-hour after-sales support.

This 1/2-inch drive breaker bar delivers powerful leverage for loosening and tightening stubborn lug nuts and automotive fasteners. The 180-degree flex head helps you reach tight spaces at the angle you need, making tire and brake jobs easier. A spring-loaded ball detent design holds 1/2-inch sockets securely while the chrome-moly head provides durable strength for everyday use.

The Trivd Frol 1/2" air impact wrench delivers high performance torque up to 1500 ft-lbs with a twin hammer impact mechanism for strong, balanced blows. It features an ergonomic grip, compact lightweight design, and quick-stop control with 3 forward speeds up to 8000 RPM plus a reverse speed. Built for demanding automotive repair and tire shop work, the rear exhaust helps keep debris away from the surface.
Confirm the Torque Specification Before You Start
Find the exact manufacturer’s torque specification before tightening the fastener. Check the vehicle owner’s manual, factory service information, equipment manual, component instructions, or another application-specific manufacturer source.
Confirm all of the following before setting the wrench:
- The required torque value.
- The correct unit, such as ft-lb, in-lb, or N·m.
- Whether the specification assumes clean, dry threads or calls for lubricant, thread locker, sealant, or another coating.
- Whether the fastener is reusable or must be replaced.
- Whether a tightening sequence or staged procedure is required.
- Whether the procedure includes a final torque-angle step.
Do not guess at thread lubrication. Friction affects the relationship between wrench torque and fastener clamp load, so changing the thread condition can change the load created by the same wrench reading.
As one application-specific example, American Honda instructions for a 2018 CR-V 19-inch accessory wheel specify 108 N·m (80 lbf·ft) for the wheel nuts. That value should not be copied to unrelated vehicles, wheels, or fasteners.
Set the Torque Wrench Correctly

To set a typical micrometer click torque wrench, first unlock the adjustment mechanism. Depending on the model, this may be a locking knob, collar, ring, or lever.
Next, rotate the handle until the main scale reaches the closest base value below or at your target. Then use the micrometer scale to add the smaller increment needed to reach the exact specification.
For example, if the main scale is set at 50 ft-lb and the micrometer scale adds 5 ft-lb, the final setting is 55 ft-lb. Scale layouts vary, so follow the instructions supplied with your wrench rather than assuming every model reads the same way.
Lock the adjustment mechanism and confirm that the setting cannot move accidentally. Check the units one more time before applying torque.
A torque wrench should also be used within its manufacturer-specified operating range. A commonly cited guideline is to choose a wrench that places the target roughly in the middle portion of its range. Norbar notes that 20% to 80% of rated capacity is typically favorable for accuracy and repeatability, but this is not a universal limit for every tool. The wrench manufacturer’s published range and accuracy specification control.
Pro Tip: Before tightening a critical fastener, read the wrench scale twice: once while setting it and once after locking it. This simple check catches unit mistakes and accidental setting changes before torque is applied.
[Products Worth Considering]

This car D-wheel lock nut key provides an anti-theft solution for D-shaped wheel lock bolts, helping keep your wheels secure. It features a flower-shaped internal pattern that resists micro-adjustment theft while allowing removal and mounting of compatible locking nuts. Made for reliable performance under high torque, it’s easy to use with standard socket wrench turning for quick tire maintenance and emergency repairs.

This spare tire tool kit is designed for the 2004 to 2018 Ford F-150 to help you loosen and tighten wheel lug nuts and manage the spare tire and provided jack functions from underneath the vehicle. It includes the lug nut wrench and extension pieces plus a convenient storage carrying case for organized transport. The jack itself is not included.

The 22800 wheel stud installer makes replacing wheel studs quick and secure, saving time and effort during tire service. It uses a ratchet or impact wrench to pull new studs firmly into place, helping when existing studs are too long. Compatible with most automotive wheels and light-duty truck wheel studs, it’s designed for easy, tool-assisted installation.
Choose the Right Socket and Extender
Choose a socket or bit that matches the fastener exactly. It should seat fully without excessive play, rocking, or slipping.
Also confirm that the socket’s drive size matches the torque wrench, such as 1/4-inch, 3/8-inch, or 1/2-inch. The socket and any adapter must be suitable for the torque you plan to apply.
Inspect the socket for cracks, rounding, deformation, or other damage before use. A damaged socket can slip and may prevent controlled torque application.
[Products Worth Considering]

The SEESII cordless impact wrench delivers high tightening and loosening power for fast wheel bolt and industrial bolt work. Its brushless motor and variable-speed 3 forward/2 reverse modes help you control precision installs and stubborn nut removal. A dual-battery system with rapid charging and an included storage case make it ready for home, car, and jobsite use.

These M14x1.5 closed-end chrome lug nuts are a one-piece replacement designed for secure fitment on compatible GM, Ford, and select Chrysler/Dodge models. Featuring a 60-degree conical seat and anti-rust chrome plating, they help resist corrosion and maintain a bright look for everyday driving. Built for long-term durability, they include OEM-style part references and are backed by 12 months of support.

The SPTA wheel and tire brush kit makes it easy to remove dirt from wheels, rims, and hard-to-reach areas without needing a high pressure washer. Ergonomic handles and soft, chemical-resistant bristles help you clean faster while reducing the risk of scratching. The set is versatile for cars, trucks, motorcycles, bicycles, RVs, boats, and more.
Understand Socket Extensions and Crowfoot Adapters
A normal square-drive socket extension used between the wrench and socket does not move the fastener center ahead of or behind the wrench’s drive axis in the same way an offset adapter does. Keep the extension straight and fully seated.
A crowfoot wrench, torque adapter, or other offset attachment is different. If it changes the effective lever length between your hand and the fastener, the wrench setting may need to be corrected.
If a crowfoot is positioned at 90 degrees to the wrench so that it does not change the effective lever length, a correction may not be required. If the fastener center is extended beyond or behind the square drive, use the formula supplied by your torque-wrench or vehicle manufacturer.
Tekton’s micrometer-wrench guidance expresses the corrected setting as:
Corrected wrench setting = Desired fastener torque × Wrench effective length ÷ (Wrench effective length + Change in length)
Use the dimensions and measurement points specified by your wrench manufacturer rather than measuring from arbitrary points on the tool.
Note: Do not add a pipe or other extension to the torque-wrench handle for extra leverage. That changes how force is applied and can damage the wrench or produce an inaccurate result.
Prepare the Fastener Before Torquing
Before reaching for the torque wrench, inspect the fastener, threads, mating surfaces, and any washers or seats involved in the joint.
Start the nut or bolt by hand whenever possible. It should turn normally for several threads without binding. If it immediately becomes difficult to turn, stop and inspect for cross-threading, damaged threads, dirt, corrosion, or the wrong fastener.
Bring the joint together and snug the fastener with an appropriate hand tool before final torquing. A torque wrench is a precision tightening tool, not the best tool for running a fastener through many loose turns or breaking loose a seized bolt.
For wheels and other multi-fastener assemblies, use the manufacturer’s specified sequence. That commonly means an opposite-side or star-type pattern rather than simply tightening every fastener around the circle in order.
Tighten Nuts and Bolts Properly
Once the fastener is prepared, attach the correct socket and position the wrench so the socket is fully seated and the wrench is as square to the fastener as the application allows.
Grip the wrench at the manufacturer’s intended hand position. Many torque wrenches are calibrated for force applied near a marked or shaped area on the handle. Moving your hand significantly up the shaft or adding a handle extension can affect accuracy.
Apply a slow, smooth pull. Do not jerk the handle, bounce on it, or use your body weight to force the wrench through the target.
Set Correct Torque
Unlock the wrench, select the required torque value, fine-tune the micrometer scale if your model uses one, and relock the setting.
Check that you have not confused ft-lb, in-lb, and N·m. A unit error can create a large torque mistake even when the wrench itself is set perfectly.
For example, the cited 2018 Honda CR-V accessory-wheel instructions specify 108 N·m, equivalent to 80 lbf·ft. That is an example of why it is useful to confirm both the value and the unit before tightening.
- Read the application specification first.
- Use a wrench whose rated range covers the target.
- Set the main and fine scales carefully.
- Lock the selected value.
- Confirm the units before pulling.
Attach Proper Socket
Match the socket to the fastener exactly, then push it fully onto the wrench drive. Seat the socket completely on the nut or bolt before applying force.
If access is limited, a straight socket extension can help you reach the fastener. If you need a crowfoot or offset adapter, check whether it changes the wrench’s effective length and calculate the required setting when necessary.
Inspect the socket, adapter, and wrench drive for damage. Do not use cracked, severely worn, or poorly fitting components.
These checks help the tool deliver torque consistently and reduce the chance of rounding a fastener or slipping under load.
Tighten Until Clicks
With a click-type wrench properly positioned, pull the handle slowly and smoothly. Maintain control as you approach the target.
When you hear or feel the click, stop applying force immediately. The click tells you that the preset torque has been reached; it does not lock the wrench or prevent you from continuing to tighten.
- Use a controlled pull rather than a sudden jerk.
- Keep the socket fully seated on the fastener.
- Apply force from the intended grip area.
- Stop at the first clear click.
- Release the load so the wrench mechanism can reset.
If you do not get the expected click within a reasonable amount of movement or the wrench feels abnormal, stop rather than continuing to pull harder. Recheck the setting, units, wrench range, socket engagement, and tool condition.
Stop When the Torque Wrench Clicks
With a click-type torque wrench, the most important operating habit is simple: stop at the first clear click. Continuing to pull after the mechanism releases can tighten the fastener beyond the intended value.
| Action | Result |
| Stop at the first click | Avoids deliberately adding torque after the target is reached |
| Keep pulling after the click | Can over-tighten the fastener |
| Pull slowly and steadily | Makes the click easier to detect and reduces overshoot |
| Verify a dropped or damaged wrench | Reduces the risk of using a tool whose accuracy has changed |
Do not routinely use a precision click wrench as a breaker bar for loosening stubborn fasteners unless the manufacturer specifically approves that use. Breaking loose a tight or seized fastener can exceed the tool’s rated range and affect its accuracy.
A click is a signal to stop pulling—not a mechanism that prevents further tightening.
Recheck the Final Torque
A final torque check is most useful when you are tightening a group of fasteners that must share load evenly, such as wheel nuts or a multi-bolt component.
Complete the required tightening sequence first. Then make one controlled final confirmation pass through the same sequence at the specified setting, stopping at the click for each fastener.
Avoid repeatedly clicking the same fastener several times in an attempt to make it “extra tight.” More clicking does not make the original specification more correct.
Verify Final Setting
Before the final pass, glance at the wrench setting again to confirm it has not moved and that the selected unit is correct.
Use the same socket, the intended handle position, and the required tightening pattern. If an application specifies several torque stages—for example, an initial value followed by a higher final value—follow those stages exactly.
- Confirm the wrench is still at the specified setting.
- Keep the wrench square and the socket fully seated.
- Follow the required fastener sequence.
- Stop at the first click.
- Investigate anything that feels abnormal rather than forcing the fastener.
For the cited 2018 Honda CR-V accessory wheel, Honda specifies 108 N·m (80 lbf·ft). Other vehicles and aftermarket wheels can use different values, so always verify the exact application.
Tighten With Steady Pressure
Apply steady pressure so torque rises smoothly. Keep your grip controlled and avoid rapid or jerky motion.
As you approach the target, slow your pull slightly and stay ready for the click. A controlled motion makes it easier to stop without overshooting.
Do not push or pull from an improvised position on the wrench shaft if the manufacturer marks a specific force point. Hand position is part of how many torque wrenches are calibrated.
If the wrench feels inconsistent after a setting change, stop and inspect it. A dropped, damaged, overloaded, or malfunctioning wrench should be checked before critical use.
Recheck After First Pass
For multi-fastener assemblies, perform the final confirmation pass in the same sequence specified for tightening.
- Follow the manufacturer’s pattern rather than tightening randomly.
- Use the same final torque setting for every fastener when the procedure calls for equal torque.
- Keep the pull smooth and stop at the click.
- Do not repeatedly “double-click” individual fasteners.
- If one fastener moves noticeably farther than the others, inspect the joint, threads, seating surface, and procedure.
Some applications also require a later service recheck after a certain distance, operating period, or thermal cycle. Only perform that step when the vehicle, wheel, component, or fastener manufacturer specifies it.
Follow the Correct Sequence on Multiple Fasteners
When several fasteners clamp one component, the order in which they are tightened can matter as much as the final torque value.
Wheel nuts commonly use an opposite-side or star-type pattern so the wheel seats evenly. Cylinder heads, covers, flanges, bearing caps, and other assemblies may use their own numbered sequences and several torque stages.
Do not invent a sequence. Follow the diagram or numbered order in the application-specific service information.
When a procedure calls for staged tightening, bring every fastener through the first stage before moving the group to the next stage. This helps distribute clamp load more evenly than fully tightening one fastener while the others remain loose.
Understand Torque-Angle and Single-Use Fasteners
Some modern fasteners are not installed with one final torque value. A procedure may specify an initial torque followed by an additional angle, such as a certain number of degrees of rotation.
That procedure may require an angle gauge or an electronic torque-and-angle wrench. Do not replace the angle step with a guessed higher torque value.
Some torque-to-yield or otherwise specified fasteners are also intended for one-time use. If the manufacturer says to replace the bolt, nut, washer, or other hardware, install new parts rather than reusing the old fastener.
Warning: A torque wrench cannot compensate for damaged threads, incorrect fasteners, wrong lubrication, contaminated seating surfaces, or a missed torque-angle step. Correct the underlying condition before tightening.
Reset the Torque Wrench for Storage
Storage instructions depend on the wrench design. For an adjustable micrometer click-type wrench, manufacturers such as Tekton instruct users to return the tool to the lowest marked torque value before storage.
Do not continue unwinding the handle below the lowest marked setting unless your wrench manufacturer specifically instructs you to do so. “Zero” is therefore not the correct universal storage setting.
A split-beam wrench can have different requirements. Some split-beam designs do not keep their internal mechanism spring-loaded at rest and can be stored without turning them down. Electronic and dial tools also follow their own manuals.
After setting the correct storage position, place the wrench in a protective case or other location where it will not be dropped, bent, crushed, or exposed to unnecessary moisture and contamination.
Clean and Care for Your Torque Wrench
Keep your torque wrench clean, dry, and protected from impact. Wipe dirt and residue from the exterior with a clean cloth after use.
Do not immerse the wrench in cleaning fluid. Do not spray solvents, oil, or other chemicals into the internal mechanism unless the manufacturer’s maintenance instructions specifically tell you to do so.
- Wipe the exterior after use.
- Inspect the ratchet head, drive, handle, scale, locking mechanism, and case for damage.
- Keep the scale readable.
- Store the wrench in the position specified for its design.
- Protect it from drops, heavy impacts, corrosion, and extreme storage conditions.
If the wrench is dropped or damaged, verify its accuracy before relying on it for a critical application. Tekton specifically advises testing and verifying a micrometer wrench after it has been dropped or damaged.
Avoid Common Torque Wrench Mistakes
Even an accurate wrench can produce a poor result when it is used incorrectly. The most common mistakes involve the wrong specification, poor setup, uncontrolled force, or improper storage.
| Mistake | Why It Matters |
| Guessing the torque value | The correct value is specific to the application and fastener condition |
| Using the wrong socket | A poor fit can slip, damage the fastener, or prevent controlled tightening |
| Jerking the handle | Makes it easier to overshoot or miss the click |
| Pulling after the click | Can add torque beyond the intended target |
| Ignoring adapter geometry | An offset adapter can change effective lever length and delivered torque |
| Using it as a breaker bar | May overload or damage a precision click wrench |
| Dropping the wrench | Can affect calibration or damage the mechanism |
| Storing a micrometer wrench at the wrong setting | Can conflict with the manufacturer’s storage requirements |
Handle the wrench as a measuring instrument rather than an ordinary ratchet. When something about the joint, tool, or reading seems wrong, stop and identify the cause instead of applying more force.
Calibrate Your Torque Wrench on Time
Calibration verifies whether the torque indicated or set by the tool corresponds closely enough to the torque it actually delivers.
There is no single service interval that should replace the instructions for every wrench. Follow the calibration or recertification schedule supplied by the wrench manufacturer, calibration certificate, employer, or applicable quality procedure.
Intervals can vary. For example, some consumer wrench manuals call for service more frequently than once a year, while other manufacturers base recommendations on use, tool history, application criticality, or measured performance.
The current published ISO references include ISO 6789-1:2017 for hand torque-tool conformance requirements and ISO 6789-2:2017 for calibration and measurement uncertainty. These standards should not be simplified into one universal consumer maintenance interval.
- Check calibration according to your wrench manufacturer’s schedule.
- Verify the wrench after a significant drop, impact, overload, or damage.
- Investigate inconsistent or unexpected readings before critical work.
- Use a qualified calibration or recertification provider when formal verification is needed.
- Keep calibration records when the work or quality system requires them.
Calibration service pricing varies by tool type, torque range, brand, provider, certificate requirements, repair needs, and shipping, so a single universal price range is not reliable.
Frequently Asked Questions
What Is the 20 Rule for Torque Wrenches?
The commonly cited 20–80 guideline means choosing a torque wrench so the target falls roughly between 20% and 80% of its capacity. It can be useful for accuracy and repeatability, but it is not a universal rule for every wrench. Always follow the rated range and accuracy specification published for your exact tool.
How Do You Explain Torque in Simple Terms?
Torque is twisting force. Imagine turning a jar lid or using a wrench on a bolt. A torque wrench measures or controls that twisting force so a fastener can be tightened to the value specified by its manufacturer. Common units include newton-meters, pound-feet, and pound-inches.
What Are Common Mistakes When Using a Torque Wrench?
Common mistakes include using the wrong torque specification or unit, failing to hand-start the fastener, using a poorly fitting socket, pulling too quickly, holding the wrench in the wrong place, continuing after the click, ignoring crowfoot-adapter correction, using the wrench as a breaker bar, and storing or calibrating it contrary to the manufacturer’s instructions.
How Do You Use an Old-Fashioned Beam Torque Wrench?
A traditional beam torque wrench works differently from a click wrench. Attach the correct socket, keep the wrench positioned so you can read the scale straight on, and pull smoothly. As the main beam bends, the pointer shows the applied torque on the scale. Stop when the pointer reaches the required value. There is normally no preset click to wait for.
Should You Store a Torque Wrench at Zero?
Not as a universal rule. Adjustable micrometer click wrenches are commonly stored at their lowest marked torque setting, not below the scale. Split-beam, dial, and electronic tools can have different requirements. Follow the instructions for your exact wrench.
Does a Socket Extension Change Torque?
A straight square-drive socket extension does not change the effective lever length the way an offset adapter can. A crowfoot or torque adapter that moves the fastener center ahead of or behind the wrench drive can change delivered torque and may require a corrected wrench setting. Follow the wrench or vehicle manufacturer’s adapter formula.
How Often Should a Torque Wrench Be Calibrated?
Use the interval specified by the wrench manufacturer, calibration certificate, workplace procedure, or quality system. Also verify the tool after a significant drop, overload, damage, or questionable reading. A single annual interval is not appropriate for every wrench and every application.
Conclusion
Using a torque wrench correctly starts with the application specification, not the wrench itself. Confirm the torque value, units, thread condition, tightening sequence, and any torque-angle requirements before you begin.
For a click-type wrench, set and lock the target, use the correct socket, grip the intended handle area, pull smoothly, and stop at the first click. Treat crowfoot and offset adapters carefully because they can change effective lever length. For multi-fastener assemblies, complete the specified sequence and make only the final confirmation passes the procedure requires.
After the job, clean and inspect the tool and store it according to its design. Adjustable micrometer click wrenches are commonly returned to their lowest marked setting rather than zero, while other wrench types may have different requirements. Follow the tool manufacturer’s calibration guidance and verify the wrench after damage, overload, or suspicious performance.
Sources
- Tekton Micrometer Torque Wrenches Product Manual — setting, hand position, stop-at-click guidance, storage, cleaning, post-drop checking, and adapter correction.
- Tekton: How to Use a Torque Wrench With a Crowfoot Wrench — crowfoot geometry and torque correction.
- Ford Service Torque Wrench Adapter Calculator — effective-length correction for torque adapters.
- ISO 6789-1:2017 — conformance testing and marking requirements for hand torque tools.
- ISO 6789-2:2017 — calibration requirements and measurement uncertainty for hand torque tools.
- American Honda 2018 CR-V 19-Inch Aluminum Wheel Installation Instructions — supports the 108 N·m (80 lbf·ft) wheel-nut example.
