The Toyota Hilux spare tire carrier is more model-specific than the original article suggests. On many Hilux pickups, the spare wheel is stored beneath the rear frame or cargo bed on a chain-operated carrier, not on an exterior rear mount or in a conventional “boot.” Because Toyota publishes different manuals by production period and market, confirm your model year, body style, and owner’s manual before using or modifying the carrier.
Quick Answer
On most Toyota Hilux pickups, the spare wheel sits beneath the rear of the vehicle on a chain-operated carrier. Use the factory wheel-nut wrench and jack-handle extensions to lower it fully to the ground, remove the anchor plate, inspect the tire, and reinstall it securely. Always confirm the exact procedure in the manual for your model year and market.
Key Takeaways
- The factory carrier on many Hilux pickups is an underbody chain or winch system; rear swing-away carriers are usually aftermarket.
- You normally do not need the jack or a socket set merely to lower the spare. Use the correct factory handle components for your vehicle.
- Lower the wheel completely to the ground before removing the anchor plate, and verify that the wheel is centered and tightly retained after reinstalling it.
- Check the spare’s cold pressure, condition, and carrier operation regularly, especially before towing, off-road travel, or a long trip.
- Rear-mount conversions must account for wheel weight, bumper or chassis strength, tailgate clearance, cameras, sensors, lighting, registration-plate visibility, towing equipment, and axle loads.
At a Glance
| Time Required | About 5–15 minutes to lower, inspect, and reinstall a working carrier; longer if it is dirty, corroded, or damaged |
| Difficulty | Easy for routine access; moderate if the mechanism is seized or an oversized tire is fitted |
| Tools Needed | Factory wheel-nut wrench and jack-handle extensions, gloves, flashlight, pressure gauge, and wheel chocks |
| Cost | No cost for routine access and inspection; replacement parts and professional repairs vary by model and condition |
Understanding the Toyota Hilux Spare Tire Carrier Design
On many Hilux pickup models, the spare wheel is held horizontally beneath the rear of the truck. A chain or cable passes through the wheel and connects to an anchor plate. Turning the factory handle lowers or raises the wheel through an access point near the rear of the vehicle.
This arrangement preserves cargo-bed space and keeps the spare outside the passenger area. It also exposes the wheel and carrier to water, road salt, mud, and impact, so the system should be inspected and operated before it is needed in an emergency.
The standard mechanism should not be described as an “advanced locking mechanism” unless your specific vehicle has a separate lock or anti-theft accessory. A normal chain carrier secures the wheel for transport, but that does not automatically make it theft-resistant.
Note: Toyota publishes separate Hilux manuals for different production periods. Check the VIN, build date, market, body style, and the exact Toyota Hilux owner’s manual before relying on a generic procedure.
Key Features and Layout Differences
The most important distinction is whether your Hilux still uses its factory underbody carrier or has been modified with a bed mount, tray mount, rear bumper carrier, or interior storage system. These layouts behave differently and use different hardware.
Factory Underbody Carrier
A factory-style underbody carrier usually offers the best cargo-bed access and keeps the spare’s weight low and close to the vehicle. Its weaknesses are exposure to corrosion, restricted access in deep mud or on uneven ground, and limited clearance for some oversized tires.
The carrier’s chain, cable, anchor plate, guide, and winch must all work together. If the wheel is not centered or the chain is twisted, the tire may sit crooked, rattle, contact nearby parts, or fail to tighten correctly.
Rear, Bed, and Interior Storage Trade-Offs
A rear swing-away carrier can make the spare easier to reach, but it may add weight behind the rear axle and interfere with the tailgate, towbar, rear camera, parking sensors, lights, or registration plate. It must be designed for the wheel-and-tire weight and mounted to suitable structural points.
A bed-mounted spare is protected from road debris and easy to inspect, but it consumes cargo space. Interior or “boot” storage is mainly relevant to wagon-style vehicles or custom builds; a pickup-bed Hilux does not have a conventional enclosed boot. Any interior tire must be firmly restrained so it cannot move during a crash or sudden stop.
How to Access and Remove the Spare Tire
The following method reflects Toyota’s current chain-carrier procedure, but access points and tool storage vary. The May 2026 Toyota Hilux manual instructs the driver to assemble the wheel-nut wrench and jack-handle bars, lower the wheel fully to the ground, remove the anchor plate, and pull the spare out.
Warning: Park on firm, level ground, apply the parking brake, switch off the engine, use the hazard lights, and chock a wheel before beginning. Never place any part of your body beneath a vehicle supported only by its jack. Lower the spare completely before releasing the anchor plate.
Tools Required for Access
For a typical factory underbody carrier, the essential access tools are the wheel-nut wrench, jack-handle extension bar, and jack-handle bar supplied with the truck. Gloves, a flashlight, a tire-pressure gauge, and wheel chocks are also useful.
The jack is needed only if you are changing a road wheel. A socket set is not normally required to lower a functioning factory carrier, although modified or replacement carriers may use different fasteners.
Step-by-Step Removal Process
- Secure the vehicle. Stop on firm, level ground away from traffic. Apply the parking brake, select Park on an automatic or an appropriate gear on a manual, switch off the engine, turn on the hazard lights, and place wheel chocks as directed by your manual.
- Find the tool kit. Tool storage varies. On the current Japanese-market Hilux manual, the jack and tool bag are beneath the rear seat cushion.
- Assemble the handle. Join the wheel-nut wrench, extension bar, and handle bar until each connection is fully engaged. Toyota warns that the sections can separate if they are not locked together correctly.
- Insert the handle into the carrier drive. Align it carefully with the access guide. Do not force it if it will not seat; confirm that you have the correct tool orientation.
- Lower the wheel completely. Turn the handle in the lowering direction shown in your owner’s manual until the spare rests fully on the ground and the chain or cable has enough slack to release the plate. Rotation direction can vary by mechanism, so do not rely on a universal “counterclockwise” rule.
- Remove the anchor plate. Tilt or rotate the plate through the center opening, then pull the wheel out from under the truck while keeping hands and feet clear of pinch points.
- Inspect the spare and carrier. Check tire pressure, tread, sidewalls, wheel damage, chain or cable condition, anchor-plate wear, and visible corrosion before installing the spare.
Pro Tip: Practice lowering and reinstalling the spare at home. A short test confirms that the tool kit is complete and prevents your first attempt from happening at night, in bad weather, or beside traffic.
How to Reinstall the Spare Tire Correctly
- Place the tire flat with the wheel face oriented as shown in your model’s manual.
- Pass the anchor plate through the center opening and center it against the wheel.
- Turn the handle to remove slack while checking that the chain or cable is not twisted.
- Raise the wheel straight upward. Keep the tire, chain, and plate clear of the exhaust, towbar, brake lines, wiring, and other nearby parts.
- Tighten the carrier only to the method or torque stated for your exact model. The May 2026 Japanese-market manual specifies 37.0 N·m for its carrier procedure, but that figure must not be assumed for earlier or different-market Hilux models.
- Push the tire up and down and try to rotate it. It should remain firmly seated without contacting surrounding parts.
- Store all tools securely before driving.
Toyota’s current instructions also call for visually confirming that the tire is secure after it is raised. If it remains loose or unstable, lower it and repeat the centering and tightening steps rather than driving with it partially retained.
Comparing Underbody, Bed, and Rear-Mount Placement
| Location | Main Advantages | Main Drawbacks | Best Fit |
|---|---|---|---|
| Factory underbody | Preserves bed space; low mounting position; factory integration | Exposed to mud and corrosion; harder to reach on rough ground; oversized-tire clearance may be limited | Stock-size spare and general use |
| Bed or tray mount | Easy inspection and access; protected from road debris; flexible for larger tires | Consumes cargo space; requires strong restraints | Work, touring, and off-road builds with available tray space |
| Rear swing-away | Fast access; can carry a larger spare; may free underbody space | Adds rear weight; can obstruct the tailgate, sensors, camera, lights, towbar, or plate | Purpose-built bumper or chassis-mounted systems |
| Interior storage | Protection from weather and theft when properly secured | Uses interior space and creates a serious projectile risk if not restrained | Custom wagon or enclosed-body applications |
How to Convert to a Rear Spare Wheel Setup Safely
A rear carrier can improve access, especially when an oversized tire no longer fits under the vehicle. However, it is a structural modification rather than a simple cosmetic upgrade. The carrier and its mounting points must withstand the tire’s weight plus the higher forces created by bumps, vibration, and off-road travel.
Before choosing a system, verify all of the following:
- Vehicle compatibility: Match the carrier to the Hilux generation, body style, bumper, tray, towbar, and market specification.
- Wheel-and-tire weight: Confirm the carrier’s rated capacity for the complete assembly, not just the tire size.
- Mounting structure: Use a purpose-designed bumper, chassis bracket, or reinforced tray mount. Do not attach a heavy spare to unsupported sheet metal.
- Clearance: Check the tailgate, swing path, tow coupling, canopy, rear step, exhaust, and departure angle.
- Visibility and electronics: Keep the rear camera, parking sensors, lights, reflectors, and registration plate visible and functional.
- Vehicle loading: Include the carrier and spare in payload and rear-axle load calculations.
- Roadworthiness: Confirm local inspection, lighting, projection, and registration requirements before installation.
Warning: Cutting, welding, drilling, or altering a bumper, chassis, restraint system, sensor mount, or towbar can affect structural strength and legal compliance. Use a qualified installer when the conversion is not a direct, model-approved bolt-on system.
[Products Worth Considering]

Mount your spare tire off the floor and onto your wall using an e-track spare tire carrier that helps you stay organized in trailers, garages, and warehouses. The upgraded double-fittings design improves stability versus single-fittings and supports greater load bearing. Install by snapping into e-track anchor points and securing the tire with a lug-nut style bolt setup for quick, secure storage.

This spare tire tool kit is designed for the 2004 to 2018 Ford F-150 to help you loosen and tighten wheel lug nuts and manage the spare tire and provided jack functions from underneath the vehicle. It includes the lug nut wrench and extension pieces plus a convenient storage carrying case for organized transport. The jack itself is not included.

Secure a full-size spare on your trailer with this powder-coated steel spare tire mount bracket. It fits most 4-, 5-, and 6-lug wheel bolt patterns and mounts to trailer tongues up to 4 in wide and 5 in tall. Built for reliable carry with a max 150 lb load rating and includes zinc-plated hardware for straightforward installation.
Keeping Your Spare Tire Carrier in Top Shape
Routine checks prevent a seized carrier, flat spare, or loose wheel from becoming a roadside problem. The goal is to keep the tire usable and the retention system clean, centered, and secure.
- Check spare pressure monthly. The NHTSA TireWise guidance recommends checking all tires, including the spare, at least monthly when cold. Use the vehicle placard or owner’s manual for the correct pressure rather than the maximum pressure molded on the tire.
- Operate the carrier periodically. Lower and raise it before long trips and after severe mud, sand, salt, or water exposure so you know it is not seized.
- Inspect the chain or cable. Look for broken strands, severe rust, kinks, twisting, or an anchor plate that no longer sits flat.
- Clean the area. Remove packed mud, stones, and road salt from the wheel, guide, plate, and visible carrier parts.
- Check retention. Push and rotate the stored wheel. It should not sag, rattle, or touch nearby components.
- Inspect the tire itself. Check cuts, cracks, bulges, tread depth, valve condition, wheel corrosion, and tire age. A full-size spare is still an emergency tire if it has spent years unused beneath the truck.
- Use lubricant carefully. Apply only a product and location recommended by Toyota or the carrier manufacturer. Coating exposed parts indiscriminately can attract grit or hide damage.
A spare tire is useful only when it is inflated, undamaged, and capable of coming off the carrier when you need it.
Troubleshooting Common Spare Tire Carrier Problems
| Symptom | Likely Cause | Safe Next Step |
|---|---|---|
| Handle will not engage | Incorrect tool assembly, poor alignment, missing extension, or debris in the guide | Reassemble the factory tools, illuminate the access point, and clean visible debris without forcing the drive |
| Handle turns but the wheel does not move | Internal winch damage, a stripped drive, broken cable or chain, or a disconnected anchor | Stop turning and have the carrier inspected; do not crawl underneath or rely on a damaged mechanism |
| Wheel lowers only partway | Corrosion, a twisted chain, a jammed plate, or the tire catching on nearby parts | Remove load from the mechanism if safe, check visible interference, and seek service if it remains stuck |
| Stored spare rattles | The plate is off-center, the chain is twisted, the wheel is not fully raised, or the tire is contacting another component | Lower the wheel, recenter the plate, raise it straight, and verify secure retention |
| Larger spare will not fit | Insufficient space around the frame, exhaust, towbar, suspension, or body | Do not force it into place; use a properly rated bed, tray, or rear carrier designed for the larger assembly |
[Products Worth Considering]

Mount your spare tire directly to the inside wall of an enclosed trailer or garage to save space and keep your tire secure. This wall-mount spare tire carrier is designed for universal trailer tire fit and includes a fixed plate and chute for convenient screw replacement. Nylon insert hex lock nuts help prevent the tire from falling off, and wing hardware enables faster load and unload during maintenance.

This side-mounted U-bolt spare tire bracket helps keep a trailer spare wheel secure and protected while you travel. It supports trailer frames up to 2–3 inches wide and fits up to 15-inch tires for 4- or 5-lug wheels. The galvanized steel threaded carrier is built for long-lasting corrosion resistance and installs easily with included lug nuts and U-bolt.

The Dr.Roc spare tire tool kit helps you release, lower, or raise your spare tire with reliable extension tools and a lug nut wrench. It is made from rustproof automotive-grade steel and includes an organized carry case for convenient storage. Designed for compatibility with select GM models from the late 1990s through 2019, it uses upgraded extension components to install and remove spare tires with less hassle.
Aftermarket Spare Tire Carrier Options
Aftermarket systems can solve a genuine clearance or access problem, but no single design is best for every Hilux. Common options include replacement underbody winches, bed or tray mounts, headboard mounts, and bumper-mounted swing-away carriers.
Choose a carrier using documented compatibility, rated wheel capacity, corrosion protection, latch redundancy, hinge serviceability, and spare-parts availability. A good system should keep the tire secure without creating new interference, visibility, or loading problems.
Be cautious with universal carriers that require improvised drilling or welding. The tire’s static weight is only part of the load; repeated vibration and impact can fatigue weak brackets or thin panels.
[Products Worth Considering]

This universal spare tire mount fits 4, 5, and 6 lug trailer wheels with bolt patterns from 4" to 5.5" and helps keep your tire securely locked in place. Its reinforced triangular structure with a sturdy behind plate is designed to handle up to 150 lbs, making it suitable for boat, camper, and RV spare tire mounting. The angled raised design reduces wind resistance and installation is straightforward with different length bolts and no drilling required.
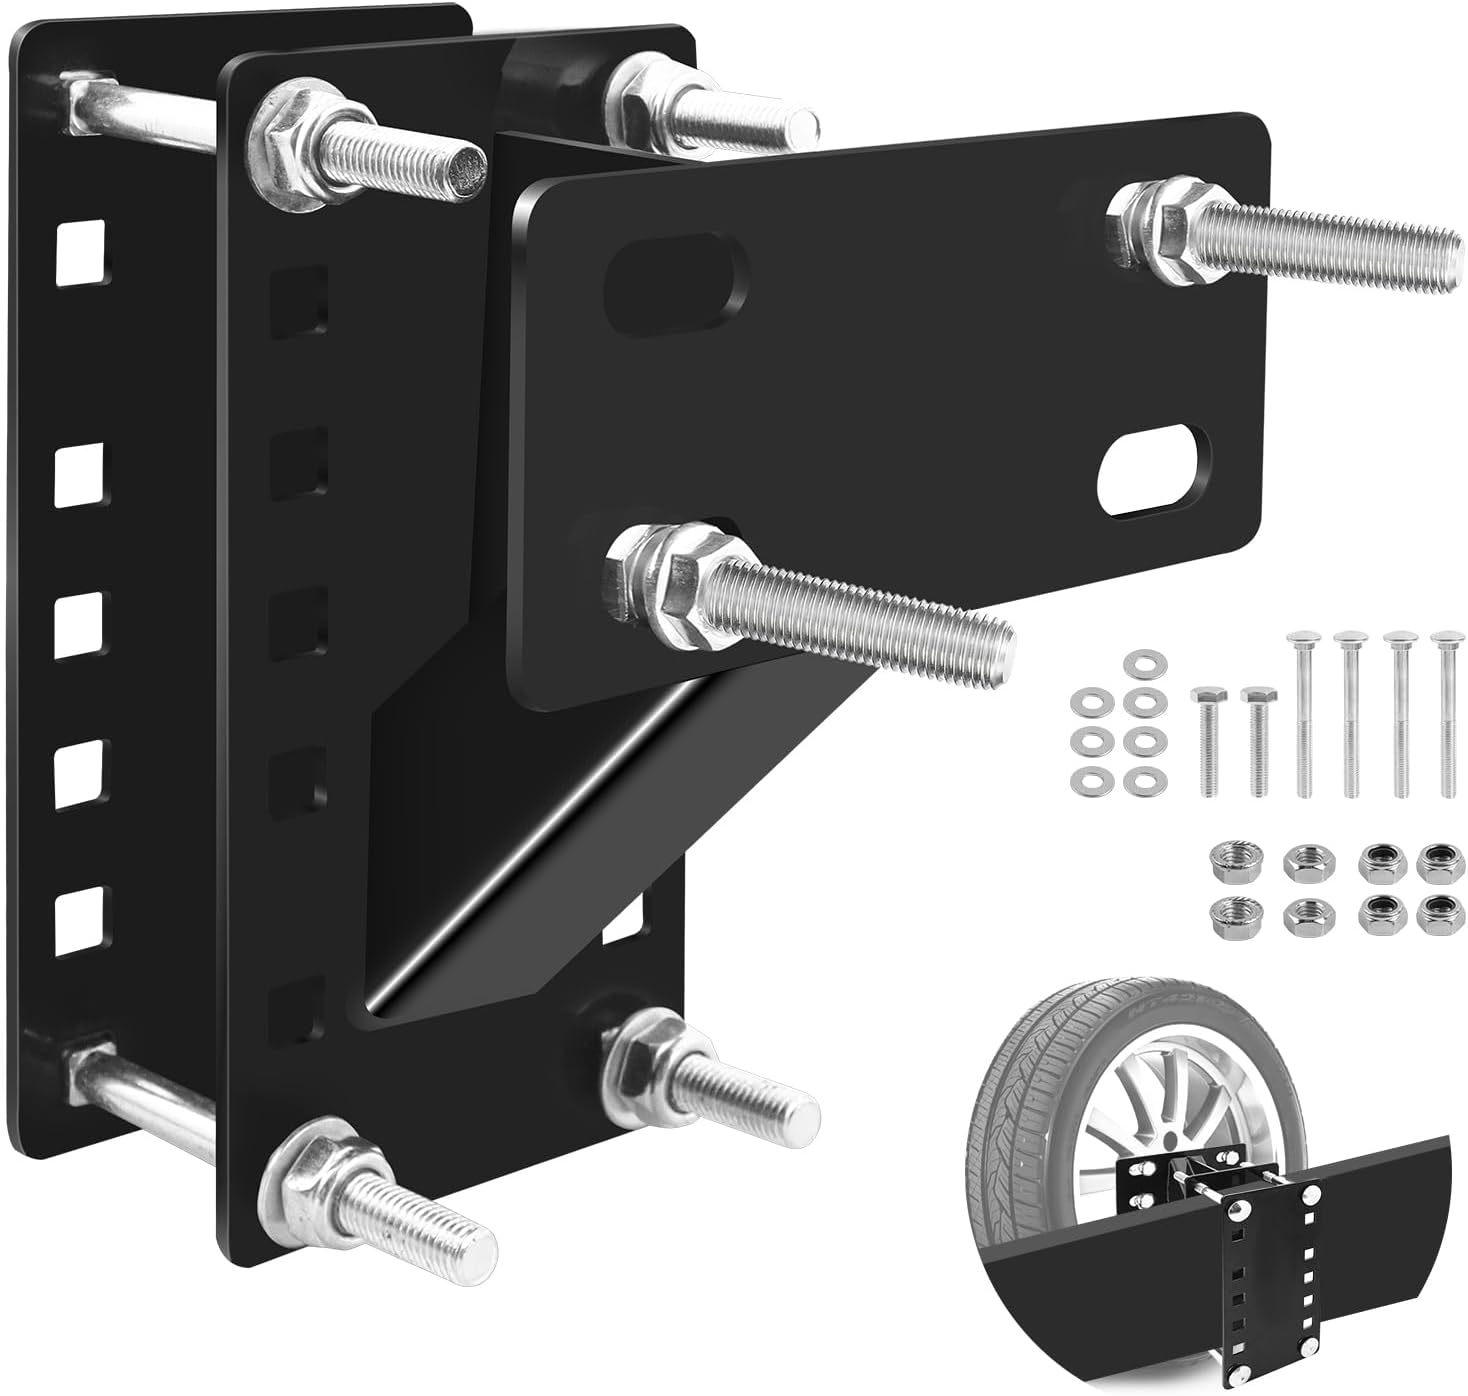
This universal spare tire mount carrier holder is built for utility trailers and boat trailers, offering a secure fit for 4, 5, and 6 lug wheels. It supports multiple bolt pattern sizes and a heavy-duty load capacity while resisting rust with a durable finish. The design allows easy installation and lets you choose the steel beam height for a better fit.

The GADFISH spare tire carrier is built for reliable hauling with a reinforced welded triangular structure and a behind plate that securely holds the tire up to 150 lbs. It fits a wide range of trailer wheel lug setups, making it suitable for boat trailers as well, while the sloping design helps reduce wind resistance and provides low-ground clearance. Installation is designed to be straightforward with different length bolts and no drilling required.
What to Expect After a Spare Carrier Modification
Rear and bed-mounted systems usually trade cargo space, rear visibility, or added weight for easier access and more room for an oversized spare. A swing-away carrier also adds another latch and hinge that must be checked before every trip.
After installation, test the tailgate, towbar, camera view, parking sensors, lights, plate visibility, and departure clearance. Drive over a short rough route, then recheck all approved fasteners to the installer’s specified torque. Stop using the carrier if it develops movement, cracking, latch play, unusual noise, or contact with the body.
Community advice can help identify practical issues, but it should not replace the carrier manufacturer’s instructions, Toyota service information, or an engineering assessment for structural modifications.
Frequently Asked Questions
How does a Toyota Hilux spare tire winch work?
A gear mechanism raises or lowers a chain or cable connected to an anchor plate through the wheel center. The factory handle turns the drive from the rear access point. When reinstalling the tire, the plate must be centered and the wheel raised firmly against its storage position.
Where is the spare tire on a Toyota Hilux?
On many Hilux pickups, it is beneath the rear frame or cargo bed. Modified trucks may use a bed, tray, or rear bumper carrier. Confirm the location in the owner’s manual for your exact model year, body style, and market.
Do I need the jack to lower the Hilux spare tire?
Usually no. The jack is used to lift the vehicle during a wheel change. The underbody spare is normally lowered with the wheel-nut wrench and jack-handle extensions from the factory tool kit.
What spare tire carrier problems are common on Hilux 4x4s?
Typical carrier-specific problems include corrosion, a seized winch, a damaged or twisted chain, a misaligned anchor plate, missing handle pieces, rattling, and insufficient clearance for an oversized spare. These are carrier issues, not a complete list of Hilux mechanical problems.
Can a larger spare tire fit in the factory carrier?
Sometimes, but fit depends on the tire’s true mounted diameter and width plus clearance around the frame, exhaust, towbar, suspension, and body. Never assume that a tire fits because its nominal size appears close. Test clearance through the full suspension and operating range or use a properly rated alternative mount.
What is the 50/50 rule for spare tires?
There is no universal Toyota Hilux rule requiring 50% tread or “matching” pressure. Use the pressure, speed, distance, and usage limits stated in your owner’s manual and on the spare tire itself. A full-size Hilux spare and a temporary compact spare can have very different requirements.
Conclusion
A Toyota Hilux spare tire carrier should be simple to use, but only when the tool kit is complete, the mechanism moves freely, and the spare is correctly inflated and secured. Treat the factory underbody chain carrier as the default starting point for many pickup models, then verify your exact manual before lowering, tightening, repairing, or replacing it.
Rear and bed-mounted upgrades can improve access or accommodate a larger tire, but they also change loading, clearance, visibility, and structural demands. Choose a model-specific system, install it correctly, and test every affected function before relying on it off-road or on a long journey.
Sources
- Toyota Hilux May 2026 digital owner’s manual: flat-tire and spare-wheel procedure — factory tools, lowering, removal, reinstallation, carrier security checks, and jack safety.
- Toyota Hilux owner’s-manual index — confirms that Toyota publishes separate manuals by production period.
- Toyota UK vehicle information and owner’s manuals — official route for market-specific manuals and support.
- NHTSA TireWise — cold-pressure checks, spare-tire inspection, tread, tire size, and general tire-safety guidance.