
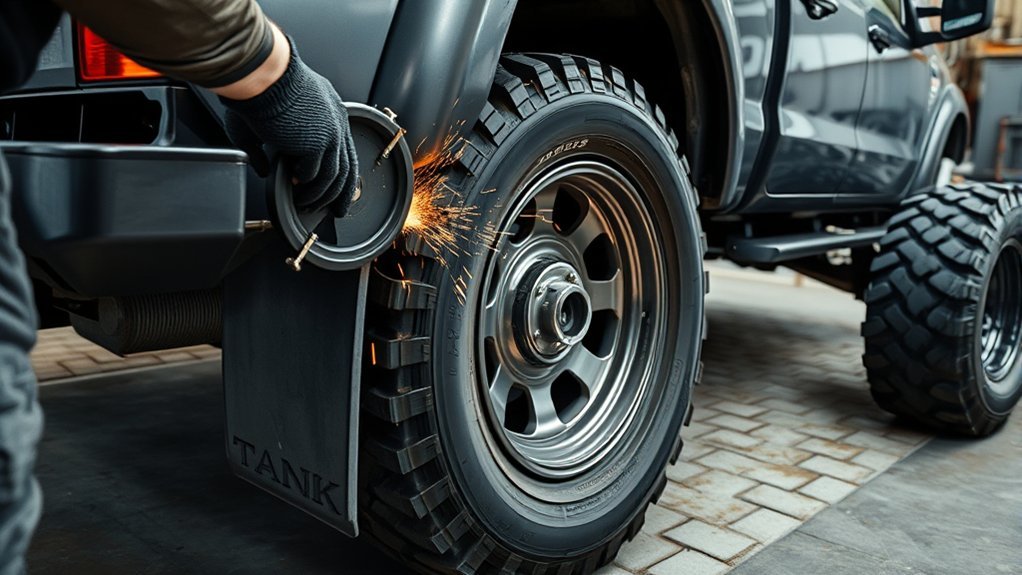
You can cut fenders for bigger tires, but the safe cut line comes from the tire’s actual interference point—not a universal measurement. Before removing metal or plastic, verify tire and wheel fitment, inspect behind the wheel opening, check steering and suspension movement, and confirm that you are not cutting a structural seam or reinforced body section. Then trim in small stages, deburr the edge, restore corrosion protection, and reattach the liner or flare securely.
Quick Answer
Cut fenders for bigger tires only after identifying exactly where the tire rubs through steering and suspension movement. Remove the liner, inspect behind the panel, mark the smallest practical trim, cut gradually with a tool suited to the material, smooth the edge, restore corrosion protection, and test the tire again before reinstalling flares or guards.
Key Takeaways
- Do not use a universal 1/16-inch, 1/8-inch, or two-inch cut measurement. Tire clearance is vehicle-specific.
- Check wheel width, offset, tire size, steering lock, suspension movement, and liner clearance before cutting.
- Inspect behind the panel for wiring, hoses, sensors, mounts, seams, and reinforced body sections.
- Use eye and face protection, hearing protection, suitable gloves, correct tool guards, and fire precautions when cutting metal.
- Trim a little at a time, re-test the tire, deburr the edge, and restore corrosion protection on exposed metal.
- Use OEM body-repair procedures or a qualified body technician if the proposed cut affects a welded seam, reinforcement, quarter-panel structure, or other structural area.
At a Glance
| Time Required | Several hours for careful measuring, trimming, finishing, and test-fitting; longer if paint, adhesive, or corrosion coatings require curing time. |
| Difficulty | Intermediate to advanced DIY bodywork. Structural or welded-panel modifications should be handled using vehicle-specific repair procedures. |
| Tools Needed | Marker, masking tape, measuring tools, trim-removal tools, material-appropriate cutting tool, files or abrasives, PPE, primer/coating, touch-up paint, and suitable liner or flare fasteners. |
| Cost | Varies widely depending on the tools you already own, finishing materials required, flare hardware, and whether professional body repair is needed. |
Warning: Do not cut through a welded flange, reinforcement, structural body section, wiring harness, brake or fuel line, sensor wiring, or other concealed component. If you cannot clearly inspect the back of the proposed cut, stop and gain access before cutting. Structural body modifications should follow the vehicle maker’s model-specific repair procedure.
What You Need for Fender Cutting
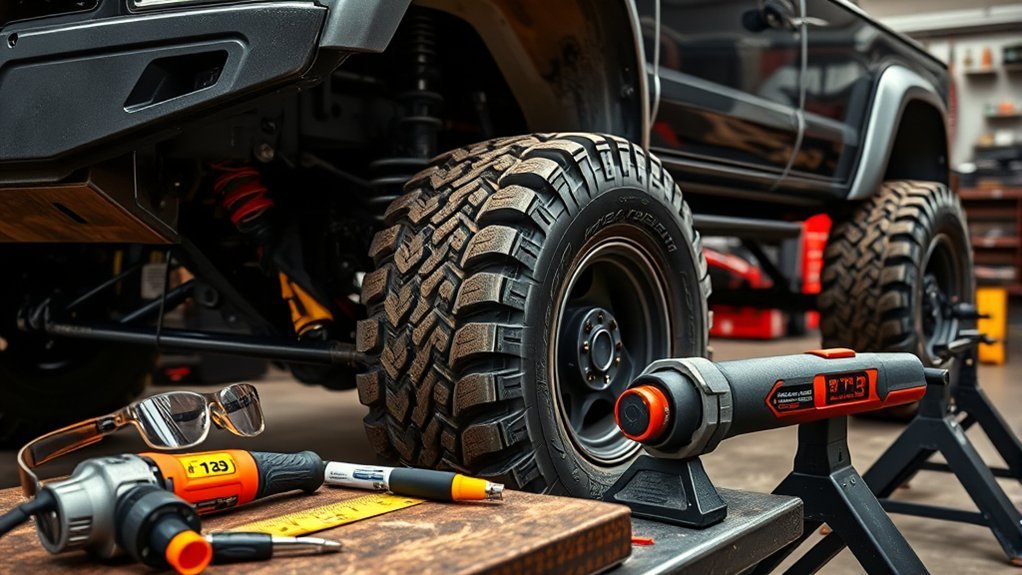
Before you cut into a fender, gather the right tools and materials. The exact cutting tool depends on whether you are trimming painted steel, aluminum, plastic trim, a liner, or a flare.
Useful supplies may include a dry-erase marker, masking tape, ruler or flexible measuring tape, trim-removal tools, a file, deburring tool, sandpaper, suitable primer or coating, matching touch-up paint, and replacement fasteners. A jigsaw, rotary tool such as a Dremel, or guarded cut-off tool may work in specific areas, but no single tool is best for every fender.
Wear safety glasses or goggles and appropriate face protection when cutting or grinding. Also use suitable gloves, hearing protection, clothing that protects your skin from sparks and debris, and any respiratory protection required by the coating, dust, or tool manufacturer. OSHA requires appropriate eye or face protection where flying particles are a hazard, and abrasive-tool guidance emphasizes proper guards and correctly rated wheels or discs. See OSHA eye and face protection guidance.
Do not assume the cut depth from tire diameter alone. Wheel width, wheel offset or backspacing, alignment, steering angle, suspension movement, tire sidewall shape, and liner movement can all change the clearance you need.
Body filler, fiberglass, and epoxy may have legitimate cosmetic or panel-repair uses, but they are not automatically structural reinforcement. If a welded or reinforced area needs repair, follow the vehicle manufacturer’s repair procedure and use only the specified attachment method and materials.
Unrelated maintenance parts such as an air filter, wiper blade, or brake pads are not normally the parts that determine a fender cut. The important components to inspect are the ones actually behind or beside the wheel opening, including the liner, wiring, washer hoses, sensors, mounting tabs, seams, and nearby suspension or brake hardware.
[Products Worth Considering]

Universal magnetic jack pad with aluminum grooved design to protect vehicle pinch welds during lifting. Durable nylon pad inserts are upgraded and secured with screws to resist damage and keep in place. Designed to fit most single vehicle pinpoint welds for safer, stable jacking when changing tires, repairs, or performing oil changes.

This universal magnetic jack pad is designed to protect pinch welds when lifting vehicles, helping prevent seam damage or warping. Crafted from solid aluminum with a nylon pad insert, it provides reinforced structural support and a secure fit for most single-vehicle pinch welds. Slotted for strong magnet holding, it supports safe jacking for cars, SUVs, trucks, and more.

These DECURCAR tire valve stem caps help prevent corrosion with a metal shell and plastic liner insert, making them ideal for wet or cold conditions. They feature a built-in leak-proof sealing ring to help reduce air loss and protect your vehicle from tire leak issues. Easy to hand-tighten and designed for Schrader valve stems, they add both function and a stylish American flag emblem look.
Before You Cut: Decide Whether Fender Trimming Is Appropriate
First identify what is rubbing. A tire may touch the plastic liner, flare, mud guard, pinch seam, outer fender lip, bumper edge, suspension component, or another part of the wheel well. Cutting the visible fender is not automatically the correct solution.
Also identify the panel itself. A removable outer front fender is different from a welded quarter panel or reinforced unibody section. Modern body structures may use high-strength steels, aluminum, adhesives, welds, rivets, and reinforcements in specific locations.
Collision-repair suppliers such as 3M repeatedly advise technicians to follow vehicle-manufacturer recommendations for structural adhesive and attachment locations. If your proposed cut reaches a factory seam, reinforcement, mounting structure, or body section that you cannot identify confidently, use the OEM body repair manual or a qualified collision-repair shop instead of improvising a reinforcement.
Pro Tip: Find the exact rub mark before changing the body. Chalk, washable marker, or visible scuff marks on the liner can show the interference point. Fixing one small contact area is better than cutting an entire arch because the tire merely looked close.
Check Tire and Wheel Fitment Before Modifying the Body
A body cut should not be used to compensate for an unsuitable wheel-and-tire combination. Check the tire size, wheel diameter and width, offset or backspacing, load capacity, and required inflation information before modifying the wheel opening.
The National Highway Traffic Safety Administration recommends using tires that match the original size or another size recommended by the vehicle manufacturer and checking the owner’s manual or Tire and Loading Information Label. If you are deliberately moving to a larger aftermarket size, have the complete combination evaluated for your vehicle rather than choosing it by diameter alone.
Large tire changes can also affect speedometer accuracy, gearing, braking feel, steering effort, and available clearance. Those effects are separate from whether the fender can physically be trimmed.
[Products Worth Considering]
Upgrade your tires with DESOUL premium valve stem caps featuring a corrosion-resistant metal shell and plastic liner. The built-in sealing ring helps prevent leaks and protects tire pressure, while the universal Schrader fit works for cars, trucks, SUVs, motorcycles, bikes, and RVs. Easy by-hand installation is built in with a secure grip design.

This manual duck head tire changer kit makes tire installation and removal simpler by letting you embed the duck head into the tire with applied pressure. The integrated design and durable steel construction help reduce friction and improve efficiency and safety during use. Suitable for 16–21 inch wheels, it’s convenient for cars, trucks, SUVs, and ATV tires, with 24-hour after-sales support.

DAPAWIN white permanent paint markers deliver long-lasting, opaque coverage with a non-toxic, low-odor, quick-dry waterproof oil-based ink. These paint pens work on metal and many other surfaces including tires, wood, plastic, rocks, fabric, ceramic, canvas, rubber, and glass for outdoor and craft projects. The rounded medium tip helps create clean lines for labeling, decorating, and quick fixes, while the caps and nib guidance help reduce leaking.
How to Mark Fender Cuts for Bigger Tires
Use a dry-erase marker or masking tape to trace the factory fender arch and the exact area where the tire or liner interferes. Do not automatically extend the line by 1/16 inch, 1/8 inch, two inches, or any other universal amount.
Your goal is to remove the minimum material needed while maintaining adequate clearance throughout the tire’s real movement.
[Products Worth Considering]

Upgrade your vehicle’s tire protection with these stylish, corrosion-resistant valve stem caps designed for Mercedes Benz AMG applications. The durable one-time die-cast construction and electroplated finish help resist oxidation and wear. A simple screw-in installation keeps moisture and debris out to maintain valve integrity.

Measure tire tread depth quickly and accurately with this LUMITECO dial gauge that reads in 1/32" increments up to 14/32". The color-coded green/yellow/red zones make it easy to judge tire wear and know when replacement is needed. A rugged, compact design with a protective pouch helps keep the gauge ready for use on cars, trucks, motorcycles, and more.

These M14x1.5 closed-end chrome lug nuts are a one-piece replacement designed for secure fitment on compatible GM, Ford, and select Chrysler/Dodge models. Featuring a 60-degree conical seat and anti-rust chrome plating, they help resist corrosion and maintain a bright look for everyday driving. Built for long-term durability, they include OEM-style part references and are backed by 12 months of support.
Marking Cut Lines
Remove the wheel-well liner or loosen it enough to inspect behind the proposed cut. Identify plastic pins, flare mounts, brackets, wiring, hoses, seams, and body reinforcements before marking anything permanent.
- Locate the actual rub or closest-clearance area.
- Trace the existing arch and mark all nearby fasteners and mounting points.
- Mark a conservative first cut that removes less material than you expect to need.
- Compare the marks on both sides if you want the finished arches to remain visually symmetrical.
- Inspect the back of the complete cut path before using a power tool.
You can score masking tape or the painted surface very lightly where appropriate to create a visible guide, but scoring does not guarantee that automotive paint will remain chip-free.
Tracing Fender Arches
Follow the body contour closely when tracing the factory fender arch. A flexible measuring tape can help you compare the shape and height at several reference points.
Do not blindly copy a measurement from another vehicle. Two vehicles with the same tire diameter may need different cuts because wheel offset, suspension geometry, body construction, and tire width differ.
If appearance matters, step back and inspect the line from the front, side, and rear before cutting. Confirm that the line flows naturally into the bumper, rocker, flare, and remaining wheel opening.
Measuring Tire Clearance
Measure more than the tire diameter. Check the tire’s width, shoulder position, wheel offset, and the gap to the liner, body, suspension, and flare.
- Check clearance with the vehicle at normal ride height.
- Turn the steering from lock to lock and watch the leading and trailing edges of the front tire.
- Check the closest point between the tire and the liner, body, brake hose routing, and suspension components.
- Assess suspension compression using a safe method appropriate for the vehicle. Never work beneath a vehicle supported only by a jack.
- Mark each interference point instead of assuming one continuous cut is required.
Documenting the measurements and reference points makes it easier to keep both sides consistent and prevents you from cutting farther than necessary.
Note: Static driveway clearance is not the same as operating clearance. A tire that clears while parked may contact the body when steering, cornering, braking, carrying a load, or moving through suspension travel.
How to Cut Fenders Without Cracking Paint
No cutting technique can guarantee that existing paint will not chip or crack, especially around an older, repaired, rusty, or previously flexed panel. You can reduce the risk by protecting the surface, using a sharp material-appropriate tool, supporting the panel, and working slowly.
| Step | Action |
|---|---|
| 1 | Protect and mark the cut area |
| 2 | Inspect behind the complete cut path |
| 3 | Make a small initial trim |
| 4 | Test tire clearance again |
| 5 | Deburr and smooth the edge |
| 6 | Restore corrosion protection and paint |
Apply painter’s tape around the work area to protect adjacent paint and make the line easier to see. If the coating can be scored safely along the final edge, a light score may reduce uncontrolled paint lifting, but do not cut deeply enough to damage material outside the area you intend to remove.
A fine-tooth jigsaw can work on accessible sheet metal when the panel is supported. A rotary tool can be useful for short or tight-radius work. A guarded cut-off tool can remove metal quickly but creates sparks and carries kickback and wheel-breakage hazards. No Dremel, saw, or grinder automatically produces a “cooler” or chip-free cut; technique, tool speed, blade or wheel choice, material, and pressure all matter.
Warning: Grinding and cutting can throw sparks and hot metal. Remove or shield combustible materials, keep sparks away from fuel or flammable vapors, use the tool’s proper guard and wheel or blade, and follow the tool manufacturer’s instructions. OSHA treats spark-producing cutting and grinding as activities requiring fire precautions when combustible hazards are present.
Make the first cut smaller than the final opening you think you need. Smooth the edge, reinstall or temporarily position the wheel, and test again. Additional small cuts are easier to control than trying to repair an oversized opening.
How to Finish and Protect the Cut Edge
After the final trim, remove burrs and sharp corners with a file, deburring tool, or suitable abrasive. A sharp exposed lip can cut a tire, damage a liner, injure your hands during future service, or start a paint failure.
On steel or aluminum bodywork, clean the edge and apply a compatible primer or corrosion-protection system followed by the appropriate finish coat. If the work has disturbed a seam, flange, closed cavity, or factory corrosion coating, touch-up paint alone may not reproduce the original protection.
3M’s collision-repair corrosion guidance discusses coatings, paint systems, seam sealers, and cavity wax as separate corrosion-protection tools when factory protection has been disturbed.
The clean-looking cut is only half the job. A finished metal edge also needs protection against corrosion and enough tire clearance through real steering and suspension movement.
How to Reattach Fender Flares and Guards
Once the fender is cut and the edge is fully finished, reattach the flares and guards without forcing them into a distorted position. Test-fit every part before drilling a new hole.
- Position the flare or liner against the body and confirm that it follows the revised wheel opening naturally.
- Identify which original mounting holes or clips can still be used.
- If a new hole is genuinely required, inspect behind that spot before drilling so you do not hit wiring, hoses, a second body panel, or another concealed component.
- Use fasteners suitable for the panel and flare material, and protect drilled metal against corrosion.
- Reinstall the wheel-well liner or water guard so it cannot sag into the tire.
- Tighten the hardware evenly and verify that the flare remains secure without pulling or cracking the bodywork.
Do not assume that every saved factory mount must be relocated. Sometimes replacing a damaged clip, modifying a nonstructural plastic liner, or using a vehicle-specific flare bracket produces a cleaner result than drilling additional body holes.
How to Reinforce a Cut Fender
Reinforcement depends on what was cut. A nonstructural plastic flare or liner mount may need a small bracket, replacement clip, bonded tab, or suitable mechanical fastener. A welded body seam or structural reinforcement is a completely different repair.
Do not automatically epoxy L brackets onto structural sheet metal. Structural adhesives are engineered products, and their use depends on the vehicle manufacturer’s specified joint, surface preparation, adhesive, weld, rivet, and fastener procedure.
If you are bonding a nonstructural trim support, dry-fit the part first and prepare the surfaces exactly as the adhesive manufacturer specifies. Sanding or abrasion requirements vary by substrate and adhesive.
Dry-fit nonstructural support pieces along the fender’s curve before bonding or fastening them so the flare and liner remain correctly positioned.
Mix and apply any two-part adhesive according to its product instructions and observe its working and curing times. Do not substitute an ordinary household epoxy for an automotive body adhesive when the repair procedure calls for a specific product.
Fiberglass or body filler can restore cosmetic contour in suitable repair situations, but filler should not be treated as a replacement for missing structural metal.
If the cut removed or altered a factory reinforcement, welded flange, structural bracket, or quarter-panel attachment point, stop the DIY repair and consult model-specific repair information or a qualified body technician.
Post-Cut Clearance Check
Do not consider the job finished just because the tire clears while the vehicle is parked straight ahead.
- Check the entire cut edge for burrs, exposed metal, loose paint, and sharp corners.
- Verify every flare, liner, splash guard, and bracket is secured.
- Turn the front wheels through their full steering range and check both sides.
- Check the tire’s nearest point to the body and suspension at normal ride height.
- Confirm that no brake hose, ABS wiring, sensor harness, or liner can fall into the tire path.
- Safely assess suspension compression or have a shop perform the dynamic-clearance check if you cannot do it safely.
- After an initial short drive, inspect the tire sidewall and wheel well for fresh rub marks.
If rubbing remains, identify the exact contact point before cutting more. A remaining problem may come from wheel offset, alignment, a loose liner, suspension geometry, or another component rather than the outer fender opening.
Common Fender Cutting Mistakes to Avoid
Even a clean-looking cut can create poor fitment or a weak repair if the planning is wrong. Measure the tire sweep and steering movement carefully, then mark the cut line more than once before removing material.
- Using a universal clearance number: Do not assume 1/16 inch, 1/8 inch, or another fixed gap is enough.
- Using a universal two-inch cut line: The amount removed should be determined by the actual interference and panel construction.
- Removing too much material: Trim only what you can justify through clearance testing.
- Ignoring the back of the panel: Inspect for wiring, hoses, mounting points, seams, and reinforcements first.
- Using the wrong cutting tool: Match the blade or wheel to the material and keep all required guards installed.
- Ignoring sparks: Protect nearby combustible materials and control where sparks travel.
- Leaving bare metal: Restore corrosion protection after cutting or drilling.
- Using filler as structure: Body filler improves contour; it does not replace structural sheet metal.
- Improvising structural reinforcement: Follow OEM procedures for welded or structural areas.
- Skipping the final movement test: Verify steering and suspension clearance after the liner and flares are back in place.
When Fender Rolling Is Better Than Cutting
If the tire contacts only a conventional inner fender lip, rolling may preserve more of the original panel than cutting. Fender rolling gradually reforms the inner lip instead of removing it.
Rolling is not appropriate for every body design. Double-layer seams, bonded sections, corrosion, body filler, unusually shaped lips, and some paint repairs can make rolling risky. Excessive pressure or heat can distort the panel or damage the finish.
If you are unsure how the lip is constructed, inspect the vehicle-specific body information or use an experienced body shop before attempting to roll it.
When to Use a Body-Repair Professional
Professional help is the safer choice when the desired clearance requires cutting through or modifying:
- a welded quarter-panel seam;
- a pinch weld or reinforced flange;
- high-strength or ultra-high-strength body structure;
- an aluminum structural panel;
- a suspension or body mounting point;
- a section whose construction you cannot identify;
- an area containing concealed electrical, fuel, brake, or safety-system components.
A professional can also help when large aftermarket tires require more than simple fender clearance, such as suspension changes, wheel-offset correction, alignment work, or a broader fitment assessment.
Frequently Asked Questions
What Is the Best Tool to Cut Fenders?
There is no single best tool for every fender. A fine-tooth jigsaw may work well on accessible sheet metal, a rotary tool can help in tight areas, and a guarded cut-off tool can make faster metal cuts. Choose the tool, blade, or wheel for the panel material and follow the manufacturer’s safety instructions.
How Do You Roll Fenders for Bigger Wheels?
A fender roller gradually reforms a suitable inner lip while you check tire clearance and panel condition frequently. Do not assume every fender can be rolled. Inspect for double-layer seams, corrosion, filler, previous paint repairs, and structural features first, because rolling can crack paint or distort the panel.
How Wide Can Tires Stick Out Past Fenders?
There is no universal legal amount. Fender and tire-coverage rules vary by state, province, country, and vehicle type. Do not rely on a general claim that one, two, or three inches is acceptable. Check the law where the vehicle will be driven. For example, Washington law requires qualifying fenders or splash devices to be as wide as the tires they cover.
How Do You Cut a Front Fender?
Remove or loosen the wheel-well liner, inspect behind the fender, identify the exact tire interference, mark a conservative cut, protect the painted surface, and trim in small stages with a material-appropriate tool. Deburr and protect exposed metal before reinstalling the liner and checking steering and suspension clearance again.
How Much Fender Clearance Do Bigger Tires Need?
There is no reliable vehicle-independent clearance number. The required space depends on tire dimensions, wheel offset, steering angle, suspension travel, alignment, liner movement, and the shape of the wheel opening. Verify the real tire sweep instead of using a fixed fraction of an inch.
Can You Use Body Filler or Epoxy to Reinforce a Cut Fender?
Body filler can restore cosmetic contour in appropriate repairs, but it is not a substitute for structural metal. Epoxy or automotive panel adhesive should be used only for applications allowed by the product instructions and vehicle repair procedure. Structural seams and reinforcements require OEM-specified repair methods.
Do You Need to Paint the Edge After Cutting a Fender?
Yes, exposed metal should receive compatible corrosion protection and a suitable finish. If cutting or grinding disturbed a seam, flange, cavity, or factory coating, additional primer, seam sealer, cavity protection, or another repair product may be required according to the vehicle and coating manufacturer’s procedure.
Conclusion
Cutting a fender for bigger tires is less about making one large opening and more about finding the exact interference, removing the minimum material, and protecting what remains. Check the tire and wheel combination first, inspect behind the panel, work in small stages, finish every exposed edge, reinstall the guards securely, and verify clearance through steering and suspension movement.
Measure twice and cut gradually. If the job reaches a welded seam, reinforcement, or structural body section, stop improvising and follow the vehicle manufacturer’s repair information or use a qualified body-repair professional.
Sources
- National Highway Traffic Safety Administration — TireWise — tire sizing, inflation, placard, and general tire-safety guidance.
- OSHA — Eye and Face Protection — protection from flying-particle hazards.
- OSHA — Welding, Cutting, and Brazing General Requirements — fire precautions for spark-producing cutting work.
- Cornell University EHS — Angle Grinder Toolbox Talk — grinder guarding, correct discs, PPE, kickback, and flying-debris precautions.
- 3M Collision Repair — Corrosion Protection — coatings, seam sealers, paint systems, and cavity protection after body repair.
- 3M Collision Repair — Structural Adhesives — OEM-specific adhesive and attachment guidance for body repairs.
