
What Is Cab Mount Chop on a Toyota Tacoma
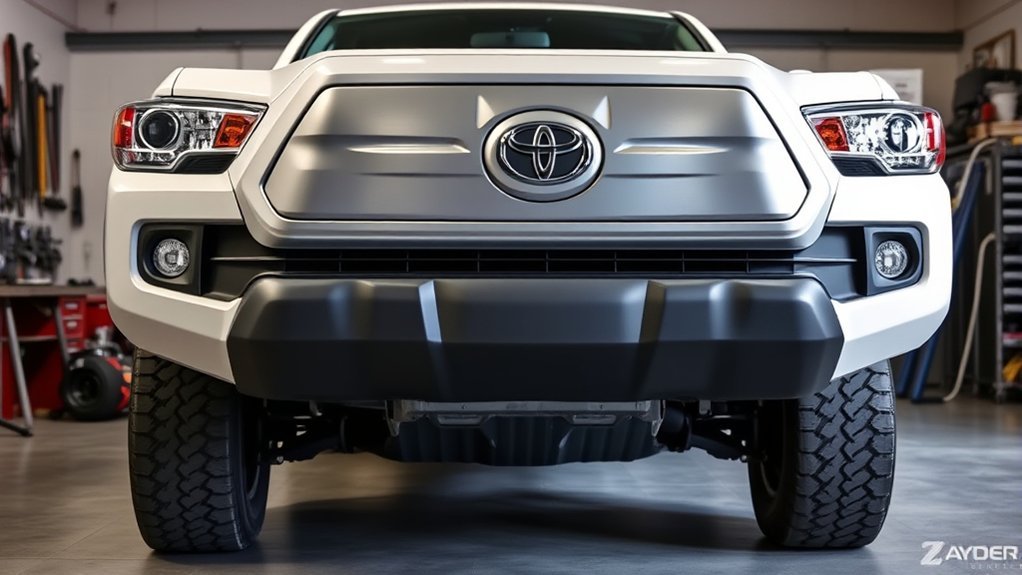
A Toyota Tacoma cab mount chop, often called a body mount chop, is a clearance modification used when larger tires rub the rear of the front wheel well near the cab/body mount. It is common on 2nd- and 3rd-gen Tacoma builds with bigger tires, added lift, aggressive wheel offset, or alignment changes that move the tire closer to the back of the fender. Done correctly, it helps the tire clear at full steering lock and during suspension compression. Done poorly, it can create rust, weak welds, tire damage, or safety problems.
Quick Answer
A Tacoma cab mount chop trims the front cab/body mount and welds in a reinforcement plate so larger tires have more room behind the front wheel. It may be needed for 33-inch or larger tire setups, but the need depends on tire size, wheel offset, caster, lift height, and where the tire rubs.
Key Takeaways
- A cab mount chop adds tire clearance; it does not increase suspension travel by itself.
- Always confirm the cab mount is the actual rub point before cutting metal.
- Use purpose-made chop plates or professional fabrication, then seal all bare metal to prevent rust.
- A full cab/body mount relocation is usually the better long-term choice for aggressive 35-inch tire setups.
- Because this job involves lifting, cutting, grinding, and welding, use proper safety gear or hire a qualified fabrication shop.
At a Glance
| Time Required | About 3–5 hours for a typical chop; more if rust repair, relocation, or extra fender trimming is needed |
| Difficulty | Advanced DIY or professional fabrication; cutting and welding are required |
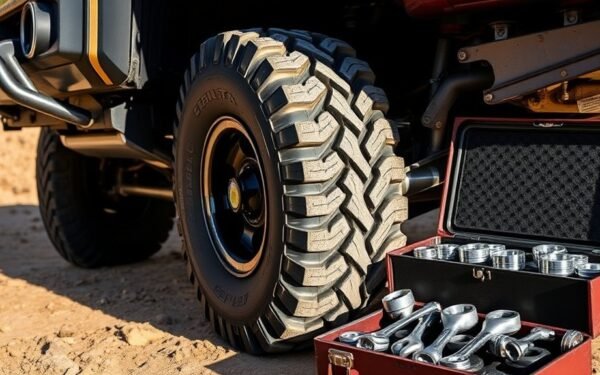
| Tools Needed | Hydraulic jack, properly rated jack stands, wheel chocks, lug wrench, angle grinder, cutoff wheel, flap disc, clamps, welder, marker/template, hammer, wire brush, PPE, rust-inhibiting paint, undercoat, torque wrench |
| Cost | Usually about $30–$100 for chop plates plus supplies if DIY; often $250–$600+ at a shop. Cab/body mount relocation can run $750–$1,200+ installed depending on parts and labor. |
What Is a Cab Mount Chop and Why Is It Necessary?
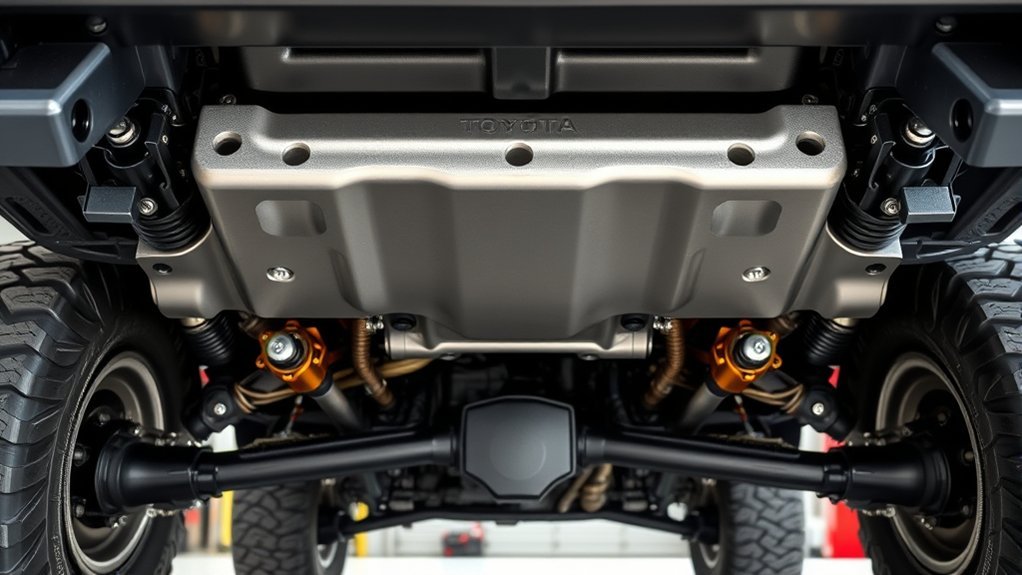
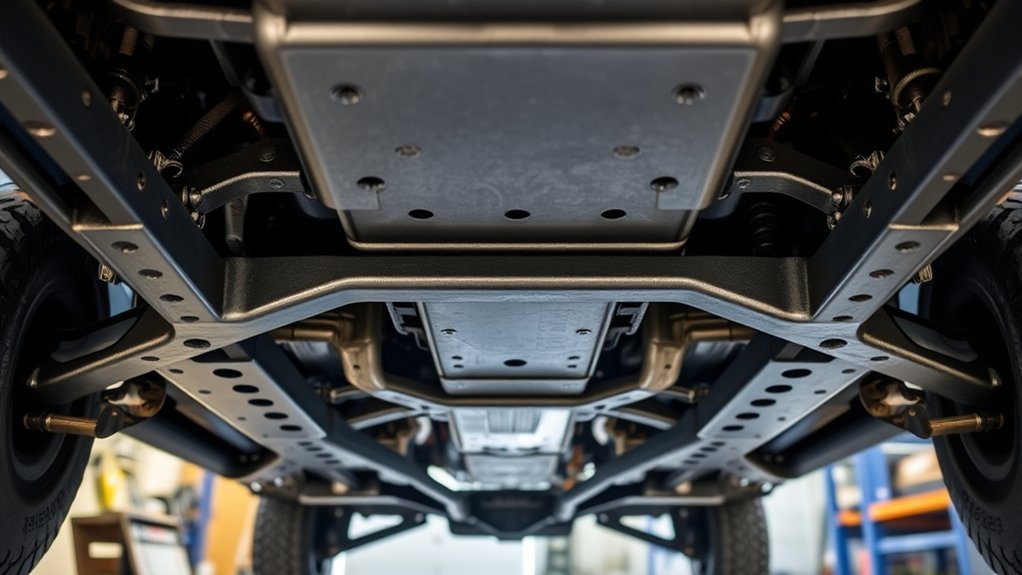
A cab mount chop is a metal modification to the front cab/body mount that sits behind each front tire. On many Tacoma builds, the rear edge of the front tire can contact this mount when the steering is turned, the suspension compresses, or the alignment adds caster. The chop removes part of the interfering metal and replaces it with a welded reinforcement plate.
This modification is most common on 2005–2023 Toyota Tacoma models because many cab/body mount chop and relocation kits are designed around 2nd- and 3rd-gen Tacoma fitment. If you have a 2024 or newer Tacoma, verify fitment with a kit manufacturer or fabrication shop before using older-generation instructions.
The important point is that a cab mount chop does not magically make every tire fit. Tire clearance depends on several parts working together: tire diameter and width, wheel offset, backspacing, lift height, caster, fender liner shape, pinch seam clearance, mud flaps, and how the truck is driven off-road.
Note: “Cab mount chop” and “body mount chop” are often used to describe the same Tacoma clearance job. Some shops say “cab mount” because the mount supports the cab; others say “body mount” because it is part of the body-mount structure.
How to Know If Your Tacoma Needs a Cab Mount Chop
Do not cut the cab mount just because you installed bigger tires. First, find the exact contact point. A tire can rub the plastic fender liner, mud flap, fender flare, pinch seam, upper control arm, sway bar, or cab mount. Each problem has a different fix.
- Turn the steering to full lock both directions on level ground and listen for rubbing.
- Check the rear of the front wheel well for shiny metal, rubber marks, scraped undercoat, or polished dirt.
- Use painter’s tape or chalk on suspected contact points, then roll the truck slowly forward and backward with the wheel turned.
- Inspect after mild suspension compression if you off-road. A tire that clears in the driveway may still rub on trail dips.
- Check both sides. Driver and passenger sides are mirrored, but they may not rub equally.
If the tire only touches plastic, trim the liner first. If it touches the pinch seam, fold and seal the pinch seam. If it hits the metal cab/body mount, a cab mount chop or relocation may be the right fix.
Safety Before You Cut or Weld
Warning: A cab mount chop involves cutting and welding near structural body-mount metal. Use eye and face protection, welding gloves, hearing protection, long sleeves, fire-safe work habits, and properly rated jack stands. If you are not comfortable cutting or welding on the truck, hire a qualified fabrication shop.
Before starting, review your Tacoma owner’s manual for safe jacking points and wheel service information through Toyota’s official manuals and warranties page. For tire safety, make sure your new tires are properly sized, load-rated, and inflated; NHTSA TireWise explains why ratings, inflation, and wear checks matter. For welding and cutting safety, OSHA’s welding, cutting, and brazing rules are published in 29 CFR Part 1910 Subpart Q.
At minimum, prepare the truck and workspace this way:
- Park on a flat surface, set the parking brake, and chock the rear wheels.
- Loosen the front lug nuts before lifting the truck.
- Lift only at approved jacking points and support the truck with properly rated jack stands.
- Remove the front wheels for access.
- Disconnect the negative battery terminal before welding.
- Move flammable materials away from the work area and keep a fire extinguisher nearby.
- Wear safety glasses while grinding and a proper welding helmet while welding.
- Protect brake lines, wiring, hoses, and painted panels from sparks and heat.
How to Perform a Cab Mount Chop: Step-by-Step Guide
The safest way to do this job is with a purpose-made cab/body mount chop plate kit for your Tacoma generation. Manufacturer instructions vary, so use the plate template and measurements supplied with your kit. For example, Total Chaos body mount chop plate instructions show using the supplied plate as a template and marking a specific distance from the frame for that kit. Do not treat a random online measurement as universal.
- Confirm the rub point. Turn the steering to full lock, inspect the rear of the front wheel well, and verify that the tire is contacting the cab/body mount.
- Set up safely. Park flat, chock the wheels, loosen the lug nuts, lift the front, support the truck on jack stands, and remove the front wheels.
- Remove or pull back the liner. Move the inner fender liner and any mud flap material out of the way so you can see the cab mount clearly.
- Mark the cut with a template. Trace your chop plate or kit template onto the cab mount. Cut conservatively; you can remove more metal, but you cannot put it back without more fabrication.
- Protect nearby components. Shield wiring, brake lines, bushings, and painted surfaces from sparks and heat.
- Make the initial cut. Use an angle grinder and cutoff wheel to cut along the marked line. Keep the cut smooth and controlled.
- Shape the opening. Use a flap disc or grinder to clean the edge until the reinforcement plate fits tightly against the modified mount.
- Tack-weld the plate. Clamp the plate in place and tack it. Before final welding, turn the steering left and right to confirm clearance.
- Final-weld the plate. Weld the plate fully to close the mount and restore strength. Let the weld cool naturally.
- Clean and seal the metal. Wire-brush the welds, remove spatter, apply rust-inhibiting primer/paint, and use undercoat in the wheel-well area after the paint cures.
- Reinstall and torque. Reinstall liners and wheels, then torque lug nuts to the specification in your Tacoma owner’s manual.
- Test carefully. Drive slowly, turn both directions at full lock, then recheck for fresh rub marks. Schedule an alignment if tire or suspension changes were part of the build.
Pro Tip: Test fit before final welding. Tack the plate, turn the tires through full steering lock, and check the tightest point again. This simple step can prevent cutting too little, welding too soon, or discovering rub only after the job is painted.
Essential Modifications for Tire Clearance After the Chop
A cab mount chop often solves the hard metal contact point, but it may not be the only place the tire rubs. Larger Tacoma tire setups usually need several small clearance adjustments.
- Trim the plastic inner fender liner. Cut only the area that contacts the tire, then secure the liner so it cannot sag back into the tread.
- Adjust or remove mud flaps. Factory mud flaps are a common rub point with wider tires.
- Trim the lower fender flare if needed. Make small cuts and test often so the flare still looks clean.
- Fold the pinch seam carefully. Relief-cut only as needed, fold it flat, and seal exposed metal with paint or undercoat.
- Check alignment. More caster can improve drivability and tire position, but it can also move the tire closer to the rear of the front fender area.
- Recheck after off-road use. Tire contact can show up only when the suspension compresses on trail obstacles.
After the chop, inspect for fresh rubber marks at the cab mount, pinch seam, fender liner, flare, and upper control arm. Keep trimming conservative and repeat the steering test after each change.
Choosing Between Bending and Notching for Your Cab Mount Chop
When people talk about bending vs notching, they are usually talking about the pinch seam behind the front tire, not the cab mount plate itself. The pinch seam is a folded body seam, and it needs to be handled carefully because rough cuts can expose bare metal and invite rust.
Folding or bending the pinch seam flat is usually the cleaner approach when there is enough material and space to do it. It keeps more of the seam intact and makes it easier to seal the area afterward. A hammer and body dolly can help flatten the seam gradually without tearing the surrounding sheet metal.
Notching or relief-cutting may be needed when the seam will not fold cleanly or when the tire needs a little more space. If you cut the seam, avoid removing more material than necessary. Smooth sharp edges, paint bare metal, and use seam sealer or undercoat so water and road salt cannot sit in the cut.
Note: Rust prevention matters as much as clearance. Any cut, grind mark, or exposed weld in the wheel well should be cleaned, painted, and sealed before the truck returns to daily driving or trail use.
Cab Mount Chop vs Cab Mount Relocation
A cab mount chop trims the existing mount and closes it with a reinforcement plate. A cab/body mount relocation removes the factory mount location and moves the mount farther back or behind the firewall area, depending on the kit design. Relocation is more involved, but it can create more clearance than a traditional chop.
Choose a cab mount chop when you have mild to moderate rubbing, you are running a common 33-inch tire setup, and you want a lower-cost solution that keeps the factory mount location.
Consider a cab mount relocation when you are building for 35-inch tires, aggressive wheel offset, long-travel suspension, or repeated hard off-road compression. For example, the DRT Fabrication Tacoma cab mount relocation kit is designed for 2005–2023 Tacomas and moves the mount to eliminate the common larger-tire interference point.
If you know your final build goal is 35-inch tires, it can be cheaper to plan the right clearance solution once than to pay for a chop now and a relocation later.
What Will Cab Mount Chop and Relocation Cost You?
Cab mount chop cost depends on whether you DIY it, use a premade plate kit, or hire a fabrication shop. The original “around $250” estimate can happen in some markets, but it is too low to treat as a universal average.
- DIY cab mount chop: about $30–$100 for plates and supplies if you already own a grinder, jack stands, welder, PPE, paint, and undercoat.
- Shop cab mount chop: commonly about $250–$600+, depending on labor rate, cleanup, paint, rust, and how much liner/pinch seam work is included.
- Cab/body mount relocation: often $249–$300+ for the kit alone, plus significantly more labor because the mount is being relocated rather than just trimmed.
- Installed relocation: commonly $750–$1,200+ depending on shop rate, kit design, welding time, and finish work.
Ask the shop what is included before approving the job. A clean quote should say whether both sides are included, whether plates or relocation parts are included, whether the pinch seam and fender liner will be trimmed, whether paint/undercoat is included, and whether the shop will test clearance after welding.
Warranty, Roadworthiness, and Inspection Notes
A cab mount chop modifies the vehicle body structure, so it can affect warranty conversations, insurance inspections, resale, and local vehicle rules. Toyota provides owner’s manuals and warranty information through its official owner portal, and Toyota’s digital warranty guidance explains that aftermarket parts or outside service can matter when they cause damage to another covered part.
Keep receipts, photos, kit instructions, and shop invoices. If a professional shop performs the work, ask them to document the plate material, weld process, corrosion protection, and final clearance check. This is useful for future service, resale, and troubleshooting.
Troubleshooting Tire Rub After a Cab Mount Chop
If your Tacoma still rubs after the chop, do not keep grinding blindly. Find the new contact point and fix that specific issue.
- Rub at full lock only: check the liner, mud flap, sway bar, and cab mount plate edge.
- Rub while reversing: inspect the rear of the front wheel well and lower liner.
- Rub during bumps: the tire may be contacting the fender flare, pinch seam, or upper liner during compression.
- Rub on the inside: check wheel backspacing, upper control arm clearance, and tire width.
- Fresh rust or bare metal: clean and reseal the area immediately before corrosion spreads.
- Uneven rubbing side to side: check alignment, caster, body mount shape, and whether both sides were cut symmetrically.
If the tire still hits the cab mount after a clean chop, the wheel and tire setup may simply need more clearance than a chop can provide. That is when relocation, different wheels, different tire size, or alignment changes should be considered.
Frequently Asked Questions
How long does a cab mount chop take?
A clean cab mount chop usually takes about 3–5 hours for someone with the right tools and welding experience. A shop may take longer if it includes fender liner trimming, pinch seam work, rust cleanup, paint, undercoat, and clearance testing.
Do I need a cab mount chop for 33-inch tires on a Tacoma?
Maybe. Many 33-inch tire setups clear with liner trimming and alignment, while others rub the cab mount because of tire width, wheel offset, backspacing, caster, or lift height. Inspect the actual rub point before cutting.
Can a cab mount chop help fit 35-inch tires?
It can help, but a traditional chop may not be enough for 35-inch tires, especially with aggressive offset or serious off-road compression. Many 35-inch Tacoma builds are better served by a cab/body mount relocation plus liner, pinch seam, and fender work.
Can I do a cab mount chop without welding?
No, not properly. The mount should be closed and reinforced with a welded plate after cutting. Leaving it open or using a non-welded patch can create strength, rust, and safety problems.
Will a cab mount chop affect my warranty?
It can affect warranty coverage if the modification or its installation causes related damage. Keep records, use quality parts, seal the work properly, and talk with your dealer or shop if the truck is still under warranty.
Do I need an alignment after a cab mount chop?
The chop itself does not change alignment, but most trucks getting a chop also have new tires, wheels, lift parts, or caster changes. If your setup changed or the truck pulls, wears tires unevenly, or still rubs, get an alignment.
Conclusion
A Toyota Tacoma cab mount chop is a practical fix when larger tires contact the cab/body mount behind the front wheel. The best results come from diagnosing the rub first, using the right plate or kit, cutting conservatively, welding cleanly, sealing every bare-metal edge, and checking the rest of the wheel well after the job. For mild 33-inch tire setups, a chop may be enough. For aggressive 35-inch builds, a full cab/body mount relocation is often the smarter long-term plan.
Sources
- Total Chaos Body Mount Chop Plates Installation Instructions — supports cab/body mount trimming, template use, fender flare trimming, tack-welding, final welding, and paint/undercoat steps.
- TEQSPORT Third Gen Tacoma Body Mount Chop Kit Installation Manual — supports tool list, safety requirements, battery disconnect, jack stands, and professional-install warning.
- Toyota Tacoma Manuals and Warranties — supports checking official owner-manual guidance for jacking, wheel service, and warranty resources.
- NHTSA TireWise — supports tire safety, tire ratings, inflation, wear checks, and proper tire maintenance.
- 29 CFR Part 1910 Subpart Q: Welding, Cutting, and Brazing — supports eye, face, and welding/cutting safety guidance.
- DRT Fabrication Tacoma Cab Mount Relocation Kit — supports cab/body mount relocation context for 2005–2023 Tacoma larger-tire clearance.
Related Articles
Toyota Tacoma Tire Rubbing After Lift How To Fix
Unlock the secrets to solving tire rubbing issues on your lifted Toyota Tacoma, and discover essential tips for optimal performance and clearance.
Read More
Steering Wheel Shakes After New Tires on Toyota Tacoma
Uncover the common causes of steering wheel shakes after new tires on your Toyota Tacoma and learn essential tips to ensure a smoother ride.
Read More
Toyota Tacoma Vibration at Highway Speed Tire Causes
Prolonged vibrations in your Toyota Tacoma at highway speeds may signal tire imbalances or suspension issues—don't ignore these signs; discover how to address them effectively.
Read More