
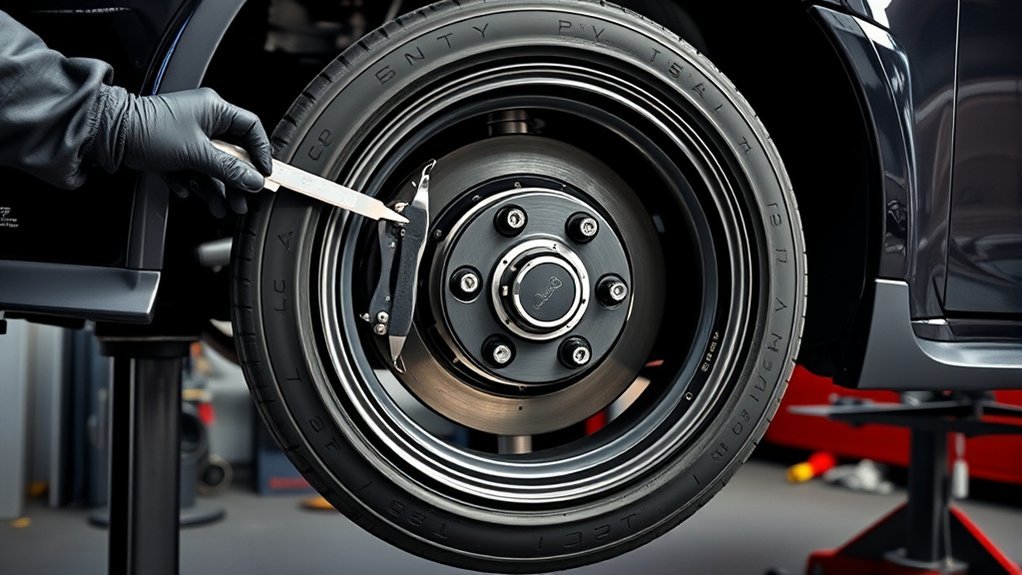
You can stop tires from rubbing by finding the exact contact point first, then correcting the cause instead of guessing. Tire diameter and width, wheel offset, backspacing, suspension height, alignment, loose liners, and worn parts can all change clearance. Check the tire at full steering lock and through safe suspension travel before deciding whether you need different wheels, a leveling kit, trimming, or a smaller tire.
Quick Answer
To stop tire rubbing, identify where the tire touches, verify the tire and wheel fitment, and check clearance at full steering lock and suspension compression. Correct the wheel offset, loose liner, alignment, tire size, or suspension setup causing the contact. Trim only non-structural areas when necessary, and leave structural cutting or welding to a qualified professional.
Key Takeaways
- Match tire diameter, section width, wheel width, offset, and backspacing to your exact vehicle instead of relying on a universal lift-height rule.
- Check both inner and outer clearance at left and right full lock because changing offset can solve one contact point while creating another.
- A leveling or lift kit can create additional clearance on approved applications, but it does not automatically increase suspension travel or guarantee that oversized tires will fit.
- Reposition or trim plastic liners before considering permanent metal modifications, and treat body-mount cutting or relocation as professional fabrication work.
- Check alignment and suspension hardware after geometry-changing suspension work, and inspect any rubbed tire for cuts, exposed cords, bulges, or other damage.
At a Glance
| Time Required | About 10–20 minutes for diagnosis; repairs range from a quick liner adjustment to several hours for suspension or fabrication work. |
| Difficulty | Beginner for inspection; intermediate for approved liner trimming; professional skill recommended for suspension changes, structural cutting, or welding. |
| Tools Needed | Flashlight, chalk or masking tape, tape measure, tire-pressure gauge, service information, and a torque wrench when applicable. |
| Cost | Varies widely. Diagnosis or repositioning a loose liner may cost little or nothing, while alignment, different wheels, suspension parts, or fabrication add parts and labor. |
Warning: Stop driving and have the tire inspected if rubbing has cut deeply into a sidewall, exposed cords, created a bulge, removed chunks of rubber, or interferes with steering. Significant sidewall damage can compromise the tire’s structure and should not be treated as harmless cosmetic scuffing.
Why Tires Rub After Upgrades
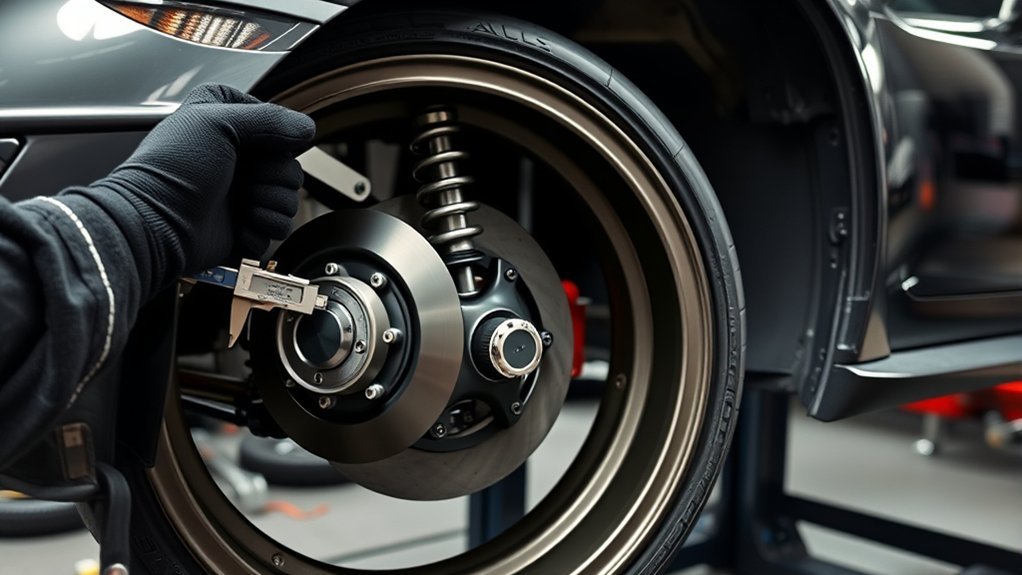
After you install larger tires, rubbing usually means the tire no longer has enough clearance somewhere in its path. A taller tire moves closer to the front and rear of the wheel opening, while a wider tire can move closer to suspension parts and bodywork.
Aftermarket wheels can change that path even when the tire diameter stays the same. Wheel offset and backspacing determine how far the wheel sits inward or outward. Tire Rack defines offset as the distance between the wheel’s mounting surface and its centerline and notes that incorrect offset can affect clearance and handling. See its wheel offset guide.
Rubbing often shows up only during steering input, braking, suspension compression, or off-road articulation because the tire moves relative to the body as the vehicle turns and the suspension cycles.
Common contact points include the fender liner, mud flap, bumper corner, pinch seam, sway bar, control arm, frame, body mount, and inner wheel well.
If your vehicle rubs with its original tire and wheel size, do not immediately assume it needs a lift. A loose splash shield, displaced liner, bent bracket, worn suspension bushing, incorrect alignment, accident damage, or another mechanical problem may have reduced clearance.
Diagnose the Rubbing Point Before Changing Parts
Find out where and when the tire rubs before buying parts. The location often points directly to the cause.
| Where It Rubs | Common Causes to Check |
|---|---|
| Control arm, sway bar, frame, or inner wheel well | Too much inward wheel position, excessive backspacing, tire width, alignment, or component movement |
| Outer fender or flare | Wheel/tire positioned too far outward, excessive tire width, insufficient compression clearance |
| Front bumper corner or front liner | Overall tire diameter, wheel offset, caster, liner position, bumper shape |
| Rear of front wheel opening or body mount | Tire diameter, caster, wheel position, body-mount clearance |
| Only over bumps or with passengers/cargo | Insufficient compression clearance, worn springs or dampers, overloaded vehicle, incorrect fitment |
Pro Tip: Put chalk or painter’s tape on suspected contact areas, turn the steering from lock to lock at very low speed, then inspect the marks. Fresh polished metal, scraped plastic, rubber transfer, or disturbed chalk makes the actual contact point easier to find.
Check Tire Size Against Lift Height
Once you know where the tire touches, compare your tire size, wheel specification, and suspension setup with the fitment guidance for your exact year, make, model, and trim.
Do not use a universal rule such as “33-inch tires need this much lift” or “35-inch tires need that much lift.” Two vehicles with the same lift height can have very different clearance because of wheel width, offset, backspacing, suspension geometry, caster, bumper design, body mounts, and tire section width.
Lift-kit manufacturers commonly publish exact tire-and-wheel combinations. For example, ReadyLIFT specifies particular tire sizes, wheel widths, and offsets for individual applications rather than relying only on nominal tire diameter. Its current F-150 fitment guidance illustrates why the complete tire, wheel, offset, and suspension combination matters.
Also check the vehicle’s tire placard and owner’s manual before changing sizes. NHTSA advises using the original tire size or another size recommended by the vehicle manufacturer. Michelin similarly recommends manufacturer-approved sizes and an equivalent or greater load-carrying capacity. See the NHTSA tire guidance and Michelin tire-size guidance.
- Record the current and proposed tire sizes.
- Check the tire’s overall diameter and section width.
- Verify that the wheel width is approved for that tire.
- Confirm load capacity is suitable for the vehicle.
- Compare wheel offset and backspacing.
- Check the suspension or lift manufacturer’s fitment notes.
- Test the actual combination before assuming it clears.
Tire diameter alone does not determine fitment. Width, wheel position, suspension geometry, body clearance, and actual tire dimensions all matter.
Stop Tire Rubbing With the Right Offset
You can sometimes reduce tire rubbing by correcting wheel offset, but the goal is not simply to choose a more positive or more negative number. The goal is to place the tire where it has enough clearance on both sides.
More positive offset generally places the wheel farther inward. That can reduce outer fender clearance and increase clearance at the outer edge, but it may bring the tire closer to control arms, frame components, brakes, or inner liners.
Moving toward a lower or more negative offset generally moves the wheel outward. That may improve inner suspension clearance while making the tire more likely to contact the fender, bumper, flare, or rear portion of the wheel opening.
[Products Worth Considering]
This flat-free TICONN wheelbarrow tire features durable polyurethane foam construction that never needs inflation, helping prevent punctures and reducing maintenance on rough outdoor terrain. With a 300 lb max load capacity and stable steel rim design, it supports safer transport for yard work and hauling tasks. An adapter kit with ball bearings and nylon spacers is included for easier fit and customization across common wheelbarrow and cart axle setups.

The Ziopetru adjustable magnetic wheel alignment tool helps you check and restore camber and caster positioning after removing and reinstalling undercarriage components. With a clear leveling/bubble measurement system and an easy zeroing adjustment knob, it supports precise horizontal angle checking. The strong magnetic base mounts to metal surfaces for convenient use at home on cars, motorcycles, trucks, vans, and SUVs.

This professional wheel and rim brush kit makes it easy to lift brake dust, grime, and dirt from wheels and tires without scratching finishes. The brushes feature soft, metal-free wool heads and a flexible 360-degree rim brush design for reaching hard-to-clean areas. Includes multiple brush types plus accessories for thorough car, motorcycle, and general vehicle detailing.
Offset and Clearance
When fitting new wheels and tires, compare the complete wheel specification rather than offset alone. A wider wheel with the same offset extends farther both inward and outward than a narrower wheel.
- Record your current wheel width and offset.
- Measure or confirm its backspacing.
- Compare the new wheel’s width and position.
- Check inner clearance to suspension and brake components.
- Check outer clearance to the fender and body.
- Test both steering directions at full lock.
The correct offset can solve some rubbing problems without major suspension changes, but an offset chosen only for appearance can create new clearance and steering problems.
Positive Vs Negative
| Offset Direction | General Wheel Movement | Clearance Risk |
|---|---|---|
| More positive | Farther inward | May reduce clearance to suspension, frame, brakes, or inner liner |
| Near factory specification | Closer to intended wheel position | Usually the safest baseline when tire size remains manufacturer-approved |
| Lower or more negative | Farther outward | May reduce inner clearance problems but increase fender, flare, bumper, or body-mount contact |
Because wheel width changes the result, do not compare offset numbers without including wheel width.
Backspacing Matters Too
Backspacing is another way to describe wheel position. It measures from the wheel’s mounting surface to its inner edge. More backspacing generally places more of the wheel inward, while less backspacing moves the inner edge outward.
This makes backspacing especially useful when you are checking clearance to control arms, tie rods, sway bars, shocks, or other inner components.
- Match wheel width and backspacing to the vehicle’s fitment requirements.
- Check inner suspension clearance at full steering lock.
- Check outer body clearance after any outward movement.
- Reconfirm fitment after a lift, lowering kit, control-arm change, or alignment adjustment.
Offset and backspacing describe related dimensions, so treat them as part of the same fitment calculation rather than separate fixes.
Use a Leveling Kit for More Clearance
A leveling kit can create additional static wheel-well clearance on vehicles for which the kit is designed. This can help with some larger-tire combinations, particularly at the front of trucks with factory rake.
However, a leveling kit is not a universal cure. It does not automatically increase usable suspension travel, correct every geometry issue, or guarantee that a particular oversized tire will clear.
Use the suspension manufacturer’s verified wheel-and-tire fitment information. Some kits require a specific wheel width and offset, while others require trimming, different control arms, or other components.
[Products Worth Considering]

This universal wheel alignment tool helps you accurately restore tire tilt angles after tire or suspension repairs using an adjustable camber gauge. It features a powerful magnetic base that firmly attaches to brake rotors for stationary, slip-free readings, improving consistency during measurement. Built from durable PC plastic, it resists wear and corrosion and is compact enough for car, truck, RV, and motorcycle alignment tasks.

This manual duck head tire changer kit makes tire installation and removal simpler by letting you embed the duck head into the tire with applied pressure. The integrated design and durable steel construction help reduce friction and improve efficiency and safety during use. Suitable for 16–21 inch wheels, it’s convenient for cars, trucks, SUVs, and ATV tires, with 24-hour after-sales support.
Black Magic Intense Foam Wheel & Tire Cleaner uses a high-foaming action to lift away dirt, grime, and brake dust without scrubbing. The color-changing formula helps show contaminants being dissolved as foam turns from white to brown. Safe for all wheel types and even wheel wells, it leaves a like-new, slick finish with a fresh cherry scent.
Clearing Factory Rake
If your truck has factory rake, a vehicle-specific leveling kit raises the front ride height and can create more room around the front tire. That may help when rubbing is caused by limited vertical or front-to-rear clearance.
Do not assume that every 1-, 2-, or 3-inch leveling kit fits the same tire size. Verify:
- Exact vehicle year, model, drivetrain, and trim.
- Approved tire size.
- Wheel diameter and width.
- Required offset or backspacing.
- Whether trimming is required.
- Whether aftermarket control arms or other components are required.
- Alignment and calibration instructions after installation.
A properly engineered kit should be installed according to its instructions, not simply chosen by advertised lift height.
Leveling Does Not Always Add Suspension Travel
Raising the front ride height and increasing suspension travel are not the same thing. A basic spacer-style leveling system may change where the suspension sits at normal ride height without increasing its total designed travel.
Other suspension systems include control arms, longer dampers, relocated mounting points, or geometry corrections that can change available droop or articulation. Those benefits belong to the specific system, not to leveling kits as a category.
Note: After changing suspension height, follow the kit manufacturer’s instructions for alignment, hardware checks, headlamp aim, and any required ADAS camera or radar calibration. Some modern vehicles need manufacturer-specific calibration procedures after their ride height changes.
Trim Fender Liners and Bumper Corners
If your fitment is otherwise correct and the tire only touches a non-structural plastic liner or bumper edge, careful targeted trimming may create the clearance needed during turns.
Start with the least permanent option. A liner may simply need to be pushed forward, re-clipped, or secured because a broken fastener has allowed it to sag toward the tire.
- Mark the actual interference point with chalk or tape.
- Check behind the area for wiring, hoses, sensors, air ducts, fasteners, and structural metal.
- Reposition the liner before cutting when possible.
- If trimming is appropriate, remove only the minimum material needed.
- Smooth any sharp edge.
- Protect exposed metal from corrosion if metal was legitimately modified.
- Retest at full lock in both directions.
Trim only the confirmed interference point. Removing extra material does not improve fitment and can expose wiring, body seams, or other components unnecessarily.
Do not cut structural components merely because the tire touches them. If a structural part is the interference point, investigate the tire, wheel, alignment, and suspension setup before modifying the vehicle.
Chop the Body Mount for Extra Clearance
On some trucks and SUVs with aggressive tire setups, the tire can contact a body or cab mount near the rear of the front wheel opening. This is very different from trimming a plastic liner.
A body-mount chop or relocation should be considered only when the modification is established for your exact vehicle and you have confirmed that the mount is the actual interference point.
Warning: Body mounts are structural attachment points. Cutting or relocating one can require welding and reinforcement. Use a vehicle-specific engineered procedure and an experienced fabricator rather than cutting the mount until the tire appears to clear.
Body Mount Interference
If the tire contacts the body mount during steering or suspension movement, first confirm that tire size, wheel offset, caster, and suspension fitment are correct. Sometimes changing the fitment eliminates the contact without structural fabrication.
When a body-mount modification is genuinely required, manufacturers of relocation systems commonly use replacement steel structures and specify professional welding. For example, current body-mount relocation guidance from DRT Fabrication states that its system requires welding and is designed for professional installation by an experienced fabricator or welder. See the manufacturer’s body-mount relocation guidance.
- Confirm the exact contact point.
- Verify that wheel/tire fitment is correct first.
- Use a vehicle-specific engineered chop or relocation design.
- Protect wiring, brake lines, fuel lines, and nearby body components.
- Use qualified welding and reinforcement procedures where required.
- Apply corrosion protection to exposed metal.
- Verify clearance through the required steering and suspension range.
Chop for Clearance
If a proven vehicle-specific body-mount chop is used, remove only the material specified by that design and install the required reinforcement. Do not improvise the shape or remove additional material simply to create a larger gap.
After fabrication, inspect weld quality, corrosion protection, tire clearance, brake and fuel-line routing, steering movement, and suspension travel before normal driving.
If an engineered relocation kit is the appropriate solution, follow its instructions rather than assuming that a basic chop provides the same structural result or tire clearance.
Get an Alignment After Installing Tires
A wheel alignment check is worthwhile when you install new tires, especially if the old tires wore unevenly, the steering wheel is off-center, or the vehicle pulls. Michelin includes new-tire installation among the situations when alignment should be checked in its wheel alignment guidance.
An actual alignment adjustment becomes particularly important after modifications that affect suspension geometry, such as leveling or lift kits, replacement control arms, or other suspension work.
Alignment changes camber, caster, and toe. On some vehicles, caster adjustment can also move the tire slightly forward or rearward in the wheel opening, which may affect an already tight clearance situation.
- Check camber against the vehicle or suspension manufacturer’s specification.
- Set caster within the approved range.
- Adjust toe correctly.
- Center the steering wheel.
- Retest tire clearance after the alignment.
If the only work performed was replacing same-size tires and the vehicle has even wear and correct handling, adjustment may not be necessary. The important step is confirming that alignment is within specification rather than assuming every new tire installation needs correction.
Tighten Loose Suspension Components
Inspect suspension components and mounting hardware when rubbing appears unexpectedly. A loose or worn part can let the wheel move farther than intended and reduce clearance during steering, braking, or bumps.
Check components appropriate to your vehicle, including control-arm bushings, ball joints, tie-rod ends, sway-bar links, strut or shock mounts, lift brackets, and wheel bearings.
If a fastener requires tightening, use the torque value and procedure in the vehicle service information or suspension-kit instructions. Do not guess at torque specifications.
Some suspension fasteners that pass through rubber bushings must also be tightened at a specified suspension position. Follow the manufacturer’s procedure because incorrect tightening can preload the bushing or affect service life.
After recent suspension work, follow the kit manufacturer’s specified reinspection or retorque schedule. Do not substitute an arbitrary mileage interval when the manufacturer gives a specific one.
Choose a Narrower Tire for Better Clearance
If the tire is simply too wide for the available space, an approved narrower tire can increase clearance to suspension parts and bodywork.
Do not choose a narrower tire based on clearance alone. Michelin recommends using a vehicle-manufacturer-approved size and maintaining at least the required load capacity.
- Check the vehicle placard and owner’s manual.
- Confirm the alternative size is approved for the vehicle.
- Maintain adequate load index and speed capability.
- Make sure the tire is compatible with the wheel width.
- Compare actual section width and overall diameter.
- Check speedometer, gearing, ABS, AWD, and stability-control considerations for substantial diameter changes.
A narrower tire can reduce the likelihood that its shoulder contacts a control arm, liner, or fender, but it does not guarantee clearance if the wheel offset or overall diameter remains unsuitable.
Consider Wheel Spacers Carefully
A wheel spacer moves the wheel outward. That means it can create additional inner clearance when a tire touches a control arm or another inboard component.
However, moving the tire outward can also make it rub the outer fender, bumper corner, flare, or body mount. In that sense, a spacer may move the rubbing point rather than eliminate the underlying fitment problem.
Before using one, verify:
- the vehicle and wheel are suitable for the spacer system;
- there is adequate thread engagement or the system provides its own approved studs/fasteners;
- the wheel remains correctly centered;
- the spacer and wheel mounting surfaces are clean and flat;
- fasteners are torqued according to the product and vehicle instructions; and
- outer tire clearance remains adequate through steering and suspension movement.
If the correct wheel offset is available, using a properly fitted wheel is often a cleaner long-term solution than adding a spacer solely to correct an unsuitable wheel position.
[Products Worth Considering]

Replace or upgrade your zero-turn lawn mower tires with a universal fit flat-free tire and wheel assembly in a convenient 2-pack. Smooth tread front-caster style helps turning with reduced turf damage, while flat-free design eliminates the maintenance and downtime of air-filled flats. The included adapter kit supports 5/8-inch axles and hub lengths from 3.4 to 5 inches for compatibility across most ZTR mowers.

These M14x1.5 closed-end chrome lug nuts are a one-piece replacement designed for secure fitment on compatible GM, Ford, and select Chrysler/Dodge models. Featuring a 60-degree conical seat and anti-rust chrome plating, they help resist corrosion and maintain a bright look for everyday driving. Built for long-term durability, they include OEM-style part references and are backed by 12 months of support.

This professional wheel and rim cleaning brush set lifts brake dust, grime, and dirt with soft, scratch-free microfiber and synthetic wool fibers. The rim brush bends up to 360 degrees for easy access to hard-to-reach areas around spokes, lips, and faces. Ideal for thorough cleaning of car, truck, motorcycle, bicycle, RV, and more wheel and tire surfaces.
Check Steering Stops Only When Approved
Some vehicles use steering stops that limit how far the front wheels turn. On applications where the manufacturer or an approved suspension system allows adjustment, a small change can prevent contact that occurs only at the very end of steering travel.
This is not a universal fix. Reducing steering angle increases the turning circle, and improperly altering steering components can create other problems. Never modify a steering stop unless a vehicle-specific procedure supports it.
Test Full Lock and Suspension Travel
After every change, retest the clearance instead of assuming the problem is solved. Turn the steering to full lock in both directions and inspect the tire’s entire path.
| Check | Result |
|---|---|
| Left full lock | Clear / Contact |
| Right full lock | Clear / Contact |
| Normal ride height | Clear / Contact |
| Safe suspension compression | Clear / Contact |
| Passengers or normal cargo load | Clear / Contact |
Never crawl under a vehicle supported only by a jack, and do not place yourself where suspension movement could trap you. If checking suspension compression requires lifting the vehicle or removing springs, use proper lifting equipment and professional procedures.
Mark every contact point and inspect the tire afterward. Larger tires need some working clearance because suspension bushings, tire sidewalls, steering components, and body mounts can move under real driving loads.
Once static checks pass, perform a cautious low-speed road test. Listen during tight turns, driveway transitions, braking, and small bumps. Reinspect the tire and wheel well before returning to normal driving.
Frequently Asked Questions
How do I get my tires to stop rubbing?
Find the exact contact point first. Then check tire diameter and width, wheel width and offset, backspacing, liner position, suspension condition, and alignment. Correct the actual fitment problem before trimming bodywork or adding suspension parts.
Will a leveling kit stop my tires from rubbing?
It can help when the tire needs more front wheel-well clearance and the kit manufacturer approves your tire and wheel combination. A leveling kit does not automatically increase suspension travel or correct rubbing caused by the wrong offset, excessive tire width, or another mechanical problem.
Will wheel spacers stop my tires from rubbing?
A spacer can help if the tire contacts an inner suspension component because it moves the wheel outward. However, that same movement can create rubbing at the fender, flare, bumper, or body mount. Verify both inner and outer clearance before using one.
Is tire rubbing a big deal?
It can be. Light contact with a plastic liner is different from a tire being cut by metal or rubbing hard enough to affect steering. Inspect the tire promptly. Cuts, exposed cords, bulges, deep sidewall grooves, or steering interference require professional attention before normal driving.
Why are my stock-size tires suddenly rubbing?
Check for a loose or displaced fender liner, broken clips, accident damage, worn suspension bushings or joints, wheel-bearing play, incorrect wheel fitment, or an alignment problem. Stock-size rubbing that starts suddenly deserves a mechanical inspection rather than an immediate lift or trimming job.
Can I just trim the fender liner where the tire rubs?
You may be able to reposition or carefully trim a non-structural plastic liner after confirming the contact point and checking behind it for wiring, hoses, sensors, and body seams. Do not treat structural metal or a body mount the same way.
Do I need an alignment after changing tires or adding a lift?
An alignment check is sensible with new tires, especially when old tires wore unevenly or the vehicle pulls. After a lift, leveling kit, control-arm replacement, or other geometry-changing suspension work, follow the suspension manufacturer’s alignment instructions and recheck tire clearance afterward.
Can a narrower tire fix rubbing?
Yes, when excessive section width is the problem. The narrower replacement still needs to be an approved size with adequate load capacity, proper wheel-width compatibility, and acceptable overall diameter for the vehicle.
Conclusion
To stop tire rubbing, diagnose the contact point before changing parts. Match the tire’s diameter and width with the correct wheel width, offset, backspacing, suspension setup, and vehicle-specific fitment guidance. Then check liners, alignment, suspension condition, and hardware.
Use a leveling kit only when the manufacturer confirms the combination you want to run. Trim non-structural plastic only where necessary, and treat body-mount cutting or relocation as professional structural work. After the fix, check full steering lock, suspension clearance, and the tire itself for damage. A measured fitment correction is safer and more reliable than repeatedly modifying whatever the tire touches next.
Sources
- National Highway Traffic Safety Administration — Tire Safety — tire sizing, inflation, balancing, alignment, and maintenance guidance.
- Michelin — Changing Tire Size or Specifications — manufacturer-approved sizes and load-capacity guidance.
- Michelin — Sidewall Problems — safety guidance for structural sidewall damage.
- Tire Rack — What Is Wheel Offset? — definitions of wheel offset and backspacing and their effect on wheel position.
- ReadyLIFT — Vehicle-Specific Leveling Kit Fitment — example of tire size, wheel width, offset, alignment, and calibration requirements varying by application.
- DRT Fabrication — Cab Mount Relocation Guidance — professional welding and installation considerations for structural body-mount relocation.

