
4Runner Fender Trimming for Tire Clearance: A Simple Guide
To fit 33-inch or larger tires on your 4Runner, you’ll need to trim the pinch welds and reshape the plastic flares. First, remove the inner fender liners by unbolting all 10mm fasteners, then mark your cut lines with painter’s tape along the wheel arch. Cut 1-2 inches of steel and plastic using a Dremel or oscillating multi-tool, smooth all edges with 80-grit sandpaper, and seal exposed metal to prevent corrosion. Reattach the flares with fresh clips and L-brackets, then test for clearance at full lock. The complete process involves additional preparation steps and specialized techniques that guarantee professional results.
Tire Size Thresholds: When Trimming Becomes Necessary
Once you’ve committed to upsizing your 5th Gen 4Runner’s tires, you’ll hit a hard limit at the 33-inch mark—anything beyond that demands fender trimming. You’ll encounter rubbing against fenders and inner linings during turns and off-road maneuvers, compromising both clearance and tire performance.
At 34 inches, you can execute conservative trimming—strategic material removal from contact points suffices. However, 35-inch tires force you into substantial modifications: you’ll reshape the front bumper and fender flares to eliminate interference at full lock. Your trim size decisions directly dictate drivability.
34-inch tires demand conservative trimming; 35-inch tires force substantial bumper and flare reshaping to maintain drivability at full lock.
The 285/75R17 specification offers a tactical alternative—you’ll maximize tire performance without extensive bodywork. This dimension balances capability and preservation.
You can defer aggressive cutting through suspension intervention. A lift kit creates vertical clearance, reducing metal removal requirements. Evaluate your terrain demands, then select your trim size strategy—mechanical liberation demands calculated precision, not guesswork.
Essential Tools for Trimming Fenders
Five specialized tools form the foundation of any precision fender trim: a Dremel with a plastic cutting wheel for clean, controlled cuts through flare material; an oscillating multi-tool with quality blades for tackling thicker sections where power meets maneuverability; painters tape to map your cut lines with millimeter accuracy; a sharp box cutter—heated when necessary—for alternative slicing through softer compounds; and a grinder to dress every edge smooth, eliminating burrs that’ll chew through tire sidewalls or snag on trail debris.
| Tool | Cutting Techniques | Tool Maintenance |
|---|---|---|
| Dremel + plastic wheel | Slow, steady passes; let speed do work | Clean wheel debris; replace when glazed |
| Oscillating multi-tool | Plunge cuts in tight radii | Lubricate blade mount; inspect teeth |
| Box cutter | Score deeply, snap or slice through | Sharpen or replace blade per cut |
| Grinder | Feather edges at 45°; avoid heat buildup | Dress grinding wheel; check guard |
Master these implements and you reclaim full suspension travel without compromise.
Remove Inner Fender Liners First
Remove the inner fender liners first to gain unobstructed access and visibility to the fender assembly. You’ll prevent clip damage by systematically unbolting all 10mm fasteners before peeling the liner back. This step simplifies the cutting process by eliminating obstructions and exposing the precise trim lines you’ll need to follow.
Access And Visibility
Before you make any cuts to the fender sheet metal, you’ll need to pull the inner fender liners to gain unobstructed visibility of the entire wheel well. Grab your socket wrench and remove the 10mm bolts and clips securing the liner—this takes minutes but transforms your workspace completely.
| Visibility Enhancement | Access Benefits | Outcome |
|---|---|---|
| Full wheel well exposure | Direct sheet metal contact | Precise cut planning |
| Clear sight of rub points | Unrestricted tool maneuverability | Clean trim lines |
| Adhesive residue visibility | Easy surface prep | Proper flare reinstallation |
With the liner out, you’ll spot exactly where tires contact the fender during compression and turning. You’re no longer guessing—you’re engineering clearance. Clean the flare mounting surface now; smooth substrate guarantees proper fitment later. Position the liner temporarily to test additional space gains before committing to cuts.
Preventing Clip Damage
If you’re planning to trim your fenders, you’ll want to pull those inner liners completely—otherwise, you’re risking cracked clips and mangled mounting points that’ll haunt you at reassembly.
- Unbolt all fasteners securing the liner to expose hidden clip types before cutting begins.
- Slice carefully with a razor blade along liner edges—this preserves the mounting structure and eliminates stress on remaining hardware.
- Snap rocker molding caps onto flare edges using temporary alignment techniques that hold position without forcing clips.
- Clean adhesive residue thoroughly post-removal to guarantee smooth reinstallation and proper clip engagement later.
Protecting these components now saves hours of sourcing replacements and delivers clean, repeatable results. Your future self—reassembling everything under the rig—will thank you for this discipline.
Simplified Cutting Process
With your clips protected and liners fully detached, you’ve cleared the workspace needed for clean, controlled cuts. Grab your multi-tool and follow the marked tape line precisely—this guarantees cutting techniques deliver straight, predictable results without wandering. Maintain steady pressure; let the blade work without forcing it. Trimming safety demands eye protection and a firm stance, as metal shards and liner fragments fly unpredictably. Once separated, hold the liner against the fender arch to verify clearance for your larger tires. Misalignment now means rubbing later. Next, score your fender cut line lightly with a grinder—this prevents the cutting wheel from biting unevenly when you commit. Finish rough edges with a Dremel or sanding disc. Smooth surfaces eliminate contact points that would otherwise shred rubber at speed.
Pop Off Flares Without Breaking Clips
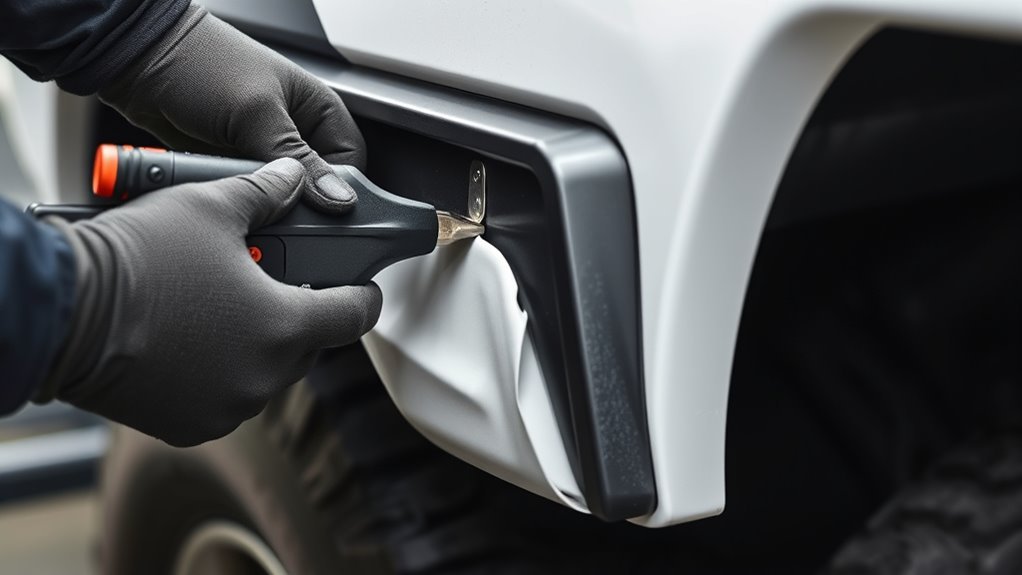
You’ll need to select the proper tool—typically a flathead screwdriver or plastic pry bar—to release each clip individually without stressing the flare. Apply gentle, consistent pressure at marked clip locations while working around the perimeter, as rushing this process risks snapping the plastic retainers. Warming the flare with a heat gun beforehand increases pliability and reduces the chance of cracking the material during removal.
Clip Removal Technique
Pop the fender flares free without destroying the clips by starting at any edge with a plastic trim tool or wrapped flathead screwdriver, working it gently between the flare and fender to create separation. Apply steady outward pressure while moving sequentially along the flare’s length, distributing force evenly across clip types specific to your 4Runner’s flare designs. Warm stubborn sections with a heat gun to soften adhesive bonds before prying.
Execute proper removal through this method:
- Heat first – Soften adhesive with a heat gun or hairdryer for easier clip release
- Pry gradually – Insert your tool shallowly to avoid clip damage
- Pull evenly – Maintain consistent outward pressure while progressing end-to-end
- Inspect thoroughly – Extract any clips remaining lodged in the fender cavity
Keep replacement clips nearby. Liberate your fenders methodically, preserving hardware for seamless reinstallation or modification.
Proper Tool Selection
Three essential tools separate successful fender flare removal from costly clip replacement: a plastic trim pry bar, a heat gun, and painter’s tape. You’ll use the pry bar instead of metal screwdrivers to prevent clip damage. Set your heat gun to low and wave it across the flare’s surface—this softens plastic without warping it, making fender modifications far safer.
| Tool | Purpose | Clip Types Protected |
|---|---|---|
| Plastic pry bar | Gentle leverage | Push-in, snap-fit |
| Heat gun (low) | Softens plastic | All thermoplastic clips |
| Painter’s tape | Edge protection | N/A—prevents paint damage |
| Flathead screwdriver | Hidden screw access | Metal threaded fasteners |
Work slowly from one end, checking for concealed fasteners underneath. Tape guides your cutting lines if trimming follows removal. Match your technique to each clip type—you’ll liberate your flares intact.
Preventing Plastic Damage
Since you’ve already selected the proper tools, you’re ready to execute the removal itself. Pop off your flares without destroying clip types by following this precise sequence:
- Mark every clip location with tape—this guarantees flawless reinstallation techniques later
- Warm the plastic evenly with your heat gun until pliable, not melting
- Slide your flat tool beneath each fastener, applying steady pressure to release clips intact
- Work the entire perimeter systematically, never forcing any single point
If a clip snaps, source automotive-grade replacements immediately—compromised fasteners guarantee loose flares and trail debris intrusion. Your patience here liberates you from cracked panels, lost hardware, and botched installation techniques. Execute methodically. The freedom of clean modification demands precision, not haste.
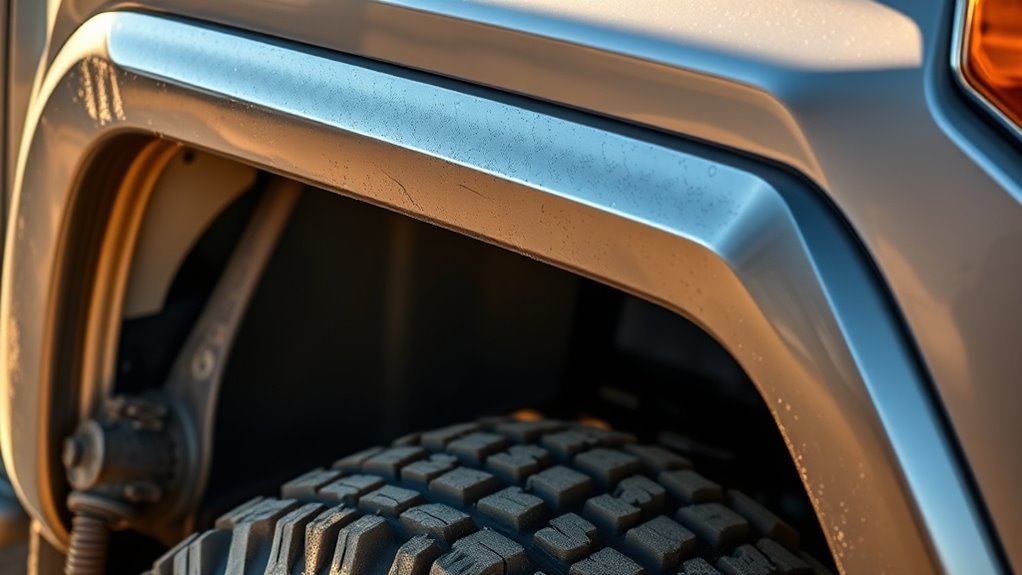
Mark Your Trim Lines: Pinch Weld Method
One critical step in fender trimming involves marking your cut lines along the pinch weld—the seam where the fender meets the body panel. Begin with pinch weld identification by tracing this seam where fender and body intersect; this guides your cutting path for ideal clearance.
Apply painter’s tape precisely along this identified seam. This tape application creates your cutting boundary, ensuring straight, uniform cuts without deviation.
Painter’s tape is your cutting boundary—straight, uniform, zero deviation.
Measure from ground to wheel arch top to determine material removal—typically 1-2 inches for larger tires. This quantifies your liberation from factory constraints.
Cut along your tape line using a multi-tool or grinder. Maintain smooth edges throughout; sharp remnants threaten tire integrity.
Test clearance by turning steering lock-to-lock. Identify rubbing points. Adjust accordingly. Your 4Runner now accommodates larger rubber, expanding capability and freedom.
Cut Sheet Metal and Plastic Flares
With your tape lines established along the pinch weld, you’re ready to remove material. Grab your multi-tool and begin cutting the sheet metal with deliberate, controlled strokes following your tape guides. Clean cuts here prevent rust and maintain structural integrity. Move to the plastic fender flares next, using the same multi-tool for the initial pass.
Refine your cutting techniques through this progression:
- Score shallow relief cuts first to prevent material binding
- Cut steel in sections, working outward from the wheel well
- Trim plastic flares with sweeping motions to reduce edge chipping
- Switch to a Dremel for beveling plastic edges, then hand-sand smooth
Address the pinch weld bracket now—cut and fabricate your S bracket for reattachment. This preserves stability while enabling clearance. Spray paint exposed edges immediately to protect against corrosion and elevate your fender aesthetics. Your modified flares will appear deliberate, not damaged. Precision here separates professional results from amateur mistakes.
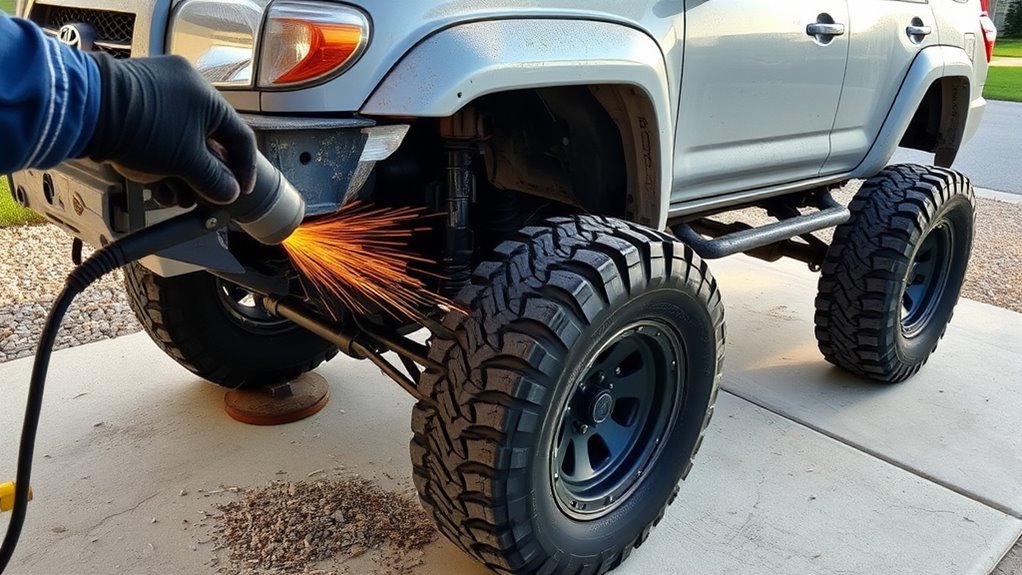
Smooth All Edges to Prevent Tire Contact
Grab your Dremel fitted with a plastic cutting wheel and attack those freshly cut fender edges—you’re eliminating every burr and ridge that could grab your tire during compression or full articulation. Work methodically along each cut, letting the wheel do the work without forcing it. This edge finishing step creates the foundation for proper tire clearance.
Switch to 80-grit sandpaper and hand-sand every edge you’ve cut. Feel for sharp points; remove them completely. You’re preventing contact points that’ll chew rubber and damage finish.
Mount a flap disc or 100-grit sanding disc to your grinder. Blend connections between metal and plastic, chasing that factory-smooth profile. Run your fingers across surfaces—anything that snags skin will snag tire.
Cycle your steering through full lock in both directions. Inspect gap consistency throughout the arc. No contact? You’ve nailed it.
Seal exposed metal with paint or protective coating. You’re locking in your work, preventing corrosion, maintaining that clean aesthetic. Your tire clearance stays uncompromised.
Reattach Flares With New Clips and L-Brackets
Your edges are sealed and your tires clear—now it’s time to lock the flares back in place. Proper fender flare installation demands fresh hardware, not worn factory remnants. Grab your new clips and follow this sequence:
- Mark factory points – Use clip alignment techniques to locate precise mounting positions; misalignment invites rattles and gaps.
- Seat clips firmly – Press each clip until it clicks into the fender, ensuring full engagement with the panel.
- Position L-brackets flush – Mount brackets tight against the fender surface; any gap traps moisture and debris.
- Torque everything down – Tighten all fasteners systematically, double-checking tension before you finish.
L-brackets reinforce the structure against trail vibrations. When mounted flush and secured with small bolts, they eliminate flex. Test each connection by hand—loose hardware fails when you need it most. Your flares stay put, your rig stays clean, and you drive free from worry.
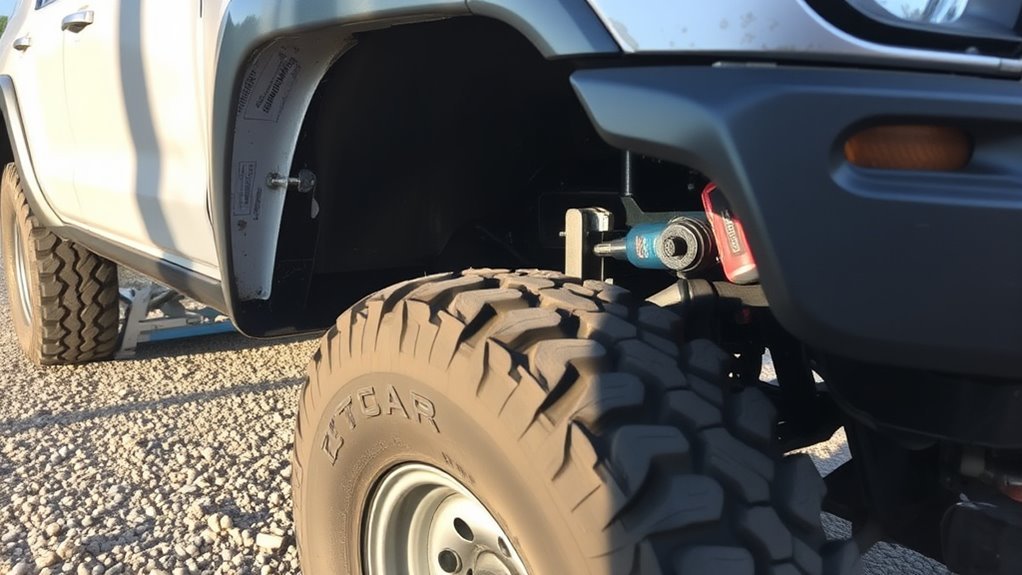
Test Your Trim: Full Lock Clearance Check
There’s nothing quite like the moment of truth—turn that wheel lock-to-lock and see what you’ve actually gained. Conduct a full lock clearance check by rotating your steering wheel fully to both sides while stationary. Listen closely and watch carefully for any rubbing points between your tire and fender.
If you encounter clearance issues, mark the exact contact points on your fender with tape or chalk. You’ll need at least 1 inch of space between tire and fender at full lock to prevent rubbing during compression or off-road articulation. Adjust your trimming plan based on these findings.
After completing your cuts, recheck everything with the vehicle at full weight—fuel, gear, passengers included. This confirms your modifications work under real driving conditions. Following off-road excursions, inspect your trimmed areas regularly. Suspension settling and future tire changes can introduce new interference, so stay vigilant.
Frequently Asked Questions
What Is the Best Trim for a 4runner?
You achieve ideal fender styles by trimming factory fenders and flares with a multi-tool and Dremel, marking lines with painter’s tape. These clearance benefits free your 4Runner for 35-inch tires and uncompromised off-road liberation.
How Much Wider Should Fenders Be Than Tires?
You’ll need fender flares extending 1–2 inches beyond your tire width—wait, there’s more. For ideal tire clearance on 35-inch tires, you must push that to 1.5 inches. Measure twice, cut once, and liberate your rig.
What Does “Norcal Mod” Mean?
You perform the Norcal Mod by cutting and rolling your fenders, removing liners, and adjusting pinch welds—fender modifications that maximize tire clearance for 35-inch tires without full body lifts.
Conclusion
You stand at the threshold—metal shavings glinting like fallen leaves, your 4Runner reborn. The trimmed fender arcs now, a bridge spanning tire and trail. You’ve carved clearance from constraint, transforming pinch weld into passage. Each smoothed edge sings of deliberate craft; every reattached flare anchors your work. Test the lock: rubber kisses nothing. The road unfolds, unchallenged. You’ve written permission onto steel—drive forward, unbound.
Related Articles

Can You Run 33 Inch Tires on a 4Runner Without Issues
People often wonder if 33-inch tires can fit a 4Runner smoothly; discover the necessary modifications to ensure a flawless ride.
Read More
What Is a Body Mount Chop on a 4Runner for Bigger Tires
Body mount chop: the irreversible 4Runner mod that unlocks massive tire clearance, but are you ready for what's hidden beneath?
Read More
4Runner Speedometer Wrong After Bigger Tires: How to Fix It
Tired of your 4Runner's speedometer lying after upgrading to bigger tires?
Read More