

A flat tire is stressful, but the safest tire change is a slow, controlled process: get away from traffic, secure the vehicle, loosen the lug nuts before lifting, use the correct jack point, install the spare, tighten the lug nuts evenly, and drive only far enough to reach tire service. Always follow your owner’s manual for your vehicle’s jack points, spare tire pressure, and lug nut torque.
Quick Answer
To change a tire, park on a flat, safe surface, turn on hazards, set the parking brake, loosen the lug nuts slightly, lift the car at the correct jack point, remove the flat tire, mount the spare, hand-tighten the nuts, lower the car, then tighten in a crisscross pattern.
Key Takeaways
- Do not change a tire in traffic, on a narrow shoulder, on a slope, or on soft ground if you can safely avoid it.
- Loosen lug nuts while the tire is still touching the ground, then jack the car only at the manufacturer’s approved lift point.
- Hand-thread lug nuts first, tighten in a crisscross pattern, and use the torque specification in your owner’s manual when possible.
- A compact temporary spare is for emergency use only; follow the limit printed on the spare or in the owner’s manual, often no more than 50 mph.
At a Glance
| Time Required | 15–30 minutes for most passenger vehicles |
| Difficulty | Beginner to moderate |
| Tools Needed | Spare tire, jack, lug wrench, owner’s manual, wheel wedges, flashlight, gloves, tire pressure gauge |
| Cost | Usually free if your vehicle already has the spare and tools |
Step 1: Get to a Safe, Level Spot and Secure the Car
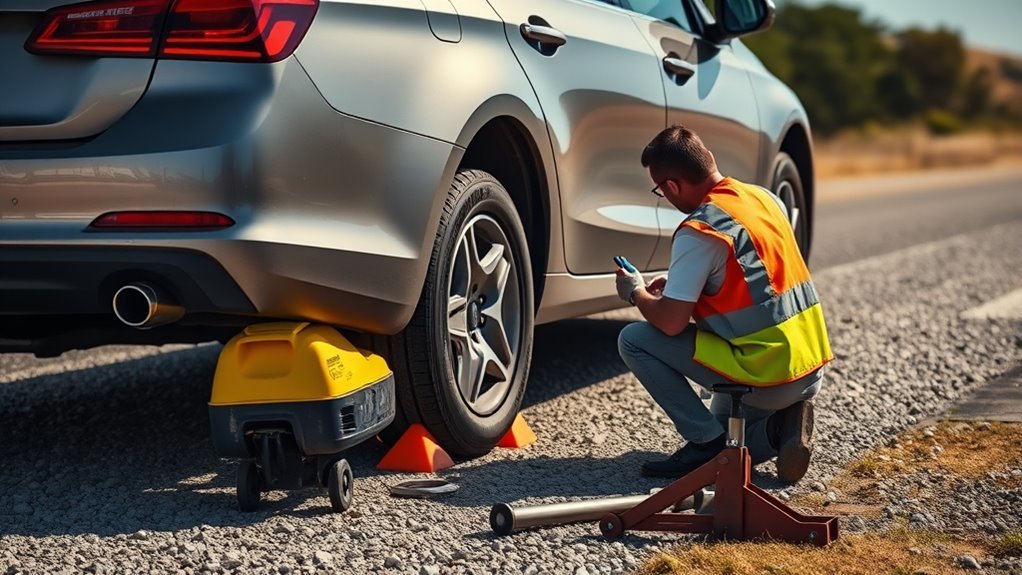
Find a flat, safe spot away from traffic, such as a parking lot, rest area, wide shoulder, or quiet side street. Turn on your hazard lights, shift into park or first gear for a manual transmission, shut off the engine, set the parking brake, and ask passengers to stand away from the roadway.
If you are on a highway, do not stop in a dangerous lane or blind curve just to save the tire. If the car can still be moved safely, drive slowly to the nearest safe, solid, level area. The Toyota owner’s manual flat-tire guidance, like many manufacturer manuals, emphasizes stopping on a hard, flat surface, setting the parking brake, and turning on emergency flashers before jacking the vehicle.
Place wheel wedges against the tires opposite the flat. If the front tire is flat, wedge behind the rear tires. If the rear tire is flat, wedge in front of the front tires. Bricks or large stones can work in an emergency, but dedicated wheel wedges are safer.
Warning: Do not change a tire on soft dirt, steep grades, icy shoulders, narrow bridges, or close to fast traffic. If the spot is unsafe, call roadside assistance and wait in a protected location.
Tire-Change Checklist: Tools and Spare to Keep in Your Trunk
One compact kit of the right items can turn a roadside headache into a controlled repair. Keep these items in your trunk or cargo area:
- Fully inflated spare tire that matches your vehicle’s requirements
- Vehicle jack rated for your car and designed for its lift points
- Lug wrench that fits your lug nuts
- Owner’s manual for jack points, spare limits, and torque specifications
- Wheel wedges to reduce the chance of rolling
- Flashlight or headlamp with fresh batteries
- Work gloves and a small kneeling pad or towel
- Tire pressure gauge for checking the spare before driving
- Reflective triangle or safety vest for visibility, especially at night
- Wheel-lock key if your vehicle uses locking lug nuts
Check your spare pressure at least monthly and before road trips. The National Highway Traffic Safety Administration recommends checking tire pressure when tires are cold and using the pressure listed on the vehicle placard or in the owner’s manual. Temporary compact spares often need higher pressure than regular tires, so do not guess.
Note: Some newer vehicles do not include a spare tire. They may use run-flat tires or a tire sealant and inflator kit instead. Check your vehicle now, not after a flat happens.
[Products Worth Considering]

This universal magnetic jack pad is designed to protect pinch welds when lifting vehicles, helping prevent seam damage or warping. Crafted from solid aluminum with a nylon pad insert, it provides reinforced structural support and a secure fit for most single-vehicle pinch welds. Slotted for strong magnet holding, it supports safe jacking for cars, SUVs, trucks, and more.

ETENWOLF’s tire pressure gauge helps you quickly and accurately check tire PSI across cars, trucks, motorcycles, bikes, and more. It’s manually calibrated to ANSI B40.1 Grade A for reliable readings, includes a large glow dial for easy nighttime viewing, and features a 360-degree swivel chuck for use at any valve angle. The gauge also works consistently in extreme hot or cold weather.

The 22800 wheel stud installer makes replacing wheel studs quick and secure, saving time and effort during tire service. It uses a ratchet or impact wrench to pull new studs firmly into place, helping when existing studs are too long. Compatible with most automotive wheels and light-duty truck wheel studs, it’s designed for easy, tool-assisted installation.
Step 2: Loosen Lug Nuts and Remove the Hubcap
If your wheel has a hubcap or wheel cover, remove it before lifting the vehicle. Some hubcaps snap off with a flat tool, while others are held by plastic caps, screws, or the lug nuts themselves. Work slowly so you do not crack the cover.
Look for a locking lug nut. If one lug nut has a different shape, you need the wheel-lock key before the wheel can come off. Fit the key securely before applying force.
With the tire still touching the ground, place the lug wrench on each nut and turn counterclockwise about one-quarter to one-half turn. This breaks the initial torque while the wheel is stable. Do not remove the nuts yet, and do not loosen them after the wheel is already spinning in the air.
- Confirm the hubcap type and remove it according to its mounting method.
- Check for a wheel-lock key and keep it within reach.
- Partially loosen all lug nuts while the tire is still on the ground.
- Keep loose caps, keys, and small parts together so nothing rolls away.
Pro Tip: If a lug nut will not move, press downward with controlled body weight instead of jerking the wrench. Sudden bouncing can damage the wrench, strip hardware, or knock the vehicle off balance.
[Products Worth Considering]

Yieokei Tesla jack pads are molded rubber lifting pucks designed for 2016-2026 Model 3/Y/S/X, including Juniper, to fit securely in the jack hole. They cushion the underframe and help position the jack precisely at the factory jack points to reduce risk of battery, paint, or chassis damage. The set also includes a tire repair tool kit for emergency roadside fixes and comes with a portable storage case to keep everything organized.

Universal magnetic jack pad with aluminum grooved design to protect vehicle pinch welds during lifting. Durable nylon pad inserts are upgraded and secured with screws to resist damage and keep in place. Designed to fit most single vehicle pinpoint welds for safer, stable jacking when changing tires, repairs, or performing oil changes.

This tire inflator with pressure gauge delivers long-lasting performance with a durable rubber-protected gauge and sturdy build. The longer hose and 360 swivel air chuck help you seal the valve securely and keep your hands free while measuring, inflating, or deflating. It’s battery-free for reliable use and provides ±2 PSI accuracy in the mid-range for most typical tires, with universal compatibility for 1/4 NPT compressor outputs.
Step 3: Position the Jack and Lift the Car Safely
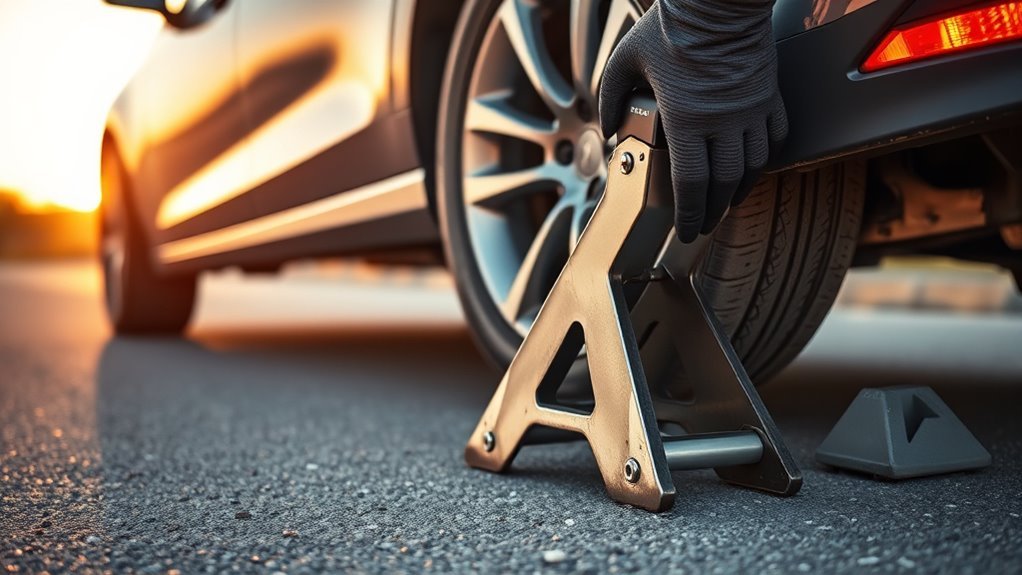
Place the jack under the vehicle’s designated metal lift point, which is usually shown in the owner’s manual and may be marked near the rocker panel or pinch weld. Never place the jack under plastic trim, floorboards, suspension arms, bumpers, or any area not approved by the manufacturer.
If the ground is soft but you have no better location, set a flat, sturdy board under the jack to spread the load. Recheck that the vehicle is level, the parking brake is set, and the opposite wheels are wedged before lifting.
[Products Worth Considering]

This spare tire tool kit is designed for the 2004 to 2018 Ford F-150 to help you loosen and tighten wheel lug nuts and manage the spare tire and provided jack functions from underneath the vehicle. It includes the lug nut wrench and extension pieces plus a convenient storage carrying case for organized transport. The jack itself is not included.

This ecocstm ratchet wrench is designed to make emergency and routine tire changes faster with a 360° rotating head and quick forward/reverse switching. The extended handle provides extra leverage to reduce effort and hand fatigue, while the adapter helps fit many scissor jacks on cars, SUVs, trucks, and vans. Built for reliable performance with durable construction, it’s a practical travel essential for on-the-road preparedness.

The Airmoto portable tire inflator quickly and accurately fills car, truck, SUV, motorcycle, and bicycle tires up to 120 PSI with auto shut-off when your target pressure is reached. Its large LCD, multi-unit pressure display, and digital gauge make it easy to dial in settings and verify readings, while the built-in LED flashlight helps in low light. The included polyurethane hard carrying case and storage mesh pocket keep the inflator and accessories protected and organized.
Jack Placement Points
Jack points vary by vehicle. Many passenger cars use reinforced pinch welds near each wheel. Some trucks and SUVs use frame points or axle-related lift areas. Your owner’s manual is the best source because lifting from the wrong place can bend metal, crack trim, or make the vehicle unstable.
- Locate the reinforced jack point closest to the flat tire.
- Center the jack saddle on solid metal.
- Raise the jack slowly until it contacts the lift point.
- Pause and confirm the jack is straight, stable, and not shifting.
- Continue lifting until the flat tire is about 6 inches off the ground.
Safe Lifting Technique
Pump or turn the jack steadily. Keep hands, feet, and body parts away from pinch points. Do not crawl under the vehicle while it is supported only by a tire-change jack. A roadside jack is meant to lift the vehicle long enough to swap a wheel, not to support under-vehicle work.
| Checkpoint | Action |
|---|---|
| Surface | Level, solid, and away from traffic |
| Wedges | Placed on the opposite tires |
| Jack point | Manufacturer-approved metal lift point |
| Height | High enough for the inflated spare to fit |
| Clearance | No body parts under the car |
Step 4: Remove the Flat and Mount the Spare Tire
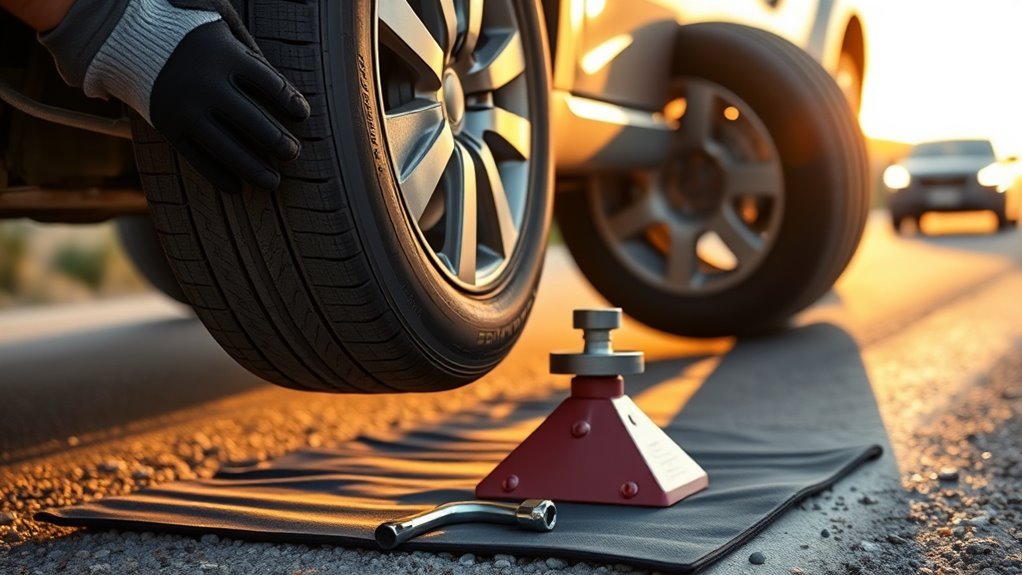
Finish removing the loosened lug nuts and place them in a pocket, cup holder, tray, or clean spot where they cannot roll away. Pull the flat tire straight toward you until it clears the studs. Tires can be heavier than they look, so use both hands and keep your feet clear.
Before installing the spare, inspect the wheel studs, mounting surface, and spare wheel. Remove obvious dirt or debris. Do not use the spare if it is visibly cracked, flat, badly damaged, or the wrong size for your vehicle.
- Align the spare tire with the wheel studs.
- Slide the spare fully onto the hub until it sits flush against the mounting surface.
- Hand-thread each lug nut clockwise to avoid cross-threading.
- Snug the lug nuts lightly by hand or with the wrench, but do not fully tighten while the wheel is in the air.
The goal is not just to get the spare on the car. The goal is to seat the wheel evenly, tighten it correctly, and drive only under the spare’s safe limits.
Step 5: Lower the Car and Tighten Lug Nuts in a Crisscross Pattern
Lower the jack slowly until the spare just touches the ground and the wheel can no longer spin. Do not put the full vehicle weight on the tire yet. Tighten the lug nuts in a crisscross pattern so the wheel seats evenly against the hub.
For a five-lug wheel, tighten one nut, then move to the nut roughly opposite it, continuing in a star pattern. For four-, six-, or eight-lug wheels, keep moving across the wheel rather than tightening around the circle. Once the lug nuts are snug, lower the vehicle completely and remove the jack.
Use a torque wrench if you have one, and tighten to the manufacturer’s specification from your owner’s manual. Many passenger vehicles fall somewhere around 80–100 ft-lbs, but that is not universal. Trucks, SUVs, aftermarket wheels, and some cars may require different torque.
After the vehicle is fully lowered, make one final pass in the same crisscross pattern. Reinstall the hubcap only if it fits the spare and does not interfere with the lug nuts or valve stem.
Warning: Do not lubricate lug nuts unless your owner’s manual specifically says to. Oil or anti-seize can change clamping force and may lead to incorrect torque.
Step 6: Check Spare Tire Pressure and Stow Your Tools
With the wheel secured, check the spare tire pressure before driving. Use a reliable tire gauge and follow the pressure listed in your owner’s manual, tire placard, or on the spare itself. Tire Rack’s temporary spare guidance notes that many compact spares are designed for 60 psi cold inflation and limited driving speeds, but your vehicle’s instructions are the final authority.
- Measure the spare’s pressure with a tire gauge.
- Inflate or adjust to the manufacturer’s specified pressure.
- Inspect the sidewall, tread, and valve stem for cuts, cracks, bulges, or dry rot.
- Stow the jack, wrench, hubcap, wheel-lock key, and flat tire securely.
- Check the area around the car so no tools are left behind.
If the tire pressure monitoring system light stays on after installing the spare, do not ignore it. Some temporary spares do not include a tire pressure sensor, and some systems need time or service to reset. Drive carefully and have the original tire repaired or replaced promptly.
Drive to a Repair Shop: Limits and Rules for Temporary Spares
After fitting a temporary spare, drive directly to a tire repair shop or safe service location. A compact spare is not a normal tire. It is usually narrower, has shallower tread, and can change braking, steering, traction, and stability.
Follow the speed and distance limits printed on the spare tire or listed in your owner’s manual. A common rule for temporary compact spares is to stay at or below 50 mph and keep the trip short, but the exact limit can vary by vehicle and spare design. The AAA tire-change guide also recommends getting professional help when the spare is missing or unusable, lug nuts are stuck, the location is unsafe, or the tire damage makes driving unsafe.
Temporary Spare Speed Limits
Because a temporary spare is designed for short-term emergency use, do not treat it like a regular tire. Avoid highway passing, sudden lane changes, hard braking, sharp turns, and heavy loads. If road conditions are wet, icy, snowy, or rough, slow down even more.
- Read the spare: Check the sidewall label for speed, distance, and pressure limits.
- Drive conservatively: Keep extra following distance and avoid sudden maneuvers.
- Fix the original tire promptly: Repair or replace the flat as soon as possible.
Distance and Usage Restrictions
One key rule: do not treat a temporary “donut” spare as a long-term tire. Drive only far enough to reach help. Temporary spares can stress handling systems, braking balance, and drivetrain components, especially on some all-wheel-drive vehicles.
If your vehicle has a full-size spare, it may allow more normal driving only if it matches the vehicle’s tire size, load rating, inflation pressure, and condition. Even then, check your owner’s manual and replace or repair the original tire quickly.
What If Your Car Has No Spare Tire?
If your vehicle has no spare tire, check whether it has run-flat tires or a tire sealant and inflator kit. Run-flat tires may allow limited driving after pressure loss, but only within the speed and distance limits from the tire and vehicle manufacturer. A sealant kit may help with small tread punctures, but it usually will not fix sidewall damage, large cuts, blowouts, or tires that have separated from the rim.
Before using a sealant kit, read the instructions fully. Some kits require connecting the sealant bottle and compressor in a specific order. If the tire is shredded, the wheel is bent, or the vehicle is sitting dangerously close to traffic, call roadside assistance instead.
Troubleshooting: Common Problems When Changing a Tire
If a problem crops up while changing a tire, stay methodical and address one issue at a time. Rushing increases the risk of injury, damaged hardware, or an unstable vehicle.
Stay methodical when changing a tire: inspect the lug nuts, jack position, wheel studs, spare pressure, and vehicle stability before moving to the next step.
- Stubborn lug nuts: Recheck that you are turning counterclockwise. Use steady pressure and make sure the wrench is fully seated. If the nut will not move, call for help rather than stripping the stud.
- Missing wheel-lock key: Search the glove box, center console, trunk storage tray, and spare tire compartment. Without the key, most roadside tire changes cannot continue.
- Jack slipping or leaning: Stop immediately, lower the vehicle carefully if possible, reposition on solid level ground, and use the correct jack point.
- Wheel stuck to the hub: With the vehicle safely lifted, try rocking the tire at the left and right edges. Do not crawl under the vehicle or kick aggressively.
- Spare will not fit: Confirm that the spare is for your vehicle and that the mounting surface is clean. Do not force an incorrect spare onto the studs.
- Spare is flat or cracked: Do not drive on it. Call roadside assistance or a tow service.
- Vehicle shakes after installation: Pull over safely and recheck lug nut tightness. If anything feels wrong, stop driving and get professional help.
After Changing the Tire: What to Check Next
Once you are moving again, keep your speed low and listen for vibration, thumping, scraping, or wobbling. Pull over safely if the car feels unstable. After a short distance, recheck that the lug nuts are still snug if it is safe to do so. A repair shop can properly torque the wheel, inspect the flat, and confirm whether it can be repaired.
Do not assume the flat tire is repairable. Punctures in the tread area may be repairable if the tire was not driven flat for too long, but sidewall damage, large punctures, exposed cords, or internal damage usually require replacement. Driving even a short distance on a fully flat tire can damage the tire and wheel beyond repair.
Frequently Asked Questions
What are the basic steps to change a tire?
Park on a flat, safe surface, turn on hazards, set the parking brake, wedge the opposite tires, loosen the lug nuts, jack the car at the correct lift point, remove the flat, mount the spare, hand-thread the nuts, lower the car, and tighten the nuts in a crisscross pattern.
How long does it take to change a tire?
Most drivers can change a tire in about 15–30 minutes if the spare, jack, and lug wrench are ready and the lug nuts are not stuck. It can take longer at night, in bad weather, or if the wheel is rusted to the hub.
How tight should lug nuts be after changing a tire?
They should be tightened to the torque specification in your owner’s manual. If you do not have a torque wrench during the roadside change, tighten them firmly in a crisscross pattern, then have a shop torque them correctly as soon as possible.
Can I drive normally on a spare tire?
Not if it is a compact temporary spare. Follow the speed, distance, and pressure limits printed on the spare or listed in your owner’s manual. Drive conservatively and go directly to a tire shop.
Should I call roadside assistance instead of changing the tire myself?
Yes, if you are close to traffic, on uneven or soft ground, missing tools, dealing with stuck lug nuts, unsure about jack placement, or physically unable to complete the change safely. Your safety matters more than the tire.
Conclusion
You followed each step: secured the car, loosened the lug nuts, positioned the jack correctly, swapped the flat for the spare, and tightened the lug nuts in a crisscross pattern. That gets you moving again, but it is not the end of the repair. Check the spare pressure, stow your tools, drive slowly, and go to a tire shop promptly so the flat tire can be repaired or replaced.
A temporary spare is a bridge to service, not a permanent fix. Keep your tire-change kit complete, check your spare regularly, and review your owner’s manual before the next roadside emergency.
Sources
- National Highway Traffic Safety Administration TireWise — tire pressure, cold inflation checks, placard guidance, and tire safety basics.
- Toyota Owner’s Manual: If You Have a Flat Tire — safe stopping, emergency flashers, parking brake, and flat-tire warnings.
- AAA Club Alliance: How to Change a Tire — roadside safety steps and when to use roadside assistance.
- Tire Rack: Temporary/Compact Spare Tire Use — compact spare pressure and speed-limit guidance.
- U.S. Tire Manufacturers Association Tire Care and Safety Guide — tire inflation, inspection, and maintenance guidance.

![[2026NEW] 5000A Jump Starter with Air Compressor (150PSI)](https://m.media-amazon.com/images/I/71oG4PFNsmL._AC_SL1500_.jpg)