
How to Fix a Flat Tire on a Toyota 4Runner on the Trail
You’ll locate your spare tire beneath the rear cargo floor and gather your jack assembly and lug wrench before finding firm, level ground. Engage your parking brake and chock the opposite wheels. Position your jack at the proper front notch or rear axle housing, then loosen the lug nuts in a star pattern and lift until the tire clears. Mount your spare, hand-tighten the nuts, lower slowly, and torque to 75-85 ft-lbs. The complete trail-tested procedure ahead guarantees you’re prepared when pavement’s far behind.
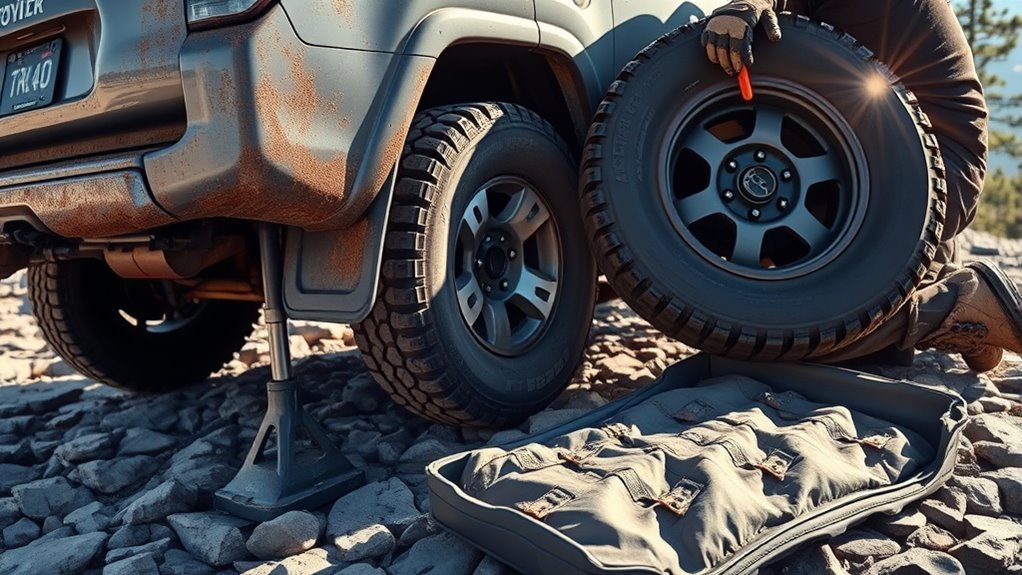
Locate Your Spare Tire and Tools in the 4Runner

Your first priority is finding the spare tire and tools before you’re stuck on uneven ground. Open your 4Runner’s rear cargo area and locate the access panel in the floor—this conceals your spare tire location beneath the vehicle. You’ll find the jack handle extension and lug wrench stowed nearby, typically in a side compartment or tool bag. Don’t wait for a flat to figure this out.
Assemble the jack handle extension now. Insert it into the lowering mechanism and rotate counterclockwise to drop the spare. Verify it lowers smoothly and retracts without binding. Check that your lug wrench fits your wheel nuts correctly—aftermarket wheels often require different sockets.
Test your tool accessibility in daylight, not when you’re kneeling in mud with rain incoming. Know exactly where each component lives. Freedom on the trail demands self-sufficiency, and that starts here. Memorize this process. Your next flat won’t schedule itself conveniently.
Find Level Ground and Prepare to Jack
Once positioned, lock your 4Runner into Park (or gear) and engage the parking brake fully. This prevents any shift in weight during the lift. For tire safety, wedge wheel chocks on the opposite side of the flat—never skip this step on inclines.
Lock your 4Runner into Park, engage the parking brake fully, and never skip wheel chocks on inclines—safety first.
Final preparation checklist:
- Verify ground firmness by stepping on it; soft earth demands reinforcement
- Position chocks firmly against tire treads, not just near them
- Double-check parking brake tension before removing any lug nuts
You’re now ready to lift without fear of the truck shifting beneath you.
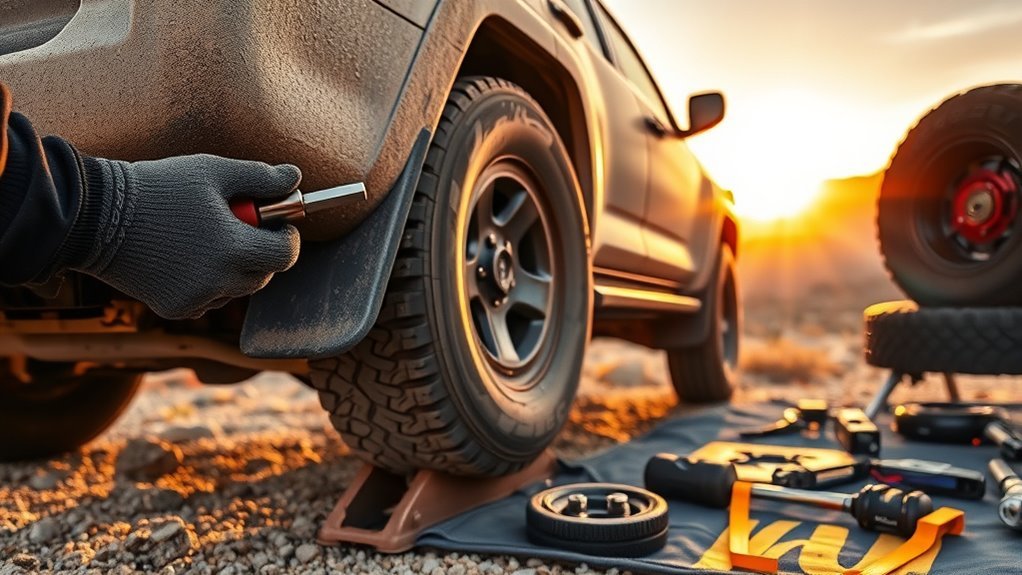
Jack Your 4Runner at the Correct Front or Rear Point
Position your jack at the notch behind the front wheels when lifting the front, ensuring the notch seats securely into the jack head groove. For rear lifting, align the jack directly under the axle housing and match the groove to the axle’s shape for stable contact. Confirm the ground is firm and level before applying any pressure, and place wheel chocks on the opposite side to prevent rolling.
Front Jacking Location
Three critical contact points exist beneath your 4Runner’s frame, but only one provides the engineered lift point for safe front-end jacking. You’ll locate the reinforced notch positioned directly behind each front wheel—this factory-stamped pocket accepts your jack’s saddle securely.
- Position your jack on firm, level ground to prevent any shifting during the lift.
- Align the jack head precisely within the notch, ensuring full contact with the frame rail.
- Double-check placement before pumping; improper positioning risks frame damage and catastrophic collapse.
Chock your opposite tires now—this isn’t optional. Jacking safety demands zero compromise. Once elevated, never crawl beneath your rig. Your tire stability depends on this disciplined approach. Master this technique, and you’ll reclaim your trail freedom without mechanical failure or personal injury.
Rear Axle Positioning
Your front-end’s secure—now let’s handle the rear. For rear axle safety, roll your jack beneath the axle housing. Locate the groove running along the axle tube—this is your jack alignment point. Seat the jack head squarely into that channel. The groove prevents lateral shift under load. Verify firm, level ground before pumping. Never compromise here. Position wheel chocks on the opposite front tire—your insurance against rollback. Once elevated, never crawl underneath. The trail demands respect, not bravado. Double-check engagement before releasing the jack handle. A misaligned jack spells disaster on uneven terrain. Your 4Runner’s rear now hangs secure, ready for tire change. Precision beats speed every time. Work smart, stay whole, and keep your adventure rolling.
Ground Stability Essentials
Solid ground isn’t negotiable—it’s your foundation. Your ground selection determines whether you walk away or get crushed. Find firm, level terrain—no mud, no loose gravel, no slope. Compress the soil with your boot; if it gives, keep hunting.
Master these stability techniques:
- Chock first—Position wheel chocks opposite your flat tire before touching the jack. Rolling kills.
- Front notch placement—Slide your jack into the factory notch behind the front wheel. It locks in.
- Rear axle alignment—Match the jack head groove to the axle housing curvature. No shortcuts.
Never crawl beneath your lifted 4Runner. Test stability by rocking the vehicle before committing your limbs. Your liberation depends on returning intact—precision now, freedom later.
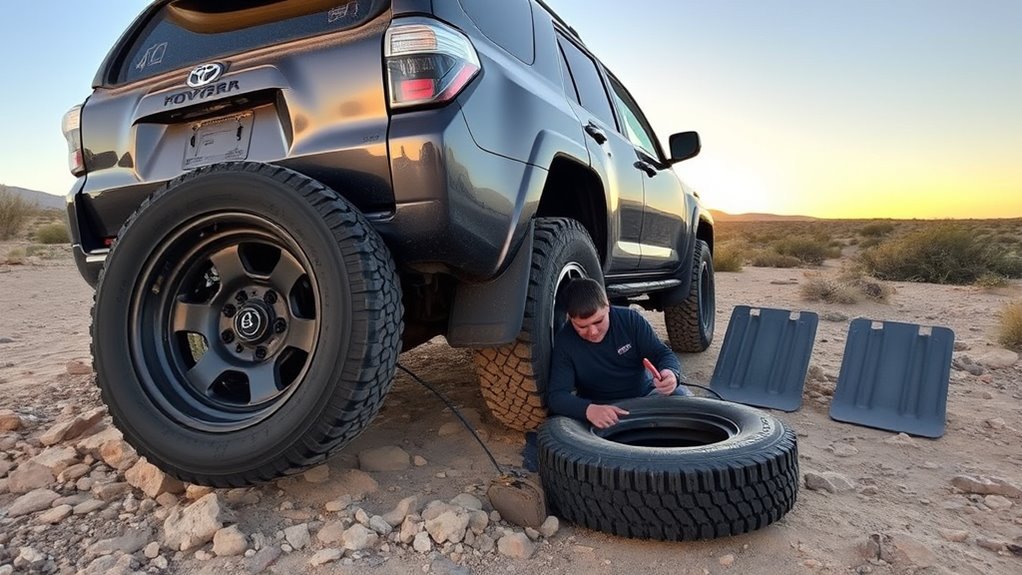
Loosen and Remove the Flat Tire Safely
Position the wheel chocks firmly against the tires on the side opposite your flat, then grab your telescoping L wrench and break each lug nut loose before you lift a thing—you’ll need that ground holding the wheel steady while you apply leverage. Work in a star pattern, turning each nut just enough to crack resistance without removing them entirely.
Once loose, position your off-road jack under the axle housing, aligning it with the jack’s groove for secure contact. Lift until the tire clears the ground. Now finish removing the lug nuts, storing them in a secure spot where they won’t scatter into trail debris. Grip the tire firmly and pull straight toward you—watch for sharp rocks or embedded objects that could cause injury.
| Safety Precautions | Tire Changing Tips |
|---|---|
| Verify jack placement on axle housing, not control arms | Use telescoping L wrench for maximum leverage |
| Store lug nuts in magnetic tray or pocket immediately | Loosen nuts in star pattern to prevent warping |
| Inspect wheel hub for damage before mounting spare | Keep body positioned clear of vehicle’s drop zone |
| Ground contact prevents wheel spin during initial loosening | Verify complete ground clearance before nut removal |
Mount the Spare Tire and Hand-Tighten the Lug Nuts
Position the spare tire onto the hub, aligning the holes precisely with the wheel studs. Hand-tighten the lug nuts clockwise until snug, following a star pattern to distribute pressure evenly. Once secured, lower the vehicle to the ground before applying final torque.
Align Spare Properly
Two critical steps remain before you’re road-ready: mounting the spare and securing it by hand. Proper spare alignment prevents dangerous wheel failure on the trail.
- Lift the spare tire and align it with the wheel hub, matching the lug bolt holes precisely for a centered, secure fit.
- Thread each lug nut by hand, twisting until snug—never force them with tools while the vehicle’s elevated.
- Tighten in a star pattern to distribute pressure evenly and eliminate wheel warping.
Verify each lug nut is finger-tight before lowering your 4Runner. This hand-tightening sequence protects your hub and guarantees safety when torqueing later. Precision here means freedom to roam without mechanical failure interrupting your journey. Double-check your work—trail reliability demands it.
Hand-Tighten First
With your spare aligned and seated against the hub, you’re ready to secure it by hand before lowering your 4Runner. Thread each lug nut finger-tight first—no power tools here. Hand tools give you the tactile feedback needed for proper engagement. Work in a star pattern, skipping adjacent nuts to distribute clamping force evenly across the wheel face. This prevents warping and guarantees true tire safety when you’re miles from pavement. Feel each nut seat firmly; stop when resistance builds naturally. Don’t force them—over-tightening now strips threads and creates false security. Keep the tire suspended until all lugs are snug. Only then lower your rig. Field-tested discipline here prevents catastrophic wheel separation on the trail. Your fingers are your first torque wrench—trust them.
Lower Then Torque
Lower your 4Runner slowly until the spare’s weight rests on the ground—don’t drop it fully yet. This prevents the wheel from spinning while you work.
Now finish the job properly:
- Torque in sequence — Tighten lug nuts following star-pattern torque specifications, not circular order, to distribute clamping force evenly across the wheel hub.
- Hit your numbers — Grab your torque wrench and dial in 75-85 ft-lbs, the factory spec for your 4Runner. Click-type wrenches eliminate guesswork when you’re miles from help.
- Verify twice — Lower completely, then re-torque. Check again within 100 miles; metal settles, nuts loosen. Neglect this and you’re stranded again.
Master these lug nut patterns now, and trail failures won’t dictate your destination. Freedom demands precision.
Lower Your 4Runner and Tighten the Lug Nuts Fully
Carefully reverse the jacking process until the spare tire just kisses the ground, letting the 4Runner’s weight settle onto the wheel without fully compressing the suspension. This partial load creates friction that locks the wheel against the hub, critical for your safety precautions during final tightening.
Grab your torque wrench. Working in a star pattern, tighten each lug nut to your 4Runner’s torque specifications—typically 80-100 ft-lbs. This cross-sequence distributes clamping force evenly, preventing rotor warp that’ll ruin your braking performance on the descent. Don’t guess; precision here separates a secure wheel from one that’ll loosen under vibration.
Once you’ve hit spec on all five nuts, lower the vehicle completely. Remove the jack, then re-check torque immediately. Freedom demands reliability—your rig’s only as capable as its connection to the trail. After 100 miles of driving, re-torque again. Heat cycles and load shifts settle hardware; verify your work before pushing deeper into the backcountry.
What If Your Spare Is Flat or Missing?
When you’re staring at a flat spare or an empty carrier, you’ve got to pivot fast—your mobility depends on it. First, inspect your damaged tire for repairable punctures using your repair essentials. A quality plug kit handles nail holes and small breaches if the damage sits in the tread center.
Three field-tested options remain:
- Inflate the spare – Deploy your portable compressor and check pressure; verify sidewall integrity before mounting.
- Plug the primary – Ream and fill the puncture with a vulcanized plug, maintaining spare safety protocols throughout.
- Signal for assistance – Activate your emergency beacon or hail passing rigs when self-recovery fails.
Your all-encompassing kit—plugs, compressor, reamer tools—transforms immobilization into temporary mobility. Never compromise on spare safety: inspect that donut or full-size before every trailhead departure. Liberation demands preparation. Pack redundantly, execute precisely, and you’ll roll out under your own power.
Plug a Damaged Tire Using a Trail Repair Kit
Grab your trail repair kit and assess the puncture immediately—plugs only work on tread-center damage under ¼ inch, so reject any sidewall wounds or gashes requiring full replacement. This judgment call protects your rig and keeps you mobile.
For viable punctures, extract your reamer and insertion tool. Work the reamer through the hole with deliberate strokes, cleaning debris and expanding the opening for a tight seal—this step demands patience for proper tire maintenance. Apply minimal lube to the plug; thread it onto your insertion tool. Drive the plug into the tire until two-thirds embeds, then yank the tool free with a swift motion. Trim excess plug material flush with the tread.
Reinflate and verify integrity—no bubbles, no hiss. This field-tested puncture prevention technique restores capability without surrendering your expedition. You’re back on the trail, self-sufficient and unbound.
Frequently Asked Questions
Can I Use a Hi-Lift Jack Instead?
Yes, you can use a Hi-Lift jack. Hi-Lift jack advantages include extreme lift range and versatility for recovery. Hi-Lift jack limitations demand stable ground, proper base, and careful handling—you’ll risk injury or vehicle damage if you’re sloppy.
What Torque Spec for 4runner Lug Nuts?
Torque your 4Runner’s lug nuts to 83 ft-lb with a calibrated torque wrench. Never guess—you’ll risk wheel separation on the trail. Recheck after 50 miles; liberation demands mechanical certainty, not hope.
Should I Chock Wheels Before Jacking?
Yes, chock wheels first. You guarantee wheel stability on uneven trail terrain, then position your jack placement on the reinforced frame rail behind the front wheel or ahead of the rear wheel.
How Long Can I Drive on a Spare?
You shouldn’t exceed 50 miles on a compact spare tire, and keep your driving distance under 50 mph. Check your 4Runner’s door placard—some full-size spares allow extended travel, but verify load ratings before pushing limits.
Is It Safe to Repair Sidewall Punctures?
You’d be gambling with catastrophic failure. Sidewall punctures are absolutely irreparable—no tire repair techniques can safely restore structural integrity. Sidewall risks include sudden blowouts at any speed. Replace the tire immediately; your liberation demands living to reach the trailhead.
Conclusion
You’ve now got the field-tested knowledge to handle a trail flat with confidence. Remember: 60% of off-road recoveries involve tire failures, so your preparation matters. Double-check your torque—83 ft-lb for stock 4Runner wheels—and inspect that spare’s pressure monthly. Safe trails start with self-sufficiency.
Related Articles

How to Check Tire Age Using the DOT Date Code
Observe your tire's DOT date code to determine its age and safety—discover essential tips to ensure your tires keep you safe on the road.
Read More
How to Use Tire Deflators for Quick Off-Road Airing Down
I discovered how tire deflators can transform your off-road experience, but there’s more to mastering their use than you might think.
Read More
Don’t Forget Your Spare: 4Runner Spare Tire Pressure Tips
Ignore your 4Runner's spare tire pressure, and your next flat could leave you stranded—discover the trim-specific secret that saves roadside headaches.
Read More