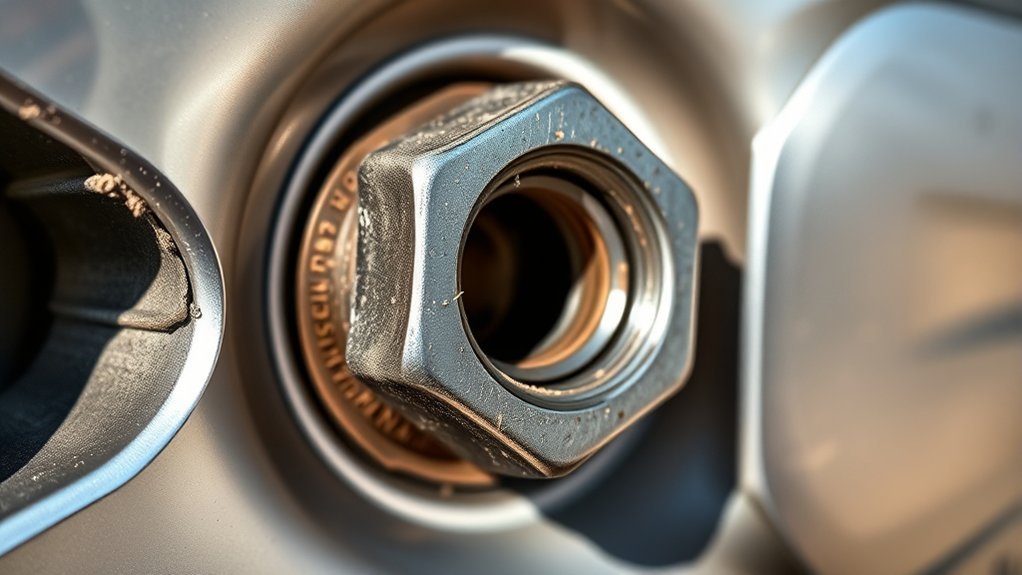
A rounded or stripped lug nut on your Toyota Tundra can turn a routine tire change into a wheel-damage risk. The safest approach is to secure the truck, identify whether the nut is rounded, swollen, seized, cross-threaded, or attached to a spinning stud, and then move from the least aggressive removal method to a dedicated extractor. Welding and drilling should be left to a qualified tire or repair shop.
Quick Answer
Secure the Tundra on level ground, confirm the correct six-point socket size, and try steady pressure with a breaker bar. If the hex is rounded, drive a dedicated spiral-flute extractor squarely onto the nut and loosen it by hand. Stop if the stud spins or the tool slips; welding and drilling should be handled by a professional.
Key Takeaways
- Identify whether the problem is a rounded hex, swollen cap, missing lock key, seized thread, cross-threading, or a spinning stud.
- Start with the correct six-point socket and controlled breaker-bar pressure before moving to a spiral-flute extractor.
- Do not rely on a generic pin-style universal socket for a high-torque wheel fastener.
- Keep wheel studs, nut threads, and seating surfaces clean and dry during final installation. Do not apply oil, grease, or anti-seize unless your exact Toyota service procedure specifically requires it.
- Replace the damaged nut, inspect the stud and wheel seat, and tighten every fastener to the specification for your exact Tundra model year and wheel type.
At a Glance
| Time Required | Usually 20 to 60 minutes if the stud remains intact; longer if professional drilling, welding, or stud replacement is required |
| Difficulty | Moderate with an extractor; advanced when the nut is cross-threaded, recessed, or attached to a spinning stud |
| Tools Needed | Wheel chocks, safety glasses, gloves, correct six-point socket, breaker bar, spiral-flute extractor set, hammer, replacement nut, and calibrated torque wrench |
| Cost | Low if you already own the tools; higher when a wheel stud, wheel, hub part, or professional extraction service is needed |
Warning: Park on a hard, level surface, shift into Park, set the parking brake, and chock the wheel diagonally opposite the damaged fastener. Never put any part of your body beneath a Tundra supported only by a jack. Wear eye protection whenever you hammer an extractor or work near damaged metal.
Identify the Lug Nut Problem Before Choosing a Tool
“Stripped lug nut” can describe several different failures. Look closely at the fastener before applying more force because the correct repair depends on what has failed.
- Rounded outer hex: The corners are worn away, so the normal socket spins. A dedicated spiral-flute extractor is usually the next tool to try.
- Swollen or distorted cap: A decorative outer shell may no longer accept the original socket size. Test nearby metric and SAE six-point sockets carefully rather than forcing the original socket.
- Missing wheel-lock key: Search the glove box, center console, under-seat tool storage, spare-tire kit, and previous service paperwork. A Toyota dealer or tire shop may be able to identify or remove the lock without damaging the wheel.
- Seized nut: Corrosion or excessive installation torque prevents movement even though the outer hex still has a usable shape.
- Cross-threaded nut: The nut may turn partway and then bind, or it may have been difficult to install from the beginning. Continuing to force it can destroy the stud.
- Spinning wheel stud: The nut and stud rotate together. Stop using the breaker bar because the stud’s mounting splines may have failed behind the hub.
Also inspect the wheel opening around the nut. Deeply recessed alloy wheels leave little room for a hammer or extractor, increasing the chance of scratching or cracking the wheel.
Why Toyota Tundra Lug Nuts Strip or Seize
Lug nuts commonly become damaged when a loose-fitting socket slips across the corners, a 12-point socket is used under heavy load, or an impact wrench repeatedly hammers the nut beyond the required torque. Rust, road salt, dirt, and damaged decorative caps can also prevent the correct socket from seating fully.
Cross-threading often begins when a lug nut is started with a power tool instead of by hand. If the nut enters the stud at an angle, the tool can force the mismatched threads together and damage both parts.
Excessive final torque is another common cause. Wheel fasteners must create the correct clamping force without stretching the stud or distorting the wheel seat. The required setting can differ by Tundra model year, wheel construction, spare-wheel configuration, and installed hardware.
Note: Do not copy a torque number from a different Tundra generation or wheel type. Use the owner’s manual or Toyota service information for your exact truck. Vehicle-manufacturer specifications take priority over general fastener charts.
Tools for Controlled Lug Nut Removal
Gather the tools before starting so you do not leave the truck partly disassembled or supported longer than necessary. The best tool sequence begins with the least aggressive option.
[Products Worth Considering]

The Trivd Frol 1/2" air impact wrench delivers high performance torque up to 1500 ft-lbs with a twin hammer impact mechanism for strong, balanced blows. It features an ergonomic grip, compact lightweight design, and quick-stop control with 3 forward speeds up to 8000 RPM plus a reverse speed. Built for demanding automotive repair and tire shop work, the rear exhaust helps keep debris away from the surface.

This 1/2-inch drive breaker bar delivers powerful leverage for loosening and tightening stubborn lug nuts and automotive fasteners. The 180-degree flex head helps you reach tight spaces at the angle you need, making tire and brake jobs easier. A spring-loaded ball detent design holds 1/2-inch sockets securely while the chrome-moly head provides durable strength for everyday use.

These M14x1.5 closed-end chrome lug nuts are a one-piece replacement designed for secure fitment on compatible GM, Ford, and select Chrysler/Dodge models. Featuring a 60-degree conical seat and anti-rust chrome plating, they help resist corrosion and maintain a bright look for everyday driving. Built for long-term durability, they include OEM-style part references and are backed by 12 months of support.
Essential Removal Tools
- Correct six-point socket: A six-point design contacts more of the nut’s flat surfaces than a 12-point socket. Use the deepest socket required to seat fully without contacting the wheel.
- Breaker bar: A long breaker bar gives you controlled leverage and lets you feel whether the nut, extractor, or stud is moving.
- Spiral-flute lug-nut extractor: Reverse spiral teeth bite into the damaged outer surface as you turn the fastener counterclockwise.
- Hammer: Use it to seat an extractor squarely. Wear safety glasses and avoid striking the wheel, tire, valve stem, or brake components.
- Torque wrench: Use a calibrated torque wrench for final installation, not for breaking the damaged nut loose.
- Replacement hardware: Have the correct nut ready. A damaged stud must also be replaced before the truck returns to normal service.
Why Universal Pin Sockets Are Not the First Choice
A pin-style universal socket may conform to light-duty fasteners, but a Tundra wheel nut can require substantial removal torque. The pins may not reach or grip the nut evenly, especially when the nut is recessed in an alloy wheel.
Use a socket made for wheel-fastener extraction instead. A dedicated extractor has hardened internal flutes that are designed to bite into a rounded nut rather than simply forming around its shape.
A high-torque impact wrench should not be your automatic first step. Impact force can knock an extractor off-center, damage a wheel-lock key, break the stud, or drive the tool into the wheel. Begin with a breaker bar and steady pressure.
Step-by-Step: Remove the Stripped Lug Nut Safely
-
Secure the truck. Park on a hard, level surface. Shift into Park, set the parking brake, switch off the engine, and chock the wheel diagonally opposite the affected wheel. Keep the tire on the ground while first attempting to loosen the nut so the wheel cannot rotate.
-
Remove anything blocking access. Carefully remove the center cap or wheel cover when required. Do not pry against a painted or machined wheel surface with an unprotected metal tool.
-
Inspect and clean the outside of the nut. Remove loose dirt and surface rust with a small brush. Check whether a decorative cap is swollen, split, or spinning around the inner nut.
-
Test the correct six-point socket. Push it fully onto the nut by hand. If it rocks, slips, or contacts only the damaged corners, stop before rounding the nut further. A slightly different metric or SAE six-point socket may fit a distorted cap, but never use a socket that sits at an angle.
-
Try controlled breaker-bar pressure. Keep the socket square to the wheel and pull counterclockwise with smooth pressure. Do not bounce on the bar, add a dangerously long pipe, or strike the breaker bar.
-
Move to a spiral-flute extractor. Select the extractor that the tool manufacturer recommends for the nut’s current outside diameter. Place it straight over the nut and tap it on until the internal flutes are fully engaged.
-
Turn the extractor by hand. Attach the breaker bar, keep it aligned with the stud, and apply steady counterclockwise force. Stop if the extractor begins to tilt, slips repeatedly, cracks, or moves toward the wheel surface.
-
Watch the stud. If the stud turns with the nut, stop. Continued force may enlarge the stud hole, damage the hub, or make professional removal more difficult.
-
Remove the remaining nuts correctly. Once the damaged nut is loose, follow the wheel-removal procedure in your exact Toyota owner’s manual. Use the specified jack point and a properly rated jack stand if the wheel must be raised.
-
Inspect before reassembly. Examine the removed nut, stud threads, wheel-nut seat, wheel hole, and wheel-to-hub mounting surface. Replace any nut or stud with stretched, flattened, cracked, cross-threaded, or missing threads.
Pro Tip: Place low-tack painter’s tape around a recessed lug opening before seating the extractor. The tape will not protect the wheel from a major tool slip, but it can reduce light cosmetic marks while helping you see whether the extractor is staying centered.
Alternative Techniques: Tapered Sockets, Lock Keys, and Welding
A tapered or spiral-flute extractor is the preferred alternative when a standard six-point socket cannot grip the damaged nut. Some mechanics also sacrifice a slightly smaller heavy-duty socket by tapping it onto the nut, but this method can jam the socket permanently and may damage a narrow wheel recess. Use a purpose-built extractor when possible.
If the problem is a locking lug nut, first look for its identification card or key code. The lock manufacturer, Toyota dealer, or a tire shop may have a matching key or master removal set. Toyota’s wheel-lock guidance instructs users to seat the key correctly and warns against using an impact wrench on the key.
Welding a larger nut onto the damaged fastener can create a new gripping surface, but it is not a routine home-garage method. Welding produces intense heat, sparks, molten metal, fumes, and electrical current close to the tire, wheel finish, brake system, TPMS components, wiring, and other combustible materials.
Warning: Treat welding as professional-only hot work. A qualified technician must control fire hazards, protect nearby components, use suitable PPE, provide ventilation, and choose a safe electrical grounding path. Do not attempt to weld beside an inflated tire or unprotected brake and suspension parts.
[Products Worth Considering]

This car D-wheel lock nut key provides an anti-theft solution for D-shaped wheel lock bolts, helping keep your wheels secure. It features a flower-shaped internal pattern that resists micro-adjustment theft while allowing removal and mounting of compatible locking nuts. Made for reliable performance under high torque, it’s easy to use with standard socket wrench turning for quick tire maintenance and emergency repairs.

The 22800 wheel stud installer makes replacing wheel studs quick and secure, saving time and effort during tire service. It uses a ratchet or impact wrench to pull new studs firmly into place, helping when existing studs are too long. Compatible with most automotive wheels and light-duty truck wheel studs, it’s designed for easy, tool-assisted installation.

Upgrade your wheels with MIKKUPPA M12x1.5 mag seat lug nuts built for secure, corrosion-resistant performance. These closed-end chrome lug nuts are a direct replacement for select Toyota models, including Camry, Corolla, RAV4, Sienna, Avalon, Highlander, Matrix, Venza, and Prius. Triple-chromium plating and cold-forged, heat-treated steel help deliver strength for daily driving and replacement needs.
When You Should Call a Professional
Stop the DIY attempt and contact a Toyota dealer, tire shop, or qualified mobile tire technician when any of the following applies:
- The stud spins with the nut.
- The nut is cross-threaded and will not move in either direction.
- The extractor has cracked, slipped repeatedly, or become stuck.
- The wheel has a deep, narrow recess that prevents square tool alignment.
- The wheel seat is cracked, gouged, distorted, or visibly enlarged.
- More than one fastener on the same wheel is damaged.
- A locking nut has a free-spinning collar or hardened outer shell.
- The repair requires welding, grinding, drilling, or nut splitting.
- You cannot support the truck safely on a suitable surface.
A professional can protect the wheel with guides and shields, use commercial extraction equipment, and replace a damaged stud after the wheel comes off. Paying for controlled extraction is usually less costly than replacing a damaged alloy wheel, hub, or bearing assembly.
Last Resort: Drilling and Replacing the Lug Nut or Stud
Drilling is a destructive last resort. The goal is normally to remove enough material from the nut or stud for the wheel to come off without enlarging the wheel’s lug hole. Accurate centering is critical because a wandering drill bit can permanently damage the wheel.
A left-handed bit may occasionally catch and rotate a fastener counterclockwise, but it is not guaranteed to remove a seized or cross-threaded lug nut. The required drill size, guide, cutting speed, and protection method depend on the nut design, stud material, and wheel access.
| Condition | Recommended Response |
|---|---|
| Extractor still grips squarely | Continue with controlled breaker-bar pressure |
| Extractor slips or contacts the wheel | Stop and arrange professional removal |
| Stud spins with the nut | Do not continue applying torque; the rear stud connection requires repair |
| Nut requires drilling, grinding, splitting, or welding | Use a qualified shop with wheel-protection and hot-work controls |
| Stud or wheel seat is damaged after removal | Replace the damaged hardware and inspect the wheel before driving |
After destructive extraction, the technician should remove the wheel, replace the affected stud and nut as needed, inspect the hub and wheel hole, clean the mating surfaces, and verify that the replacement nut has the correct thread and seat design.
[Products Worth Considering]

Upgrade your wheels with MIKKUPPA closed-end lug nuts designed for reliable fit and corrosion resistance. The one-piece, cold-forged and heat-treated steel construction helps resist rust and stripping, while the integrated finish delivers a durable black appearance. Built to OEM standards with a conical 60-degree seat, these nuts provide a secure solution for compatible Ford, Honda, Jeep, and Chevrolet models.

This spare tire tool kit is designed for the 2004 to 2018 Ford F-150 to help you loosen and tighten wheel lug nuts and manage the spare tire and provided jack functions from underneath the vehicle. It includes the lug nut wrench and extension pieces plus a convenient storage carrying case for organized transport. The jack itself is not included.

Upgrade your Toyota tire setup with these corrosion-resistant, leak-proof valve stem caps designed to help protect the valve core from water, snow, and road grime. The caps feature a snug rubber seal and durable copper alloy construction to resist rust and oxidation while maintaining stable tire pressure. Ideal for replacing worn original caps and keeping your wheels looking clean and stylish.
Preventing Future Stripped or Seized Lug Nuts
Use the Correct Installation Process
- Clean dirt and loose corrosion from the stud, nut threads, wheel seat, and hub mounting face.
- Keep the threads and seating surfaces dry. Do not apply oil, grease, or anti-seize as a general wheel-installation practice.
- Confirm that the replacement nut has the correct thread, length, diameter, and seat shape for the installed wheel.
- Start every lug nut by hand for several complete turns. If it does not turn freely, remove it and inspect the threads.
- Snug the nuts gradually in the crossing or star sequence specified by Toyota.
- Lower the wheel enough to prevent rotation without placing the truck’s full weight on a loosely installed wheel.
- Use a calibrated torque wrench for final tightening to the exact model-year and wheel specification.
- Follow your owner’s manual’s recheck interval. Some Tundra manuals direct owners to retighten wheel nuts after a specified driving distance following wheel replacement.
Use Quality Tools and Inspect the Hardware
Use a six-point socket that fits fully over the nut without rocking. Replace sockets that are cracked, spread, or worn internally. Avoid using chrome hand sockets with an impact wrench because they may not be designed for impact loads.
Inspect capped lug nuts for swelling, separated shells, heavy corrosion, or a socket fit that has become unusually tight. Replace damaged hardware before it leaves you unable to remove the wheel during a roadside emergency.
Keep the wheel-lock key in a labeled pouch in the glove box, center console, or factory tool kit. Record the key code separately so you can order a replacement if the key is lost.
The correct torque value is only reliable when the nut, stud, seating surface, wheel, and tightening procedure match the vehicle manufacturer’s specification.
Practical Best Practices for Lug Nut Removal
- Stop early instead of escalating blindly: A partly rounded nut is easier and cheaper to remove than one that has been hammered, drilled off-center, and welded repeatedly.
- Keep the extractor straight: Side loading reduces grip and moves the tool toward the wheel surface.
- Use the shortest practical extension: Long extensions can twist and make it harder to keep the socket aligned.
- Do not use the torque wrench as a breaker bar: Excessive reverse force can affect its calibration.
- Replace the damaged fastener: Do not reinstall a nut simply because an extractor managed to remove it.
- Inspect neighboring fasteners: If one nut was over-tightened, rounded, or cross-threaded during a previous service, the others may have been handled the same way.
- Keep roadside tools ready: Store the correct socket, breaker bar or factory wrench, wheel-lock key, flashlight, gloves, and wheel chocks where you can reach them.
Frequently Asked Questions
Is it safe to drive a Toyota Tundra with a stripped or missing lug nut?
Do not resume normal driving with a loose, missing, cross-threaded, or improperly torqued wheel fastener. The remaining fasteners may not provide the clamping force intended for that wheel. Replace the damaged hardware, inspect the stud and wheel seat, and torque every nut correctly before returning the truck to service.
Can I use an impact wrench on a stripped lug nut?
A breaker bar gives you better control and should normally be tried first. Impact force may make an extractor slip, break the stud, or damage a wheel-lock key. Never use an impact wrench with a Toyota wheel-lock key, and only use an impact-rated extractor when its manufacturer permits that method.
Should I use penetrating oil or anti-seize on a Tundra lug nut?
Do not apply oil, grease, or anti-seize when reinstalling the wheel unless the exact Toyota service procedure for your configuration specifically requires it. Lubrication changes friction and can produce the wrong clamping force at the stated torque. Penetrating oil also provides little benefit when a closed-end nut prevents it from reaching the threads.
What should I do if the wheel stud spins with the nut?
Stop applying torque. The stud’s rear splines or mounting area may no longer be holding it in the hub. A shop may need to secure or cut the stud from behind, remove the wheel, and replace the damaged hardware.
What is the correct Toyota Tundra lug-nut torque?
The correct value depends on the model year, wheel type, installed hardware, and sometimes the spare-wheel configuration. Check the wheel-changing or maintenance section of the owner’s manual for your exact Tundra. Do not assume a torque value found for another generation or wheel is correct for yours.
Conclusion
A stripped Toyota Tundra lug nut is easiest to handle before repeated tool slips turn it into a larger repair. Secure the truck, identify the type of damage, try the correct six-point socket, and then use a dedicated spiral-flute extractor with steady breaker-bar pressure.
Stop when the stud spins, the extractor will not remain square, or the repair begins to threaten the wheel. Welding, drilling, grinding, and nut splitting require professional equipment and safety controls. After removal, replace damaged hardware, keep the threads and seats clean and dry, and tighten every nut to the specification for your exact Tundra and wheel.
Sources
- Toyota 2022 Tundra Hybrid Owner’s Manual: If You Have a Flat Tire — supports safe vehicle setup, wheel-lock handling, torque-wrench use, wheel-fastener inspection, tightening order, and follow-up tightening.
- Toyota Manuals and Warranties — provides the correct owner’s manual for a specific Toyota Tundra model year and configuration.
- Toyota Wheel Installation Guidance — supports Toyota’s warning against applying oil or grease to wheel bolts and wheel nuts.
- SAE J1701: Torque-Tension Tightening for Fasteners — explains how friction, materials, surfaces, temperature, and tightening tools affect the torque-to-tension relationship.
- SAE J2316: Aftermarket Wheel Fastening Systems — supports using vehicle-manufacturer requirements for the complete wheel-fastening system.
- OSHA Precautions for Hot Work — supports the welding, spark, molten-metal, fire-control, and work-area safety warnings.