
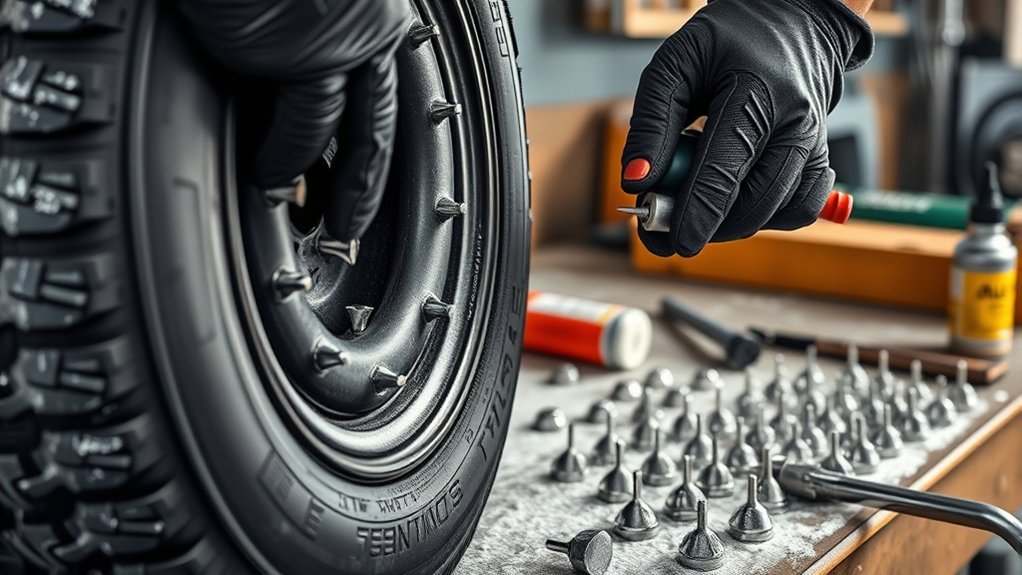
To put studs in a tire safely, start with the right tire. Standard road-going tire studs are made for studdable winter tires with factory-molded stud holes. Do not drill random holes into a regular tire. Check local studded tire laws, measure the molded hole depth, match the stud size to the tire or stud maker’s chart, and use a dedicated tire stud gun or approved installation tool. After installation, every stud should sit even and flush at the base, with only the carbide pin standing proud of the tread.
Quick Answer
Use only stud-compatible tires with molded stud holes. Measure the hole depth, choose the correct stud from the maker’s chart, mount the tire securely, lubricate the holes lightly, and press each stud in with a tire stud gun until the base sits flush. Then drive gently for the first 50–100 miles.
Key Takeaways
- Only stud tires that are marked or sold as stud-compatible.
- Use the tire or stud manufacturer’s size chart instead of guessing by tread depth alone.
- For normal passenger-vehicle studs, use a tire stud gun or purpose-built studding tool, not a drill.
- Each stud base should sit flush with the tread surface, with only the hard pin protruding.
- Check local laws before driving on studded tires, then break them in gently for 50–100 miles.
At a Glance
| Time Required | About 30–90 minutes per tire, depending on tire size, number of studs, and tool type. |
| Difficulty | Moderate. A tire shop is the safer choice if you do not have a proper stud gun or tire stand. |
| Tools Needed | Tread depth gauge, stud-size chart, correct tire studs, tire stud gun or approved stud tool, tire stand, water or approved lubricant, gloves, eye protection, and tire pressure gauge. |
| Cost | Usually low for the studs themselves, but higher if you need to buy or rent a stud gun. Professional installation is often worth the cost for road tires. |
Warning: Studded tire laws vary by state, province, country, road type, and season. Check your local transportation or motor vehicle authority before installing or driving on studded tires. Also, never drill or stud a tire that is not designed for studs. Tire damage can cause loss of pressure, poor handling, or tire failure.
Choose Stud Size and Installation Tools
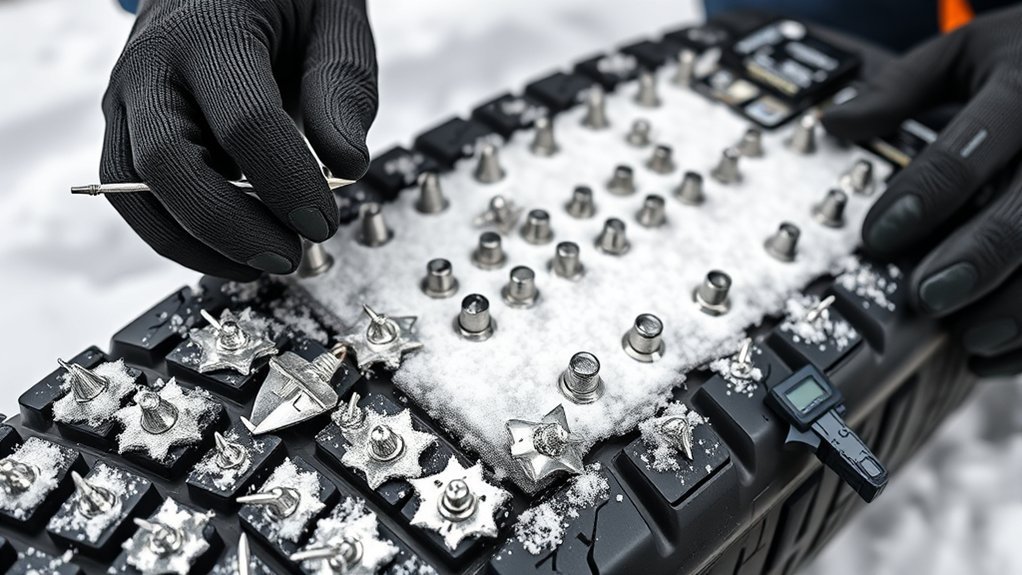
Before you install anything, confirm that the tire is studdable. A studdable road tire has molded holes in the tread blocks. Those holes are sized for specific studs. A regular winter tire without molded stud holes should not be drilled for highway use.
Measure the molded stud hole depth and check the tire maker’s or stud maker’s chart. Do not choose a stud by tread depth alone unless the chart tells you to do that. The right stud should anchor securely in the hole, leave the body seated in the tread, and expose only the hard pin above the rubber.
For standard passenger-car and light-truck tire studs, use a tire stud gun or purpose-built studding tool. This tool spreads the molded hole, places the stud squarely, and releases it at the correct depth. Screw-in studs that use a drill adapter are a different product, usually meant for off-road, ATV, motorcycle, or specialty ice-use tires. Follow that kit’s instructions if you are using that style.
Note: If the tire has already been driven on, inspect the molded holes closely. Dirt, stones, wear, or distorted holes can keep studs from seating correctly. When in doubt, have a tire shop inspect it.
[Products Worth Considering]

The UYYE TPMS relearn tool helps activate and relearn tire pressure monitor sensors quickly, typically in minutes. It supports TPMS learn mode resetting using a simple three-step process: enter learn mode, position the tool near the valve stem, and press the learn button. Designed for specific GM models, it streamlines sensor programming and reduces trips to dealers or tire shops.

Measure tire tread depth quickly and accurately with this LUMITECO dial gauge that reads in 1/32" increments up to 14/32". The color-coded green/yellow/red zones make it easy to judge tire wear and know when replacement is needed. A rugged, compact design with a protective pouch helps keep the gauge ready for use on cars, trucks, motorcycles, and more.

The 22800 wheel stud installer makes replacing wheel studs quick and secure, saving time and effort during tire service. It uses a ratchet or impact wrench to pull new studs firmly into place, helping when existing studs are too long. Compatible with most automotive wheels and light-duty truck wheel studs, it’s designed for easy, tool-assisted installation.
Prepare the Tire for Stud Installation
Good preparation prevents loose, crooked, and overdriven studs. Work on a clean tire in a stable area with enough light to inspect every tread block. Wear eye protection and gloves, especially if you are using a pneumatic or lever-style studding tool.
Check Tire Tread Depth
Measure the tire tread depth and molded hole depth at several points around the tire. Uneven wear can change how well the studs seat. If the tire is worn close to the wear bars, do not stud it. The National Highway Traffic Safety Administration says tires are not safe and should be replaced when tread is worn to 2/32 inch. For winter traction, you usually want far more usable tread than the legal minimum.
Also inspect the tire age, sidewalls, beads, and tread blocks. Do not stud a cracked, bulging, punctured, or repaired tire unless a qualified tire technician says it is safe.
Mount Tire Securely
Secure the tire on a tire stand, mandrel, or stable work surface so it cannot roll or twist while you press the tool into the tread. A rigid setup keeps the stud straight and helps the collar seat evenly.
- Set the tire at a comfortable working height.
- Keep the tread face stable and easy to see.
- Confirm that the molded holes are open and clean.
- Lightly wet the stud holes with water or an approved tire-stud lubricant.
Clean and Lubricate the Stud Holes
Use water or the lubricant recommended by the stud tool or tire maker. Do not use petroleum grease, oil, or solvent unless the manufacturer specifically approves it. The goal is only to reduce friction during insertion, not to leave a slippery residue that weakens retention.
Mark Stud Placement
Most studdable tires already have a planned molded-hole pattern. Follow that pattern instead of inventing your own. If your tire gives you optional holes, follow the tire maker’s layout for your vehicle type and winter conditions.
Keep the pattern balanced from side to side and around the tire. Do not cluster studs in one area. Uneven placement can create vibration, uneven wear, and unpredictable grip.
Plan a Better Stud Placement Pattern
A good stud pattern improves grip without making the tire harsh or unbalanced. On a road tire, the safest pattern is the one molded into the tread by the tire manufacturer. These holes are normally staggered across the tread blocks to spread load and reduce straight-line noise.
Follow the molded stud-hole pattern. It is designed to balance ice grip, braking, cornering, noise, and stud retention.
- Use every required molded hole unless the tire maker says some are optional.
- Keep left and right tires matched so the vehicle handles evenly.
- Use the same stud type and size across the full set.
- Replace any damaged or contaminated studs before installation.
Pro Tip: Lay out the studs for one tire before you start. This helps you confirm the count, size, and pattern before the tool is loaded.
Install Each Tire Stud Correctly
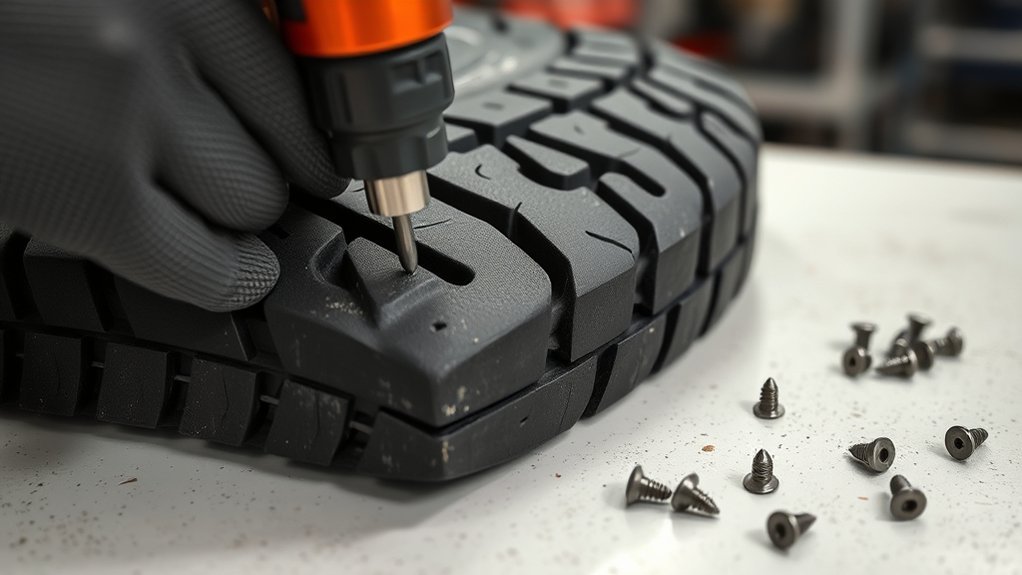
Load one stud into the tire stud gun or approved stud tool with the pin facing the correct direction. Place the tool squarely over the molded hole, press straight down, and let the tool spread the rubber long enough to seat the stud. Release the tool only after the stud base is fully inside the hole.
Use steady pressure, not forceful jabbing. If the tool is angled, the stud can lean, tear the rubber, or sit too high. If a stud does not seat cleanly, remove it if the tool allows, inspect the hole, and try again with a fresh stud if needed.
For screw-in studs made for off-road or specialty tire use, follow the kit instructions exactly. Set the drill to low speed, keep the stud square to the tread block, and stop as soon as the shoulder reaches the recommended depth. Do not use screw-in studs on highway tires unless the tire, stud maker, and local law allow it.
[Products Worth Considering]

The SAFELIFE dial tire tread depth gauge measures tread depth in 1/32 inch increments with clear, easy-to-read 2-inch dial face. Color zones using a traffic light system help you quickly judge whether tread is low, marginal, or ample for safer driving. Built with a durable zinc cast body and a metal detect probe for precise, comfortable use across cars, motorcycles, trucks, and buses.

Monitor tire tread wear with a smart, color-coded depth gauge that shows clear condition ranges at a glance. The bar is range marked for fast, easy readings, helping you maintain safer traction and performance. Each gauge is portable with a pocket clip, and the set includes 20 units for daily use and sharing.

Accurately measure tire tread depth with a calibrated gauge marked from 0 to 1 inch in 1/32 inch increments. The color-coded bar helps you quickly identify tread condition ranges, supporting safe driving for trucks, motorcycles, automobiles, and passenger vehicles.
Check That Each Stud Sits Flush
After each row, stop and inspect the studs from several angles. The stud body or jacket should sit flat in the tread hole. Only the hard pin should protrude above the rubber. A high, crooked, or loose stud can pull out and may damage the tire or road surface.
- Look across the tread for raised collars or tilted studs.
- Compare nearby studs for even height.
- Press lightly with a gloved finger to check for movement.
- Correct any uneven stud before moving to the next section.
If a stud sits high, do not keep driving it deeper with random force. Reposition the tool, apply controlled pressure, and reseat it only if the rubber hole is still intact. Replace the stud if the base is damaged.
Fix Loose Studs and Avoid Common Mistakes
A loose stud usually means the stud is the wrong size, the hole is worn or dirty, the tool was angled, or the stud was not seated fully. Fix it before the tire goes on the vehicle.
- Loose stud: Remove and replace it if possible. If the molded hole is damaged, ask a tire shop whether the tire is still safe.
- Stud sits too high: Reseat it with the correct tool. Do not hammer it.
- Stud sits crooked: Remove it if the tool allows, inspect the hole, and install a new stud squarely.
- Studs keep falling out: Stop. The studs may be the wrong size or the tire may not be suitable.
- Vibration after installation: Have the tire and wheel assembly checked for balance, pressure, and visible installation errors.
After the tire is mounted on the vehicle, set cold tire pressure to the value on the vehicle placard or owner’s manual, not the maximum pressure printed on the tire sidewall. Recheck pressure after the first drive.
[Products Worth Considering]

The Trivd Frol 1/2" air impact wrench delivers high performance torque up to 1500 ft-lbs with a twin hammer impact mechanism for strong, balanced blows. It features an ergonomic grip, compact lightweight design, and quick-stop control with 3 forward speeds up to 8000 RPM plus a reverse speed. Built for demanding automotive repair and tire shop work, the rear exhaust helps keep debris away from the surface.

Milton S-921 pencil tire pressure gauge helps you maintain optimal tire pressure for passenger cars with accurate readings in PSI and kPa. It features a built-in deflator valve for convenient pressure adjustments, plus a single chuck head and nylon indicator bar for easy use on the go. Built from durable plated brass and designed for reliable performance, it’s a practical road trip and cold-weather maintenance tool.

This TPMS relearn tool helps you quickly activate, match, and reset GM tire pressure sensors to keep the vehicle monitoring system working properly. It clears tire pressure alarms and dashboard warning lights after sensor replacement or tire rotation, and supports learning for common 315/433 MHz TPMS sensors. Designed for simple one-button operation, it can help you avoid unnecessary trips to repair shops.
Break In Your Studded Tire Safely

Newly installed studs need a gentle break-in period so the rubber can settle around the stud bodies. Follow the tire or stud maker’s instructions first. If no specific break-in is given, use a conservative 50–100 mile break-in.
First 100 Miles
During the first 50–100 miles, drive at moderate speeds and avoid hard launches, panic braking, and sharp steering. This helps the studs seat evenly and reduces early pullout.
- Accelerate smoothly.
- Brake early and gently.
- Avoid high-speed dry-pavement driving.
- Inspect the studs after the first few drives.
- Recheck cold tire pressure after the break-in period.
Gentle Cornering
Take corners gently while the studs settle. Sharp cornering can pull sideways on new studs before the rubber fully grips them. Build speed and cornering load gradually after the break-in miles are complete.
Slow Brake Practice
Use smooth brake pressure during the first drives. Abrupt stops can stress new studs and roughen the seating area. Once the break-in is complete, inspect every tire again. If any stud is high, crooked, missing, or loose, fix it before relying on the tire in icy conditions.
When to Let a Tire Shop Do It
Use a tire shop if you do not have the correct stud gun, if the tire has been driven on, if the molded holes are dirty or damaged, or if you are unsure which stud size fits. Shops that handle winter tires can usually install studs quickly and check the tire for defects at the same time.
A shop is also the better choice for modern passenger vehicles if you need mounting, balancing, TPMS care, rotation, or a full set installed evenly. Studding is simple when the setup is right, but mistakes can affect tire safety.
Frequently Asked Questions
How do you insert studs in tires?
For standard road-going studdable tires, load the correct stud into a tire stud gun, place the tool squarely over the molded stud hole, press straight down, and release the stud so the base seats inside the tread. The base should sit flush, with only the hard pin above the rubber.
Can I stud my tires myself?
Yes, but only if the tires are stud-compatible and you have the correct studs, chart, and installation tool. For passenger-car winter tires, a tire shop is often safer because it has the proper stud gun, tire stand, and balancing equipment.
Can you put studs in any tire?
No. For normal road use, only stud tires that are designed with molded stud holes. Do not drill a non-studdable tire. If you are using screw-in studs for off-road or specialty use, follow the stud kit and tire manufacturer’s instructions.
How do you choose the right tire stud size?
Measure the molded stud hole depth and use the chart from the tire or stud manufacturer. The correct stud should seat firmly in the hole, leave the base flush with the tread, and expose only the traction pin above the rubber.
How far should tire studs stick out?
The stud body should not sit proud of the tread. The body or jacket should be seated in the molded hole, while the hard pin protrudes above the rubber enough to bite ice. Use the tire or stud maker’s specification for the exact protrusion.
How do you insert wheel studs?
Wheel studs are different from tire traction studs. Wheel studs are the threaded fasteners in the hub that hold the wheel on. They must match the hub and vehicle, seat fully, and be tightened with the correct lug-nut torque from the vehicle manual. If you meant tire studs, use a tire stud gun and molded stud holes.
Do studded tires need a break-in period?
Yes. Follow the tire or stud maker’s instructions. If none are provided, drive gently for the first 50–100 miles. Avoid hard acceleration, hard braking, sharp cornering, and high-speed dry-road driving during that period.
Conclusion
Putting studs in a tire is all about matching the tire, stud, tool, and pattern. Start with a stud-compatible tire, confirm local laws, choose the stud size from the proper chart, and use a tire stud gun or approved tool. After installation, inspect every stud for flush seating and even height. Then break the tires in gently so the rubber can settle around the studs before you depend on them on ice.
Sources
- NHTSA Tire Safety — backs up tire tread, pressure, replacement, and general tire safety guidance.
- ISO 19447:2021 Passenger car tyres — Method for measuring ice grip performance — supports current ice-grip testing context for passenger tires.
- UNECE World Forum for Harmonization of Vehicle Regulations — supports international vehicle and tire regulation context.
