
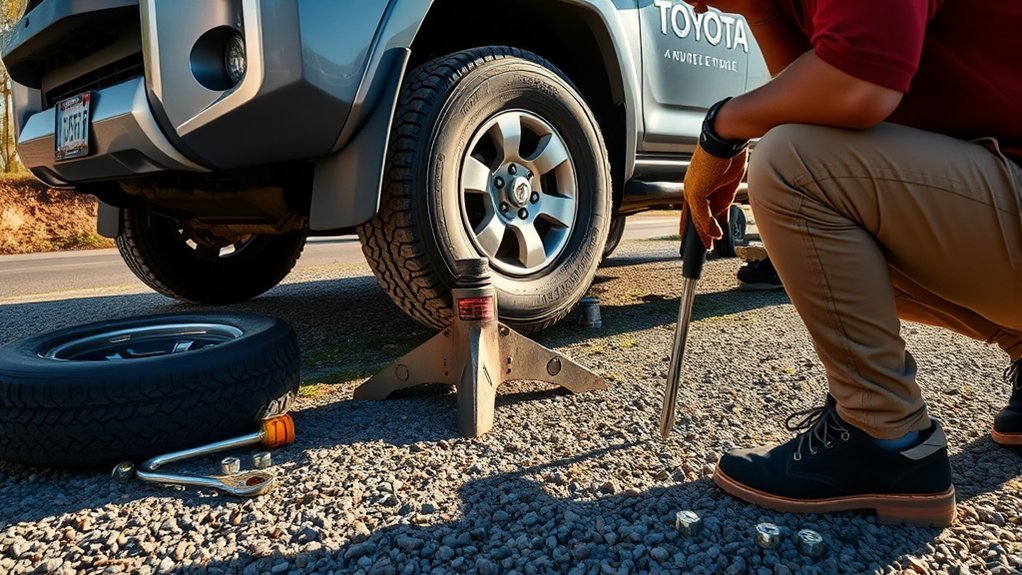
A flat tire on a Toyota 4Runner can happen on a highway shoulder, in a parking lot, or far from pavement. The safest fix is not just swapping the wheel—it is choosing a safe place to stop, using the correct 4Runner jack points, checking the spare, and tightening the lug nuts correctly. Always let your Toyota owner’s manual and tire placard override general advice, because jack locations, spare type, tire pressure, and wheel-nut torque can vary by model year and trim.
Quick Answer
To change a flat tire on a Toyota 4Runner, stop on solid level ground away from traffic, set the parking brake, chock a wheel, loosen the lug nuts slightly, jack only at the approved lift point, install the spare, hand-start the lug nuts, lower the vehicle, tighten in a star pattern, then verify torque and spare pressure as soon as possible.
Key Takeaways
- Do not change a tire on a narrow shoulder, soft ground, steep slope, or traffic-side position if you cannot work safely.
- Use only the jack points shown in your Toyota 4Runner owner’s manual.
- Loosen lug nuts while the tire is still on the ground, but do not remove them until the vehicle is lifted.
- Tighten lug nuts in a star pattern and confirm the final torque with a torque wrench using your model-year specification.
- Check the spare tire’s pressure and driving limits before continuing, especially if it is a temporary-use spare.
At a Glance
| Time Required | 20–40 minutes if the spare, tools, and lug nuts are in good condition |
| Difficulty | Moderate roadside DIY task; call roadside assistance if conditions are unsafe |
| Tools Needed | Owner’s manual, spare tire, Toyota jack, lug wrench, wheel chocks, tire pressure gauge, gloves, flashlight, reflective triangles, and torque wrench for final verification |
| Cost | Usually $0 roadside if your spare and tools are ready; repair or replacement costs depend on tire damage |
Find a Safe Location to Change Your Tire

When your 4Runner gets a flat, your first job is to get out of danger—not to grab the jack immediately. Turn on your hazard lights, slow down gently, avoid sudden steering, and look for a parking lot, wide shoulder, side street, or other solid and level area away from moving traffic.
Warning: Do not try to change a tire if the vehicle is on soft soil, loose gravel, a steep slope, a blind curve, a narrow highway shoulder, or too close to traffic. If you cannot work safely, stay clear of traffic and call roadside assistance.
Once stopped, shift to Park, turn the engine off, set the parking brake, and have passengers wait away from the road. If you have reflective triangles or road flares, place them where approaching drivers can see them. At night or in rain, wear a high-visibility vest if available.
Before you start, open your Toyota 4Runner owner’s manual or the digital manual for your exact year. Toyota changes equipment and specifications across generations, so the manual is the authority for jack placement, tool storage, spare access, tire pressure, and wheel-nut torque.
Get Your Tools Ready for the Tire Change
Gather every tool before loosening anything. Most 4Runners include a spare tire, jack, and lug wrench, but the exact storage location varies by model year and trim. Check the cargo area, side storage panels, under-floor compartments, or the owner’s manual if you are not sure where the tools are stored.
[Products Worth Considering]

This 1/2-inch drive breaker bar delivers powerful leverage for loosening and tightening stubborn lug nuts and automotive fasteners. The 180-degree flex head helps you reach tight spaces at the angle you need, making tire and brake jobs easier. A spring-loaded ball detent design holds 1/2-inch sockets securely while the chrome-moly head provides durable strength for everyday use.

The Dr.Roc spare tire tool kit helps you release, lower, or raise your spare tire with reliable extension tools and a lug nut wrench. It is made from rustproof automotive-grade steel and includes an organized carry case for convenient storage. Designed for compatibility with select GM models from the late 1990s through 2019, it uses upgraded extension components to install and remove spare tires with less hassle.

This spare tire tool kit is designed for the 2004 to 2018 Ford F-150 to help you loosen and tighten wheel lug nuts and manage the spare tire and provided jack functions from underneath the vehicle. It includes the lug nut wrench and extension pieces plus a convenient storage carrying case for organized transport. The jack itself is not included.
Essential Tools Required
At minimum, you need the correct Toyota jack, lug wrench, spare tire, wheel chocks, and the owner’s manual. A safer roadside kit also includes gloves, a flashlight or headlamp, a tire pressure gauge, reflective triangles, and a torque wrench for final tightening after the spare is installed.
| Tool | Why It Matters |
|---|---|
| Toyota jack | Lifts the 4Runner only at approved jack points. |
| Lug wrench | Loosens and snug-tightens the wheel nuts. |
| Wheel chocks | Help keep the vehicle from rolling while jacked. |
| Tire pressure gauge | Confirms the spare is inflated to the correct cold pressure. |
| Torque wrench | Confirms final lug-nut torque to your model-year specification. |
Safety Gear Considerations
Roadside visibility matters. Put on a high-visibility vest before stepping out if you have one. Use gloves to protect your hands from sharp wheel edges and brake dust. A headlamp is better than a phone flashlight because it leaves both hands free.
Check the spare tire before you jack the vehicle. The National Highway Traffic Safety Administration recommends checking tire pressure at least once a month, including the spare. Use the tire information placard and owner’s manual for the correct cold pressure, not the pressure molded on the tire sidewall.
Note: The sidewall shows the tire’s maximum pressure, not necessarily the correct operating pressure for your 4Runner. Use the driver-door tire placard or owner’s manual for the recommended cold PSI.
Loosen the Lug Nuts Before Lifting
Before lifting the 4Runner, loosen each lug nut while the flat tire is still touching the ground. Fit the lug wrench fully onto the nut and turn counterclockwise about a half turn. Do not remove the lug nuts yet.
Loosening the nuts on the ground keeps the wheel from spinning and gives you better control. Work in a star or crisscross pattern so the wheel releases evenly. If a lug nut will not move, press down steadily with your body weight while keeping your balance. Do not jump on the wrench, use makeshift pipe extensions on a narrow shoulder, or use so much force that the vehicle shifts.
| Step | Action | Safety Note |
|---|---|---|
| 1 | Seat the lug wrench fully on the nut. | A partially seated wrench can round the nut. |
| 2 | Turn each nut counterclockwise about a half turn. | Do this before jacking the vehicle. |
| 3 | Move in a star pattern. | This helps release pressure evenly. |
| 4 | Leave the nuts on the studs. | Remove them only after the tire is off the ground. |
Pro Tip: Keep your lug-nut key in the glove box or tire-change kit if your 4Runner has wheel locks. A missing wheel-lock key can turn a simple tire change into a tow.
[Products Worth Considering]

This ecocstm ratchet wrench is designed to make emergency and routine tire changes faster with a 360° rotating head and quick forward/reverse switching. The extended handle provides extra leverage to reduce effort and hand fatigue, while the adapter helps fit many scissor jacks on cars, SUVs, trucks, and vans. Built for reliable performance with durable construction, it’s a practical travel essential for on-the-road preparedness.

The Trivd Frol 1/2" air impact wrench delivers high performance torque up to 1500 ft-lbs with a twin hammer impact mechanism for strong, balanced blows. It features an ergonomic grip, compact lightweight design, and quick-stop control with 3 forward speeds up to 8000 RPM plus a reverse speed. Built for demanding automotive repair and tire shop work, the rear exhaust helps keep debris away from the surface.

Upgrade your wheels with MIKKUPPA M12x1.5 mag seat lug nuts built for secure, corrosion-resistant performance. These closed-end chrome lug nuts are a direct replacement for select Toyota models, including Camry, Corolla, RAV4, Sienna, Avalon, Highlander, Matrix, Venza, and Prius. Triple-chromium plating and cold-forged, heat-treated steel help deliver strength for daily driving and replacement needs.
Jack Up Your 4Runner Safely
After the lug nuts are loosened, place wheel chocks on the wheel diagonally opposite the flat tire if possible. Confirm the parking brake is set and the vehicle is in Park. Then locate the approved jack point for the flat tire using your owner’s manual.
Position the jack squarely under the approved lift point. The base must sit flat on solid ground. Raise the vehicle slowly until the flat tire clears the ground enough to remove it and install the spare. Keep your hands, feet, legs, and head out from under the vehicle at all times.
Warning: Never crawl under a Toyota 4Runner supported only by its tire-changing jack. The roadside jack is for changing a wheel, not for under-vehicle repairs.
[Products Worth Considering]

The 22800 wheel stud installer makes replacing wheel studs quick and secure, saving time and effort during tire service. It uses a ratchet or impact wrench to pull new studs firmly into place, helping when existing studs are too long. Compatible with most automotive wheels and light-duty truck wheel studs, it’s designed for easy, tool-assisted installation.

This manual duck head tire changer kit makes tire installation and removal simpler by letting you embed the duck head into the tire with applied pressure. The integrated design and durable steel construction help reduce friction and improve efficiency and safety during use. Suitable for 16–21 inch wheels, it’s convenient for cars, trucks, SUVs, and ATV tires, with 24-hour after-sales support.

These M14x1.5 closed-end chrome lug nuts are a one-piece replacement designed for secure fitment on compatible GM, Ford, and select Chrysler/Dodge models. Featuring a 60-degree conical seat and anti-rust chrome plating, they help resist corrosion and maintain a bright look for everyday driving. Built for long-term durability, they include OEM-style part references and are backed by 12 months of support.
Remove the Flat Tire and Prepare the Spare

Once the flat tire is off the ground, finish removing the loosened lug nuts. Put them in a pocket, cup holder, or clean spot where they cannot roll away. Pull the flat tire straight toward you with both hands. Wheels can be heavy, so use your legs and keep your balance.
Before installing the spare, inspect it for obvious damage, low pressure, sidewall cracking, or embedded objects. If it is flat, badly cracked, or visibly damaged, do not install it for normal driving. Call roadside assistance or arrange a tow.
4Runner spare-tire access can differ by generation. Some models store the spare under the rear of the vehicle and use a lowering tool, while the jack and tool kit may be stored in the cargo area. Follow the owner’s manual for your exact year so the spare and the flat tire are secured correctly after the swap.
Install the Spare Tire Correctly and Securely
Lift the spare onto the wheel studs and align the holes carefully. Push the wheel inward until it sits flat against the hub. Make sure the valve stem faces outward. If the wheel does not sit flush, remove it and check for dirt, rust flakes, or misalignment.
Start every lug nut by hand. Each nut should thread on smoothly for several turns. If a nut cross-threads or binds, stop and realign it. After all lug nuts are hand-started, snug them gently in a star pattern with the lug wrench. Do not fully tighten them while the tire is still hanging in the air.
Note: Do not apply grease or oil to lug studs, lug-nut seats, or wheel mounting seats unless Toyota specifically instructs it for your vehicle. Lubricated hardware can give inaccurate torque readings.
Lower the Vehicle and Tighten the Lug Nuts
Lower the jack until the spare tire just touches the ground and cannot spin freely. Tighten the lug nuts in a star or crisscross pattern. This seats the wheel evenly against the hub.
After the lug nuts are snug, lower the 4Runner completely and remove the jack. Then tighten the lug nuts again in the same star pattern. As soon as possible, use a torque wrench set to the correct specification in your owner’s manual. If you do not have a torque wrench roadside, drive carefully to a tire shop or service center and have the lug nuts torqued correctly.
Wheel lug nuts should not be “as tight as possible.” They should be tightened evenly and verified to the correct Toyota specification for your exact model year and wheel type.
After the spare is installed, stow the jack, tools, and flat tire securely. If your 4Runner stores the spare under the vehicle, make sure the flat tire is raised and secured according to the manual so it cannot loosen while driving.
Drive Safely After Installing the Spare
Do not treat a spare tire as a permanent fix unless your owner’s manual confirms it is a matching full-size spare in safe condition. Temporary-use spares have speed, distance, and handling limits printed on the tire or listed in the owner’s manual. Drive gently, avoid sudden acceleration or hard braking, and get the flat repaired or replaced promptly.
If the tire pressure warning light stays on after the spare is installed, check the spare’s pressure when cold and follow the TPMS instructions in your manual. Recheck lug-nut torque after the wheel has been installed and driven, especially if the wheel was newly installed, recently serviced, or replaced.
Troubleshooting Stuck Tires During Your Change

A wheel can stick to the hub because of corrosion, dirt, or long periods without removal. Do not put your body under the vehicle, do not strike the wheel violently, and do not move the vehicle while it is supported by a jack.
Safer Techniques for Stuck Wheels
If the wheel will not come off, first make sure the 4Runner is stable on the jack and the lug nuts are still loosely threaded a few turns. Keeping the nuts loosely installed helps prevent the wheel from falling suddenly if it breaks free.
- Hold the tire at the 3 and 9 o’clock positions and rock it gently.
- Try again from the 12 and 6 o’clock positions without putting any part of your body under the vehicle.
- If you have a rubber mallet, tap the tire sidewall with controlled blows while rotating your position around the tire.
- If the wheel still will not release, stop and call roadside assistance or a tire professional.
Warning: Avoid sledgehammer blows, unsafe leverage, or driving maneuvers to free a stuck wheel during a roadside repair. These methods can damage the vehicle or create a serious safety hazard.
Common Causes of Sticking
| Cause of Sticking | Safer Fix |
|---|---|
| Rust or corrosion between the wheel and hub | Have the hub face cleaned during tire service; keep lug threads and seats dry. |
| Dirt, mud, or trail debris | Clean the hub area when the wheel is off during safe service conditions. |
| Overtightened lug nuts | Use a torque wrench to the Toyota specification after installation. |
| Long time since tire rotation | Rotate tires on schedule so wheels are removed and inspected regularly. |
Preventive Maintenance Tips
The best tire change is the one that goes smoothly because the spare and tools were ready before the emergency. Add these checks to your normal maintenance routine:
- Check tire pressure monthly, including the spare.
- Inspect the spare for age cracks, low pressure, and damage before long trips.
- Confirm the jack, lug wrench, wheel-lock key, and spare-lowering tools are present.
- Have tires rotated on schedule to reduce corrosion and uneven wear.
- Keep reflective triangles, gloves, a flashlight, and a tire pressure gauge in the vehicle.
Frequently Asked Questions
What should I do if my spare tire is flat?
Do not install a flat or damaged spare for normal driving. If you have an inflator and the spare holds air, inflate it to the cold pressure listed in the owner’s manual or tire placard before using it. If it will not hold pressure, call roadside assistance or arrange a tow.
How often should I check my spare tire’s pressure?
Check the spare at least once a month and before long trips. Tires naturally lose air over time, and a spare mounted under a vehicle can be exposed to weather, dirt, and road debris.
Can I drive on a spare tire long term?
Usually no. A temporary-use spare is only meant to get you to repair service and has speed and distance limits. A matching full-size spare may be more capable, but it still needs correct pressure, safe tread, and proper installation. Follow the spare tire label and your Toyota owner’s manual.
What if I can’t loosen the lug nuts?
Make sure the lug wrench is fully seated and apply steady pressure counterclockwise while the tire is still on the ground. Do not jump on the wrench or use unsafe extensions in traffic. If the nuts will not move, call roadside assistance or a tire professional.
Is it safe to change a tire in the rain?
It can be safe only if the vehicle is on firm, level ground away from traffic and you can see clearly. Wet pavement, mud, poor visibility, and passing traffic raise the risk. If the jack base might slip or sink, call for help instead.
Where are the Toyota 4Runner jack points?
Use the jack points shown in the owner’s manual for your exact 4Runner year. Do not guess based on another generation or another Toyota model, because incorrect jack placement can damage the vehicle or make it unstable.
Do I need a torque wrench after changing the tire?
Yes. A lug wrench can get the spare installed, but a torque wrench is the proper way to confirm the lug nuts are tightened to the Toyota specification. If you do not have one roadside, visit a tire shop or service center as soon as possible.
Why should lug nuts be tightened in a star pattern?
A star or crisscross pattern helps seat the wheel evenly against the hub. Tightening in a circle can pull one side tight before the wheel is centered, which may lead to uneven clamping.
Conclusion
Changing a flat tire on a Toyota 4Runner is manageable when the conditions are safe and your spare, jack, and tools are ready. The key steps are simple: stop away from traffic, chock the vehicle, loosen the lug nuts on the ground, lift only at the approved jack point, install the spare, tighten in a star pattern, and verify final torque and tire pressure. If the location, weather, ground, lug nuts, or spare tire make the job unsafe, skip the roadside repair and call for help.
Sources
- Toyota Owners — 4Runner Manuals and Warranties — model-year owner manual reference for jack points, tool locations, tire pressure, and torque specifications.
- Toyota Owners — If You Have a Flat Tire — official Toyota flat-tire procedure reference for equipped vehicles.
- NHTSA Tire Safety Brochure — monthly tire-pressure checks, spare-tire pressure, tire placard, and cold-pressure guidance.
- NHTSA TireWise — tire maintenance and consumer tire-safety education.
- Tire Rack — Proper Wheel Lug-Nut Torque — crisscross tightening, torque-wrench use, dry-thread guidance, and re-torque best practice.
- AAA — How to Change a Tire — safe stopping location, roadside precautions, and general tire-change safety steps.


1 thought on “How to Change a Flat Tire on a Toyota 4Runner Safely”