
How to Put Studs in a Tire: Step-by-Step Studding Guide
To put studs in a tire, first confirm the tire is stud-compatible, measure tread depth, and choose the correct stud size from the manufacturer’s chart. Mount the tire securely, mark a staggered pattern, and use a variable-speed drill or purpose-built tool to seat each stud straight down. Make sure each collar sits flush with the tread, recheck loose studs, and drive gently for the first 100 miles. The next steps show how to do each part correctly.
Key Takeaways
- Measure tread depth and choose the correct stud size using the manufacturer’s chart.
- Mount the tire securely, mark stud positions, and use a proper stud installation tool.
- Insert each stud straight down with firm pressure until the collar sits flush with the tread.
- Inspect all studs for even height, then press loose ones back into place carefully.
- Drive gently for the first 100 miles and recheck studs to ensure they stay seated.
Choose Stud Size and Installation Tools
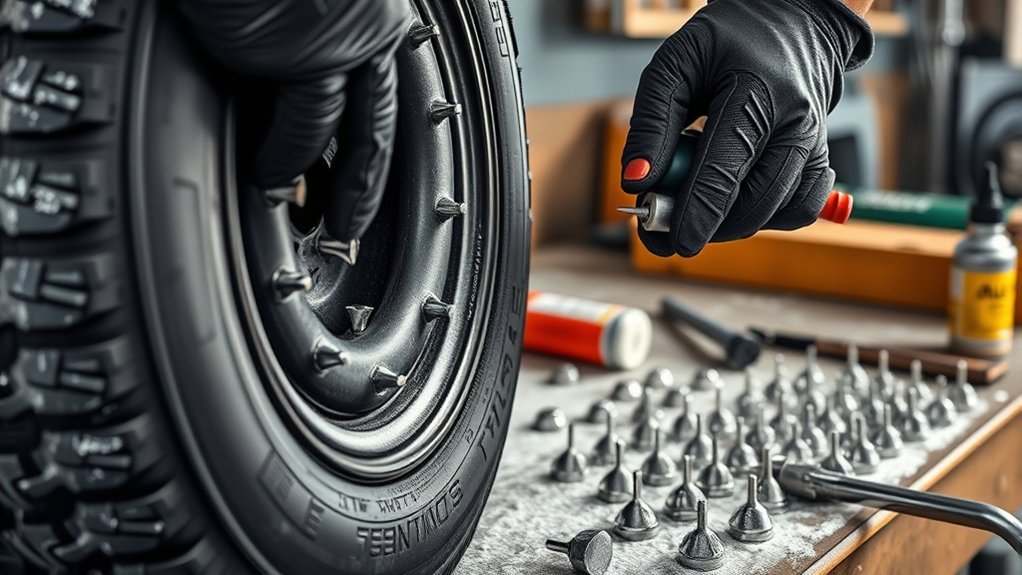
Before you start, measure your tire tread depth with a tread depth gauge so you can choose the correct stud size; for example, a 12/32-inch tread depth calls for TSMI #12 studs. Match each tire stud to the measured tread depth, because the wrong length can weaken retention or reduce traction. Check the manufacturer’s chart for your tire type, and verify stud compatibility before you buy anything. You’ll need a variable speed power drill and purpose-built install tools for studding; skip impact drivers, since they can overload the rubber and hinder control. A proper install tool grips the stud, aligns it squarely, and helps you seat it at the correct depth without forcing it. Keep the setup exact: accurate tread depth measurement, correct tire stud size, and compatible install tools give you a safer, more reliable result. When you choose deliberately, you keep control over the process and protect your freedom to move. Additionally, consider using all-season tires like the Fullway HP108 for reliable performance in various conditions while studding your tires.
Prepare the Tire for Stud Installation
Check the tire tread depth with a gauge first so you can match the stud size to the hole depth. Then mount the tire securely over the mandrel of the K-5 stand and confirm it doesn’t move before you begin. Mark the stud placement points on the tread so you can install each stud accurately. Ensure the tire is compatible with studded tire regulations to avoid legal issues during winter driving.
Check Tire Tread Depth
Measure the tire tread depth with a tread depth gauge so you can choose the correct stud size for reliable performance. Check the tire tread depth at several points around the circumference, because uneven wear can change how you install studs and reduce traction. If the tread measures 12/32 inches, select TSMI #12 studs for proper fit. Keep the tire stable on the mandrel of the K-5 stand so your readings stay accurate and your work stays controlled. Before you place each stud, wet the stud holes with water to lower friction and protect the tire from tearing. Recheck tire tread depth before winter use, since consistent depth helps you maintain grip, precision, and freedom of movement on snow and ice.
Mount Tire Securely
Secure the tire over the mandrel of the K-5 stand so it can’t shift during stud installation. You need a rigid setup before you touch a stud hole; stability keeps the work precise and safe. Verify the tread depth you measured earlier still matches the stud size you’ll use, then wet the stud holes lightly with water for smoother insertion. If you’re opening a new account for this process, document the tire size and tread reading now.
- Center the tire on the mandrel.
- Lock the stand so the assembly won’t rock.
- Confirm the tread remains compatible with the studs.
- Moisten the holes, then begin installation.
Mark Stud Placement
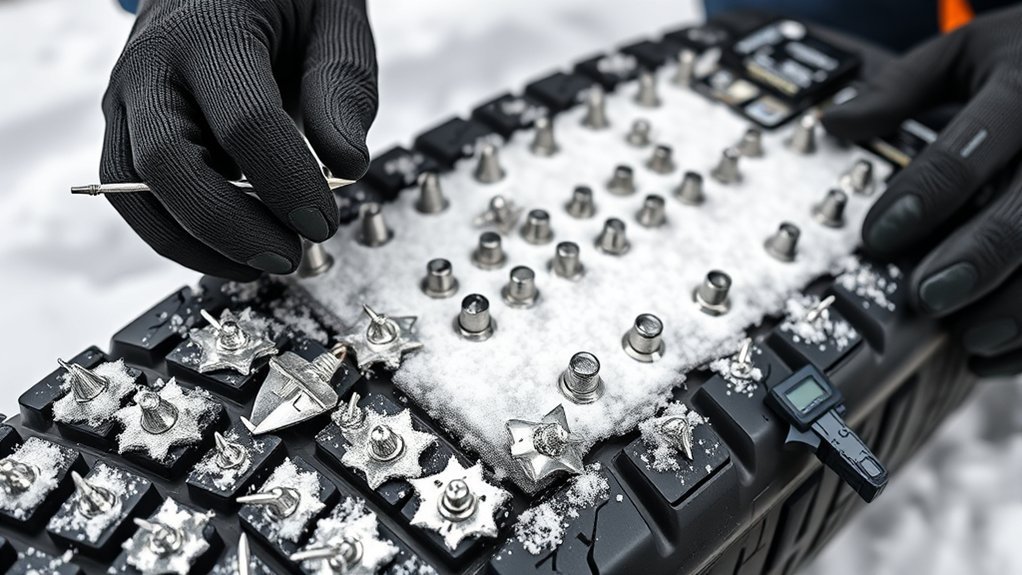
With the tire already fixed on the stand, mark the tread face before you start driving studs so you can lay out a staggered pattern that improves traction and helps keep the studs from shifting. Use visual guides to map each row, then apply marking techniques that keep spacing even and avoid straight lines. Check tread depth with a gauge so you choose studs that match the tire’s depth and sit correctly. Vary the pattern slightly across the tread blocks, but keep the layout balanced for predictable grip on snow and ice. Lightly wet the marked areas with water to ease installation later and reduce damage to the rubber. Your goal is a controlled, liberated setup: precise marks, clean alignment, and enough freedom in the pattern to maximize bite without losing stability.
Plan a Better Stud Placement Pattern
Plan your stud pattern so the tire gains grip without creating unnecessary wear or drag. Use traction optimization strategies to map studs in a varied, staggered layout instead of a straight line. This improves bite, spreads load, and supports terrain adaptability considerations when conditions shift. Keep studs evenly spaced, usually 1-2 inches apart, so you preserve balance and reduce localized stress.
Plan a staggered stud pattern to improve grip, balance load, and reduce wear without adding drag.
- Offset each row to break up force paths.
- Place slightly more studs near the outer edges for cornering traction.
- Keep the center less dense for smoother rolling.
- Scale density to tire width and terrain demand; wider tires can carry more studs, while narrower tires need fewer.
These stud placement techniques help you tune the tire for control, efficiency, and durability. When you plan the pattern carefully, you reclaim traction without surrendering speed or stability. Additionally, consider the importance of a 3PMSF certification to ensure your winter tires are ready for severe conditions.
Install Each Tire Stud Correctly
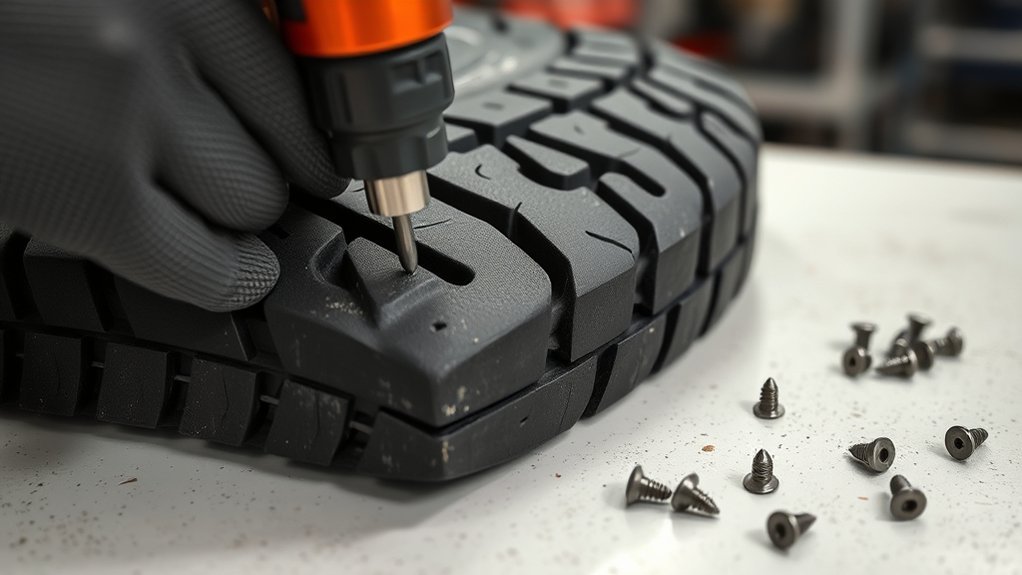
Align the stud’s auger tip with the drilled hole, then press straight down and turn the stud slowly until the notched collar sits flush with the rubber. Use steady stud alignment techniques so the threads catch cleanly and the stud enters without cross-loading. Apply firm, even pressure; your pressure application tips should keep the prongs biting into the rubber while you rotate just enough to seat the hardware. Don’t rush the turn or over-tighten, because excess rotation can lacerate the tire carcass and weaken retention. Keep your hand centered and your force direct so each stud anchors with precision, not force. Repeat the process for every hole, maintaining the same rhythm and depth. This disciplined method supports reliable traction on ice and helps you build a tire that answers your movement with control. For long-term stud maintenance strategies, install each one consistently now, so the tire stays secure and ready for hard winter miles. Additionally, ensuring proper stud placement is crucial for achieving optimal traction and handling in severe winter conditions.
Check That Each Stud Sits Flush
Once each stud is seated, check that the notched collar sits flush with the tire’s rubber surface. You’re verifying fit, traction, and control. Inspect the tread from multiple angles and confirm no stud protrudes past the surrounding rubber. Use stud alignment techniques to read the row straight and even. Then measure depth with a tire tread depth gauge so every insert reaches the specified seat.
- Look across the tread for any raised collar.
- Compare neighboring studs for uniform height.
- Gauge depth to confirm correct installation.
- Press and rotate only if a stud sits unevenly.
If you spot an off-center stud, apply gentle downward pressure while turning it until it settles. These stud maintenance tips help you keep performance consistent and reduce wear. Follow studding safety precautions by rejecting any stud that won’t sit flush, because a proud stud can loosen during use and compromise stability. Additionally, ensure that the tire’s fitment check aligns with the specifications for your vehicle to maximize performance and safety.
Fix Loose Studs and Avoid Common Mistakes
If a stud feels loose, press it back until the notched collar sits flush with the rubber; that seat helps prevent it from backing out during use. Use steady downward force while you reinstall it so the prongs bite cleanly into the tread. For loose stud identification, inspect each row visually and tug lightly on any suspect stud; movement means you need to reseat it now, not later. Don’t over-tighten, because excess force can lacerate the rubber and weaken retention. Keep your pattern varied across the tire so you spread grip points and lower pullout risk. As stud maintenance tips, recheck every stud after the first 50–100 miles, then inspect periodically for shift or loss. When troubleshooting stud issues, replace damaged rubber sections only if needed and reset any stud that no longer sits flush. Consistent technique protects your tire and keeps your traction free to perform. Additionally, ensuring proper tire maintenance can significantly enhance your overall driving experience.
Break In Your Studded Tire Safely

For the first 100 miles, drive conservatively so the studs can seat fully in the rubber. Use gentle cornering and avoid abrupt steering inputs that could loosen them. Practice slow, controlled braking to let the tire wear in without stressing the studs. Additionally, consider using 3-Peak Mountain Snowflake certified tires for optimal performance in severe winter conditions.
First 100 Miles
During the first 50 to 100 miles, drive at moderate speeds so the studs can seat properly without excessive wear. Use these break in techniques to protect stud performance and preserve tire maintenance.
- Keep acceleration smooth and controlled.
- Brake gently and early.
- Inspect each tire regularly for studs that sit proud or shift.
- After the break-in, check tire pressure and tread depth.
You’re not surrendering control; you’re training the tire to work with you. Avoid hard inputs that can loosen studs or damage the carcass. After this initial mile range, raise driving intensity gradually and keep watching for movement or wear. If any stud looks uneven, correct it before you trust the tire on ice.
Gentle Cornering
As your studded tires break in over the first 50 to 100 miles, take corners gently so the studs can seat without being pulled loose. Use measured cornering techniques, keep steering inputs smooth, and avoid sharp turns or sudden maneuvers that can tear the rubber around each stud. Build speed and cornering intensity gradually as the tread settles, because tire stability improves when the hardware seats flush. After the initial miles, inspect the studs to confirm they remain even with the tire surface. This discipline protects your traction and lets the tire deliver full control on icy conditions. By honoring this break-in process, you preserve stud retention, maintain predictable handling, and keep your machine ready for freer, safer travel.
Slow Brake Practice
Gentle cornering helps the studs seat evenly, and the same break-in period calls for careful braking. For the first 50-100 miles, you should use slow speed and smooth brake pressure so each stud can settle without shock. This discipline protects tire stability on icy terrain and reduces the chance of loosening.
- Apply brakes early, not abruptly.
- Keep stops progressive and controlled.
- Increase brake pressure only as the tire feels consistent.
- Inspect studs after each drive for movement.
Avoid hard acceleration and aggressive stops during this phase. As confidence builds, you can raise speed and braking intensity gradually, but never rush the process. Your studded tire performs best when you let it break in cleanly and deliberately.
Frequently Asked Questions
How to Insert Studs in Tires?
You insert studs by loading the stud into your installation tool, then attaching that tool to a variable-speed drill. Press the auger against the tire, keep steady downward force, and drive it in until the collar sits flush. Don’t over-tighten. For tire maintenance tips, compare stud types comparison and follow an installation tools guide. Afterward, check alignment, then break them in for 50–100 miles with gentle driving.
How to Insert Wheel Studs?
You install wheel studs by matching them to the hub, seating each one squarely, and tightening the nut to the maker’s torque spec; don’t over-tighten or strip threads. You’ll want to inspect each stud for full seating, then recheck after driving. For tire maintenance tips, study studded tire benefits, and prioritize winter driving safety. Use the right tools, keep your work precise, and you’ll keep control on your terms.
How Do You Install Studs?
You install studs by attaching the tool to a variable-speed drill, loading a stud, and pressing it straight into a thick tread knob until the collar’s flush. You keep steady pressure, you avoid overdriving, and you repeat in a varied pattern for tire safety, stud durability, and winter performance. Then you inspect each stud, confirm near-flush seating, and drive 50–100 miles to let them break in properly.
Can I Stud My Tires Myself?
Yes, you can stud your tires yourself if you’ve got the right tools and skills. You’ll need a variable-speed drill, a stud tool, and the correct stud size for your tread depth. Wear gloves and safety glasses, then keep steady pressure so each stud seats flush. Use varied placement patterns for better winter performance, tire safety, and stud durability. If you’re unsure, you can still take control and learn first.
Conclusion
With the right stud size, clean prep, and a deliberate pattern, you can stud a tire accurately and safely. I once saw a rider lose traction on the first icy turn because two studs sat proud; after a quick reset, the tire tracked cleanly. That’s the point: every stud must bite evenly. Double-check flush seating, fix any loose studs, and break the tire in gently so the tread and studs settle before hard use.
Related Articles

How to Plant Potatoes in a Tire: Step-by-Step Garden Hack
Fresh, space-saving potato-growing in tires is easier than you think, but the secret step that boosts your harvest comes later.
Read More
How to Measure Tire Lug Pattern: Bolt Pattern Guide
Tired of guessing your wheel fitment? Learn how to measure tire lug patterns and decode bolt patterns before making a costly mistake.
Read More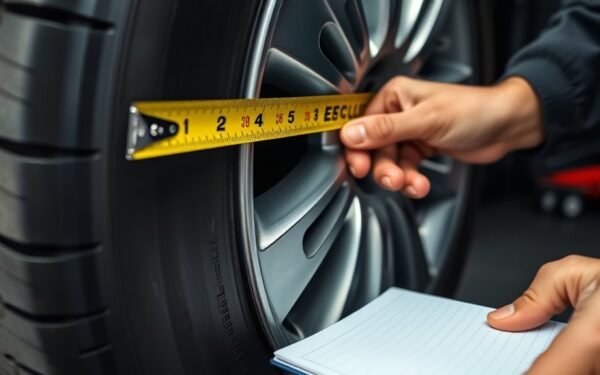
How to Figure Out Tire Height: Reading & Calculating Dimensions
Tire height is easy to decode from sidewall numbers, but the real trick to matching fit, speedometer accuracy, and handling comes next.
Read More