
How to Build a Tire Swing: Step-by-Step Guide for the Perfect Hang
Pick a clean passenger tire, inspect it for cracks, and drill 4–6 drainage holes. Gather a drill, heavy-duty rope or chain rated for 500 pounds, S-hooks, and a swivel. Hang the tire from a healthy hardwood limb at least 6 inches thick, using a double bowline or secure hardware. Keep the seat 12–18 inches off the ground and leave clear space around it. Follow these steps and you’ll get the rest of the setup right.
Key Takeaways
- Choose a clean, crack-free tire sized appropriately for the rider and drill 4-6 drainage holes.
- Gather heavy-duty rope or chain, eye-bolts, S-hooks, a swivel, measuring tape, and a drill.
- Select a healthy hardwood branch at least 6 inches thick and inspect it for rot, cracks, or weakness.
- Hang the tire securely with a double bowline or rated hardware, keeping it 12-18 inches above the ground.
- Check all connections regularly and maintain a clear landing area with ongoing safety inspections.
Choose the Right Tire for Your Swing
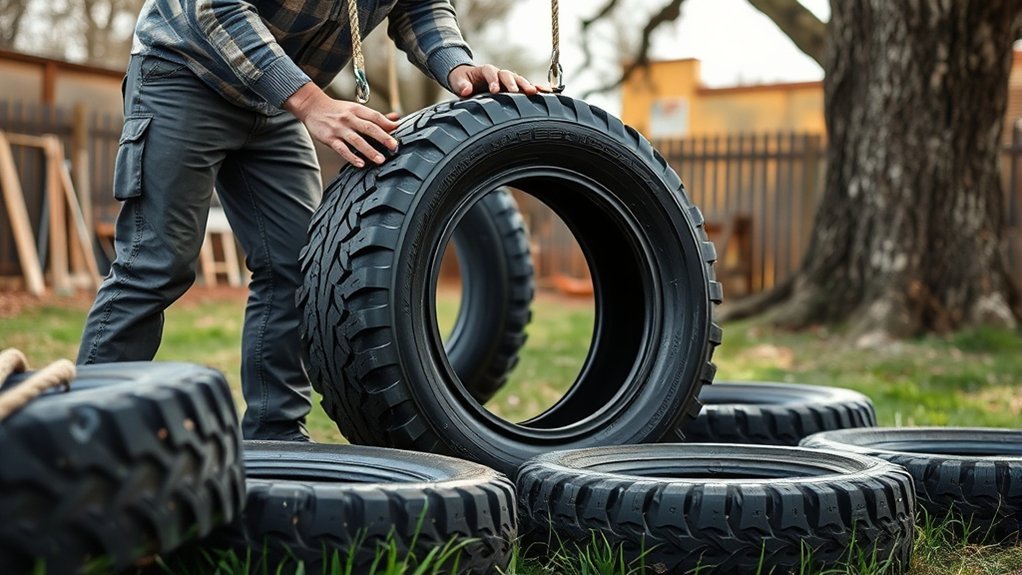
Start with one good tire: choose a standard passenger tire for adults or older children, or a smaller tire for young children, and aim for a diameter between 24 and 30 inches for a comfortable ride. You want a tire that matches the rider’s weight, so don’t force a heavy used tire onto a small child. Inspect the tire for cracks, holes, and excessive wear before you commit. A clean, intact tire looks better and helps your swing setup feel intentional, not improvised. Check that the tread pattern is still present, because it can help water drain after you drill holes, reducing trapped moisture. When you inspect the tire, confirm it’s sturdy, smooth, and free from damage that could compromise safety. Choose a size of 24 to 30 inches if you want balance, comfort, and easier handling. Picking the right tire gives you a safer, more dignified swing from the start. Additionally, consider selecting a tire with good tread life as it ensures durability and safety for your swing setup.
Gather Tire Swing Tools and Hardware
Gather a sturdy tire, a drill with a 1/2-inch bit, a ladder, and tools for tightening hardware. You’ll also need eye-bolts, S-hooks, a heavy-duty swivel, and chain or rope rated for at least 500 pounds. Make sure your chain or rope is about 20 feet long so you can hang the swing securely from a strong tree limb. Additionally, consider using a cordless inflator to maintain the tire’s pressure for optimal safety and performance.
Essential Tools
Before you hang the tire, collect the right tools and hardware: a drill with a ½-inch bit for drainage holes, a sturdy ladder for safe access, a measuring tape for spacing and height, and heavy-duty rope or chain rated for at least 500 pounds. Add eye-bolts, S-hooks, fender washers, and a heavy-duty swivel so your setup moves freely and holds firm. Use the drill to open drainage holes, then check your rope for wear before you work. Keep the measuring tape close so you can set even height and balanced clearance. When you choose your connection points, aim for safety, freedom of motion, and clean lines. With the right tools in hand, you can build a swing that feels strong, steady, and ready to liberate play.
Hardware Checklist
A solid hardware checklist keeps your tire swing safe and stable. Start with a sturdy tire free of cracks and holes, with enough tread for grip and durability. Gather eye-bolts, S-hooks, and chains rated for at least 500 pounds, plus fender washers, lock washers, and nuts to lock every connection down. Use a drill with a 1/2-inch bit to drill holes for drainage so water can’t sit inside and cause mold. Choose strong rope or heavy-duty chains at least 20 feet long so you can attach your rope with room for height and clearance. Before you hang the tire swing, inspect each part, replace anything worn, and keep the hardware checklist close. Freedom starts with safe, solid gear.
Drill the Tire for Drainage
Use a 1/2 inch drill bit to make 4-6 drainage holes in the bottom sidewall of the tire, spacing them evenly with the tread pattern as your guide. Drill each hole at a slight downward angle so water can escape easily and won’t clog inside the tire. This step helps prevent water buildup, which reduces mold and mildew and keeps the tire in better shape longer. Additionally, ensuring proper tread life can further enhance the longevity of your tire swing.
Drainage Hole Placement
Drill several drainage holes in the bottom sidewall of the tire with a 1/2 inch drill bit so water can’t collect inside. Place the drainage holes evenly around the lower edge, ideally following the tread pattern for a balanced look and reliable flow. Aim for four to six holes so you reduce water accumulation and help prevent mold or mildew. Keep each hole low enough that trapped water can escape without delay. This simple step protects your tire swing from standing water and supports easier maintenance over time. Check the holes regularly, clear out debris, and make sure they stay open. With good placement, your swing stays lighter, cleaner, and ready for free, safe movement outdoors.
Proper Drill Bit Size
For drainage holes, you’ll want a 1/2 inch drill bit so water can escape without weakening the tire. Use it to make clean holes in the bottom sidewall of your tire swing, keeping each one low and evenly spaced. Aim for four to six drainage holes, following the tread pattern so the tire drains freely while staying strong.
| Tool | Purpose | Feeling |
|---|---|---|
| 1/2 inch drill bit | Creates safe drainage holes | Confidence |
| Even spacing | Supports balanced drainage | Relief |
| Careful placement | Protects tire strength | Freedom |
Drill slowly, let the bit work, and check that each opening is clear. Later, inspect the holes for blockages or wear so your tire swing stays ready for open-air play.
Preventing Water Buildup
To keep water from collecting inside the tire, you’ll need to drill several 1/2-inch drainage holes in the bottom sidewall. Use the tread pattern as your guide and space the drainage holes 4 to 6 inches apart so runoff moves freely. Drill each hole all the way through the tire wall; partial cuts won’t stop water accumulation. After drilling, clear out any rubber scraps and check that nothing blocks the openings. Inspect them regularly, especially after rain, to keep debris from trapping moisture and preventing mold and mildew. Good drainage also protects the tire’s structure, helping preserve its weight capacity as it flexes under load. With this simple step, you free the swing from rot, odor, and hidden damage, keeping it safe, clean, and ready.
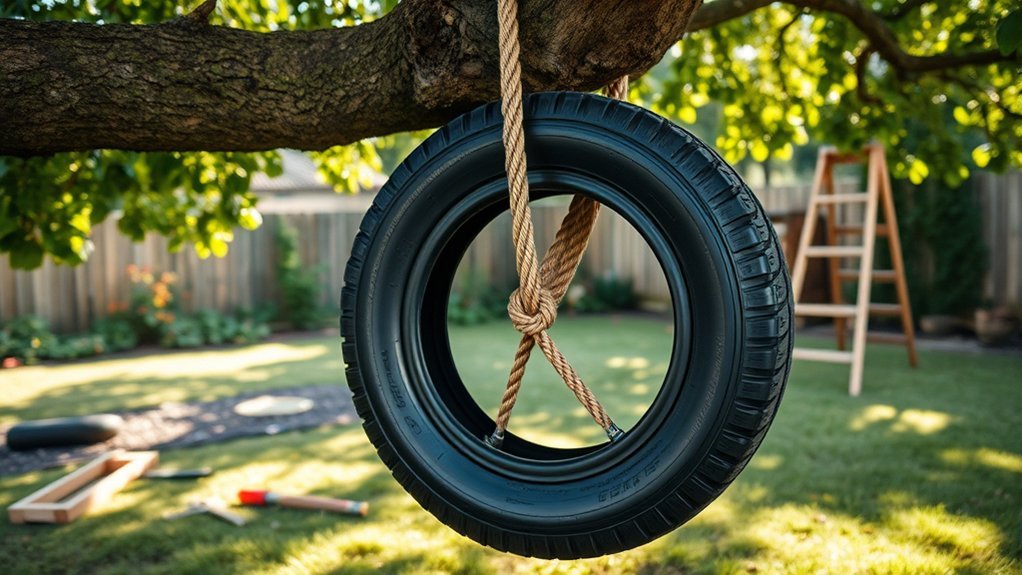
Hang the Tire Swing From a Tree Limb
Choose a sturdy hardwood limb at least 6 inches thick and 7 to 20 feet above the ground, since it needs to support both the tire’s weight and the motion of swinging. Inspect the tree limb for cracks, rot, or weak growth before you commit. Once you’ve confirmed the branch is sound, run the hanging rope over it and use a reliable knot, such as a double bowline or swing hitch line, to keep the tire swing secure. Keep the rope centered so the swing moves freely. Set the tire so its seat hangs 12 to 18 inches above the ground, then adjust for your height and reach. After installation, make safety inspections part of your routine: check the rope, knot, and branch for wear, and clear rocks, tools, and other hazards from the area. With careful setup, you create a swing that feels open, simple, and safely yours. Additionally, ensuring the tire swing can support the load rating is crucial to avoid accidents.
Secure the Rope or Chain
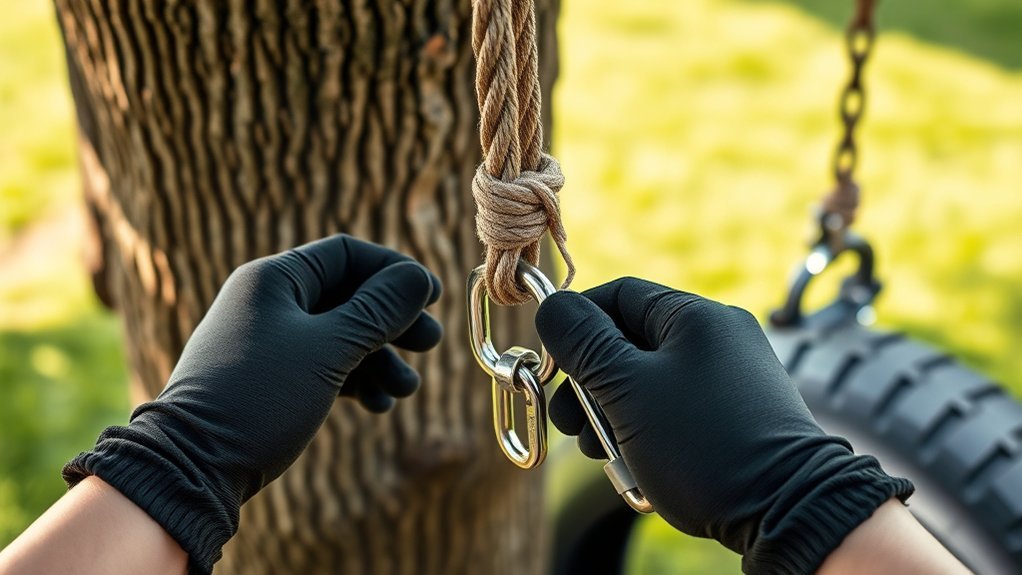
Now secure the rope or chain to the swing so it can handle repeated use without slipping. Choose a durable line, such as nylon rope, polyester, or galvanized steel chain, rated for at least 500 pounds. If you use rope, tie a double bowline knot at the tire, then tighten it firmly so it won’t creep under load. If you use chain, connect it with carabiners or S-hooks at both the tire and the branch for quick adjustment and a cleaner install. Install eye bolts into the branch to create a stable anchor and reduce bark damage; drive them deep enough to resist dynamic force. As you secure the rope or chain, make SURE every connection sits straight and bears evenly. When you’re ready to hang your swing, leave no twist or slack in the hardware. After setup, inspect for wear, fraying, or corrosion, and replace damaged parts right away. Additionally, ensure you select a high-performance tire to provide optimal support and durability for any outdoor activity involving swings.
Check Safety, Height, and Clearance
Before you let anyone ride, check that the tire swing hangs at least 12 feet above the ground and that the landing area is clear for 12 feet in every direction from the swing’s lowest point. This height gives you room to move freely and reduces impact risk. Set the seat about 12 to 18 inches from the ground so riders can mount and dismount without strain. Look up and confirm the tree branches above and around the swing stay well outside the swing path. Make sure the limb is strong, healthy, and at least 6 inches in diameter. Verify the rope or chain doesn’t shift the swing into nearby trunks, fences, or rocks. For real safety, keep the clearance open and uncluttered. When you choose space carefully, you build a swing that supports play without limits. Additionally, ensure that the landing area is free of obstacles to prevent injuries during use.
Inspect and Maintain Your Tire Swing
Once your tire swing is hung with proper height and clearance, keep it safe by checking it regularly. Inspect every piece of hardware: eye-bolts, S-hooks, chains, and knots. Look for wear, rust, bending, or cracks, and replace anything questionable before someone rides. Check the tire itself for tears, deep cracks, or heavy wear that could weaken the swing. Make sure drainage holes stay open so water can’t collect, creating mold or mildew. After storms or heavy use, verify the swing still hangs level and stable; adjust rope or chain lengths if it starts to tilt or drift. Build a monthly maintenance habit and treat it like part of the freedom this swing gives you. A quick safety check keeps the ride open, easy, and reliable. Consistent inspection protects your setup, extends its life, and lets you enjoy the swing without worry. Additionally, regular rotations can enhance the longevity of any rubber elements, ensuring a safer experience for all users.
Frequently Asked Questions
How High to Hang a Tire Swing?
Hang your tire swing 7 to 8 feet above the ground, with the tire’s bottom 12 to 18 inches off the surface. That height boosts swing safety, supports easy entry, and helps protect tire durability. Keep at least 12 feet of clear space around it, and choose a sturdy hardwood branch 6 inches wide or more. Follow installation tips, and check swing maintenance regularly so you can swing freely and safely.
How Thick Should a Branch Be for a Tire Swing?
You need a branch at least 6 inches thick, or about 19 inches in circumference, for a tire swing. Think of it like a medieval gatepost: solid, stubborn, and ready. Check safety considerations first, then choose materials from a healthy hardwood like oak or maple. Match swing height to the branch’s strength, inspect for decay, and keep up with tire maintenance so you can swing freely without fear.
What Is the Best Size Tire for a Tire Swing?
You’ll do best with a 24- to 36-inch tire, depending on who’ll ride it. Use about 24 inches for young children and up to 36 inches for teens or adults; larger tire types usually handle more weight and improve swing safety. Choose a tire with no cracks or heavy wear. For installation tips, hang it 12-18 inches above ground. Add maintenance advice: inspect it regularly and replace damaged hardware.
Where to Drill Holes for Tire Swing?
Drill three eye-bolt holes on the tire’s top sidewall, equally spaced with a string; then add drainage holes on the bottom sidewall. About 70% of DIY tire-swing failures come from poor hole placement, so precision matters. Use drilling techniques with a bit just large enough for each shaft, and keep the holes clean. This protects tire safety, boosts swing stability, and lets you build freely with confidence.
Conclusion
Now that you’ve built your tire swing, give it one last safety check before you let it fly. Make sure the tire hangs level, the rope or chain is secure, and the area below stays clear. Test it gently first, then enjoy the ride. With regular inspections and basic care, your swing will stay sturdy and fun, ready for years of use. Your backyard will feel as welcoming as a summer afternoon.
Related Articles

How to Operate a Tire Machine: Complete Beginner’s Tutorial
Master tire machine basics fast, but discover the crucial safety and setup steps that separate smooth swaps from costly mistakes.
Read More
How to Use a Tire Changer Machine: Full Tutorial for Beginners
Master tire changing basics with this beginner-friendly guide—learn the essential steps, avoid costly mistakes, and discover the crucial final tips inside.
Read More
How to Remove Air From a Tire: Safe Step-By-Step Methods
Carefully learn how to release tire air safely and precisely, then discover the easiest ways to avoid over-deflating and get the pressure just right.
Read More