
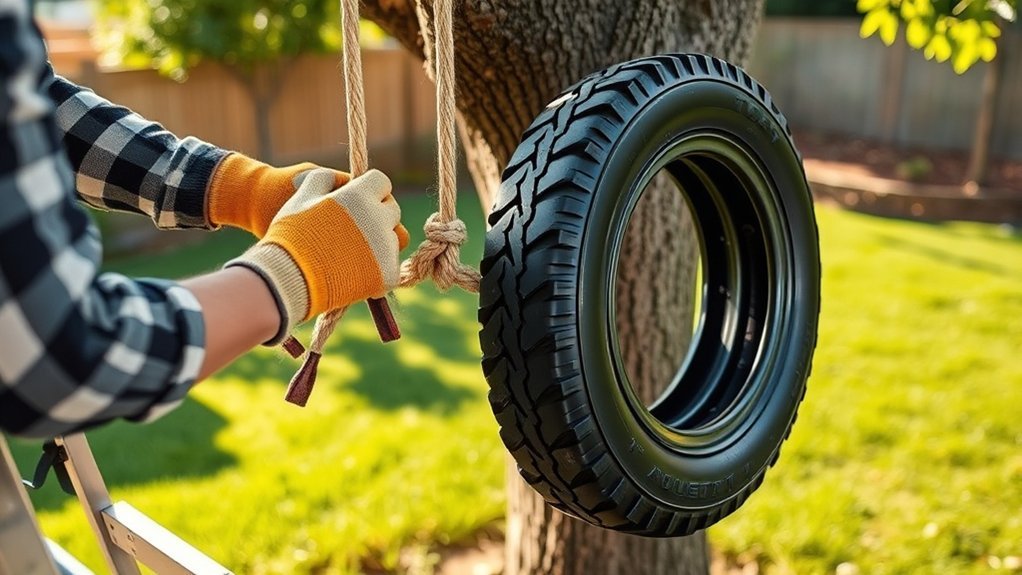
A tire swing can turn a backyard into a fun play space, but it needs more than a strong-looking branch and an old tire. To hang one safely, you need a healthy support, a clear use zone, impact-absorbing surfacing, drainage holes, rated hardware, and regular inspections.
Last updated: July 7, 2026.
Quick Answer
To hang a tire swing safely, choose a healthy mature tree branch, install protective surfacing below it, drill drainage holes in the tire, use rated corrosion-resistant hardware, close every S-hook, and leave a clear use zone equal to the suspension length plus 6 feet in all directions.
Key Takeaways
- Use a healthy, mature branch with no cracks, dead wood, decay, weak unions, or storm damage.
- Install real protective surfacing under and around the swing; grass and dirt are not enough.
- For a tire swing, keep the clear use zone equal to the suspension length plus 6 feet in every direction.
- Use a sound tire, drill underside drainage holes, and reject tires with cracks, exposed steel belts, or sharp edges.
- Use rated, corrosion-resistant chain or rope, eye bolts, washers, locking nuts, S-hooks, and a swivel made for dynamic loads.
- Inspect the tree, tire, surfacing, knots, chains, S-hooks, and hardware monthly and after severe weather.
At a Glance
| Time Required | About 2–4 hours for the swing setup, plus extra time for protective surfacing and tree inspection. |
| Difficulty | Moderate. The drilling is simple, but the tree, hardware, surfacing, and load checks must be done carefully. |
| Tools Needed | Drill, 1/2-inch drill bit, wrench set, locking pliers, tape measure, marker, ladder, gloves, safety glasses, and a level. |
| Cost | Varies by hardware, chain or rope, surfacing material, and whether you hire an arborist. Do not save money by using unrated or rusty parts. |
Warning: A tire swing can fail if the tree, branch, hardware, rope, chain, tire, or landing surface is unsafe. Do not install one over concrete, asphalt, rocks, roots, or bare dirt. Do not let children wear bike helmets, drawstring clothing, or loose straps while using play equipment.
Pick a Safe Hanging Spot
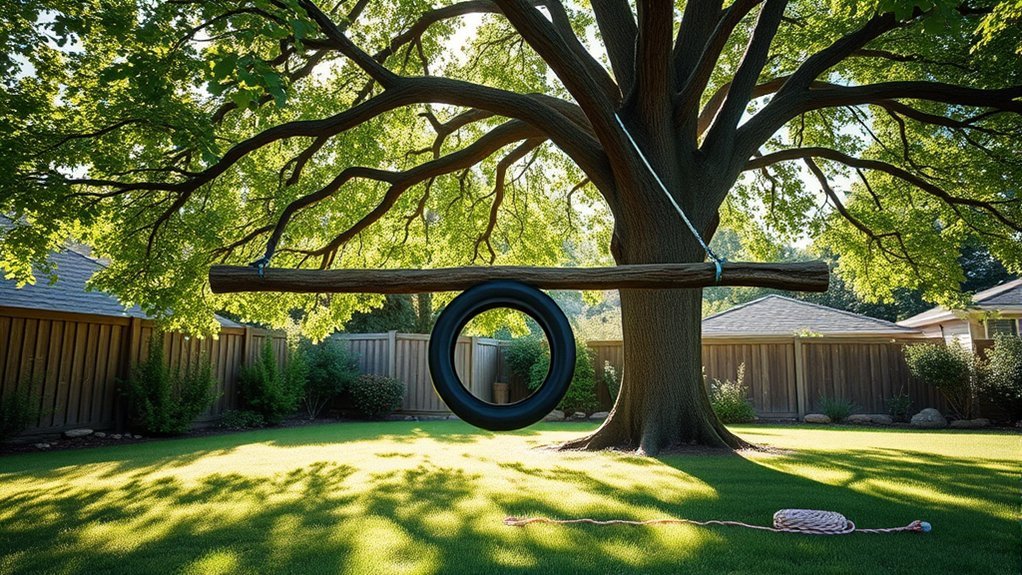
Start with the location, not the tire. Choose a level area with room for the swing to move in every direction. Keep the swing away from fences, walls, sheds, trunks, exposed roots, rocks, garden edging, outdoor furniture, and other play equipment.
For a tire swing, use the safety-zone formula from the CPSC Outdoor Home Playground Safety Handbook: extend protective surfacing in a circle whose radius equals the length of the suspension chain or rope plus 6 feet. If the chain or rope from the branch to the tire is 7 feet long, the clear surfaced circle should extend 13 feet from the point under the hanger.
Do not rely on grass or dirt as the landing surface. CPSC home playground guidance says grass and dirt are not considered protective surfacing because wear and weather can reduce shock absorption. Use impact-absorbing material such as engineered wood fiber, wood chips, shredded rubber mulch, or another surface tested for the fall height.
Note: For loose-fill surfacing, CPSC recommends maintaining at least 9 inches of wood mulch, wood chips, engineered wood fiber, or shredded rubber mulch for equipment up to 8 feet high. Higher setups may need a professionally rated surface.
Check the Tree and Branch Before You Build
Pick a mature hardwood tree with a strong horizontal branch. The branch should look healthy from the trunk to the hanging point. Avoid branches with cracks, cavities, peeling bark, fungal growth, dead sections, storm damage, weak V-shaped unions, or signs of decay.
Branch thickness helps, but it is not the only safety factor. A large branch can still fail if it has internal decay, a weak union, or root problems. If the branch is high, hard to inspect, recently damaged, or close to a house or walkway, ask a qualified arborist to inspect it before you hang anything.
Look at the whole tree too. The University of Florida IFAS tree-risk guidance points to dead or broken branches, decay, cavities, codominant stems, and sudden leaning as warning signs. The ISA-related tree-risk guide also warns about cracks or splits in trunks, major branches, and branch unions.
Choose the Right Tire and Hardware
Choose a clean, sound automobile tire that fits the rider’s body. Avoid heavy truck tires because they can hit harder if they swing into a child. Do not use a tire with exposed steel belts, protruding wires, sharp edges, deep cracks, severe weathering, or oily residue.
Wash the tire with mild soap and water before you work on it. Let it dry fully so you can see cracks, wires, and weak spots. If the tire smells strongly, leaves black residue on skin, or has hidden water trapped inside, choose another tire.
Use hardware with a visible working load limit that exceeds the expected rider weight plus the extra force created by swinging and spinning. Choose corrosion-resistant parts made for outdoor use, including eye bolts or forged eye nuts, large fender washers, lock washers or self-locking nuts, S-hooks, chain or rope, connector links, and a heavy-duty swivel.
[Products Worth Considering]

A fun climbing and balance swing for outdoor play, featuring a circular disc kids can stand or sit on, plus platforms to help them climb. The thick braided rope is easy to grip and supports skill-building through repeated swings and careful balance. It’s designed for quick installation and includes an adjustable rope length and a tree strap for a perfect fit.

Replace worn tires quickly with this universal 4.80/4.00-8 tire and inner tube set designed for wheelbarrows and outdoor utility carts. The ribbed tread helps reduce turf damage while the natural rubber construction supports longer service life. Compatible with 15.5-inch outer diameter, 4-inch width, and 8-inch rim diameter wheels, it uses a straight TR-13 valve stem for easy installation. For best results, inflate with a manual pump and do not exceed 25 PSI.
This flat-free TICONN wheelbarrow tire features durable polyurethane foam construction that never needs inflation, helping prevent punctures and reducing maintenance on rough outdoor terrain. With a 300 lb max load capacity and stable steel rim design, it supports safer transport for yard work and hauling tasks. An adapter kit with ball bearings and nylon spacers is included for easier fit and customization across common wheelbarrow and cart axle setups.
Tools and Materials Checklist
| Item | What to check |
|---|---|
| Tire | No cracks, wires, sharp edges, heavy wear, or trapped water. |
| Eye bolts and nuts | Rated for load, corrosion-resistant, and long enough for washers and locking nuts. |
| Washers | Use large fender washers to spread force across the tire sidewall. |
| S-hooks or connector links | Rated, closeable, and free of sharp gaps or protrusions. |
| Chain or rope | Outdoor-rated, load-rated, and replaced if rusted, frayed, kinked, or stiff. |
| Swivel | Heavy-duty model designed for rotational movement. |
Pro Tip: Buy all hanging hardware from the same hardware category and load class when possible. Mixing old, unrated, rusty, or mismatched parts makes the weakest piece hard to identify.
Drill Drainage Holes in the Tire
Before you hang the tire, drill drainage holes in the underside. Water trapped inside a tire can add weight, encourage mold, attract insects, and make the swing unpleasant to use.
Turn the tire so the future bottom side faces up. Mark at least four evenly spaced points along the lowest sidewall area. Drill each hole with about a 1/2-inch bit, keeping your hands clear of the bit and wearing safety glasses. Drill from the inside out if you can reach safely.
After drilling, shake the tire and rinse it again. Make sure water drains freely through the holes. Check the holes during monthly inspections because leaves, mud, and mulch can block them.
Install the Eye Bolts and S-Hooks
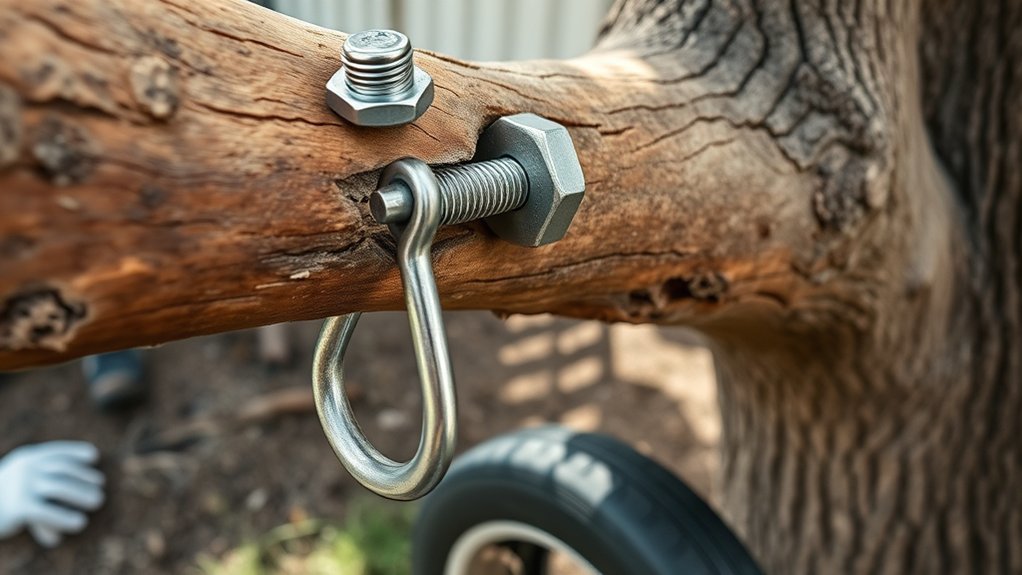
Place three eye bolts evenly around the upper sidewall of the tire. Equal spacing helps the tire hang level and spreads the rider’s weight across three points. Mark the holes carefully before drilling.
Use a drill bit that matches the eye-bolt shaft. Push each eye bolt through the tire, then add a large fender washer, lock washer, and nut. If your hardware design uses washers on both sides of the tire wall, install them as directed by the hardware manufacturer. Tighten each nut firmly without crushing or tearing the tire.
| Check | What to do |
|---|---|
| Spacing | Keep all three attachment points equal so the tire hangs level. |
| Fit | Drill snug holes that do not wobble around the eye-bolt shaft. |
| Hardware | Use rated, corrosion-resistant parts with washers and locking nuts. |
| S-hook closure | Close each S-hook so the opening is smaller than the thickness of a dime. |
Slide an S-hook or rated connector through each eye bolt. Close each S-hook with locking pliers so it cannot pop open or catch clothing. Do not leave sharp bolt ends, open hooks, or exposed hardware where a child can scrape skin or snag clothing.
[Products Worth Considering]

Vigorder rubber cement glue delivers superior adhesion and cures quickly within about 30 seconds for seamless rubber bonding. Once cured, it helps provide a strong, durable, waterproof seal that holds up to vehicle weight, pressure, and heat. Suitable for cars, motorcycles, trucks, bicycles, and off-road tires, it’s designed for emergency patch and maintenance repairs.

Steelman white tire marking crayons provide high-contrast, semi-permanent marks for repairing and inspecting tires and equipment. They write on wet or dry, smooth or coarse surfaces including rubber, metal, glass, and wood, making them ideal for puncture location and damage outlining. The lead- and zinc-free crayons resist weather and fading yet wipe away when you no longer need the marks.

The Topeak SmartGauge D2 delivers precise digital tire pressure readings for bikes, motorcycles, and sports equipment up to 250 psi (17 bar). Its rotating SmartHead works with both Presta and Schrader valves, so you can check pressure quickly without adapters. The LCD display makes it easy to read results in psi, bar, or kg/cm² with an included CR2032 battery for immediate use.
Attach the Chains and Top Connector
Attach one chain to each tire connection point. The three chains should be equal in length so the tire hangs flat. Bring the top ends together at one rated swivel or connector. A swivel reduces twisting and helps the tire rotate more smoothly.
[Products Worth Considering]

This 13-inch flat-free wheelbarrow tire uses solid polyurethane foam construction with steel rims, so it will not puncture, rot, or go flat. The anti-skid tread improves stability and maneuverability across garden, lawn, and mixed terrain. It includes pre-installed 5/8-inch bearings plus extra 3/4-inch bearings and a versatile adapter kit to fit compatible wheel sizes and cart hubs.

This car D-wheel lock nut key provides an anti-theft solution for D-shaped wheel lock bolts, helping keep your wheels secure. It features a flower-shaped internal pattern that resists micro-adjustment theft while allowing removal and mounting of compatible locking nuts. Made for reliable performance under high torque, it’s easy to use with standard socket wrench turning for quick tire maintenance and emergency repairs.

Upgrade your garden cart, wagon, trolley, or hand truck with solid puncture-guarded tires that help prevent flats for worry-free pushing. Textured tread improves stability, grip, and shock absorption for smoother, safer travel over outdoor surfaces. Built with strong polyurethane and durable bearing components for long-lasting performance and confident handling.
Chain Attachment Steps
Connect each lower chain to its tire-mounted S-hook or connector link. Close every hook fully, then pull on each chain by hand to make sure nothing shifts. Do not use decorative chain, thin utility chain, or chain with bent, stretched, or rusted links.
| Check | What you want |
|---|---|
| Hook fit | Closed tight with no clothing-snag gap. |
| Chain strength | Visible working load limit that exceeds expected use. |
| Chain length | Equal on all three sides. |
| Movement | Smooth swing and rotation without binding. |
Top Connector Setup
Gather the three chain tops into a rated top connector or swivel. The top connector becomes the main lift point, so it must be stronger than the load you expect and suitable for outdoor movement. Follow the hardware manufacturer’s instructions for orientation and closure.
If you use a tree strap or branch hanger, choose one designed for swings and outdoor loads. Avoid wrapping bare chain tightly around a living branch because it can damage bark and create a weak point over time.
Secure Load Connections
After the chains, swivel, and top connector are assembled, inspect each connection from bottom to top. Look for open hooks, crooked connectors, loose nuts, twisted links, and hardware rubbing against the tire.
- Check each eye bolt and washer for a snug fit.
- Make sure every S-hook or connector is fully closed.
- Confirm the three chains carry the load evenly.
- Reject any part with rust, bending, cracking, or unknown rating.
Hang the Tire Swing on the Branch
Lift the swing into position only after the tire, chains, hardware, and surfacing are ready. Use a stable ladder and have another adult help. Keep children away during installation.
Attach the top connector to the branch hanger, tree strap, or properly installed rope system. If you use rope, choose outdoor-rated rope that does not untwist or separate, and use secure knots such as a bowline or double figure-eight. Do not leave loose loop-forming rope where a child could become entangled.
Set the tire so the bottom sits at least 12 inches above the protective surface. Many backyard setups work best when the bottom of the tire is about 18 to 24 inches high, but the right height depends on the rider’s age, leg length, and the swing arc. The tire should not drag on the surface at the lowest point of the swing.
Stand back and check the full path of travel. The tire should clear the trunk, nearby branches, fences, posts, and any other object throughout its swing and spin.
Test Weight, Height, and Wear
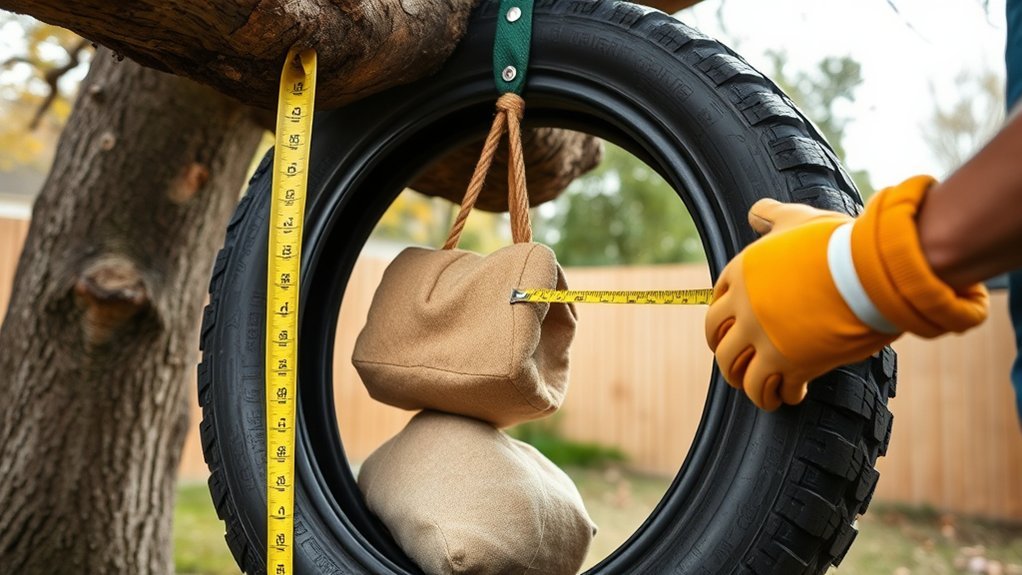
Do not let anyone ride until you test the swing. Start with a slow hand pull, then apply weight gradually. Watch the branch, strap, rope, chain, swivel, S-hooks, eye bolts, washers, tire sidewall, and surfacing while the swing moves.
Test Weight Capacity
Test with a controlled load before the first ride. Use a load that matches or exceeds the heaviest expected rider, but do not exceed the working load limit of the weakest part. If any part shifts, creaks, bends, slips, or digs into the branch, stop and fix the problem before use.
- Press down on the tire and watch each attachment point.
- Pull the tire forward, backward, and side to side.
- Spin it slowly to check the swivel and top connector.
- Stop immediately if any hardware opens, twists, or loosens.
Check Height And Wear
Check the height again after testing. The tire may settle as knots tighten or surfacing shifts. Keep at least 12 inches of clearance under the tire, and maintain the full protective surface depth across the use zone.
Look for wear every month and after storms. Replace cracked tires, frayed rope, rusty chain, loose nuts, bent S-hooks, worn swivels, and compacted surfacing. If the branch changes shape, loses bark, cracks, or sheds dead limbs, stop using the swing until the tree is inspected.
Maintenance Checklist
A tire swing needs routine checks because swinging and spinning create repeated stress. Add these checks to your monthly yard routine.
- Rake loose-fill surfacing back into place and confirm the depth is still adequate.
- Clear drainage holes in the tire so rainwater can escape.
- Check that S-hooks remain fully closed.
- Tighten nuts only if the hardware design allows it and nothing is damaged.
- Replace rope that looks fuzzy, flat, brittle, loose, or sun-damaged.
- Replace chain with rust, stretched links, kinks, or sharp edges.
- Check the branch and trunk after high wind, ice, lightning, or heavy rain.
- Supervise children and limit the number of riders to what the swing and hardware can safely support.
Common Mistakes to Avoid
Most tire swing problems come from rushing the setup or treating the swing like a decoration instead of play equipment. Avoid these mistakes before children use it.
- Do not hang the swing over concrete, asphalt, gravel, roots, or bare dirt.
- Do not use a cracked tire or one with exposed steel belts or wires.
- Do not use heavy truck tires for children’s swings.
- Do not leave open S-hooks or protruding bolts where clothing can catch.
- Do not hang the tire too low or so high that a child has to climb dangerously to sit.
- Do not let children twist loose ropes around their necks, bodies, or clothing.
- Do not allow bike helmets on play equipment because helmet straps can snag.
- Do not assume a branch is safe because it looks large from the ground.
Frequently Asked Questions
How do you properly hang a tire swing?
Choose a healthy branch, prepare a clear surfaced use zone, drill drainage holes in the tire, install three evenly spaced rated attachment points, connect equal chains to a rated swivel, and hang the tire so the bottom stays at least 12 inches above the protective surface. Test every connection before use.
How do you hang a swing from a tree safely?
Use a mature, healthy branch with no visible defects, then use a tree-safe hanger, rated strap, or outdoor-rated rope system. Keep the swing path clear, install protective surfacing below, and avoid wrapping bare chain tightly around the branch. If you are unsure about the tree, ask an arborist to inspect it.
How high off the ground should a tire swing be?
Keep the bottom of the tire at least 12 inches above the protective surface. Many backyard swings feel comfortable around 18 to 24 inches, but the safest height depends on the child’s size and the swing’s arc. The tire should never scrape the ground during use.
How thick should a branch be for a tire swing?
Many DIY installers look for a branch at least 8 inches thick, but diameter alone is not enough. The branch also needs a strong union, healthy wood, good tree structure, and no cracks, decay, cavities, dead limbs, or storm damage. When in doubt, get a professional tree inspection.
Can you use rope instead of chain for a tire swing?
Yes, but use outdoor-rated rope with a working load limit that exceeds expected use. Avoid rope that can untwist, separate, fray quickly, or form loose loops. Secure knots carefully, check them often, and replace rope at the first sign of wear.
Is grass enough under a tire swing?
No. Grass and dirt are not reliable protective surfacing for playground equipment. Use impact-absorbing surfacing, maintain the correct depth, and extend it across the full tire-swing use zone.
Conclusion
A safe tire swing starts with a healthy tree, a sound tire, rated hardware, and real protective surfacing. Take your time with the branch check, drainage holes, chain setup, S-hook closure, and height adjustment. Then inspect the swing monthly and after storms. If anything looks cracked, loose, rusty, frayed, or unstable, stop using the swing until it is repaired or replaced.
Sources
- CPSC Outdoor Home Playground Safety Handbook — home playground surfacing, swing spacing, S-hook closure, rope hazards, and maintenance guidance.
- CPSC Public Playground Safety Handbook, Publication 325, July 2025 — multi-axis tire swing guidance, drainage holes, heavy tire warnings, use zones, and clearance benchmarks.
- UF/IFAS Gardening Solutions: Tree Risk Assessment — tree defect signs, including dead branches, broken branches, decay, cavities, codominant stems, and leaning.
- TreesAreGood: Recognizing Tree Risk — tree-risk warning signs such as cracks, splits, dead branches, weak unions, and decay.
