
How to Use a Manual Tire Machine: Beginner’s Step-by-Step Guide
To use a manual tire machine, you first inspect the wheel, gather your tools, and apply tire lubricant to the bead and rim. Then clamp the wheel securely on the turntable, remove the valve core, and use the bead breaker to separate the tire from the rim. Next, guide the tire off with the duck head, mount the new tire, and inflate slowly until the bead seats. Stay within pressure limits, and you’ll catch the finer details next.
Key Takeaways
- Inspect the wheel, confirm tire size and direction, and gather gloves, safety glasses, lubricant, and basic hand tools.
- Clamp the clean wheel securely on the turntable, centered and stable, with the valve stem positioned for easy access.
- Break the bead by removing the valve core, then use the bead breaker and lever bar to separate the tire from the rim.
- Lubricate the beads and rim, then mount the tire carefully over the duck head while keeping the opposite bead secured.
- Inflate slowly to seat the bead, never exceed 40 psi, then reinstall the valve core and verify final tire pressure.
How a Manual Tire Machine Works
A manual tire machine uses mechanical leverage and a few key components to mount and dismount tires without electricity. You operate it by anchoring the wheel in the rim clamps, then using the center post and duck head mount to guide the tire. These tire changers let you control bead breaking and mounting a tire with steady, deliberate force instead of brute effort. The main components work together: the clamps hold the wheel firm, the post provides alignment, and the duck head creates the path that lifts the bead over the rim edge. You must apply pressure smoothly and keep the tire lubricated so the bead slides cleanly and the rim stays protected. Because the machine multiplies your strength, you can change tires efficiently while maintaining precision and control. With correct technique, you gain access to service your own wheels without dependence on powered equipment. Additionally, understanding the importance of reinforced sidewalls can enhance your tire-changing experience and ensure better protection for your rims.
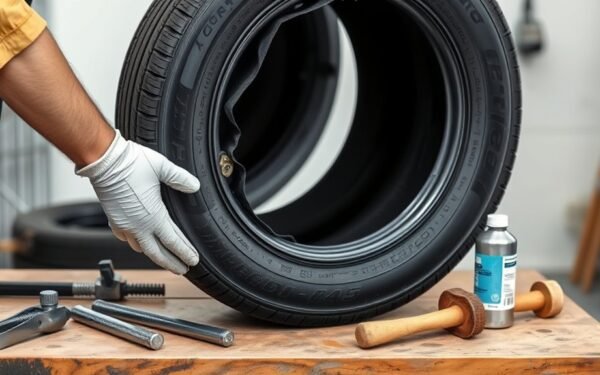
Gather Tools and Inspect the Wheel
Before you start, gather a 3/16 hex key, a 1/2 wrench or socket, tire lubricant, gloves, and safety glasses so you’ve got the basics for the job. Then gather tools and place them within reach so you can work without delay. Put on your safety glasses and gloves before you touch the wheel. Inspect the wheel for cracks, bends, gouges, or corrosion that could compromise serviceability. Clean off dirt, brake dust, and any loose debris so your inspection is accurate and your work stays controlled. Check the center bore and confirm it matches your manual tire machine’s interface; incompatible fit can disrupt the process. Verify the tire size against the wheel markings, and note any directional arrows or side indicators before you proceed. Apply tire lubricant only where needed to reduce friction and help the bead move cleanly. When you inspect the wheel carefully, you protect your labor, your freedom, and the integrity of the assembly. Additionally, ensure that the wheel’s fit aligns with BFGoodrich tire specifications to avoid any compatibility issues during installation.
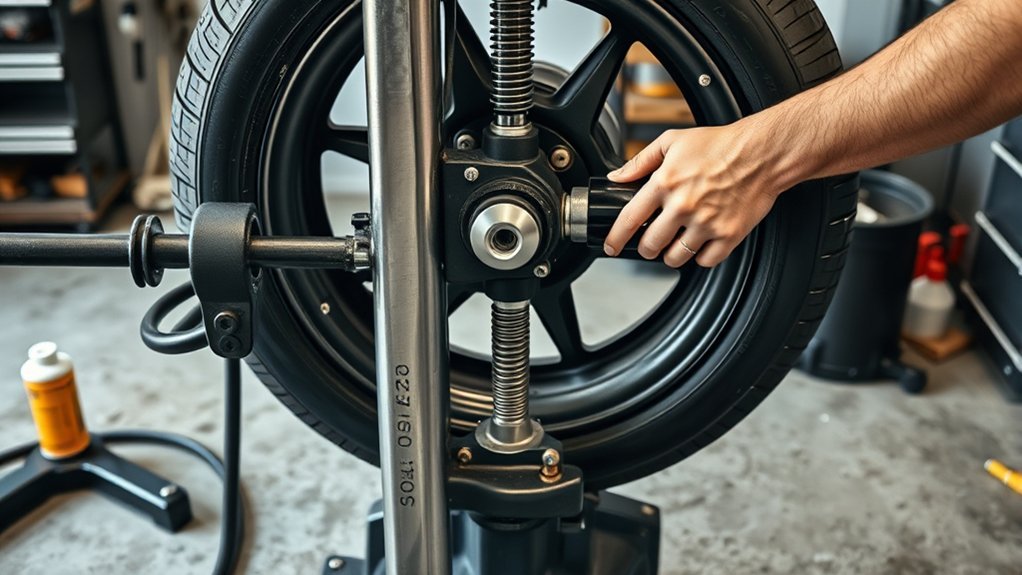
Clamp the Wheel on the Machine
Set the clean wheel on the turntable with the valve stem facing up so you can reach it easily during mounting. Choose clamps sized for the wheel, then align them with the rim so the tire machine grips without forcing the metal. If your machine uses inside clamps, avoid any misplacement that could mark the rim. Tighten each clamp evenly until the wheel sits firmly and won’t shift under pressure. A secure hold matters because movement can compromise tire mounting accuracy and safety. After clamping, check that the wheel is centered on the turntable and remains stable when you apply light pressure by hand. If it rocks or sits off-center, release the clamps, reposition the wheel, and tighten again. This step gives you control, protects the rim, and keeps the tire machine ready for efficient work. Additionally, ensuring the wheel is properly clamped is crucial for preventing off-road traction issues during the mounting process.
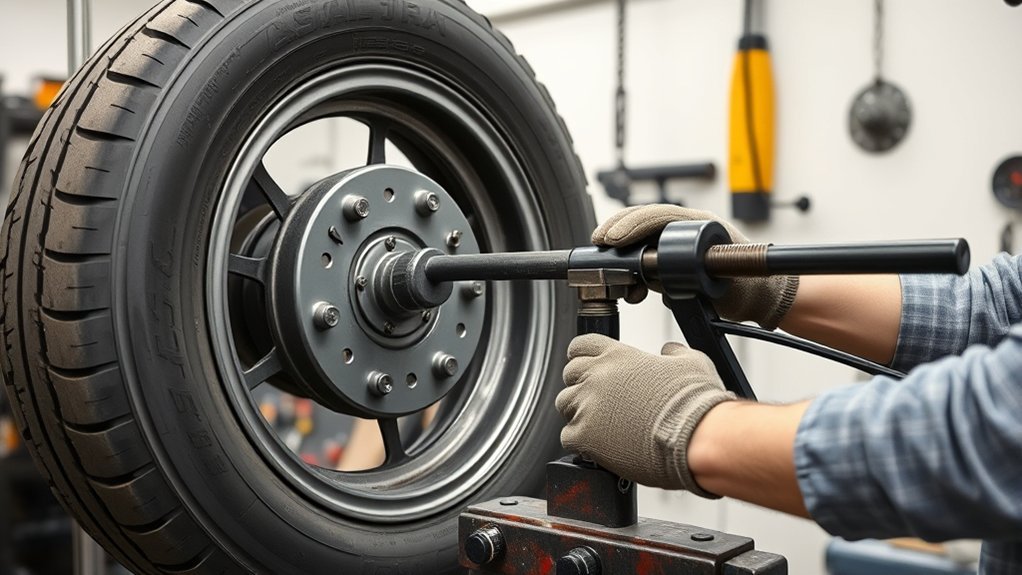
Break the Bead and Remove the Tire
Remove the valve stem core to lower tire pressure, then position the tire upright with the valve at the top near the bead breaker. Activate the bead breaker arm to separate the bead fully from the rim. Use a lever bar to lift the tire off the rim carefully, avoiding damage to either component. It’s important to monitor tire pressure post-repair to ensure optimal performance after re-mounting the tire.
Breaking the Tire Bead
Deflate the tire by removing the valve stem core, then stand the tire upright on its tread with the valve stem facing up and aligned with the bead breaker. Clamp the wheel on the tire machine so it can’t shift. Lower the bead breaker arm until it presses the bead free from the rim, then repeat around the sidewall.
| Step | Action | Result |
|---|---|---|
| 1 | Remove the valve stem core | Pressure drops |
| 2 | Align the bead | Cleaner contact |
| 3 | Activate the arm | Bead separates |
Apply steady force, not excess, to protect the wheel. Once both beads are broken, lock the assembly firmly and use a lever bar to begin you’ll remove the tire safely, with control and freedom from guesswork.
Lifting Off the Tire
With the beads already broken, lock the wheel and tire assembly firmly on the machine so it can’t shift during dismounting. On the tire changer, position the wheel so the valve stem area stays clear, then use the rim and lock clamps to secure it. Insert the lever bar between the bead and rim edge, and pry only enough to lift the bead over the flange. Keep steady pressure as you work around the circumference, guiding the sidewall off in controlled sections. If resistance remains, pause and check that the bead is fully free; don’t force it. Maintain protection for the rim and tire throughout. Your goal is clean separation, minimal strain, and the freedom to remove the tire without damage.
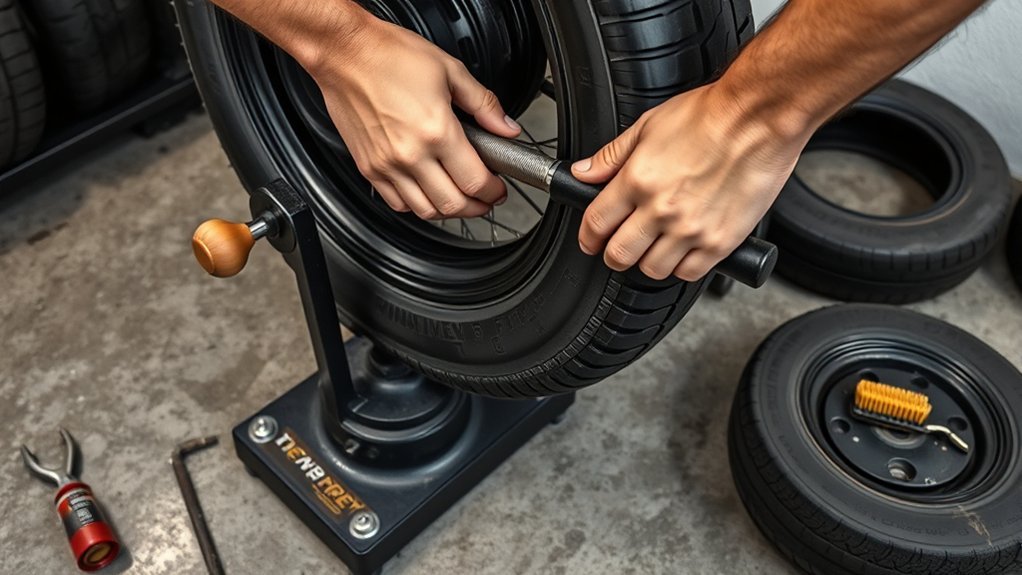
Mount the Tire on the Rim
Lubricate the tire beads and rim edge, then position the tire over the center post with the valve stem aligned to the rim. Angle the inside bead over the duck head and keep the opposite side in the drop center with a rim clamp while you maintain the correct duck head angle. Continue mounting until the bead seats, then inflate the tire to the specified pressure. Using a tire sealant can help prevent leaks and maintain tire pressure effectively.
Prepare Tire And Rim
Start by cleaning both the tire and rim thoroughly so dirt or debris doesn’t interfere with mounting. To prepare tire and rim, inspect the tire for directional markings, then align the valve stem with the manufacturer’s design. Apply tire lube to the tire bead and the rim edge; this reduces friction and protects the bead during mounting. Position the tire over the center post of the manual changer, keeping the inside bead angled over the duck head for controlled installation. Set the rim clamp to secure the assembly and hold the opposite side in the drop center. These steps give you precise control, reduce strain, and help you move with confidence and freedom while you work.
Align Bead To Duckhead
Align the inside bead over the duckhead and line the valve stem up with it before you begin mounting. To align bead to duckhead, center the tire on the rim and set the opposite bead in the drop center. Lock the rim clamp so the tire can’t shift while you work. On tire machines, that restraint helps you control leverage and keeps the bead moving cleanly over the rim. Apply a thin coat of tire lubricant to the bead, then maintain the duckhead’s correct angle as you advance the tire. Your step-by-step instructions should keep steady pressure and avoid damage to the tire. If the bead starts to bind, stop, reset the alignment, and continue with controlled force so you can mount it safely and efficiently.
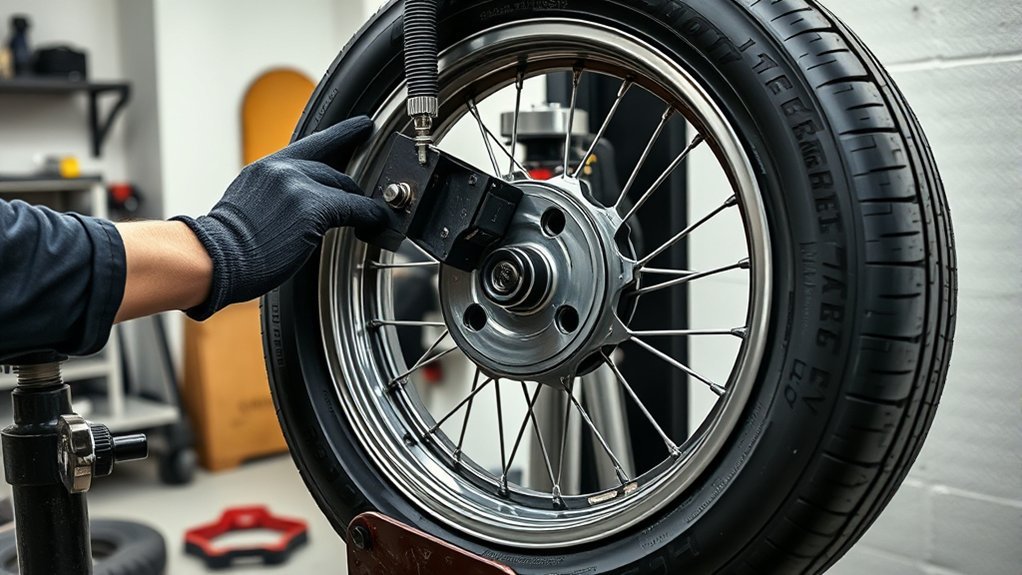
Inflate Until Bead Seats
After the tire is fully lubricated along the rim edge and bead, remove the valve core and secure the inflation chuck to the valve stem so air can flow freely. Begin to inflate until bead seats, watching the tire and rim interface closely. Keep the pressure gauge in view and add air gradually; do not exceed the maximum recommended pressure of 40 psi (2.76 bar). You should hear a sharp pop when each bead locks into place. That sound confirms proper seating and helps guarantee a smooth, even mount. If the bead doesn’t seat, stop, deflate, and inspect lubrication, alignment, and the rim. Once both beads are seated, shut off air, remove the chuck, and reinstall the valve core immediately to preserve pressure.
Seat the Bead and Inflate Safely
With the tire mounted on the rim, inspect the bead all the way around to make sure there isn’t a visible gap between the tire and wheel, then apply tire lubricant to the bead to help it seat and reduce damage during inflation. Use the lube sparingly but completely so the bead can move freely. To seat the bead, connect your air source and inflate the tire slowly, listening for the sharp pop that confirms engagement. Keep tire pressure below 40 psi (2.76 bar) during this step.
- Check the bead line on both sides.
- Inflate in short bursts and watch for the pop.
- Verify tire pressure against the manufacturer’s specification.
Once the bead seats, monitor tire pressure closely and adjust it to the recommended level. Reinstall the valve core securely, then recheck pressure before you put the tire into service. This controlled process protects the tire, the wheel, and your freedom to work safely. Additionally, ensuring proper tire inflation helps maximize tire life and performance.
Avoid Common Manual Tire Machine Mistakes
Even a properly mounted tire can fail if you overlook a few common mistakes, so keep the wheel centered on the turntable, use only tire-specific lubricant, and follow the manufacturer’s inflation limit to avoid damaging the bead or weakening the tire. When you use a tire machine, activate the bead breaker smoothly and verify the tire and wheel sit squarely before each move. Check directional arrows and inside/outside labels before you proceed. At your repair shop, inspect the manual machine for wear, loose pivots, or bent components, because a neglected tool can slip and injure you. It’s also essential to carry a reliable spare tire kit to ensure you are prepared for emergencies on the road.
| Mistake | Risk | Fix |
|---|---|---|
| Off-center wheel | Uneven pressure | Reposition it |
| Wrong lubricant | Bead seating issues | Use tire lube |
| Overinflation | Blowout risk | Stay within specs |
| Misread markings | Incorrect fit | Confirm orientation |
| Poor maintenance | Mechanical failure | Inspect regularly |
You can work with precision, protect your freedom, and finish faster.
Frequently Asked Questions
What Tire Sizes Can a Manual Tire Machine Handle?
Manual tire machines usually handle passenger-car and light-truck sizes, but your exact Tire size compatibility depends on the rim diameter, bead profile, and machine jaw range. You should check the manufacturer’s limits before mounting. For safe Manual tire maintenance, match the tire width and sidewall height to the tool’s specs, then verify Tire bead seating after inflation. Follow Machine safety tips, keep clear of pinch points, and choose equipment that fits your needs.
Do I Need Special Training Before Using One?
Yes—you should get basic training before you use one. A tire slipping into place just as your hands steady the bead shows why. You’ll learn safety precautions, machine maintenance, and tire changing tips that prevent injury and damage. Don’t skip demos or manuals. Common mistakes include improper bead placement and poor lubrication. With practice, you can work confidently, efficiently, and independently, without relying on guesswork or unsafe habits.
How Much Force Should I Apply When Clamping?
Apply only enough force to hold the wheel firmly without deforming the rim; you’ll usually feel the clamps bite, then stop. Use clamping pressure techniques to increase pressure gradually, and keep a safety precautions overview in mind. Avoid common mistakes beginners make, like over-tightening or slipping the wheel. You’ll protect yourself and maintain equipment longevity by checking grip, re-centering, and re-tightening only as needed.
Can I Use a Manual Tire Machine on Alloy Wheels?
Yes, you can use a manual tire machine on alloy wheels, but you’ve got to verify alloy wheel compatibility first. You might think manual tools are too rough, yet manual machine advantages include control and feedback. Use proper tire changing techniques, protect the rim with inserts, and follow safety precautions to avoid scratches or bends. With careful leverage and steady positioning, you’ll work efficiently and stay in command.
How Often Should the Machine Be Lubricated?
You should lubricate the machine before every use and inspect it weekly for dry pivots, sliding surfaces, and threaded parts. Your Maintenance schedule depends on workload, but heavy daily use may need midshift relubrication. Use the correct Lubrication types recommended by the manufacturer to gain Performance benefits like smoother leverage and reduced wear. Follow Safety precautions: clean excess grease, avoid contaminating beads, and lock out the machine during service.
Conclusion
With your manual tire machine set up correctly, you can swap tires with steady, controlled force, like turning a stubborn lock with the right key. Keep your wheel clamped, your bead tools aligned, and your motions smooth to avoid pinching the sidewall or scratching the rim. Inflate only when the bead seats evenly, and always double-check your work. When you follow each step carefully, you’ll finish safely, efficiently, and with professional-looking results.
Related Articles
How to Turn a Tire Inside Out: Step-by-Step Method
A step-by-step method reveals how to turn a tire inside out safely, but the trick that makes the hardest part easy comes next.
Read More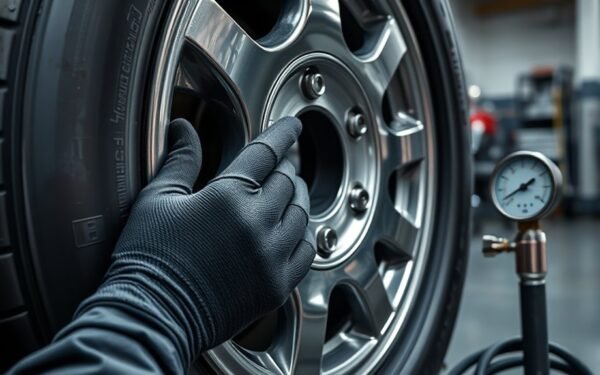
How to Rebead a Tire: Proven Methods for a Perfect Seal
Great tire sealing starts with the right prep, but one overlooked step can make all the difference—discover the proven method inside.
Read More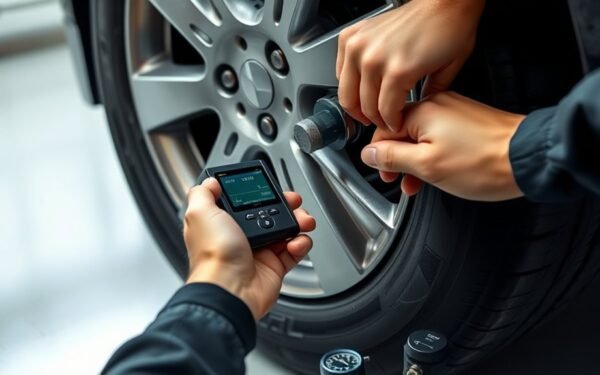
How to Program Tire Sensors (TPMS): Step-by-Step Guide
Master tire sensor programming with our step-by-step TPMS guide, and discover the crucial trick that can keep your warning light on.
Read More