
How to Use a Manual Tire Changer: Complete Step-by-Step Guide
Set the manual tire changer on a level surface, attach the center guide, and verify the post cap fit. Clean the wheel, remove the valve core, and apply tire lubricant to the bead and rim. Lock the wheel, break the bead, and pry the old tire off with controlled leverage. Mount the new tire with the bead in the drop center, then inflate in short bursts until both beads seat. Keep going to avoid common mistakes and learn proper maintenance.
Key Takeaways
- Set up the manual tire changer on a stable surface and ensure all parts are properly aligned and tightened.
- Clean the wheel, inspect for damage, remove the valve core, and apply tire lubricant before starting.
- Secure the wheel, break the bead, and use a lever bar to carefully remove the old tire.
- Mount the new tire by keeping the bead in the drop center and rotating the arm slowly over the rim.
- Inflate in short bursts until the beads seat, then check pressure and perform regular cleaning and maintenance.
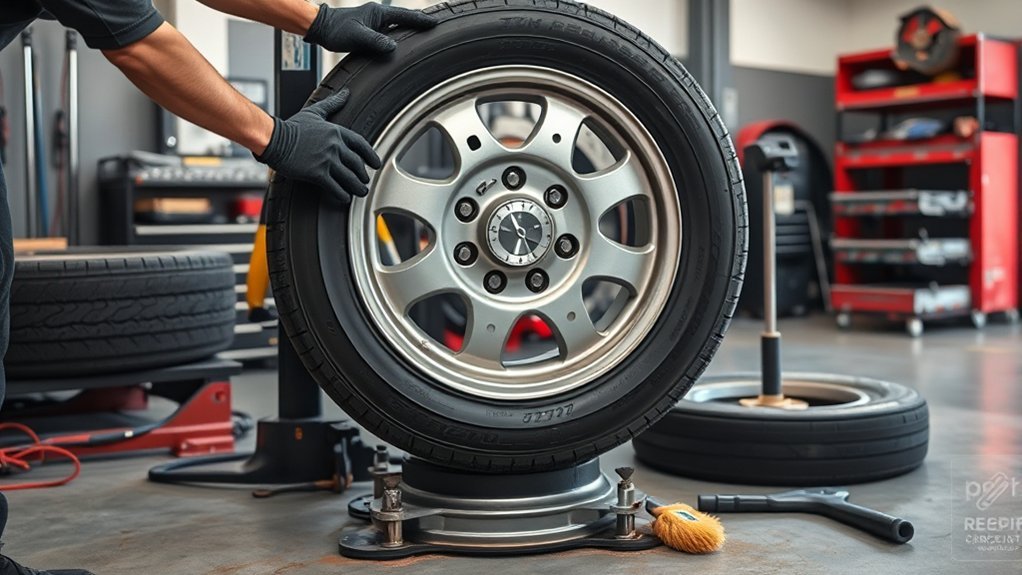
Set Up Your Manual Tire Changer
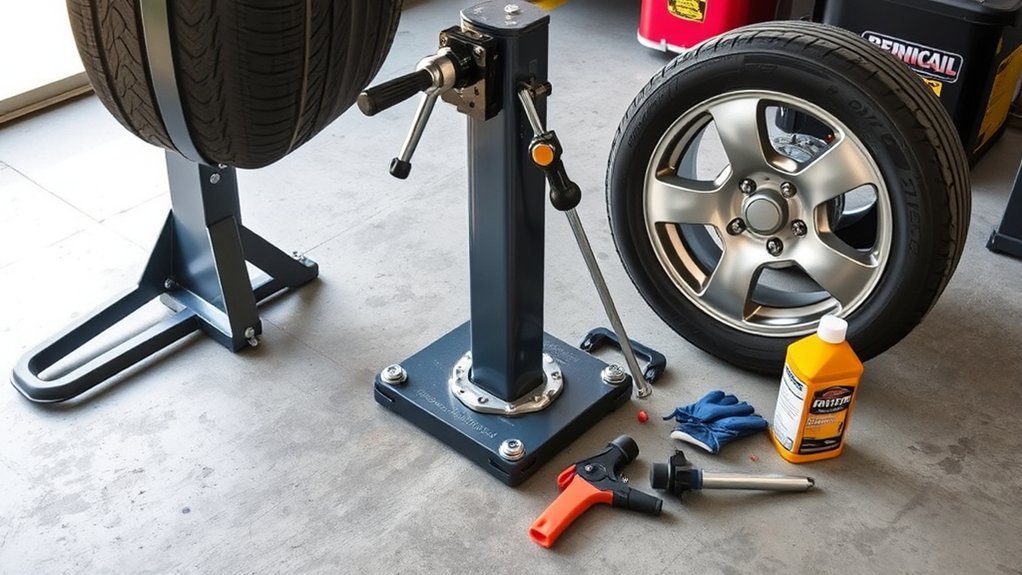
Before you start, place the manual tire changer on a stable, level surface so it stays steady during use. This setup keeps tire changers from wobbling and gives you control during assembly. Gather a 3/16 hex key and a 1/2 wrench or socket before you begin. Check that your model accepts a 2-inch or smaller post cap, because fit matters for safe mounting. Attach the center guide to the overarm with two 5/8 bolts, then tighten them evenly to create a secure fit. Next, insert the duck head mount arm into the rear of the center guide. Adjust its height so you can work with less strain and better access. Keep each fastener snug, but don’t overtighten. When you set up the machine correctly, you free yourself from avoidable friction and prepare for efficient tire service. Validate alignment before moving on. Having a reliable tire repair kit can also ensure you’re prepared for any unexpected issues during the process.
Prepare the Wheel and Tire
Start by cleaning the wheel and tire thoroughly so dirt and debris don’t interfere with the mounting process. Use cleaning the wheel as a deliberate prep step: scrub the rim edge, wipe the bead seat, and clear away grease, rust, or grit. Next, inspect both the rim and tire for cracks, bulges, cuts, or bent flanges; if you spot damage, don’t proceed. Then remove the valve stem core to drop pressure and make the assembly safer to handle. Position the tire upright on its tread with the valve stem facing upward, and line it up squarely with the bead breaker so you can work with control, not force. Before you mount or dismount, apply tire lubricant to the rim edge and tire bead. This reduces friction, protects the rubber, and helps the bead move smoothly. When you prepare the wheel and tire this way, you keep the process efficient, precise, and under your command. Additionally, having a tubeless tire repair kit on hand can be a lifesaver for quick fixes during unexpected punctures.
Break the Bead and Remove the Tire
First, remove the valve stem core to drop tire pressure and make bead breaking easier. Set the tire upright with the valve stem facing up near the bead breaker, then lock the wheel and tire securely on the changer. Activate the bead breaker to fully separate the bead from the rim, then use a lever bar to pry the tire off without damaging either surface. Ensuring proper tire compatibility is crucial for optimal performance during this process.
Preparing the Wheel
With the wheel secured on the tire changer, remove the valve stem core and fully deflate the tire to eliminate pressure before breaking the bead. Lock the assembly firmly so it can’t shift while you work. Next, position the tire vertically with the valve stem facing up, giving the bead breaker clear access to the sidewall. Activate the bead breaker and press the shoe against the tire evenly around the wheel to separate the bead from the rim without twisting the assembly. Once the bead is free, use a lever bar to remove the tire from the rim in controlled passes, working around the circumference to keep the steel and rubber intact. This method gives you clean control and the freedom to remove the tire safely.
Breaking the Bead
Remove the valve stem core to bleed off pressure and let the tire relax against the rim before you break the bead. Set the tire upright, valve stem near the bead breaker, then lock the tire and rim securely on the machine.
| Step | Action |
|---|---|
| 1 | Position the assembly for access. |
| 2 | Activate the bead breaker arm. |
| 3 | Maintain steady force. |
| 4 | Separate the bead cleanly. |
With the wheel stable, apply the arm until the bead releases without damage to the tire or rim. This controlled breaking the bead step is standard on tire machines and mirrors the precision you’ll use when mounting a tire later. Once both beads are free, use a lever bar to pry the tire away from the rim. Keep your strokes deliberate; that’s how you stay liberated from avoidable damage to the tire and wheel surfaces.
Mount the New Tire Correctly
Lubricate the tire bead and rim edge before you start, then position the inside bead over the duck head at a slight angle so it mounts more easily. For clean tire mounting, align the tire with the wheel and use the rim clamp to lock the rim in place. Keep the opposite side of the tire bead down in the drop center; that extra slack gives you room to work and protects the sidewall from stress. With the mounting arm set, rotate it gradually and guide the bead over the rim in one controlled pass. Maintain steady pressure so the bead doesn’t pinch or twist against the lip. If resistance rises, stop and recheck your setup instead of forcing it. A correct mount should feel smooth, deliberate, and free of drama. When the bead is on, you’ve completed the mechanical part of the change and you’re ready for inflation checks. Proper tire maintenance, including regular pressure checks, helps ensure optimal performance and longevity.
Seat the Bead and Inflate Safely
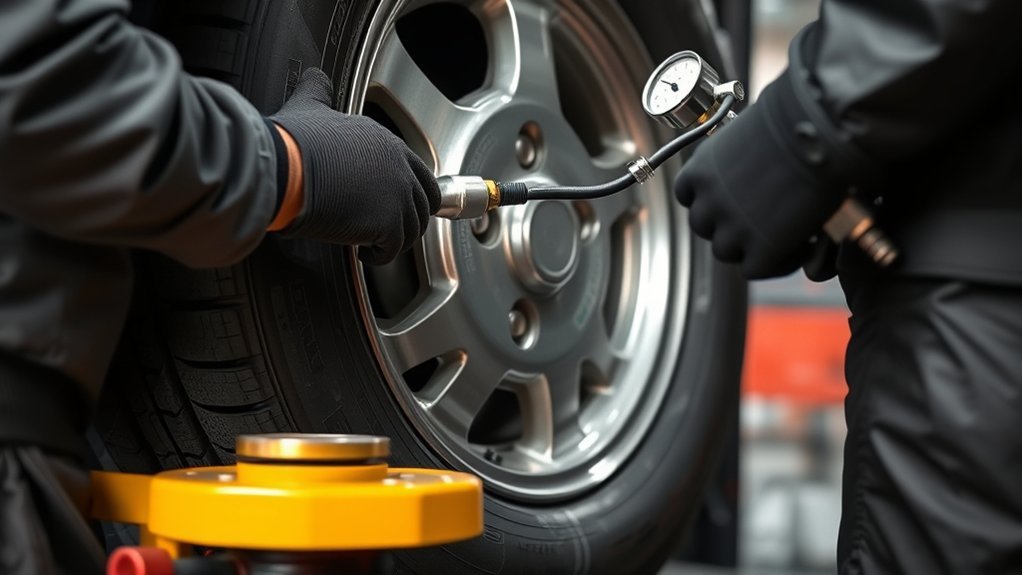
Once the tire is mounted, make certain the bead and rim edge are still well lubricated before you begin inflation. This helps seat the bead and lets the tire and rim move together smoothly as pressure rises. Secure the inflation chuck tightly on the valve stem so no air escapes. Then inflate safely in short, controlled bursts while you watch the tire pressure gauge. Keep your eyes on the sidewalls and listen for the sharp pop that signals both beads have seated against the rim. Stop near 30-40 psi, or when seating is complete, whichever comes first. Don’t rush the process; gradual inflation helps guarantee a smooth, even set without stressing the assembly. After the beads lock in place, remove the inflator, install the valve core, and check tire pressure again. Confirm it matches the recommended range before you move the wheel back into service. Proper tire inflation is crucial for maintaining optimal performance and safety on the road.
Avoid Common Manual Tire Changer Mistakes
After the tire is seated and inflated, the next step is avoiding the setup and handling errors that can damage the tire, rim, or changer. In your shop, follow step-by-step instructions and wear safety glasses before you touch the setup. Lubricate the tire without skipping the bead; dry mounting invites tearing and makes the lever fight you. Center the tire on the post so pressure stays even and the rim doesn’t twist. When you engage the duck head, keep the angle correct; a bad angle pinches the sidewall and causes leaks. Don’t force bolts down by feel. Use a torque wrench and match the manufacturer’s specification so you don’t warp the rim. If you use a tire machine, treat it with the same precision. Inspect the changer regularly for wear, loose parts, and binding, because a worn tool steals control and limits your freedom to work cleanly, safely, and efficiently. Additionally, ensuring proper tire specifications can prevent installation difficulties and enhance overall performance.
Maintain Your Manual Tire Changer
You should clean your manual tire changer regularly to remove debris and lubricant buildup, keeping the механизмs moving smoothly and preventing component damage. Check and refill the oiler weekly, and drain the water separator daily so you maintain proper lubrication and consistent air pressure. Inspect all parts for wear or damage, and replace worn components promptly to keep the machine safe and reliable. Additionally, using a tire spoon kit can enhance your DIY tire changing experience and help avoid service fees.
Regular Cleaning
Regular cleaning keeps your manual tire changer operating smoothly and prevents residue from interfering with performance. After each use, wipe the manual tire changer with a soft cloth and mild detergent to remove dirt, debris, and tire lubricant. This routine supports regular cleaning, protects moving parts, and helps you inspect and clean high-contact zones before problems spread.
- Clean the turntable and mounting arm first, where grease and grime collect fastest.
- Drain the water separator daily to stop moisture-related damage.
- Check the oiler weekly and clean it so moving parts stay properly supplied.
Avoid harsh chemicals; they can damage surfaces and reduce control. By preventing buildup, you keep the machine responsive, efficient, and ready for the next job without unnecessary downtime.
Lubrication And Inspection
With the changer clean, keep it lubricated and checked for wear so it works smoothly and safely. Apply tire lubricant to the rim edge and tire bead before each mount or demount; this cuts friction, protects the wheel, and helps you work with less strain. Inspect the frame, bolts, and pivot points every session, and stop if you spot cracks or looseness. Check the oiler weekly and refill it so moving parts stay coated. Drain the water separator daily to prevent moisture damage in the air system. Wipe high-use contact points after jobs to block debris build-up. This maintenance routine keeps your manual tire changer efficient, durable, and ready for independent, reliable service whenever you need it.
Frequently Asked Questions
Can a Manual Tire Changer Work on Run-Flat Tires?
Yes, a manual tire changer can work on run-flat tires, but you’ll face tough run flat tire characteristics and need verified manual changer compatibility. You’ll often need stronger bead breaking techniques, extra leverage, and careful tire changing safety practices to avoid damaging the sidewalls. If you want freedom from shop dependence, use proper lubrication, inspect the rim, and follow maintenance tips to keep the tool and tire serviceable, efficient, and safe.
Which Tires Are Too Large for a Manual Tire Changer?
Tires exceed your manual tire changer’s maximum tire size when the bead diameter, section width, or overall diameter outruns its tire changer limitations. You’ll usually struggle with wide low-profile, heavy LT, run-flat, and large off-road tires. Check tire type compatibility before you start. Manual changer benefits include low cost and portability, but professional tire changers handle oversized assemblies faster, safer, and with less strain on you.
How Much Force Should Break the Bead?
You’ll usually need about 50–100 pounds of steady force to break the bead, but the real answer hides in the tire’s stiffness. Use proper bead breaking techniques, required equipment, and safety precautions, then press until the bead releases cleanly. Don’t overforce it; common mistakes damage rims and tires. Maintain your tire changer maintenance, and you’ll work faster, safer, and with less struggle—free from guesswork.
Do All Wheel Sizes Need the Same Adapter?
No, you don’t need the same adapter for every wheel size. You should match adapter compatibility to your wheel diameter and the specific tire changer types you’re using, because the installation process depends on fit and leverage. Check the maker’s chart before you start, and don’t force mismatched parts. For smooth operation, inspect wear points, keep threads clean, and follow maintenance tips so you stay efficient, safe, and in control.
Can I Use a Manual Changer Without Tire Lubricant?
You can use a manual changer without tire lubricant, but you’ll work harder and risk bead damage. For better tire maintenance tips, use lubricant alternatives like soapy water or approved mounting paste. These manual changer benefits improve tire changing techniques, reduce friction, and protect the rim. Follow safety precautions: keep hands clear, support the tire evenly, and stop if resistance spikes. You deserve efficient, controlled tire service.
Conclusion
When you finish, think of your manual tire changer as a steady bridge between worn tread and fresh road. If you set it up right, prepare the wheel carefully, break the bead with control, and seat the new tire safely, you’ll cross without trouble. Keep your motions precise, avoid common mistakes, and maintain the tool after each use. Then every tire change becomes a reliable passage, not a struggle.
Related Articles
DIY Tire Swing: How to Build One Safely at Home
Making a DIY tire swing safely at home means choosing the right tire, hardware, and tree limb—before you hang it, learn the crucial steps.
Read More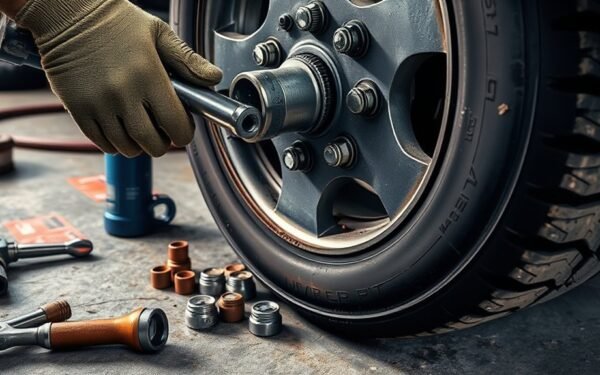
How to Unscrew Tire Bolts: Tools & Methods for Stubborn Bolts
Break stubborn tire bolts with the right tools and techniques, then discover the safest tricks to free them without damage.
Read More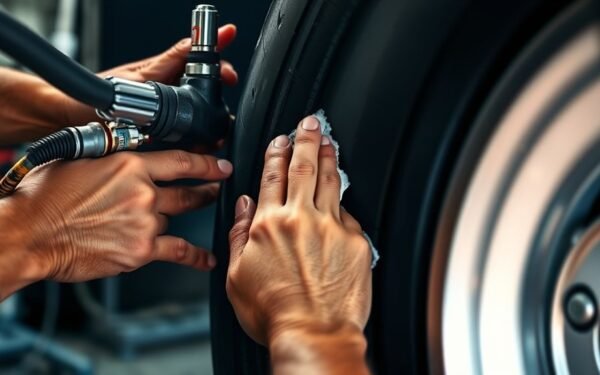
How to Seat a Tire Bead: Proven Methods for a Proper Seal
Fixing a stubborn tire bead can be easier than you think, but the right trick makes all the difference.
Read More