
How to Unmount a Tire: Tools, Steps & Pro Tips for Clean Removal
To unmount a tire cleanly, you’ll need a tire machine or manual changer, tire irons, rim protectors, lubricant, and a valve core tool. Mark the tire, remove the valve core, and fully deflate it. Break both beads, keep the TPMS sensor at 12 o’clock, then clamp the wheel securely and lift the top bead with the duckhead. Clean the rim and inspect TPMS parts carefully. There’s more you can do to make the job easier.
Key Takeaways
- Gather a tire machine or manual changer, tire iron, rim protectors, lubricant, and a valve core tool before starting.
- Mark the tire’s position, remove the valve core, and fully deflate the tire to avoid damage and sudden air release.
- Break both beads at multiple points, then confirm the sidewalls are free before unmounting the tire.
- Clamp the wheel securely with guards, keep the drop center up, and align the duckhead carefully near the valve stem.
- Clean bead seats and inspect TPMS components after removal, replacing worn seals or valves before reinstallation.
Gather Tire Removal Tools
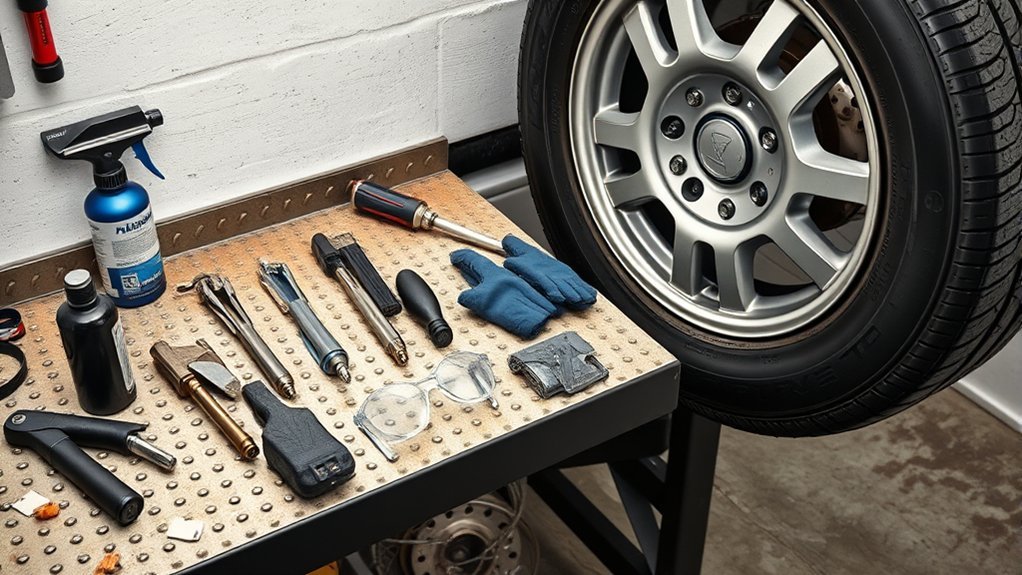
Start by gathering the tools you’ll need to remove the tire safely and efficiently. You’ll want a tire machine or a manual tire changer, plus a tire iron for controlled leverage. Fit rim protectors to shield the wheel lip, and keep tire lubricant ready so the bead can move with less resistance. Use a valve core tool to extract the valve core and vent trapped pressure before you touch the tire. Keep a wire brush nearby to scrub the rim and bead areas, because grit can bind the assembly. If the wheel carries stick-on or hammer-on weights, bring a putty knife or hammer tool to strip them off cleanly. Add a plastic cover when you use a tire changer; it helps preserve the finish and keeps your work precise. When you assemble these tools first, you work faster, reduce damage, and keep control over the removal process. Additionally, consider carrying a reliable spare tire kit for emergencies, ensuring you’re prepared for any unexpected situations.
Prepare the Tire and Wheel
Before you deflate the tire, mark its position on the wheel with tape so you can reinstall it correctly for sensor reprogramming. Then remove the valve core to fully release air and make sure the valve stem’s clear and protected during bead breaking. Clean the rim and tire beads, and remove any wheel weights or debris so the tire comes off without damage. Additionally, ensure your tires have a good tread life rating to maintain performance and safety during removal.
Mark Tire Location
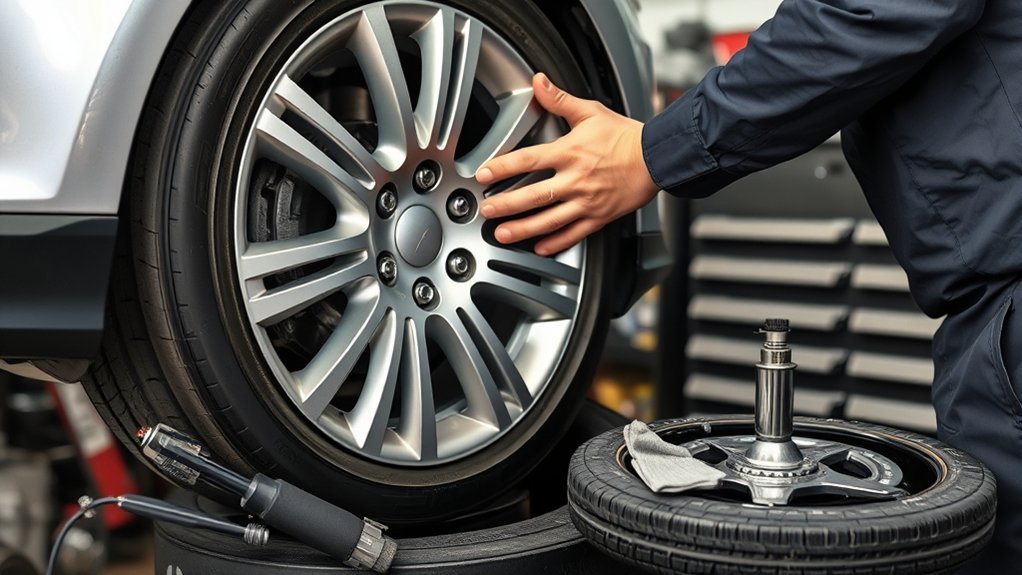
Mark the tire’s original position on the wheel with a piece of tape so you can reinstall it in the same orientation without having to reprogram the tire pressure sensor. Then mark tire location relative to the valve hole, and note where the sensor sits. Set the sensor at 12 o’clock before bead breaking so you don’t damage it. Check the sidewall for directional arrows and asymmetrical markings; record them now so you can restore the tire’s intended rotation and fit. Remove any wheel weights before you start, because they can snag tools and distort your reference points. Also track the red and yellow dots on the tire; they show balancing points you’ll need during reinstall. These small marks keep the job clean, fast, and in your control.
Deflate And Remove Core
Remove the valve cap and use a valve core tool to unscrew the valve core so the tire deflates completely. Let all air escape through the valve stem until pressure drops to zero. Next, position the tire pressure sensor at 12 o’clock and keep it there while you work. Use a tire machine to break the bead on both sides, rotating the tire as needed and checking multiple points around the circumference. If the bead is broken correctly, you should be able to push it down by hand without resistance. Keep the sensor protected and aligned throughout the process. Once the tire is fully deflated and the bead is broken, secure the wheel in the machine before you move on to dismounting.
Clean Wheel And Beads
With the tire fully deflated and the bead broken, clean the wheel’s bead seat areas with a steel wire brush to remove paint, rust, and debris, then inspect the rim for cracks, corrosion, or other damage that could affect sealing. Keep the clean wheel free of grit so the tire beads can release without gouging or tearing. Remove any wheel weights now; that gives you a clean, accurate setup for later balancing. Mark the tire’s original position on the wheel with tape if you plan to reinstall it and want to preserve sensor calibration. Apply approved lubricant, like Euro paste or liquid soap, to both the inside and outside of the tire beads. That reduces friction, protects the bead, and lets you work with control, speed, and less force.
Break the Tire Bead and Deflate It
Start by removing the valve cap and using a valve core tool to unscrew the valve core so the tire fully deflates. With the valve open, you can safely break the tire bead without trapped air fighting you. Place the tire pressure sensor at the 12 o’clock position, and handle it carefully so you don’t damage the sensor or its seal. Use a tire machine to break the bead at several points around the circumference, then rotate the tire and repeat until the bead releases all the way around. After each pass, push the sidewall down by hand to confirm the bead is free from the rim on both sides. Don’t rush this step; a fully broken bead gives you control and keeps the tire ready for clean removal. Additionally, having a tire plug kit on hand can be beneficial for quick repairs if you encounter a puncture during your process. Once both beads are loose and the tire is flat, you’re set to move on with the next stage of unmounting.
Unmount a Tire With a Rim Clamp
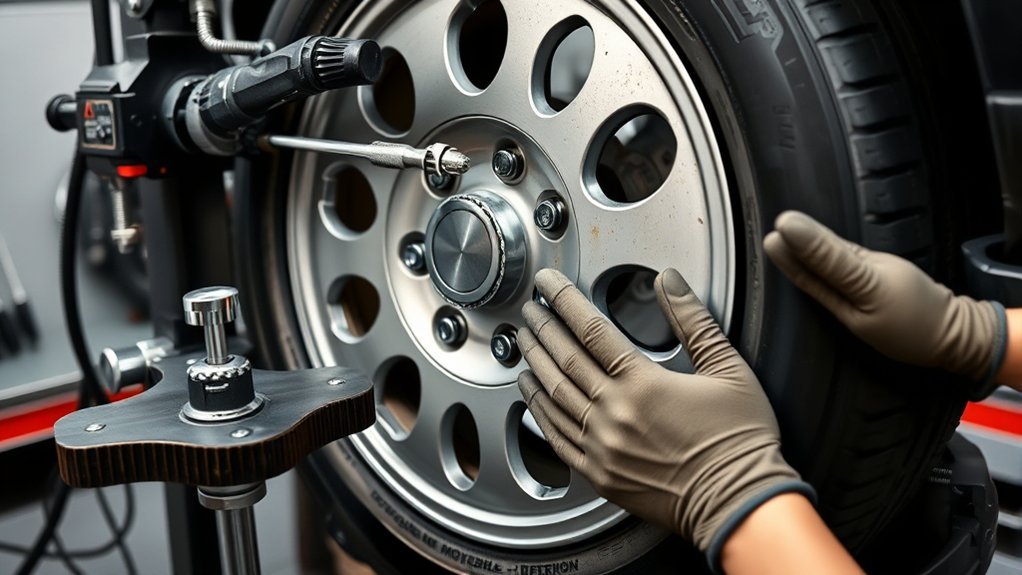
Now that the tire’s fully deflated and the beads are broken free, you can unmount it on a rim clamp machine. Protect the wheel first so you don’t trade freedom for scratches. Set plastic guards on the clamps and tools, then position the wheel with the drop center facing up. Break the bead again at 90 or 180 degrees from the valve stem if needed, keeping clear of the stem.
| Step | Action |
|---|---|
| 1 | Clamp the wheel safely |
| 2 | Shield contact points |
| 3 | Orient the drop center up |
| 4 | Work the top bead over the duckhead |
| 5 | Clean the bead seats |
Align the duckhead with the valve stem, then use a pry bar to lift the top bead over the duckhead. For standard drop centers, remove the tire over the front flange. Finish by brushing the bead seat areas with a steel wire brush so the next tire seats cleanly on either side.
Remove a Tire With a Pedestal Changer
Secure the wheel through the centerbore with a pistol tool, and protect the finish with plastic covers before you begin. If the wheel uses reversed mounting, install the reversed wheel adapter so the pedestal changer supports it correctly. Next, position the appropriate roller(s) and break both beads loose exactly as the machine maker specifies. Keep steady pressure and let the changer do the work; don’t force the bead, or you’ll risk damage. Once the beads are free, use the demount head to remove a tire from the rim in a controlled pass. Maintain clearance for the tire pressure sensor so it stays out of the tool path. Work methodically, keep your hands clear, and guide the rubber off the wheel without jerking. After the tire is off, use a steel wire brush on the bead seat areas to prep the surface for the next install and keep your workspace moving cleanly. Additionally, ensure the tire being removed is suitable for your vehicle’s specific load rating to maintain optimal performance and safety.
Clean the Rim and Check TPMS Parts
You’ll need to clean the rim bead seats with a wire brush so you remove rust, paint, and debris before the tire goes back on. Inspect the TPMS components for damage or wear, and mark the sensor position with tape so you don’t lose its original location. If the service pack parts are due for replacement, install new seals, valve components, and any worn hardware before reassembly. This step ensures optimal performance, similar to the long tread life found in Michelin tires, enhancing your overall driving experience.
Clean Rim Bead Seats
With the tire off, clean the rim bead seats thoroughly using a steel wire brush to remove paint, rust, and debris so the new tire can seal properly. You should clean rim bead seats and the rim flange with deliberate pressure, working the full circumference until bare metal shows. Use plastic protectors on clamps and tools so you don’t mar the finish while you scrub. Inspect the wheel for cracks, deep corrosion, or distortion; any structural damage can compromise fit, handling, and safety. After cleaning, wipe away loose residue and apply approved lubricant to the bead seats and rim flange. That thin film helps the tire slide on cleanly and reduces future sticking, giving you more control during remounting and keeping the assembly ready for reliable service.
Inspect TPMS Components
Inspect the TPMS sensor before you continue, checking the valve-stem area for cracks, corrosion, or other visible damage that could throw off readings or cause failure. Next, inspect the tire area around the sensor and make sure it sits at the valve stem, not twisted or pinched. Clean the rim thoroughly with a wire brush to strip rust, debris, and old adhesive so the new tire can seat on a smooth surface. Use only compatible cleaning agents; harsh chemicals and abrasives can weaken parts. Check the grommet and nut on the TPMS sensor, then tighten the nut until the grommet bulges slightly—no more. That small, controlled preload helps protect accuracy, preserves the seal, and keeps your wheel ready for clean, independent service.
Replace Service Pack Parts
Before you install replacement service pack parts, consult the TPMS chart so you match the correct components to the sensor and keep the system working as intended. Clean the rim with a wire brush until you remove rust, debris, and old adhesive; a clean seat lets the new parts seal correctly. Inspect each TPMS part for cracks, corrosion, or distortion, and replace any worn piece right away. When you tighten the sensor nuts, stop as soon as the grommet bulges slightly; that gives you a reliable seal without over-torquing. After you replace service pack parts, verify air pressure readings and check that the sensor responds normally. Regular inspection and timely replacement keep the system precise, dependable, and ready for the road.
Frequently Asked Questions
How to Take off a Tire Step by Step?
First, you deflate the tire fully, remove the valve core, and break the bead at several points. Next, you secure the wheel in a tire machine, protect the sensor, and lubricate the rim. Then you pry the beads over the lip and lift the tire off. Remove weights, clean the bead seat, and inspect for damage. These tire maintenance tips support safe tire storage solutions and let you work with control.
What Is the 3 Tire Rule?
The 3 tire rule means you keep at least three tires on the ground while lifting a vehicle, so you don’t invite a sudden shift. You use it to protect yourself, the suspension, and alignment during tire maintenance. Always lift from designated points and follow safety precautions. If you leave only one or two tires hanging, the vehicle can tip. You stay stable, precise, and in control.
How to Dismount a Tire on a Tire Machine?
You dismount a tire on a tire machine by clamping the wheel with protected jaws, then breaking both beads with the rollers. Set the tire pressure sensor clear, and use the demount head or a tire iron to lift each bead over the rim. Remove the tire carefully, then brush the bead seats clean. Follow safety precautions and routine tire machine maintenance so you work efficiently, protect the wheel, and keep control.
How to Dismount and Mount a Tire?
You’ll dismount the tire by marking its position, fully releasing tire pressure, breaking both beads, and lifting the tire off the rim with the machine and a tire iron. Then you’ll inspect the rim, clean it, and apply lubricant before mounting the new tire, matching directional arrows and sensor position. Inflate to 5 psi first, verify bead seating, then raise pressure to spec in a safety cage.
Conclusion
So there you have it: a tire that once hugged the rim like a stubborn tax auditor can now be removed with the right tools, patience, and a little mechanical diplomacy. You’ve gathered the gear, broken the bead, and chosen your changer wisely. Clean the rim, inspect the TPMS, and don’t pretend brute force is a skill. Precision beats drama every time. Treat the wheel correctly now, and it won’t return the favor with leaks later.
Related Articles

How to Tie a Tire Swing: Safe Knot & Hanging Guide
D**iscover the safest knot, rope, and branch choices for a tire swing, plus expert tips that could prevent a dangerous mistake.
Read More
How to Take Off a Motorcycle Tire: Full Step-by-Step Guide
Discover the easiest way to remove a motorcycle tire safely, and learn the crucial steps that make reinstallation smoother.
Read More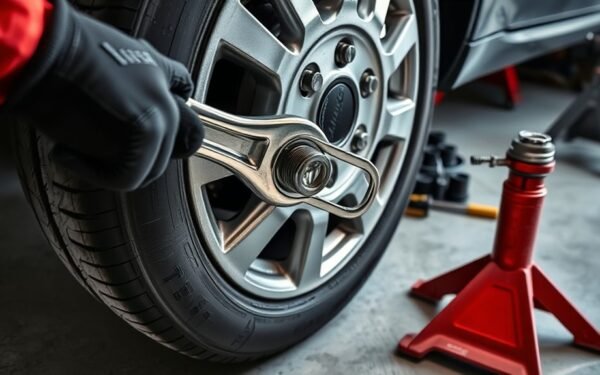
How to Remove Lug Nuts From a Tire: Tools, Torque & Tips
Need the right tools and torque to remove stubborn lug nuts safely, and learn the tricks that keep you moving.
Read More