
How to Use a Tire Changer Machine: Full Tutorial for Beginners
To use a tire changer machine, first remove the valve stem, clear the work area, and position the bead breaker shovel against the rim edge. Press the pedal to break both beads, then lock the wheel and swing the arm so the duck clears the rim. Lubricate the bead, mount the new tire, and use the air hose to seat it. Finish by checking pressure to the manufacturer’s spec, and the next steps get even easier.
Key Takeaways
- Remove the valve stem, break both beads, and keep hands clear of moving parts for safety.
- Lock the wheel, position the duck head near the rim, and pry the tire off without scratching the rim.
- Lubricate the bead and rim, then guide the new tire onto the wheel using the changer’s duck head.
- Inflate carefully with controlled air bursts, stand clear, and listen for bead-seating pops.
- Check pressure with a calibrated gauge, reinstall the wheel, and torque lugs to specification.
Prepare the Tire Changer Safely
Start by removing the valve stem completely so trapped air won’t interfere with the tire change. You’ll free the assembly from residual tire pressure and prevent sudden movement as you set up the machine. Check that tire pressure monitoring sensors sit in their correct positions; if they shift, you can damage them during setup. Inspect the rim edge and align the shovel just beside it, never against the metal, so you protect the rim while preparing to break the bead. Keep your hands clear of all moving parts and maintain a stable stance, because the machine can engage quickly. Before you press the right pedal, confirm the tire is centered and the area is clear. Then rotate the wheel 180 degrees and repeat the setup on the opposite side so you’re ready for a complete, controlled bead break without compromising safety or freedom of movement. Additionally, consider the UTQG ratings of the tires you’ll be changing, as they provide insight into tread life and performance.
Remove the Valve Stem and Break the Bead
Remove the valve stem completely with the proper tool so you don’t trap air in the tire during service. Position the bead breaker shovel against the rim edge without contacting the rim itself. Then press the right pedal to break the bead on one side, rotate the tire 180 degrees, and repeat on the opposite side. This process ensures that you can effectively manage durable tires while preventing damage during removal.
Remove Valve Stem
With the wheel secured, you should completely unscrew the valve stem using the correct tool and store it safely so it does not get lost. This remove valve stem step lets trapped air escape cleanly and prevents pressure from fighting your work. Once the stem is out, you can move into bead breaking with control and confidence. Set the machine so the shovel contacts the rim edge without touching the metal, then step on the pedal to drive the bead downward. After one side releases, rotate the tire 180 degrees and repeat to free the opposite bead. Keep your hands clear of moving parts at all times. Precise setup protects the rim, speeds the job, and gives you the freedom to work efficiently.
Position Bead Breaker
Completely unscrew the valve stem before you begin so trapped air can’t interfere with the bead-breaking process. With the tire fully deflated, center the bead breaker shovel at the rim edge, then check that it doesn’t contact the rim face. You want firm leverage on the tire bead, not a scarred wheel. Keep your stance stable and your hands clear of moving parts. Apply controlled pressure until the bead releases from the rim seat. Work methodically around the sidewall, maintaining alignment so the tool tracks cleanly. After one side is free, rotate the tire 180 degrees and repeat on the opposite side. Push the tire edge toward the rim center as you go. This controlled setup gives you freedom from binding and damage.
Press Right Pedal
Start by taking out the valve stem so trapped air can’t interfere with the bead-breaking process. Next, place the shovel against the rim edge, not on it, then press right pedal to drive the bead breaker into the tire. You’re aiming to push the tire edge toward the rim center, where it loses tension and releases cleanly. Work both sides methodically.
- Remove all air first.
- Press right pedal steadily.
- Keep the shovel off the rim.
- Rotate the tire 180° and repeat.
After one side breaks, rotate the tire 180 degrees and repeat on the opposite side. Check that the bead sits centered before moving on. This controlled step protects the rim, frees the tire, and keeps the process efficient.
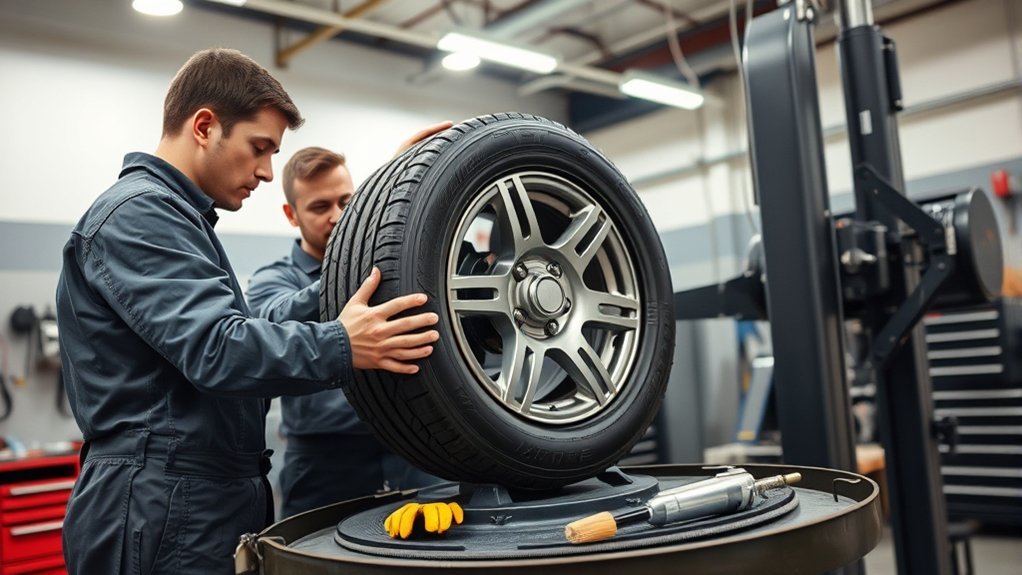
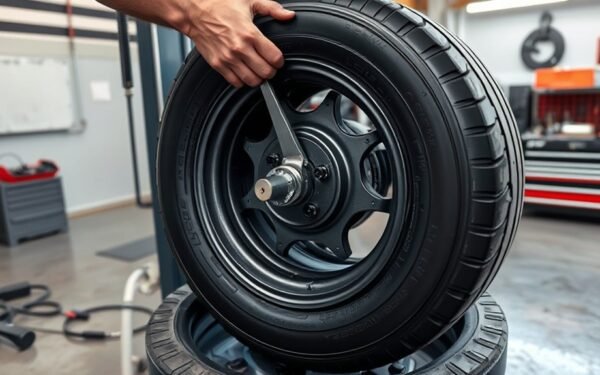
Lock the Wheel and Remove the Tire
Lock the wheel in place with the middle pedal so it stays stable while you remove the tire. Once the tire is secured, swing the arm down until the duck meets the rim edge, then tighten the knob to lock the wheel and hold the head steady. This keeps the machine from shifting while you work. Use the duck as your reference: the beak should sit at the bead line, ready to lift it without scraping the rim. Pry gently on the duck’s beak and keep firm pressure on the bar as you rotate the tire. Don’t force it; controlled leverage gives you better command and protects the wheel. Turn the rim slowly so the bead breaks all the way around. Keep watching the contact point, and adjust your grip as needed. When the bead releases fully, the tire comes off cleanly, and you’ve reclaimed control over the wheel. Remember, tread depth is important for ensuring the tire’s performance and longevity.
Lubricate and Mount the New Tire
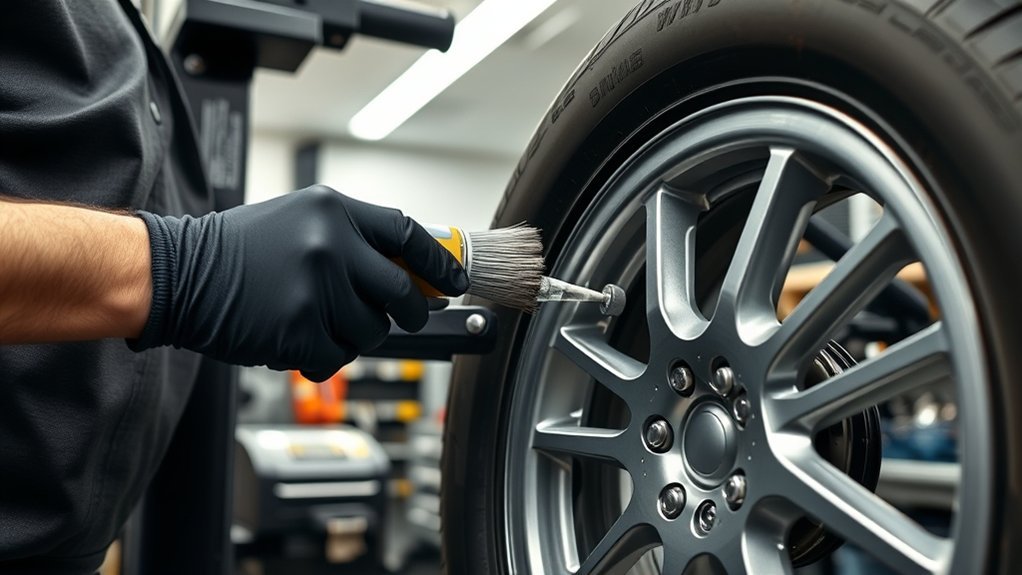
Before you mount the new tire, apply a generous coat of lubricant to the bead and rim edge so the bead slides on smoothly. Set the tire at a slight angle, adjust the tire changer’s knob to keep the duck’s arm clear of the rim, and place the lower bead over the duck’s tail and under the head. Repeat the process on the top bead, keeping your knuckles clear of the rim to avoid injury. Ensure you are using a tire that meets your vehicle’s tire size specifications for optimal performance and safety.
Bead Lubrication
Apply a generous amount of tire lubricant, such as rube glide, to both the tire bead and the rim edge so the new tire seats more easily. This bead lubrication reduces friction and helps you mount the tire with less effort and more control.
- Angle the tire against the rim to lower resistance.
- Adjust the knob so the duck’s beak stays clear of the rim edge.
- Guide the lower bead over the duck’s tail and under the head.
- Repeat on the top side, and keep your knuckles away from the rim.
Work deliberately and keep the contact surfaces coated. If the bead grabs or drags, add more lubricant and realign your approach. Precise bead lubrication lets you move the tire into place smoothly while protecting the rim and your hands.
Tire Mounting Steps
With the tire and rim lightly coated with lubricant, set the tire at an angle to the rim so the beads align more easily. You’ll let the slick film reduce friction as you guide the tire onto the wheel. Adjust the changer’s knob so the duck stays clear of the rim edge and can’t gouge the metal. Next, place the lower bead over the duck’s tail, then roll it under the head in one controlled motion. Keep steady pressure and watch the bead seat evenly. Repeat the same sequence for the upper bead, using the machine’s leverage instead of force. Keep your knuckles clear of the moving arm and rim. Work deliberately; clean alignment gives you safer, smoother, and more liberated control.
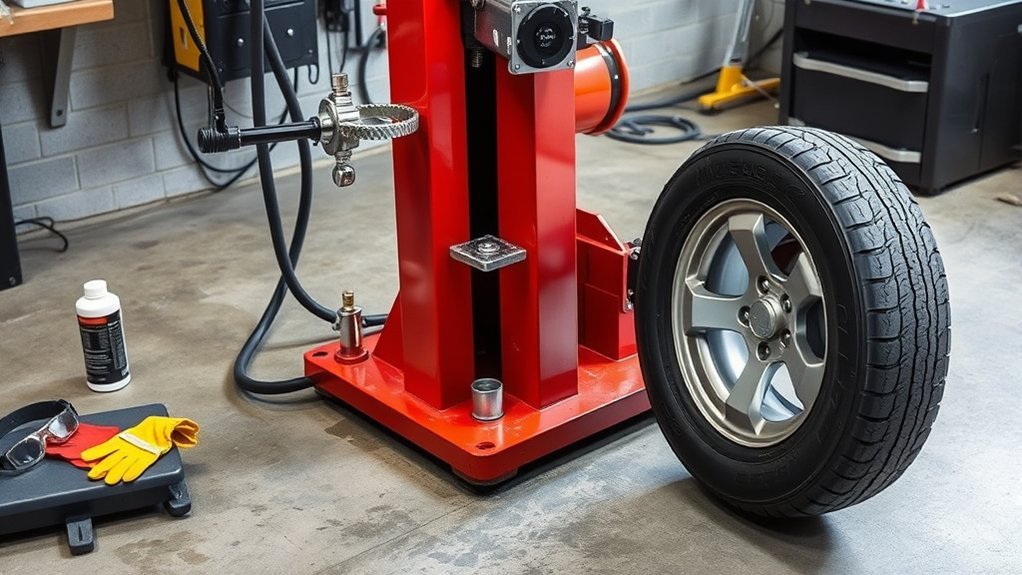
Seat the Tire Bead With Air
Once the tire is mounted, remove the hose from the tire changer and attach it securely to the valve stem so you can begin inflation. To seat the tire bead, use the black pedal to release a controlled burst of air into the tire. Keep your body clear of the sidewall and rim path; a sudden shift can injure you. Watch and listen closely for popping sounds, which mean the bead has locked against the rim. Work deliberately, not fearfully, because precise control gives you freedom from mistakes and wasted effort.
Attach the air hose securely, stand clear, and seat the bead with a brief burst of air.
- Attach the air hose firmly
- Stand back from the tire
- Press the black pedal briefly
- Listen for bead-seating pops
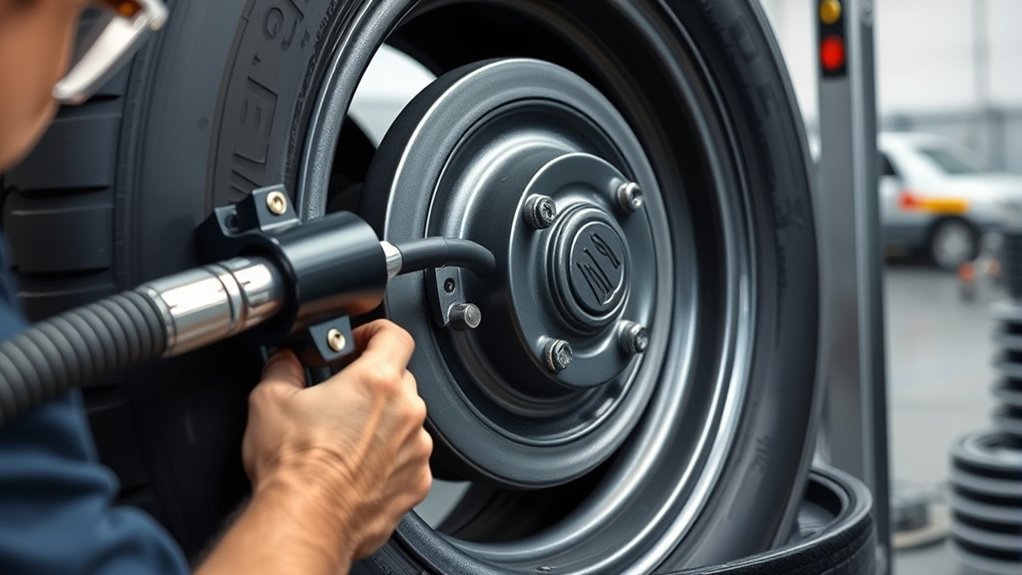
When the bead seats, stop the air blast and confirm the tire is stable on the rim. Then replace the valve stem core and continue inflation to the manufacturer’s recommended pressure. Additionally, ensuring that your tires have consistent wear can help improve overall performance and safety during inflation.
Check Tire Pressure and Wrap Up
Use a tire pressure gauge to verify the inflation level before you reinstall the wheel, then check it again after inflation to confirm it matches the manufacturer’s specification, typically 30 to 35 PSI for standard passenger vehicles. When you check tire pressure, use a calibrated gauge, not guesswork, so you keep control of your work and your safety. If you replaced the valve stem, tighten it securely to prevent slow leaks. Inflate the tire with a calibrated air compressor, and stop before over-inflation can trigger a blowout. As the bead seats, listen for sharp popping sounds; they tell you the tire has locked onto the rim correctly. After inflation, check tire pressure again to confirm it still sits in range. If it doesn’t, adjust it now. Then reinstall the wheel, torque the lugs to spec, and you’re done—free, precise, and ready to roll. Always ensure you’re using dedicated winter tires for optimal safety during cold weather conditions.
Frequently Asked Questions
How Much Does a Tire Changer Machine Cost?
A tire changer machine usually costs $1,500 to $5,000, depending on features, capacity, and brand. If you’re watching Budget Considerations, you can find entry-level manual units around $1,500, while automatic models often exceed $3,000. Professional-grade machines run $3,000 to $5,000, and high-end units with balancers can top $6,000. Used machines may cost $500 to $2,500, giving you more control over your setup and freedom.
What Are the Common Problems With Tyre Changers?
Like a misfiring compass, a tyre changer can steer you wrong. You’ll see incorrect bead seating, rim damage from excess bead-breaking force, misalignment during mounting, poor lubrication, and settings left wrong for different sizes. These faults cause leaks, uneven wear, and handling issues. For Tire Maintenance, you should check bead contact, use the right lube, and adjust pressure and arms carefully so you stay in control and avoid costly, unsafe errors.
How to Use a Tire Pressure Machine at Home?
At home, you plug in the tire pressure machine, calibrate it, and confirm the display reads accurately. Remove the valve stem cap, press the hose firmly onto the valve, and read the pressure. For inflation, connect the air hose, set the target if available, and monitor the gauge. Stop at the recommended PSI on the sidewall. Refit the cap quickly. This Tire Maintenance routine keeps you independent and safe.
How Much Money Does a Tire Changer Make?
You’d usually make $30,000 to $50,000 a year as a tire changer, with wages around $12 to $25 an hour, and overtime can lift that. Think of your Career Outlook like a sturdy road: skill, certification, and demand steer your earnings upward. In busy or specialized shops, you can pass $60,000. You’re not trapped; you can advance, add benefits, and build real financial freedom through training.
Conclusion
Using a tire changer machine correctly helps you replace tires faster and with less physical strain. In fact, the U.S. Tire Manufacturers Association reports that underinflated tires can reduce fuel economy by up to 3%, so proper mounting and pressure matter. Always secure the wheel, use enough lubricant, and seat the bead evenly before inflating. When you follow each step carefully, you’ll finish with a safe, professional-quality installation every time.
Related Articles
How to Operate a Tire Machine: Complete Beginner’s Tutorial
Master tire machine basics fast, but discover the crucial safety and setup steps that separate smooth swaps from costly mistakes.
Read More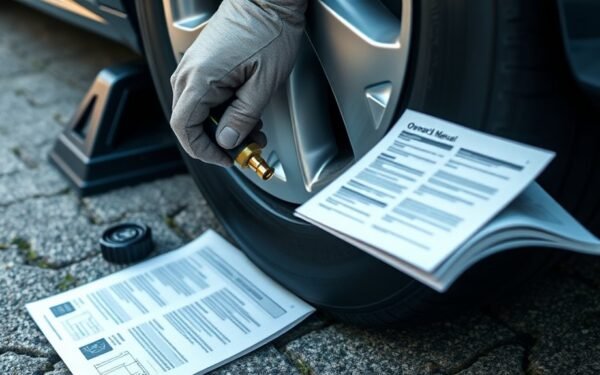
How to Remove Air From a Tire: Safe Step-By-Step Methods
Carefully learn how to release tire air safely and precisely, then discover the easiest ways to avoid over-deflating and get the pressure just right.
Read More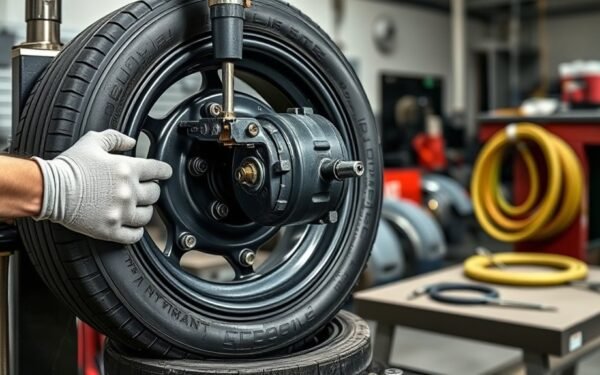
How to Use a Tire Mounting Machine: Step-by-Step Tutorial
Ongoing tire mounting can be tricky, but this step-by-step guide shows you how to avoid costly mistakes and get it right every time.
Read More