
How to Operate a Tire Machine: Complete Beginner’s Tutorial
To operate a tire machine, you first remove the valve stem, inspect the wheel, and center it on the turntable. Use the bead breaker to separate both beads, then lock the wheel with the clamps. Apply tire lubricant to the bead and rim edge, remove the old tire, and mount the new one under the duck head. Inflate carefully to seat the bead, then verify alignment and set final pressure. There’s more to get right next.
Key Takeaways
- Remove the valve stem, inspect the wheel, and center it securely on the tire machine turntable.
- Use the bead breaker shovel carefully against the rim edge to break both tire beads.
- Lock the wheel firmly with the machine clamps before removing or installing the tire.
- Apply tire lubricant to the bead and rim edge to reduce friction and protect the wheel.
- Mount the tire with the duck tool, then inflate slowly until both beads seat evenly.
How a Tire Machine Works
A tire machine uses mechanical arms and foot pedals to break the tire bead, lift the tire off the rim, and help you reinstall it safely. You control the sequence with locking pedals and guided motions, so you can work with precision instead of force. The duck tool pries the bead over the rim edge while protecting the wheel surface. Apply rube glide to the bead to cut friction and let the machine move the tire cleanly. During inflation, you attach the hose to the valve stem and use the pedal to release air; this lets the bead seat against the rim at the correct tire pressure. Keep your hands clear, follow the machine’s markings, and watch the tire valve as you finish. Additionally, understanding the tire repair process can enhance your efficiency and effectiveness with the machine. When you understand each control, you gain safer, faster service and more freedom from manual strain.
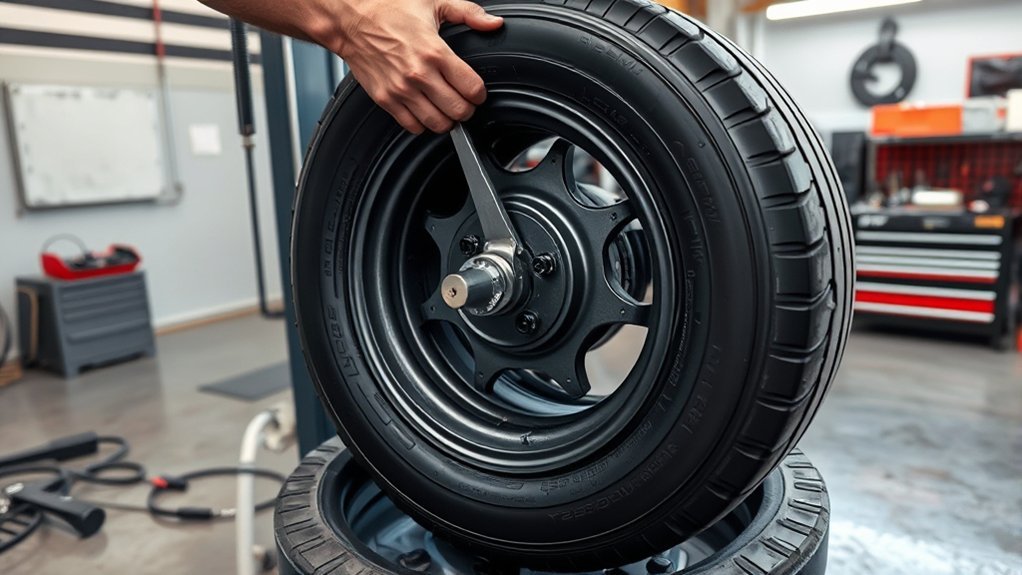
Prepare the Wheel and Valve Stem
Start by removing the valve stem completely so no trapped air pressure interferes during the tire change. You free the assembly for safer handling and eliminate sudden force at the rim. Next, inspect any tire pressure monitoring sensor and confirm it sits correctly inside the wheel; if it’s misaligned, you could damage it during installation. Position the tire on the machine with the edge of the tire clear, then align the shovel with the rim edge without touching metal. That precise clearance protects the rim from scratches and deformation. Keep the wheel centered and stable so you can work with control, not struggle. Check that the valve area is open, unobstructed, and ready for later reinstallation. Before moving forward, verify the tire is seated evenly and the edges are directed toward the rim center. This preparation gives you clean, controlled motion and keeps the wheel ready for the next step. Additionally, ensuring the tire is compatible with the vehicle’s recommended tire sizes enhances safety and performance during installation.
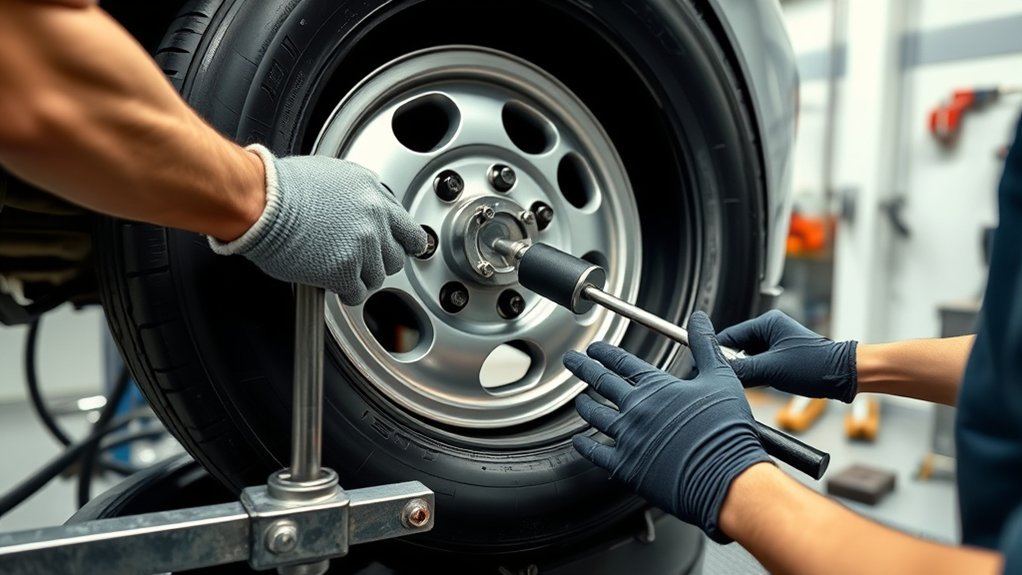
Break the Bead on Both Sides
With the wheel centered and the valve area clear, you can break the bead on the first side. Position the shovel against the rim edge, and make sure it doesn’t touch the rim itself. Take the valve into account so you don’t pinch or damage it. Step on the right pedal gently; a little bit of pressure starts the bead-breaking action without shocking the wheel. Watch the tire edge move toward the rim center until it opens a clean gap. Keep your hands clear of the shovel and all moving parts while the machine works. Once the first bead releases, stop the pedal and confirm the tire sits away from the rim lip. Rotate the tire 180 degrees to expose the opposite side. Repeat the same setup, keeping the shovel aligned on the bead, not the metal. Apply controlled pedal pressure again until the second bead breaks free, giving you full liberation for removal. Additionally, ensure you are using dedicated winter tires to provide optimal performance in snowy conditions.
Lock the Wheel on the Machine
Center the wheel on the turntable, then engage the middle pedal to lock it in place. Position the tire squarely in the center so the machine can hold it with maximum stability. Tighten the clamps or knobs until they grip the rim securely, but don’t crush or scar the edge. This lock, sometimes called the wheel clamp, keeps the assembly from shifting while you work. Check that the tire sits level and that no side is wobbling. If anything moves, reset the wheel before continuing. A secure lock lets you operate with control, protect your hands, and keep your work independent of unnecessary risk. Confirm the hold again before you move on to any other machine action. When the task is finished, release the lock only then, so the wheel can’t drift unexpectedly. Precise setup is how you stay safe and in command. Additionally, using a reliable spare tire kit ensures you’re equipped for any unexpected issues during your operation.
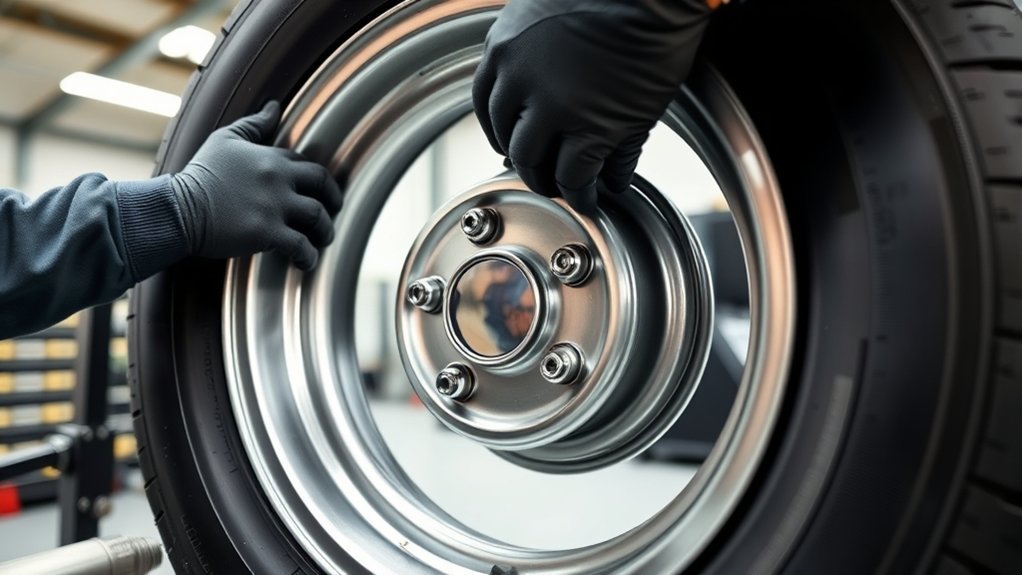
Remove the Old Tire Safely
Remove the valve stem first, then use the tire machine’s shovel to break the bead on both sides, rotating the tire 180 degrees to fully detach it. Lock the tire with the middle pedal and lower the arm so you’ve secured the rim before removal. Apply pressure to the duck beak and rotate the tire to pry it off without damaging the rim. Additionally, ensuring that you have proper tire specifications can prevent issues during the removal process.
Bead Breaking
Lock the tire in place with the middle pedal before you start breaking the bead. Use proper bead breaking techniques: set the shovel against the rim edge, but don’t let it touch the rim itself. This protects the wheel from damage while you separate the tire. Keep your hands clear of moving parts and follow all safety precautions; one careless reach can trap fingers. Step on the pedal gradually to push the bead inward, then confirm the tire edge has moved toward the rim center. Rotate the tire 180 degrees and repeat on the opposite side. Avoid common mistakes like forcing the shovel too deep or rushing the pedal. Stay controlled, work deliberately, and you’ll remove the old tire safely with less strain and more freedom.
Tire Locking
With the tire still seated, press the middle pedal to lock the wheel so it can’t shift during removal. This secures tire safety and gives you stable control. Lower the arm carefully until the duck rests at the rim edge, then tighten the knob firmly without marring the rim. Use the duck term to track tool position clearly and keep your workflow precise. Apply steady pressure on the duck’s beak to start lifting the bead, then rotate the tire as you work so the bar stays engaged and the load stays even. These proper techniques reduce stress on the machine and support machine maintenance. Move deliberately, maintain pressure, and let the tool do the work while you free the tire cleanly and safely.
Duck Bead Removal
Press the middle pedal to lock the tire in place so it can’t shift during removal, then swing the arm down to the rim edge and secure it with the knob, using the duck terminology to keep the process clear. Use these tire removal techniques with firm control and measured force. | Step | Action |n|—|—|n|1|Pry on the duck’s beak.|n|2|Hold steady pressure.|n|3|Rotate the tire.|n|4|Continue bar pressure.|n|5|Check the bead clears.|nKeep the rim protected by avoiding common mistakes like jerking the bar or letting the tire slip. Follow safety precautions by staying clear of pinch points and controlling every movement. When the bead releases, finish rotating until the tire comes free. Before new installation, confirm the TPMS sensors sit correctly.
Apply Lubricant to the Bead
Apply a generous, compatible tire lubricant along the entire bead to lower friction and help the tire mount without damage. You’ll need to coat the rim edge as well, since that contact area affects how smoothly the bead seats. Spread the lubricant evenly with a brush or your hands, and reapply it if any section starts to dry out during installation. This technique is particularly important for ensuring consistent wear and prolonging the life of your tires.
Bead Lubrication Basics
A properly lubricated bead helps the tire mount more easily and protects both the bead and rim from damage. You should coat the tire bead with a suitable product like rube glide, using lubrication techniques that reduce friction and support controlled movement. Apply it generously around the entire bead, then spread it evenly before mounting. These installation tips help you work with confidence and keep the rubber free from scuffing or tearing.
- Use a non-petroleum lubricant.
- Cover the full bead circumference.
- Verify even distribution.
- Mount promptly for smooth seating.
When you prepare the bead correctly, you reduce bead damage during installation and improve the chance of a clean seal when inflated. This method gives you safer, faster, more reliable tire mounting.
Rim Edge Application
Position the tire lubricant, such as rube glide, on both the tire bead and the rim edge to reduce friction and protect the mating surfaces during mounting. You should coat the full contact area so the bead seats cleanly during inflation. Use a brush or cloth to spread it evenly, and inspect for dry spots that can slow installation. When you position the tire, apply the lubricant at a slight angle so the bead slides over the rim edge with less resistance. This step supports rim damage prevention and improves control. After mounting, check for excess lubricant and wipe it away to avoid imbalance or poor performance. These tire maintenance tips work across common lubricant types and help you mount with confidence and precision.
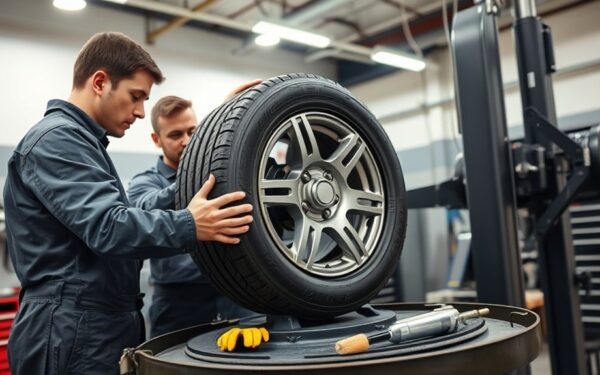
Mount the New Tire on the Rim
Generously coat both the tire bead and the rim edge with lubricant, such as rube glide, so the tire can slide into place without binding. Use these lubricant application methods to support clean tire mounting techniques and protect the rim from scuffing. With the tire angled, guide the lower bead over the duck’s tail so it settles under the duck’s head without force. Adjust the knob to keep the duck safely away from the rim edge, and maintain control with deliberate pressure.
Generously coat the bead and rim edge with lubricant so the tire slides smoothly into place without binding.
- Place the lower bead first.
- Verify the bead tracks under the duck’s head.
- Keep your knuckles clear of the rim edge.
- Set the top bead over the duck’s tail without pinching.
These bead seating tips help you move with precision, reduce resistance, and claim efficient control over the mounting process. Working with proper techniques will enhance your all-terrain tire experience, ultimately ensuring optimal performance. Work steadily, watch the bead line, and secure the tire only after it sits correctly on the rim.
Inflate the Tire to Seat the Bead
Attach the air hose securely to the valve stem, then use the black pedal to deliver a controlled blast of air and seat the bead against the rim. Keep a safe distance while you inflate the tire and listen for the distinct popping sounds that show the bead’s seated. Once it’s seated, reinstall the valve stem and set the tire to the manufacturer’s recommended pressure. For optimal results, consider using a tire inflator with an auto shut-off feature to prevent overinflation.
Seat Bead With Air
With the tire properly seated on the rim and the valve stem accessible, secure the air hose to the valve stem and check for leaks before inflating. Practice bead seating techniques by using the machine’s black pedal to send a controlled burst of air into the tire. Keep your body clear of the assembly and maintain tire inflation safety at all times. Proper air hose maintenance matters: a tight, leak-free connection helps the bead seat without waste or delay.
- Confirm rim position before airflow.
- Lock the hose on firmly.
- Pulse air until the bead moves outward.
- Watch for seating cues, then stop inflating.
This step gives you command over the process and prepares the tire for final pressure adjustment.
Check Pressure And Pop
After mounting the tire, connect the air hose to the valve stem and keep your hands clear of the assembly. Use the black pedal to release a quick burst of air and seat the bead. Maintain distance and watch for the tire to expand evenly. Listen for distinct pops; they signal the bead has locked onto the rim.
| Signal | Action | Result |
|---|---|---|
| No pop | Recheck hose | Bead may not seat |
| Pop heard | Stop and inspect | Seating is complete |
| Stable pressure | Install valve stem | Ready for final inflation |
Follow these tire maintenance tips, apply safety precautions, and avoid common mistakes like standing too close or overinflating. Once seated, replace the valve stem and inflate to the manufacturer’s recommended pressure.
Check Bead Seating and Alignment
Before inflating, make sure the tire bead sits evenly against the rim on both sides so the assembly is properly aligned. Use bead alignment techniques that keep the bead centered, and apply a light lubricant to improve tire seating methods while reducing friction and damage. Inflate slowly, then listen for the sharp popping sounds that show the bead has locked into place. After that, stop and inspect the rim edge for uniform contact; any visible gap means the bead isn’t fully seated yet. These inflation safety tips help you work with control and protect the tire from failure.
- Check both bead lines for equal height.
- Use lubricant only on the bead contact area.
- Watch for pops and steady movement onto the rim.
- Confirm there are no gaps before moving on.
Additionally, proper bead seating is crucial for achieving consistent traction year-round, which enhances overall tire performance and safety.
Set the Final Tire Pressure
Attach the air hose to the valve stem and inflate the tire gradually with the black pedal until you reach the manufacturer’s recommended PSI. Listen for the popping sound that confirms the bead’s final seat. Then remove the hose, check pressure with a tire gauge, and compare it to the vehicle spec. If it’s low, add air in small bursts; if it’s high, bleed off air carefully. Use pressure monitoring devices as part of your tire maintenance tips so you don’t rely on guesswork. Avoid common inflation mistakes like overinflating, skipping the gauge, or rushing the fill rate. When the reading matches spec, shut off the air supply and recheck once more for accuracy. This step protects handling, wear, and fuel economy. Finish by reinstalling the valve stem cap to block dirt and moisture, keeping the valve clean and the tire secure.
Frequently Asked Questions
What Safety Gear Should I Wear While Using a Tire Machine?
You should wear tire machine safety gear: safety glasses or a face shield, cut-resistant gloves, steel-toe boots, and snug clothing. Add hearing protection if the machine’s loud, and avoid loose jewelry that can catch. This essential protective gear helps you maintain control, protect your hands and eyes, and keep your footing. Check each item before starting, because avoiding injuries depends on prepared, disciplined work and your freedom to operate safely.
How Do I Know if My Tire Machine Fits My Wheel Size?
Check your tire machine compatibility against your wheel size measurement, and the fit may reveal itself just as your hands meet the rim. Read the machine’s fitting guidelines, then compare minimum and maximum diameters, widths, and clamping range. You’ll need clearance for both the bead breaker and the turntable. If the wheel falls within spec, you’re free to work safely and precisely; if it doesn’t, choose a different adapter or machine.
What Should I Do if the Bead Won’T Break Loose?
Apply more pressure at the bead breaker, then stop and inspect the sidewall and rim. You should use bead lubrication techniques, add a little, and rotate the tire so the lubricant reaches the stubborn area. If it still won’t move, reset the jaws, recheck air pressure, and use emergency bead release only as your machine allows. These tire mounting tips help you free the bead safely and efficiently.
Can I Use a Tire Machine on Low-Profile Tires?
Yes—you can, but only if you match the tire machine features to the job, because one slip can ruin the sidewall. You’ll face low profile challenges: stiffer beads, shorter sidewalls, and tighter clearance. Use protected jaws, proper lubricant, and controlled force. Then apply precise bead seating techniques with enough air pressure and careful valve-core handling. When you respect the tire, you keep control and work freely.
How Often Should I Maintain and Clean My Tire Machine?
You should maintain and clean your tire machine daily, with deeper tire machine maintenance weekly and a full inspection monthly. Follow a maintenance schedule that includes lubricating moving parts, checking air lines, and tightening fasteners. Use cleaning tips like wiping debris after each use and clearing bead breaker residue. If you run heavy volume, inspect sooner. You’ll protect performance, extend service life, and keep your shop working freely and efficiently.
Conclusion
Now you know how to operate a tire machine safely and accurately from start to finish. Remember, proper bead seating matters because one poor mount can compromise the entire assembly. In fact, tire-related issues contribute to about 11,000 crashes each year in the U.S., so precision really counts. Always verify alignment, inflation, and valve stem condition before you release the wheel. With careful setup and consistent technique, you’ll handle tire changes with confidence.
Related Articles
How to Use a Tire Changer Machine: Full Tutorial for Beginners
Master tire changing basics with this beginner-friendly guide—learn the essential steps, avoid costly mistakes, and discover the crucial final tips inside.
Read More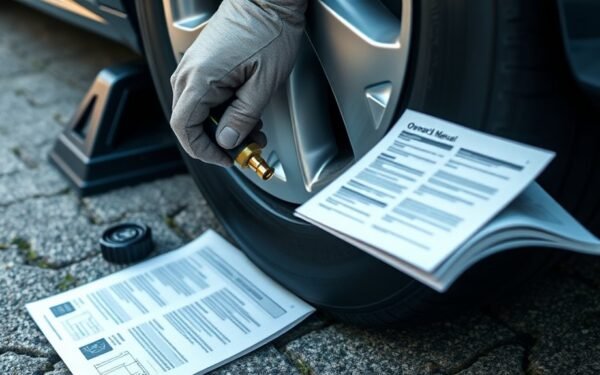
How to Remove Air From a Tire: Safe Step-By-Step Methods
Carefully learn how to release tire air safely and precisely, then discover the easiest ways to avoid over-deflating and get the pressure just right.
Read More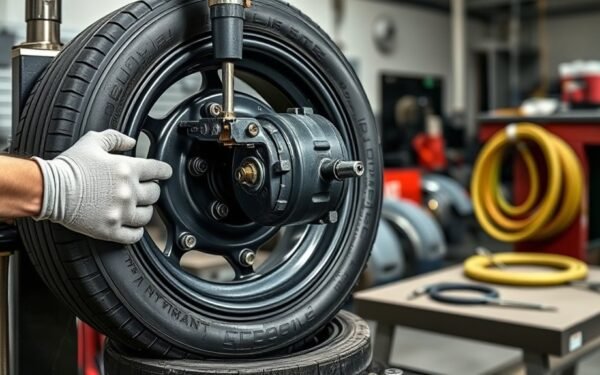
How to Use a Tire Mounting Machine: Step-by-Step Tutorial
Ongoing tire mounting can be tricky, but this step-by-step guide shows you how to avoid costly mistakes and get it right every time.
Read More