

A tire mobility kit is a temporary flat-tire repair system that uses tire sealant and a small air compressor instead of a spare tire. It can help you reach a tire shop after a small tread puncture, but it is not designed for sidewall damage, blowouts, large punctures, or long-term driving. Always follow your vehicle owner’s manual first, because pressure limits, speed limits, driving distance, and reset steps vary by vehicle.
Quick Answer
A tire mobility kit temporarily seals and reinflates a tire with a small tread puncture so you can drive to a safe repair location. Connect the sealant hose to the valve stem, power the compressor from the 12-volt outlet, inflate to the vehicle’s recommended pressure, drive the manual-specified distance to spread sealant, then recheck pressure.
Key Takeaways
- A tire mobility kit is a temporary emergency tool, not a permanent tire repair.
- Use it only for small punctures in the tire tread area unless your owner’s manual says otherwise.
- Do not use it on sidewall damage, large punctures, blowouts, rim damage, or a tire that was driven while very low.
- After sealing, drive only within your kit’s speed and distance limits and go directly to a tire service location.
- Check the sealant use-by date regularly; many Ford kits call for replacement after four years of non-use.
At a Glance
| Time Required | About 15–30 minutes, plus the short sealant-distribution drive and pressure recheck. |
| Difficulty | Easy, but only if the tire damage is within the kit’s repair limits. |
| Tools Needed | Vehicle tire mobility kit, sealant canister, compressor, 12-volt power outlet, tire pressure gauge, and owner’s manual. |
| Cost | Varies by vehicle and brand. Aftermarket kits may start around $50, while OEM kits and dealer-specific parts can cost more. |
What Is a Tire Mobility Kit?

A tire mobility kit, also called a tire inflator and sealant kit, is a compact emergency kit that inflates a flat tire and injects sealant into the tire so the sealant can close a small puncture from the inside. Most kits include a compressor, sealant canister, hose, valve connector, power cord, pressure gauge, and sometimes adapters for sports balls or inflatables.
Automakers use these kits because they save weight and cargo space compared with a spare tire and jack. The tradeoff is important: a tire mobility kit does not replace a full spare, and it cannot fix every tire failure. It is meant to help you get to a safe tire service location, not to keep driving normally for days.
Ford describes its tire inflator and sealant kit as a temporary repair that can get you to a dealer or tire service location. Tire-industry repair guidance also makes the same point: sealant and emergency inflators are not long-term repairs.
What Does the Service Tire Mobility Kit Alert Mean?
The Service Tire Mobility Kit alert usually means the kit needs attention. In many vehicles, it is a reminder to check or replace the sealant canister because the sealant has a limited shelf life. In other vehicles, the message may relate to a stored maintenance interval, a missing or used canister, a vehicle-specific reset procedure, or a service bulletin.
Note: Do not clear the alert and assume the kit is ready. First check the sealant use-by date, confirm the canister is unused and compatible with your vehicle, and follow the reset procedure in your owner’s manual.
Common Alert Causes
- Expired sealant: Many Ford owner-manual examples say to check the use-by date and replace the canister after four years of non-use.
- Used sealant canister: Most OEM kits contain enough sealant for one tire repair only.
- Vehicle maintenance reminder: Some vehicles track the kit service interval in the instrument cluster menu.
- Wrong or missing kit parts: A missing canister, damaged hose, or incompatible replacement may keep the kit from working.
- Recall or service action: A specific vehicle may have a recall or technical service bulletin related to the tire repair kit.
How to Reset the Service Tire Mobility Kit Alert
- Open the storage compartment and inspect the kit.
- Check the sealant canister’s use-by date.
- Replace the canister, hose, or kit only with the correct part for your vehicle.
- Use the vehicle menu or owner’s manual reset procedure after the kit is actually service-ready.
- If the warning returns, ask a dealer or qualified service shop to check vehicle-specific bulletins.
When a Tire Mobility Kit Will and Will Not Work
A tire mobility kit is usually intended for a small puncture in the tire tread area, such as a nail or screw hole. Many manufacturer and tire-industry references use 1/4 inch or 6 mm as a common maximum repairable puncture size, but your kit’s manual is the final authority.
Warning: Do not use a tire mobility kit for sidewall damage, shoulder damage, a blowout, a tire that came off the rim, visible rim damage, a puncture larger than your manual allows, or a tire that was driven while severely underinflated. Stop and call roadside assistance.
[Products Worth Considering]

Vigorder rubber cement glue delivers superior adhesion and cures quickly within about 30 seconds for seamless rubber bonding. Once cured, it helps provide a strong, durable, waterproof seal that holds up to vehicle weight, pressure, and heat. Suitable for cars, motorcycles, trucks, bicycles, and off-road tires, it’s designed for emergency patch and maintenance repairs.

The Gurduenon scissor car jack tire changing kit is designed for quick flat-tire replacement with a lifting capacity of 2.5 tons and a scissor-lift range sized for many vehicles. The complete emergency set includes a ratchet wrench, lug wrench, gloves, a pencil tire pressure gauge, and a storage bag for convenient trunk or garage use. Universal compatibility makes it suitable for cars, SUVs, and other vehicles roadside assistance needs.

Replace your worn or missing TPMS sensors with pre-programmed, direct-fit sensors for compatible Ford, Lincoln, and select Mazda models. Each sensor comes ready to activate with a scan tool, helping restore accurate tire pressure monitoring and trouble-free installation. Built with a long-life CR2032 battery and tested before factory release, this set provides dependable performance with a one-year warranty.
Use the Kit Only When
- The puncture is in the tread area.
- The tire can still sit on the wheel correctly.
- The tire has no sidewall bulges, cuts, or exposed cords.
- The sealant is not expired.
- The compressor can inflate the tire to the pressure required by your manual or tire placard.
Do Not Use the Kit When
- The sidewall is damaged.
- The puncture is large or in the shoulder area near the edge of the tread.
- The tire has been driven flat or nearly flat long enough to damage the inner liner.
- The tire or wheel is cracked, deformed, or leaking around the bead.
- The compressor runs but the tire will not build pressure within the time limit in your manual.
- Your vehicle or kit is under an active recall that says not to use it before repair.
How Do You Tell Which Kit You Have?
To identify your tire mobility kit, look at the control layout and hose setup. Common OEM designs include dial kits and dual-port kits. A dial kit usually lets you select sealant mode or air-only mode with a knob. A dual-port kit has separate ports or hose paths, so the hose may need to be attached to the kit body before use.
Some aftermarket kits work differently. For example, a pour-in sealant kit may require removing the valve core, adding sealant manually, reinstalling the valve core, and then inflating the tire. That is why you should read the instructions printed on your specific kit before you need it on the roadside.
The safest way to confirm the type is to search your owner’s manual for “tire mobility kit,” “tire inflator and sealant kit,” or “temporary mobility kit.” The manual should show the kit location, hose connections, operating mode, pressure targets, warning labels, speed limits, and replacement part information.
Where Is the Tire Mobility Kit Stored?

You will usually find the tire mobility kit in the trunk, cargo area, luggage compartment, under the load floor, or under the front passenger seat. Some vehicles use a dedicated compartment with a label or diagram.
Common Storage Locations
- Under the cargo floor or trunk floor.
- Inside a side storage cubby in the luggage area.
- Under the front-row passenger seat.
- Inside a dedicated emergency equipment compartment.
Check the Owner’s Manual
If you cannot find the kit quickly, check the owner’s manual instead of guessing. The manual should show the exact storage location and explain whether the kit has a removable sealant canister, a single hose, a dual-purpose hose, separate sealant and air hoses, or a dial selector.
Once you find it, inspect it before long trips. Confirm that the compressor, hose, power cord, sealant, valve connector, pressure gauge, and instructions are present. Keep luggage and cargo from blocking access to the kit.
Before You Use the Kit: Safety Checklist
Before using a tire mobility kit, make the situation safe. A flat tire on the shoulder is a traffic hazard, and the kit will not help if the tire damage is outside its limits.
- Move as far away from traffic as safely possible.
- Turn on the hazard lights.
- Set the parking brake.
- Ask passengers to stand in a safe location away from traffic.
- Read the kit label and owner’s manual instructions.
- Check the sealant use-by date.
- Do not remove nails, screws, or other puncturing objects unless your kit instructions say to do so.
- Use the kit only outdoors or in a well-ventilated area if the engine must run for power.
- Do not stand directly over the kit or tire while inflating.
- Stop immediately if the tire sidewall bulges, the kit leaks, or pressure does not build.
Note: Some sealants contain latex or other chemicals. If you have sensitivities, avoid skin contact, keep the kit away from children, and wash exposed skin after handling the hose or canister.
How Do You Use a Tire Mobility Kit in an Emergency?

Use the instructions for your exact kit first. The general process below applies to many compressor-and-sealant kits, but hose connections and mode selections vary.
- Park safely. Move away from traffic, turn on the hazard lights, and set the parking brake.
- Inspect the tire. Do not use the kit if there is sidewall damage, a blowout, rim damage, or a large puncture.
- Leave the puncturing object in place. Many OEM instructions say not to remove nails or screws because the sealant works around the puncture.
- Connect the hose. Remove the valve cap and attach the sealant hose firmly to the tire valve stem. On a dual-port kit, confirm the hose is connected to the correct sealant port.
- Power the compressor. Plug the power cord into the 12-volt outlet. Some vehicles require the ignition or engine to be on; only run the engine outdoors or in a well-ventilated area.
- Select the correct mode. Choose sealant mode if the tire needs repair. Use air-only mode only for normal inflation when no sealant is needed.
- Inflate to the recommended pressure. Use the tire pressure listed on the driver’s door label, tire loading placard, or owner’s manual. Do not use the tire sidewall maximum as the target pressure.
- Turn off and disconnect. Once the correct pressure is reached, turn off the compressor, unplug the power cord, remove the hose, and reinstall the valve cap.
- Drive the short distribution distance. Drive the distance specified by the kit to spread sealant inside the tire. Some Ford instructions use about 4–5 miles as the distribution drive.
- Recheck the pressure. Stop safely, check pressure again with the compressor off, and add air if the manual allows. If pressure is below the manual’s minimum, stop and call roadside assistance.
- Go to tire service. Drive only within the kit’s speed and distance limits and have the tire inspected as soon as possible.
Pro Tip: Take a photo of the kit instructions and the sealant expiration date before a road trip. In an emergency, it is easier to zoom in on your phone than to read small print on a roadside shoulder.
[Products Worth Considering]

This AUTOWN flat tire repair kit is designed for quick, reliable puncture repairs using a plug kit and spiral probe tool to simplify installation. Built for durability and safe handling, it offers strong adhesion and flexibility to help maintain tire air tightness. With a portable storage case and a multi-vehicle approach, it’s suitable for cars, motorcycles, ATVs, tractors, lawn mowers, RVs, jeeps, and trucks.

This tire repair kit provides fast emergency puncture repair without removing the tire from the rim, helping you get back on the road quickly. Its screw plug system is designed for punctures in both tread and sidewall and includes a complete patch plug tool set with essential accessories. A portable storage bag makes it easy to carry for cars, trucks, SUVs, motorcycles, and heavy-duty applications.
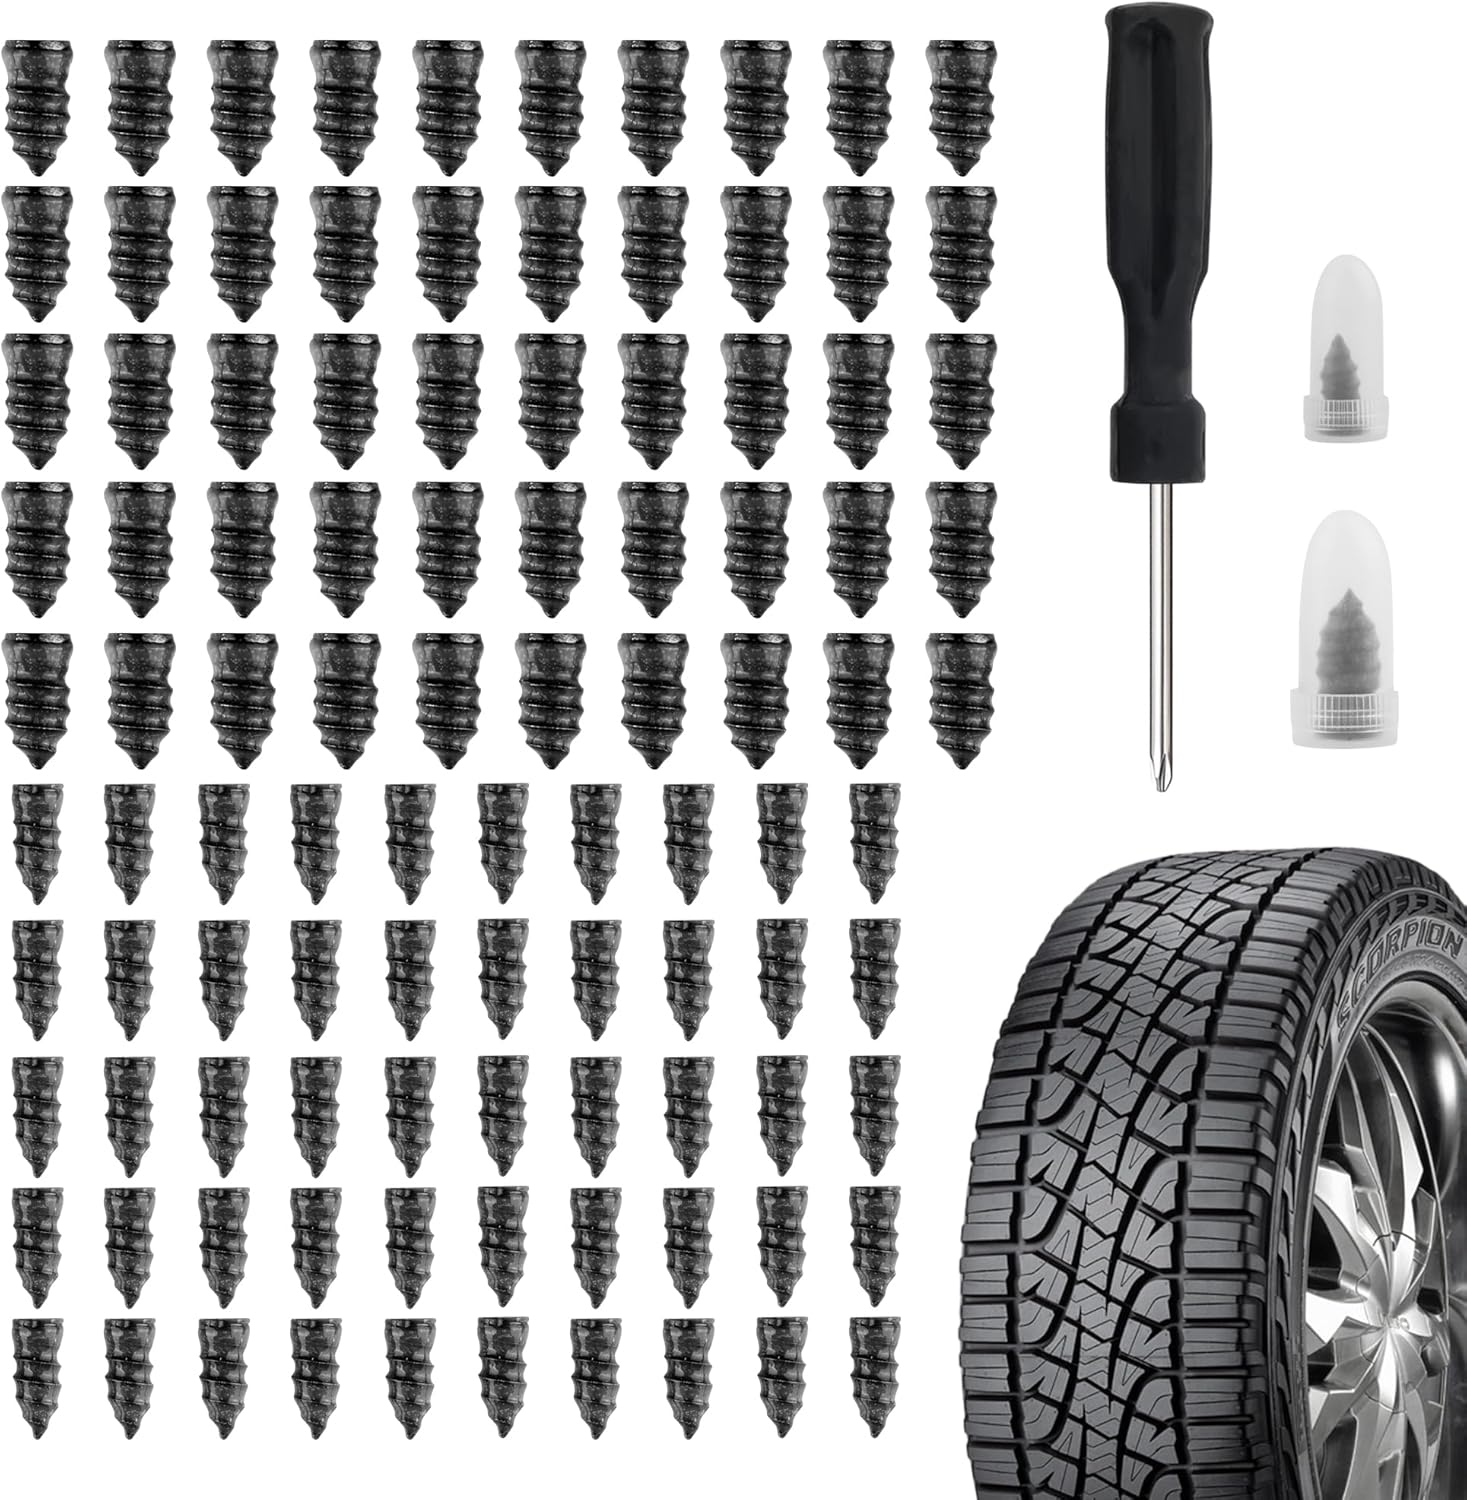
Salior’s tire plug kit provides a fast, reliable self-service fix for punctured or leaking tires without the need for flaring tools. Choose the correct plug size, then screw the nail into the puncture using the included screwdriver for an enhanced seal. The set is durable and convenient for on-the-go maintenance across multiple vehicle types.
Dual-Port vs. Dial Kit Differences
A dial kit usually has one main selector knob for sealant mode and air mode. A dual-port kit may require attaching the hose to the kit body before connecting it to the tire. If the hose is on the wrong port, the kit may inflate without sealant or fail to operate correctly.
Before turning the compressor on, confirm three things: the hose is tight at the valve stem, the kit is in sealant mode, and the compressor power cord is fully seated in the 12-volt outlet.
Troubleshooting: When to Stop and Call Roadside Assistance
Stop using the kit and call roadside assistance if any of these happen:
- The puncture is in the sidewall or shoulder area.
- The hole is larger than the kit’s stated repair limit.
- The tire does not inflate to the required pressure within the kit’s time limit.
- The tire has bulges, cuts, exposed cords, or visible deformation.
- The wheel is bent, cracked, or leaking at the bead.
- You hear unusual vibration, thumping, or ride disturbance after sealing.
- The pressure drops again after the sealant-distribution drive.
- The compressor becomes hot, smells like burning, or stops working.
- Your vehicle is in a tire repair kit recall that says not to use the kit before repair.
Warning: Do not keep driving on a tire that will not hold pressure. A temporary seal can fail suddenly, especially if the tire has internal damage that cannot be seen from the outside.
How Fast and Far Can You Drive After Repair?
After using a tire mobility kit, the first drive is usually a short trip to spread the sealant inside the tire. After that, stop and recheck the tire pressure. This short sealant-distribution drive is not the same as the total distance you may be allowed to drive afterward.
Speed and distance limits are vehicle-specific. Some Ford owner-manual examples say the maximum after sealant use is 50 mph (80 km/h) and up to 120 miles (200 km), but other vehicles and aftermarket kits may have different limits. Follow the label on your kit and the owner’s manual.
Drive smoothly, avoid hard braking, avoid sharp steering, and go directly to a tire shop or dealer. If the vehicle pulls, vibrates, thumps, or the pressure warning returns, pull over safely and call for help.
A tire mobility kit buys time to reach professional service. It does not turn a damaged tire back into a normal, fully repaired tire.
When Should You Replace the Sealant?
Replace the sealant before the use-by date printed on the canister. For many Ford kits, owner-manual guidance says to check the use-by date regularly and replace the canister after four years of non-use. Other brands may use different dates, so the printed label matters more than a general rule.
You should also replace the sealant after any use. Many OEM kits contain enough sealant for one tire repair only. Depending on the kit design, you may also need a new hose or replacement cartridge.
Sealant Maintenance Checklist
- Check the use-by date every oil change or before long trips.
- Confirm the bottle is full, sealed, and not leaking.
- Use only sealant approved for your vehicle or kit.
- Do not mix different sealant types unless the manufacturer allows it.
- Replace the canister after use, even if some liquid remains.
- Dispose of used or partially full canisters according to local rules or dealer guidance.
What Happens at the Repair Shop After Sealant?
Tell the tire technician that sealant was used. The shop may need to clean the tire, inspect the inner liner, check the valve stem, and inspect or replace the TPMS sensor depending on the vehicle and sealant type.
A proper permanent tire repair is not just an outside plug. Tire-industry guidance says the tire should be removed from the wheel for internal inspection, and a proper repair generally uses a rubber stem or plug to fill the injury and a patch to seal the inner liner. If the damage is in the sidewall or shoulder, larger than the repair limit, overlapping another repair, or the tire was driven while severely underinflated, the tire may need replacement.
How Much Does a Tire Mobility Kit Cost?
The cost depends on whether you buy an aftermarket emergency kit, an OEM replacement kit, or only a replacement sealant canister. As a rough reference, Slime lists its Smart Spair flat tire repair kit at $49.99, while OEM kits and vehicle-specific replacement parts can cost more. Always verify fitment by vehicle, part number, and sealant type.
Do not choose a replacement only by price. The hose connection, sealant chemistry, bottle shape, compressor pressure range, and vehicle storage design must match the kit and vehicle.
[Products Worth Considering]

This self-service tire repair nail kit includes 60 pieces (30 small + 30 large) to help seal punctures quickly without needing an auto shop visit. The nails are designed to fit different hole sizes and provide a tight connection with sealing glue to help prevent air and water intrusion. Suitable for cars, motorcycles, trucks, and other vehicles, it’s an easy, efficient way to patch roadside tire damage.

Get back on the road fast with this compact tire plug repair kit for tubeless tires. It includes self-vulcanizing rubber plugs, T-handle rasp and insert tools, and a storage box that fits in your glove compartment for easy access. Also included are a 4-way valve steam tool set with valve cores and caps for added roadside convenience.

This tire inflator with pressure gauge delivers long-lasting performance with a durable rubber-protected gauge and sturdy build. The longer hose and 360 swivel air chuck help you seal the valve securely and keep your hands free while measuring, inflating, or deflating. It’s battery-free for reliable use and provides ±2 PSI accuracy in the mid-range for most typical tires, with universal compatibility for 1/4 NPT compressor outputs.
Current Safety Note: Check for Recalls
Before relying on any factory tire repair kit, check your vehicle’s VIN for open recalls. In June 2026, NHTSA Recall 26V366 covered certain Honda vehicles because a flat tire repair kit could build pressure in the sealant bottle if the nozzle was improperly connected, potentially causing the bottle cap to detach. That recall does not apply to every tire mobility kit, but it shows why checking vehicle-specific safety information matters.
You can check open recalls through your vehicle manufacturer, dealer, or the NHTSA recall lookup.
Frequently Asked Questions
What does it mean when your car says Service Tire Mobility Kit?
It means the tire mobility kit needs attention. The most common reason is an expired or due-for-replacement sealant canister, but the exact meaning depends on the vehicle. Check the sealant date, inspect the kit, replace any used or expired parts, and reset the reminder only according to the owner’s manual.
How long can you drive with a tire mobility kit?
Only as long as your kit and owner’s manual allow. The first drive is usually a short sealant-distribution drive, followed by a pressure recheck. Some Ford examples allow up to 50 mph and 120 miles after sealing, but limits vary. Treat the repair as temporary and go directly to tire service.
What are the disadvantages of tire mobility kits?
They are temporary, have sealant expiration dates, usually work only on small tread punctures, and cannot fix sidewall damage, blowouts, large punctures, or rim damage. Sealant can also make professional tire service messier and may require valve-stem or TPMS service depending on the vehicle.
How much does a tire mobility kit cost?
Aftermarket kits may start around $50, while OEM kits and vehicle-specific replacement parts can cost more. Replacement sealant canisters also vary by brand and vehicle. Check your owner’s manual, VIN-based parts catalog, or dealer before buying a replacement.
Can a tire mobility kit fix sidewall damage?
No. A tire mobility kit should not be used for sidewall damage or shoulder damage unless your manufacturer gives different instructions. Sidewall damage usually requires tire replacement because the sidewall flexes heavily and cannot be safely sealed as a temporary tread puncture.
Do you need a tire shop after using a tire mobility kit?
Yes. The kit is only a temporary emergency repair. A tire technician should remove the tire from the wheel, inspect the inner liner, determine whether the tire is repairable, clean out sealant as needed, and repair or replace the tire properly.
Conclusion
A tire mobility kit is useful when the damage is minor, the sealant is fresh, and you follow the instructions exactly. It can save you from changing a wheel on the shoulder, but it has strict limits. Use it only for the right kind of puncture, recheck pressure after the short sealant-distribution drive, stay within the kit’s speed and distance limits, and get the tire professionally inspected as soon as possible.
Sources
- Ford — Tire Inflator and Sealant Kit — kit types, location, basic operation, sidewall/puncture limits, and temporary-use guidance.
- Ford Owner Manual Content — Tire Sealant and Inflator Kit — use-by date, four-year sealant replacement, speed/distance examples, and after-use replacement guidance.
- NHTSA TireWise — tire pressure placard, cold inflation pressure, and tire-pressure safety guidance.
- U.S. Tire Manufacturers Association — Tire Repair Basics — repairable tread-area limits and proper tire repair requirements.
- Tire Industry Association — Tire Repair — sealant and emergency inflator limitations, sidewall restrictions, and permanent repair guidance.
- NHTSA Safety Recall Report 26V366 — 2026 tire repair kit safety recall example involving sealant bottle pressure buildup.

![[2026NEW] 5000A Jump Starter with Air Compressor (150PSI)](https://m.media-amazon.com/images/I/71oG4PFNsmL._AC_SL1500_.jpg)