
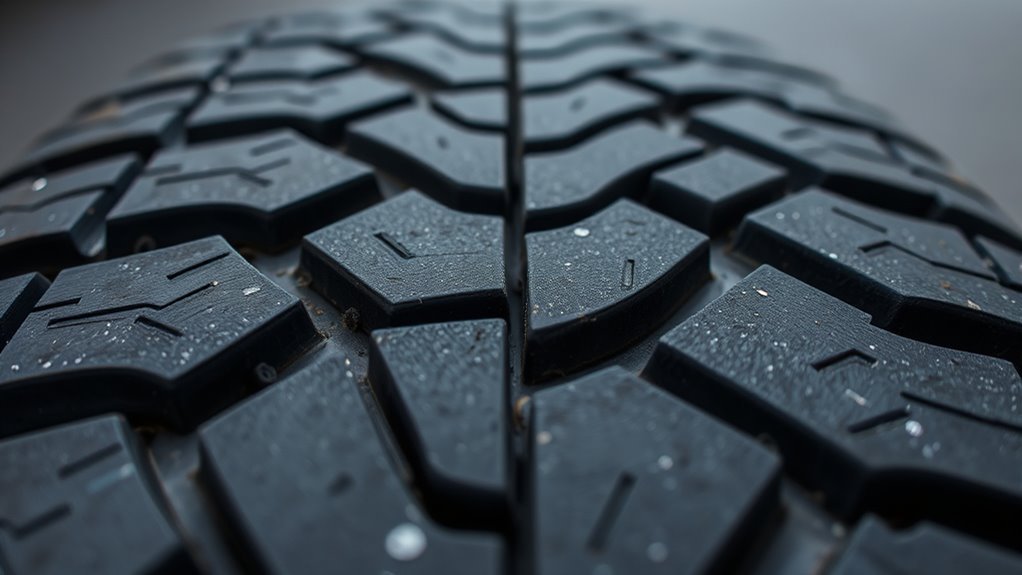
Tire wear indicator bars are small raised rubber strips molded into the main tread grooves. When the surrounding tread wears down until it is level with those bars, the tire is at about 2/32 inch of tread depth and should be replaced. Use a tread-depth gauge for the most accurate reading, then confirm the result in several grooves around each tire.
Quick Answer
Tire wear indicator bars show when tread has worn to about 2/32 inch. If the tread is flush with the bars, replace the tire. Start shopping earlier, around 4/32 inch, especially if you drive in rain, because wet braking and handling drop before the legal minimum.
Key Takeaways
- Wear bars are molded into the main grooves and become level with the tread at about 2/32 inch.
- A tread-depth gauge is more precise than the penny or quarter test.
- Use 4/32 inch as a practical shopping point for better wet-road safety.
- Check several grooves and several points around each tire; replace based on the lowest safe reading.
- Uneven wear can point to inflation, alignment, balancing, or suspension problems.
At a Glance
| Time Required | 5–10 minutes for all four tires |
| Difficulty | Easy |
| Tools Needed | Tread-depth gauge, penny, quarter, flashlight, tire-pressure gauge |
| Cost | Free with coins; usually low-cost for a tread-depth gauge |
How to Check Tread Depth: Tire Wear Bars, Penny/Quarter, and Gauges
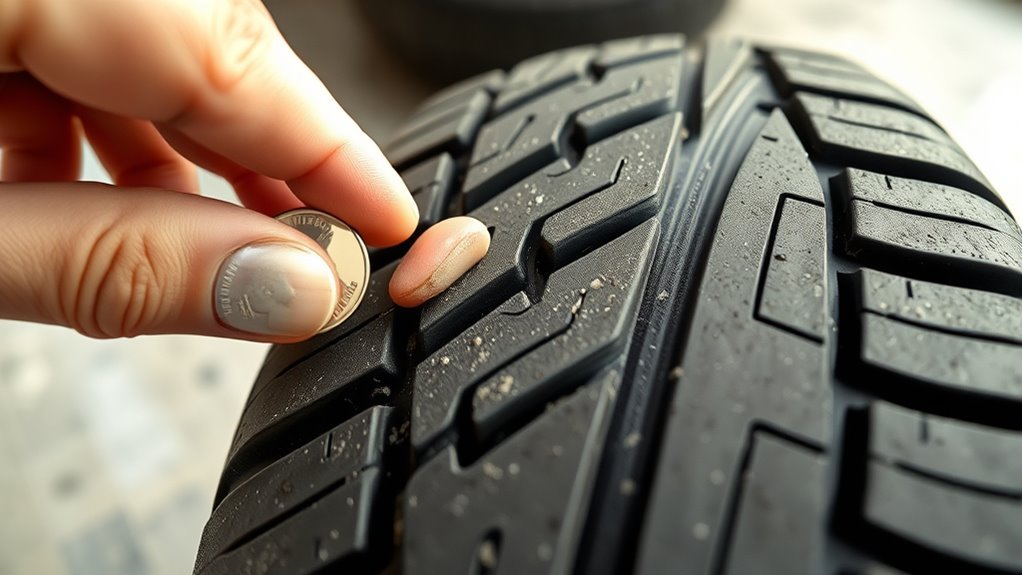
Routine tread checks help you catch worn tires before grip becomes unsafe. The easiest way is to look for the built-in wear bars across the grooves. If the tread surface is level with a bar, the tire is worn out and should be replaced.
- Park safely and turn the wheel if needed. Make sure the vehicle is on a flat surface and the tires are cool enough to inspect.
- Find the main tread grooves. Look between the tread ribs for small raised bars running across the groove.
- Check the wear bars. If the bar is flush with the surrounding tread, replace the tire.
- Use a tread-depth gauge. Place the probe into a main groove, press the base flat against the tread, and read the depth.
- Repeat the measurement. Check inner, center, and outer grooves in at least three spots around the tire.
- Use the lowest reading. A single worn area can make a tire unsafe even if other areas look acceptable.
Warning: Do not measure tread depth on top of a wear bar, tie bar, hump, or raised rubber feature. Measure inside the main tread groove so the reading reflects actual usable tread.
The penny test is a quick backup check. Place a penny upside down into a tread groove. If all of Lincoln’s head is visible, the tire is at or below the common replacement point. The quarter test is a more cautious wet-weather screen: if Washington’s head is fully visible, the tread is around 4/32 inch and it is time to start shopping.
Pro Tip: Keep a small tread-depth gauge in your glove box. Coins are useful in a pinch, but a gauge gives a number you can track over time.
| Tread Depth | What It Means | What To Do |
|---|---|---|
| 6/32 inch or more | Generally usable tread for normal conditions | Keep monitoring monthly |
| 4/32 inch | Wet traction is noticeably reduced | Start shopping, especially for rainy driving |
| 2/32 inch | Common minimum wear point; wear bars are usually flush | Replace immediately |
[Products Worth Considering]

The SAFELIFE dial tire tread depth gauge measures tread depth in 1/32 inch increments with clear, easy-to-read 2-inch dial face. Color zones using a traffic light system help you quickly judge whether tread is low, marginal, or ample for safer driving. Built with a durable zinc cast body and a metal detect probe for precise, comfortable use across cars, motorcycles, trucks, and buses.

Measure tire tread depth quickly and accurately with this LUMITECO dial gauge that reads in 1/32" increments up to 14/32". The color-coded green/yellow/red zones make it easy to judge tire wear and know when replacement is needed. A rugged, compact design with a protective pouch helps keep the gauge ready for use on cars, trucks, motorcycles, and more.

Monitor tire tread wear with a smart, color-coded depth gauge that shows clear condition ranges at a glance. The bar is range marked for fast, easy readings, helping you maintain safer traction and performance. Each gauge is portable with a pocket clip, and the set includes 20 units for daily use and sharing.
Where to Spot Tire Wear Bars and What They Look Like
Tire wear bars usually sit inside the main tread grooves. They look like narrow rubber bridges that run across the groove from one tread block to another. They are easier to see when the tire is clean and the tread is dry.
| Location | Marker Type | What To Watch For |
|---|---|---|
| Central grooves | Raised bar | Bar becomes flush with tread |
| Shoulder grooves | Dimple or small indicator | Small molded mark near the edge |
| Sidewall edge | TWI, arrow, triangle, or brand mark | Points toward the wear bar location |
| Full circumference | Repeated bars | Check several bars around the tire |
| Multiple grooves | Repeated indicators | Compare inner, center, and outer wear |
Some tires also have “TWI” marks, small arrows, or triangular symbols on the shoulder to point you toward the tread wear indicators. If you cannot find the bars, use a flashlight and follow the main groove around the tire until you see a raised strip.
Uneven Wear Patterns and What They Indicate
Uneven tread wear can reveal problems before they become expensive. Do not only check whether the wear bars are visible. Compare the inner edge, center, and outer edge of each tire.
| Wear Pattern | Likely Cause | Fix |
|---|---|---|
| Center wear | Overinflation | Set cold pressure to the vehicle placard |
| Both edge shoulders worn | Underinflation or overloading | Correct pressure and load |
| One edge worn | Camber or alignment issue | Schedule an alignment check |
| Feathered tread ribs | Toe alignment issue | Correct toe settings |
| Cupping or scalloping | Worn shocks, struts, bushings, or imbalance | Inspect suspension and balance tires |
Note: If you see exposed cords, bulges, cracks, tread separation, deep cuts, or vibration while driving, stop using the tire and have it inspected by a tire professional.
When to Replace Tires: Legal Limits, Safety Thresholds, and Timing to Shop
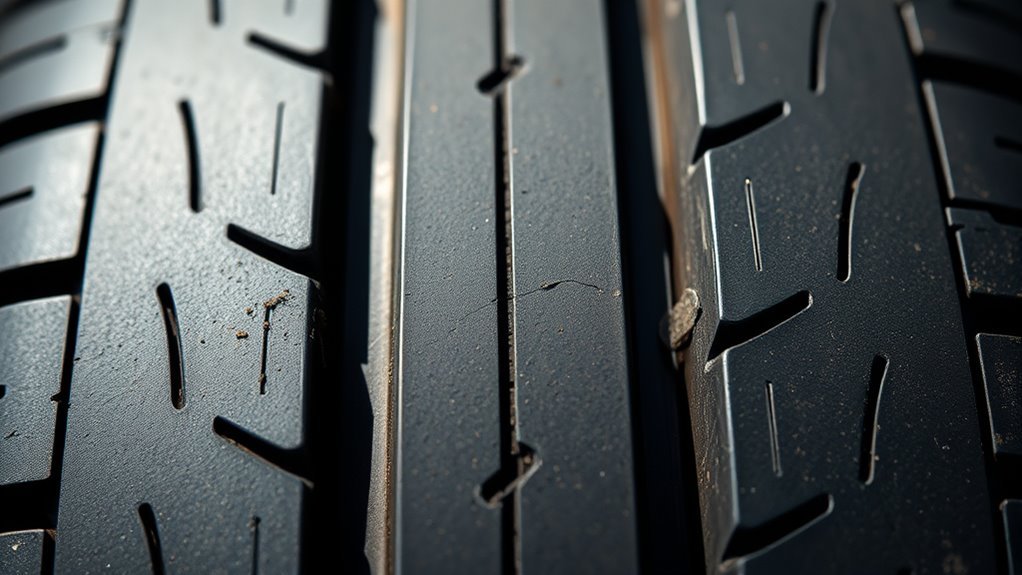
Replace a tire immediately if any main tread groove reaches 2/32 inch, the wear bars are flush, or the tire has structural damage. Start shopping earlier at about 4/32 inch if you drive in rain or highway conditions, because wet stopping distance and handling decline before the tire reaches the minimum wear point.
AAA testing found that all-season tires worn to 4/32 inch took about 87 feet longer to stop on wet pavement than new tires in passenger-car testing at highway speed.
[Products Worth Considering]

Steelman white tire marking crayons provide high-contrast, semi-permanent marks for repairing and inspecting tires and equipment. They write on wet or dry, smooth or coarse surfaces including rubber, metal, glass, and wood, making them ideal for puncture location and damage outlining. The lead- and zinc-free crayons resist weather and fading yet wipe away when you no longer need the marks.

Keep your tires properly inflated with this analog VONDIOR tire pressure gauge, designed for fast, easy readings without batteries. The swiveling, two-axis hose and large glow dial help you measure at any tire angle with instant visibility. Built with a protective rubber shield, it supports durable, low-maintenance use for cars and trucks.

Check tire pressure with the Milton S-925 pencil gauge built for trucks, RVs, and bicycles. It features a single-head chuck with a built-in deflator valve, and it displays readings in both PSI and kPa for convenient use. The gauge is designed for accurate, repeatable pressure checks within its working range.
Legal Minimum Tread
In many U.S. passenger-vehicle rules, 2/32 inch is treated as the minimum tread depth. Federal commercial-vehicle rules also use 2/32 inch for many tire positions, but require 4/32 inch on the front wheels of buses, trucks, and truck tractors. Check your local law, inspection rules, and vehicle type before treating one number as universal.
Legal minimums are not the same as best safety practice. A tire can still be legal but have reduced wet traction, especially at highway speeds or in heavy rain.
Optimal Replacement Window
Use 4/32 inch as a practical planning point. At this depth, the tire may still have visible tread, but water evacuation and wet grip are already reduced. If rain, snow, mountain roads, or long highway trips are common for you, replacing before 2/32 inch is the safer choice.
Signs To Shop Now
- Any wear bar is flush with the tread.
- A gauge reads 4/32 inch or less and you drive in wet conditions.
- Any main groove reads 2/32 inch or less.
- Wet braking feels longer or the vehicle hydroplanes more easily.
- Inner or outer edges are wearing much faster than the center.
- The tire has cracks, bulges, exposed cords, tread separation, or repeated pressure loss.
Seven Maintenance Steps to Prevent Premature Wear and Extend Tread Life
Good tire care slows premature tread loss and makes wear bars easier to interpret. Pressure, tread, rotation, alignment, and inspection should be part of routine maintenance. Additionally, regular monitoring of tread depth helps you plan replacement before the tire reaches the wear bars.
1. Check Tire Pressure Monthly
Check tire pressure at least once a month and before long trips. Measure when tires are cold, meaning the vehicle has been parked for several hours. Use the pressure listed on the driver-side door placard or in the owner’s manual, not the maximum pressure printed on the tire sidewall.
Underinflation can cause edge wear, heat buildup, poor fuel economy, and internal tire damage. Overinflation can cause center wear and make the tire more vulnerable to impact damage.
2. Rotate Tires Regularly
Rotate tires according to your owner’s manual. If no interval is listed, a common industry recommendation is every 5,000–8,000 miles. Rotation helps even out front-to-rear wear caused by steering, braking, drive axle forces, and vehicle weight distribution.
Use the correct rotation pattern for your vehicle. Directional tires, staggered tire sizes, full-size spares, and dual rear wheels may require special patterns.
3. Keep Wheels Aligned
Alignment problems can wear one edge of a tire long before the wear bars appear in the center groove. Schedule an alignment check if the vehicle pulls to one side, the steering wheel sits off-center, or you see feathering or one-edge wear.
4. Balance Tires When Needed
Unbalanced tires can create vibration and patchy tread wear. Have the tires balanced when you install new tires, after a tire repair, or any time you feel vibration through the steering wheel, seat, or floor.
5. Inspect Suspension Components
Inspect shocks, struts, bushings, ball joints, and mounts at routine service intervals. Worn suspension parts can let the tire bounce against the road, creating cupping or scalloped wear. Fix the mechanical cause before replacing tires, or the new set may wear the same way.
| Risk | Action | Reward |
|---|---|---|
| Leaks or weak damping | Replace worn shock or strut | Better grip and less cupping |
| Loose bushings or joints | Repair suspension play | Alignment holds longer |
| Persistent misalignment | Professional alignment check | More even tread wear |
6. Check for Damage, Age, and Repairs
Tread depth is not the only reason to replace a tire. Look for cracks, bulges, exposed cords, punctures near the sidewall, tread separation, and repeated air loss. Also check the DOT date code on the sidewall and follow your vehicle or tire manufacturer’s service-life guidance.
7. Avoid Overloading and Harsh Driving
Heavy loads, aggressive cornering, hard braking, pothole impacts, and fast starts can accelerate tread wear. Stay within the vehicle load rating, slow down for rough roads, and keep tires matched by size, type, and load rating on the same axle.
Quick Troubleshooting: Unusual Wear Despite Proper Care
If your tires wear strangely even though pressure and rotation are correct, look for mechanical causes. A tire that keeps losing air may have a puncture, valve leak, bead leak, cracked wheel, or hidden damage. A tire that cups or scallops may point to worn suspension or imbalance. A tire that wears on one edge usually needs alignment attention.
- Feathering: Check toe alignment.
- Inner or outer shoulder wear: Check camber, toe, and suspension parts.
- Both shoulders worn: Check underinflation or overloading.
- Center worn: Check overinflation.
- Cupping or scalloping: Check shocks, struts, wheel balance, and loose suspension parts.
- Rapid wear on one tire: Check alignment, brake drag, bearing play, or prior tire damage.
After repairing the cause, recheck tread depth and pressure monthly. If you are unsure whether a tire is safe, have it inspected before taking a long trip.
[Products Worth Considering]

Accurately measure tire tread depth with a calibrated gauge marked from 0 to 1 inch in 1/32 inch increments. The color-coded bar helps you quickly identify tread condition ranges, supporting safe driving for trucks, motorcycles, automobiles, and passenger vehicles.

ETENWOLF’s tire pressure gauge helps you quickly and accurately check tire PSI across cars, trucks, motorcycles, bikes, and more. It’s manually calibrated to ANSI B40.1 Grade A for reliable readings, includes a large glow dial for easy nighttime viewing, and features a 360-degree swivel chuck for use at any valve angle. The gauge also works consistently in extreme hot or cold weather.

Measure tyre tread depth precisely with a digital gauge that reads in both MM and inches, helping you monitor safe driving conditions. The large LCD screen is easy to operate, and the compact tool fits for cars, trucks, and motorcycles. It provides high accuracy with a 0-25.4mm range and includes a 1-year warranty for added peace of mind.
Frequently Asked Questions
How do you read a tire wear bar?
Look inside the main tread grooves for a small raised rubber strip. If the tread surface is level with the strip, the tire has reached about 2/32 inch of tread depth and should be replaced.
Can you drive with tires at the wear bars?
You should replace tires once the tread is flush with the wear bars. At that point, wet traction is poor, stopping distances increase, and the tire may be at the legal minimum in many places.
Are built-in tread wear indicators required on all tires?
Most passenger tires have tread wear indicators molded into the main grooves. The location and marker style can vary, so look for bars in the grooves and symbols such as TWI, arrows, or triangles on the shoulder.
Is the penny test or a tread-depth gauge better?
A tread-depth gauge is better because it gives an exact measurement. The penny test is useful for a quick check, but it does not show small differences across the tire as clearly as a gauge.
Should I replace tires at 4/32 inch or 2/32 inch?
Replace immediately at 2/32 inch or when wear bars are flush. Start shopping around 4/32 inch if you drive in rain, because wet braking and handling decline before the tire reaches the minimum wear point.
Conclusion
Tire wear indicator bars are simple but important safety markers. When the tread is flush with the bars, the tire is worn to about 2/32 inch and should be replaced. For a safer routine, check tread depth monthly with a gauge, use coins only as quick backup tests, inspect several grooves around each tire, and start planning replacement around 4/32 inch if you often drive in wet weather. Pair those checks with correct inflation, rotation, alignment, balancing, and suspension maintenance to get longer tire life and safer grip.
Sources
- NHTSA TireWise — tire safety, maintenance, tire ratings, and tire-related crash fatality context.
- U.S. Tire Manufacturers Association: Tire Care Essentials — pressure checks, tread depth, wear bars, penny test, and rotation intervals.
- AAA: Tread Lightly, Worn Tires Put Drivers at Risk — wet-road stopping distance and handling results at 4/32 inch tread depth.
- 49 CFR § 393.75 Tires — federal commercial-vehicle tread-depth requirements and measurement notes.
- USTMA Tire Care & Safety Guide — wear bar inspection, penny test, tire service life, and damage checks.
