
How to Use a Tire Jack Safely: Step-by-Step Guide

To use a tire jack safely, park on solid, level ground, set the parking brake, and put the transmission in park or gear. Check your owner’s manual for the correct jacking points, then position the jack squarely under a reinforced lift point. Raise the vehicle slowly, set it on rated jack stands, and remove the wheel. Keep clear while lowering the car, and avoid loose gravel or unsupported lifting points for safer results and more control.
Key Takeaways
- Park on a flat, stable surface, set the parking brake, and use the owner’s manual to confirm safe jacking points.
- Position the jack squarely under the designated lift point and check that the base and saddle are firmly seated.
- Raise the vehicle slowly and only high enough for the tire change, watching for any shifting or instability.
- Place jack stands under approved support points before removing the wheel; never work under a car supported only by a jack.
- Lower the vehicle slowly, keeping clear of the drop zone, and inspect the jack for damage before and after use.
Check Your Parking Spot
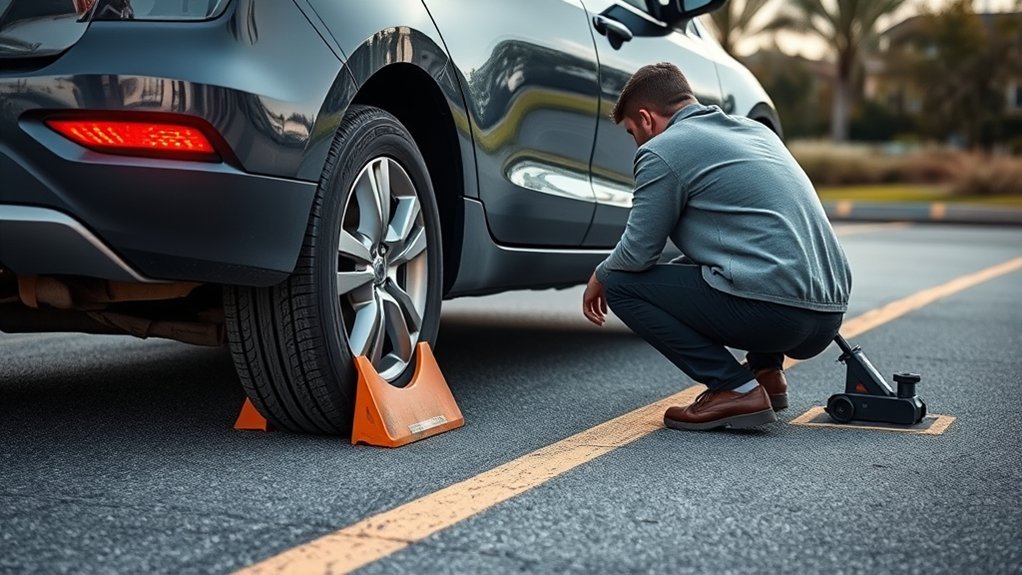
Before you jack up the vehicle, park on a solid, level surface that can support the load safely. You need stable ground because a shifting vehicle can trap you and damage the car. Make sure the spot is flat, free of debris, and clear of tools, curbs, or loose gravel that could interfere with lifting. Avoid parking near traffic or on any slope, since movement risk rises fast in those conditions. If you drive an automatic, shift to park and set the emergency brake firmly. If you drive a manual, select first gear or reverse and engage the brake. Then check that the vehicle won’t roll when you load the suspension. Consult your owner’s manual for site-specific guidance, because some models require extra precautions. By choosing the right parking spot, you protect your body, preserve your equipment, and keep the job under your control. Additionally, ensuring the area is free of debris helps maintain safety while you work on your vehicle.
Find the Jacking Points
Locate the pinch welds first, since most modern vehicles use these reinforced seams as designated jacking points. Then check your owner’s manual to confirm the exact lift locations for your make and model, because they can vary. Use only marked or reinforced safe lift points, as placing the jack anywhere else can damage the structure or make the vehicle unstable. Additionally, ensure that you are aware of your vehicle’s tire specifications, as this will help you select the appropriate jack and lifting technique.
Locate Pinch Welds
Your vehicle’s jacking points are usually integrated into the pinch weld, a reinforced section of the body designed to support safe lifting. You should verify the exact spot, because pinch welds importance directly affects jack placement and vehicle stability. Inspect the area first for bends, rust, debris, or panels that could shift under load. Use this quick check:
| Check | Why it matters | Action |
|---|---|---|
| Weld seam | Confirms support | Center the jack there |
| Surface damage | Prevents failure | Choose another point |
| Obstructions | Preserves clearance | Remove what you can |
| Alignment | Guarantees balance | Reposition before lifting |
| Contact pad | Limits slip | Seat it firmly |
Wrong placement can crush sheet metal or cause accidents. Move deliberately, trust the reinforced seam, and lift only when the contact feels solid.
Check Owner’s Manual
Once you’ve identified the pinch weld area, confirm the exact jacking points in your owner’s manual. This step shows the owner’s manual importance because it maps your vehicle’s approved lift zones and supports safe vehicle lifting techniques. Read the diagrams and notes carefully; they often specify where to place the jack for stable support during lifting. You’re not guessing here—you’re verifying the manufacturer’s design, which protects both you and the vehicle. Build safety precautions awareness by reviewing these instructions before you start, not after the car’s weight shifts. If the manual isn’t available, inspect the vehicle for marked points, but treat that as a fallback only. When you know the correct jacking points, you work with your machine’s structure, not against it.
Identify Safe Lift Points
Find the manufacturer-approved jacking points before you lift the vehicle. You’ll usually find integrated points on the pinch weld, a reinforced edge built to take jack load safely. Use your owner’s manual to confirm the exact locations, then position the jack squarely under the marked point. Good jacking techniques protect the chassis, keep the vehicle stable, and let you work with confidence. If the lift points aren’t obvious, don’t improvise; consult a professional or the manufacturer. Wrong placement is one of the most common mistakes and can bend structure or cause a slip. Keep your safety equipment ready, verify the surface, and double-check alignment before raising the car. Precision here isn’t optional; it’s how you stay free from preventable failure.
Position the Jack Correctly
Before you raise the vehicle, park it on solid, level ground and set wheel chocks behind the tires that’ll stay on the ground. You free yourself from preventable risk by placing the jack at the factory jacking point, usually the pinch weld, as your manual specifies.
- Align the jack squarely: Keep it perpendicular to the jacking point; these jack alignment tips reduce side load and slippage.
- Clear the handle path: Make sure the handle moves without hitting the body or ground, so you can operate smoothly.
- Run jack stability checks: Confirm the saddle sits centered and the base contacts firm pavement before you apply force.
These steps support safe, controlled work and keep the vehicle from shifting unexpectedly. If you’re handling emergency jacking techniques, don’t improvise with soft shoulders, loose gravel, or damaged lift points. Precision here isn’t a luxury; it’s the difference between autonomy and injury. Additionally, always ensure that you’re familiar with factory jacking points to avoid any potential damage to your vehicle.
Lift the Car Safely
Park the vehicle on solid, level ground and set the emergency brake before you lift it. Check your manual for the correct jacking points, usually on the pinch weld, so you don’t damage the frame or lose stability. Insert the jack handle securely and raise the car slowly until you’ve got enough clearance for the task. Maintaining proper tire pressure ensures your vehicle remains stable during maintenance.
Choose Stable Ground
Set your vehicle on solid, level ground before lifting it, because uneven or unstable surfaces can cause the jack to slip or fail. This level ground safety step protects you and keeps the load controlled. Surface stability importance matters, so avoid gravel, dirt, mud, or any soft area that can shift under weight. Use these jack placement techniques to prepare the zone:
- Clear the work area of traffic and hazards.
- Set wheel chocks on the tires that stay down.
- Check your owner’s manual for surface guidance.
You’re not trapped by bad conditions; you can choose a firm, level setup that supports safe lifting. When the ground stays stable, the jack works as intended, and you keep control throughout the job.
Find Jacking Points
Jacking points are your vehicle’s designated lift zones, and you should locate them before raising the car. On most modern vehicle types, they sit on the pinch weld and give your jacking tools a secure contact area. Check your owner’s manual for the exact locations, because guessing can crush body panels or damage structural parts. Keep the car on solid, level ground, away from traffic and other hazards, while you identify these points. Use safety equipment as needed, and don’t lift anywhere else. Knowing your vehicle’s specific jack points helps you work faster, safer, and with more confidence when you handle tire changes or roadside repairs. Precision here protects you, your car, and your freedom to keep moving.
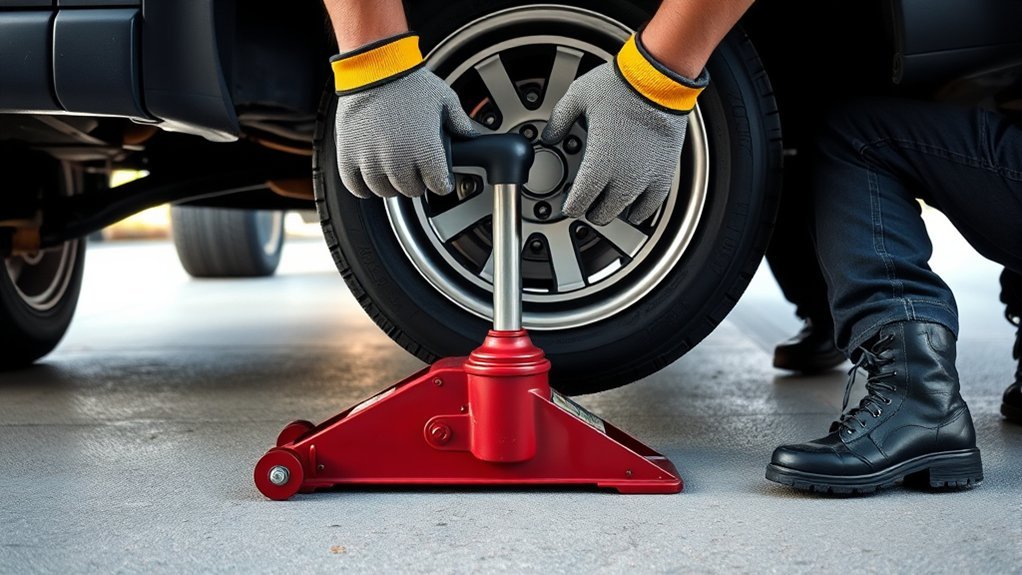
Raise Vehicle Slowly
With the jacking points identified, make sure the vehicle sits securely on a solid, level surface before you lift it. Insert the jack handle fully, then rotate it slowly so the car rises in controlled increments. Use disciplined lifting techniques and keep checking alignment at the designated point to protect vehicle safety and prevent slippage.
- Watch the jack and tire together as you lift.
- Raise the vehicle only 6–12 inches, enough for removal or stand placement.
- Pause briefly at height and confirm stability before you go under.
These jack stability tips help you stay in command of the task, reduce risk, and keep the load balanced. Don’t rush; steady motion gives you freedom from preventable failure and makes the whole operation safer.
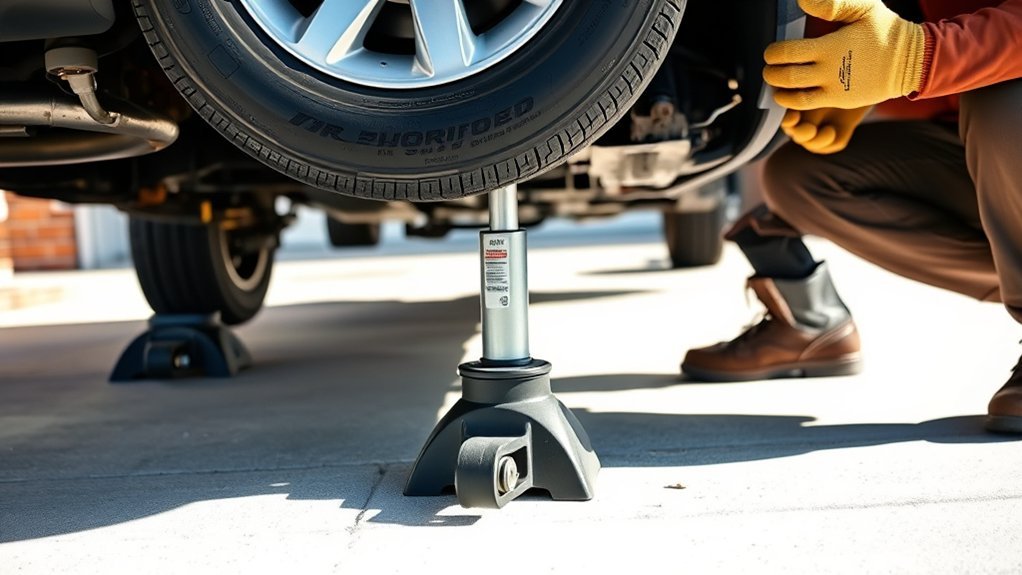
Set the Car on Jack Stands
After you lift the vehicle high enough, position jack stands beneath the designated jacking points as close to them as possible so the car stays balanced. Choose jack stand types rated for your vehicle’s weight; under-rated supports can fail. Check stability factors like level ground, solid contact, and correct stand height before you commit. These safety precautions keep you in control and protect your freedom to work without dependence on the jack alone. Additionally, ensure that you have the right tire size for optimal performance, as specified in your owner’s manual.
| Check | Action |
|---|---|
| Capacity | Match stand rating to vehicle weight |
| Placement | Align stands with factory jacking points |
| Lowering | Release the jack slowly until the car rests fully |
Once the stands sit firmly, lower the vehicle gradually and confirm it’s fully supported. Don’t leave any load on the jack; it’s only a lifting tool. Keep the setup steady, verify both sides, and work only when the vehicle feels solid and unmoving.
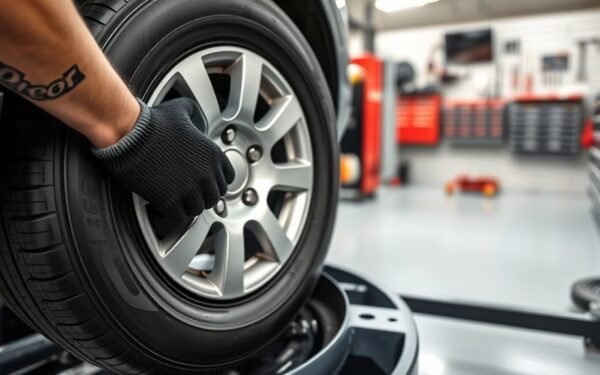
Remove the Wheel
Now that the car sits securely on jack stands, you can remove the wheel. Verify stability before you touch the lugs.
- Use a lug wrench and turn each lug nut counterclockwise. If you haven’t already, crack them loose before lifting next time for easier wheel maintenance.
- Support the wheel with one hand as you remove the last lug nut. This keeps the assembly controlled and prevents it from dropping.
- Pull the wheel straight off the hub with steady pressure. Don’t twist it; that protects the brake components and keeps the hub face clean for tire rotation or lug nut replacement.
Place the lug nuts in a safe, organized spot so you don’t lose them while you inspect or replace the tire. Work methodically, keep your grip firm, and let precision replace guesswork. When you handle the wheel cleanly, you preserve control, protect the hardware, and claim the freedom to service your vehicle on your terms.
Lower the Car Safely
Before lowering the car, clear all tools and equipment from beneath and around the vehicle, then stand to the side so you’re out of any drop zone. Grip the jack handle and rotate it slowly in the opposite direction to start the lowering technique. Keep the motion controlled so the vehicle descends smoothly and your vehicle stability stays intact. Watch the car closely as it comes down; it shouldn’t shift, tilt, or wobble. If you see uneven movement, pause and reassess before continuing. As the tires near the ground, check that no hands, feet, or tools are still under the frame or suspension. These safety precautions protect you from pinch points and unexpected contact. Additionally, ensuring that you have a reliable spare tire kit can provide peace of mind during roadside emergencies. Finish lowering until the car rests fully on the ground. Then remove the jack and, if you changed a wheel, tighten the lug nuts securely so you leave with freedom, control, and a safe, road-ready vehicle.
Avoid Common Jacking Mistakes
Even a simple tire change can go wrong if you skip basic jack safety checks. You need disciplined jacking techniques to keep control and protect your freedom from preventable failure. Before you lift, confirm the car sits on a solid, level surface, and inspect the jack for wear or damage. Use the vehicle manual to locate the correct lifting points; wrong contact can bend parts or shift the load.
Even a simple tire change can fail without solid jack safety and precise lifting points.
- Don’t crawl under a vehicle held only by a jack. Use jack stands every time.
- Don’t trust a scissor jack for extended support; it’s for temporary lifting only.
- Don’t skip safety gear like gloves and eye protection when you work.
These common errors can turn a routine repair into a hazardous stall. Stay methodical, verify each step, and let precise setup do the heavy lifting. Additionally, consider using performance all-season tires to enhance stability while working on your vehicle.
Frequently Asked Questions
How to Use a Hydraulic Jack Step by Step?
You place the hydraulic jack on solid, level ground, set the parking brake, and inspect it for Jack maintenance issues. Align it with the vehicle’s jacking point, then pump the handle using proper Lifting techniques until the load rises. Add jack stands before you work underneath. Lower slowly by turning the release valve counterclockwise. Keep clear, monitor stability, and practice Hydraulic safety so you control the task, not the other way.
What Is the 3 4 Rule for Floor Jacks?
The 3-4 rule says your floor jack should be rated for at least three times your vehicle’s weight, so you’re not pushing it near failure. For a 3,000-pound car, you’d want a 9,000-pound jack. Use jack safety tips, verify lifting techniques, and run maintenance checks on both the jack and vehicle specs. This protects you from overload and, with jack stands, keeps you in control.
How to Correctly Jack a Car?
No shortcuts: you’ll jack the car correctly by parking on level ground, engaging the emergency brake, and chocking wheels. Check the manual for jacking points, then position the jack under the pinch weld. Crank slowly until the tire lifts clear. For car stability tips, add jack stands before work. Follow jack maintenance advice, and use proper tire replacement techniques. Lower the vehicle only after tools clear, fully.
How to Lift a Tire With a Jack?
You lift a tire with a jack by parking on level ground, setting the brake, and placing the jack at the correct lift point from your manual. You crank the handle until the tire clears the ground. Choose suitable jack types, follow safety precautions, and avoid common mistakes like lifting on soft soil or skipping jack stands. Then support the vehicle securely before removing the wheel, so you work free and safely.
Conclusion
Using a tire jack safely comes down to careful setup, correct jack placement, and steady lifting. You’ve checked the parking spot, found the jacking points, and lowered the car only after securing it on jack stands. Why rush a job that depends on stability? Keep the jack level, avoid common mistakes, and follow your vehicle’s manual every time. If you stay methodical, you’ll protect yourself, your car, and your tools.
Related Articles
How to Use a Tire Changing Machine: Easy Beginner’s Tutorial
Now learn the simple steps to use a tire changing machine safely, and discover the key mistake beginners must avoid.
Read More
How to Set a Bead on a Tire: Easy Methods That Actually Work
Discover simple, safe ways to set a tire bead, and find out what to do when the bead still won’t seal.
Read More
How to Seat a Tire Bead With WD-40: Step-By-Step Guide
Need a quick, safe way to seat a tire bead with WD-40? Discover the step-by-step method and the one caution that could save your tire.
Read More