
How Tight Should Tire Nuts Be? Torque Specs & Safety Guide
You should tighten tire nuts to your vehicle’s exact torque spec, which is often 80–120 ft-lbs, but always verify the owner’s manual or manufacturer data. Use a torque wrench, clean dry threads, and a star pattern to seat the wheel evenly. Don’t use an impact gun for final tightening. Re-torque after 50–100 miles, and check sooner if you hit potholes or feel vibration. More details below can help you avoid costly mistakes.
Key Takeaways
- Tire nuts should be tightened to the vehicle manufacturer’s exact torque spec, usually found in the owner’s manual or trusted lookup tools.
- Most passenger vehicles use about 80–120 ft-lbs, but the correct value depends on the make, model, and wheel type.
- Tighten lug nuts by hand first, then use a torque wrench in a star pattern for even seating and proper clamping force.
- Avoid over-tightening, which can strip threads, warp wheels, or damage studs, and under-tightening, which can let the wheel loosen.
- Recheck torque after 50–100 miles, and inspect for vibrations, looseness, or unusual sounds after tire changes or rough driving.
What Is Lug Nut Torque?
Lug nut torque is the amount of rotational force you apply to a lug nut, usually measured in foot-pounds (ft-lbs), to secure a wheel properly and safely. You need to match your vehicle’s exact specification, which you can usually find in the owner’s manual. Most vehicles call for 80–120 ft-lbs, but you shouldn’t guess. Correct lug nut torque keeps the wheel clamped firmly so it doesn’t loosen on the road, where failure can cause serious accidents and damage. You should use a torque wrench, because hand-tightening can overdo it, strip threads, or distort the wheel and hub. After installation, check the lugs again after 50–100 miles to confirm they’ve stayed within spec. When you torque correctly, you protect your vehicle, your freedom to move, and everyone around you. Precision isn’t optional; it’s how you keep the wheel secure and your journey safe. Additionally, using the appropriate tire selection criteria ensures that your tires match your vehicle’s needs and enhance overall safety.
How Tight Should Tire Nuts Be?
How tight tire nuts should be depends on your vehicle’s exact torque spec, which is usually in the 80 to 120 ft-lbs range for many cars and trucks. You need to meet that torque specification exactly, not guess. Use a torque wrench so you can apply controlled force and keep your wheels secure without waste or risk.
- Tighten in a star pattern.
- Avoid over-tightening; studs can strip.
- Avoid under-tightening; wheels can loosen.
- Recheck torque after installation.
- Recheck again after 50 to 100 miles.
This approach protects your vehicle and your autonomy on the road. If you exceed torque specifications, you can damage threads or studs. If you fall short, you invite wheel separation. Work methodically, keep the load even, and verify each nut with the wrench. Safe torque isn’t about force; it’s about precision, discipline, and freedom from preventable failure. Additionally, ensuring proper tire maintenance can significantly enhance your vehicle’s safety and performance.
How to Find Your Torque Spec
Check your owner’s manual first, because it lists the exact torque spec for your vehicle’s make and model in ft-lbs. If you don’t have it, use your VIN or license plate to look up the correct value in a reliable database or tool. Then confirm the manufacturer’s specs online, since torque can change with wheel type and bolt size and you need the exact figure before tightening. Additionally, ensure the torque spec aligns with your vehicle’s recommended tire size for optimal performance and safety.
Check Owner’s Manual
Your owner’s manual is the most reliable place to find the correct lug nut torque spec for your vehicle, usually listed in foot-pounds (ft-lbs) and sometimes in a wheel installation section with the proper tightening pattern. You should check the owner’s manual before you install wheels, because torque can vary a lot by make and model.
- Find the lug nut torque spec
- Note the tightening pattern
- Confirm ft-lbs, not guesswork
- Use the manual’s safety guidance
- Recheck before final tightening
Most passenger vehicles fall around 80 to 120 ft-lbs, but you shouldn’t assume that range applies to yours. If you can’t find the printed copy, use the manufacturer’s digital manual or website. This step helps you avoid over-tightening, under-tightening, and wheel damage.
Use Vehicle Details
Enter your vehicle’s year, make, and model into a torque-spec database or consult the manufacturer’s manual to get the correct lug nut torque value for your exact setup. When you use vehicle details, you remove guesswork and work from verified data, not assumptions. Most passenger vehicles land between 80 and 120 ft-lbs, but wheel size, axle load, and chassis design can shift the target. If you can’t identify the exact trim, a license plate lookup may help, though custom plates can fail. Before tightening, make sure the lug nut threads are clean and dry; lubrication changes friction and can skew clamp force. Accurate specs protect the wheel, hub, and your ability to drive free and safe.
Confirm Manufacturer Specs
To confirm the correct torque spec, start with your owner’s manual, since the manufacturer lists the exact lug nut value for your make and model. That’s the most reliable way to confirm manufacturer specs and protect wheel retention. If you don’t have the book, check the maker’s website or a trusted torque spec database by year, make, and model. Use only dry threads, because lubricant changes clamp load and can distort torque specs.
- Verify vehicle year, make, and model
- Match wheel size and stud type
- Read the listed ft-lbs value
- Cross-check with a professional if unsure
- Re-torque in a safe sequence
Most passenger vehicles land near 80–120 ft-lbs, but your exact number matters.
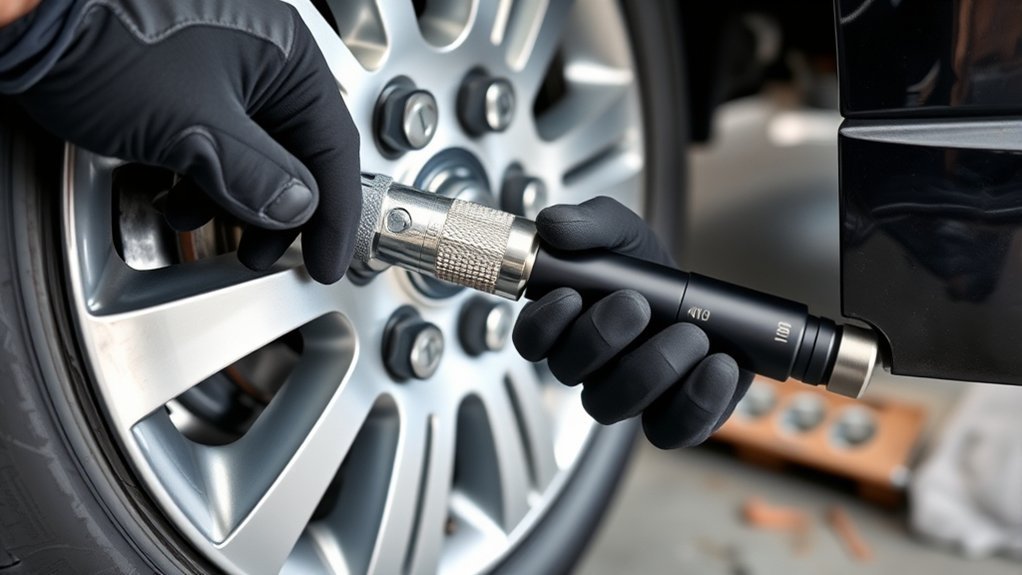
What Tools You Need to Tighten Lug Nuts
Tightening lug nuts correctly starts with the right tools: a torque wrench to match the manufacturer’s specification, the correct socket size—usually 17 mm to 21 mm—and a breaker bar for stubborn fasteners. These tools let you apply controlled force instead of guessing, so you protect the wheel studs and keep the joint secure. You’ll also need a car jack and jack stands if you must lift the vehicle; never rely on the jack alone. A wire brush helps you clean rust and dirt from the hub face, improving contact and fit before tightening. Additionally, having the right tire specifications ensures you choose the correct lug nut torque. Keep your tools organized and verified before you start, because the right setup reduces slip, damage, and wasted effort. With accurate equipment, you stay in control, work safely, and maintain the freedom to service your own vehicle without unnecessary risk.
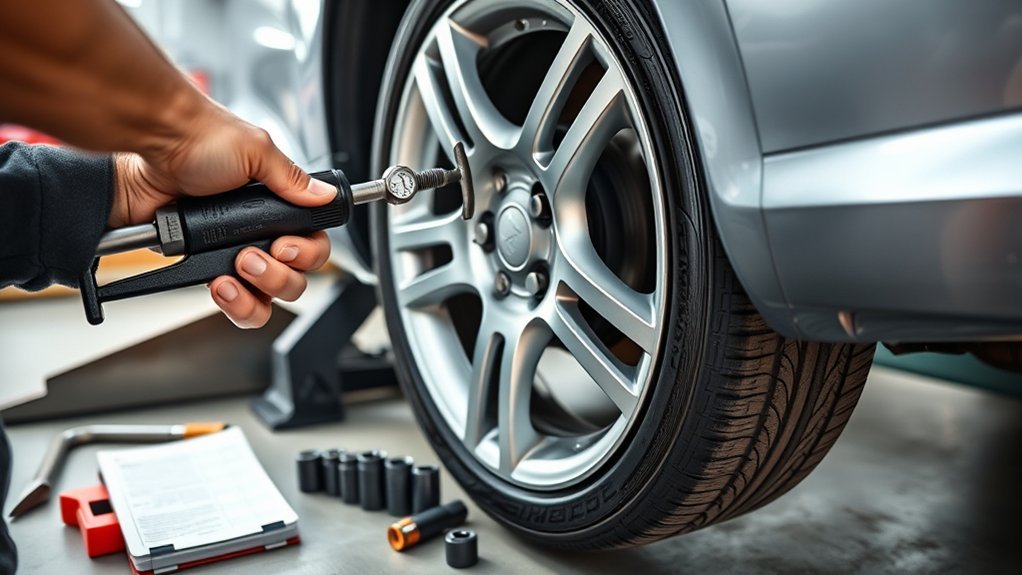
How to Tighten Lug Nuts in a Star Pattern
You should tighten lug nuts in a star, or criss-cross, pattern so you apply pressure evenly across the wheel. Start by hand-threading each nut, snugging them lightly in sequence, and then use a torque wrench to reach the manufacturer’s specified torque. This pattern helps prevent warping and misalignment, and you should recheck torque after 50 to 100 miles. Carrying a reliable spare tire kit is essential for RAV4 drivers in case of emergencies.
Star Pattern Basics
A proper star pattern keeps wheel clamping force even and helps prevent hub distortion. When you tighten lug nuts, you’re choosing control over guesswork and protecting your vehicle’s integrity. Use the star pattern to move across the wheel, not around it in a circle.
- Hand-tighten each lug nut first to prevent cross-threading.
- Apply the torque wrench in a criss-cross sequence.
- Tighten one nut, skip the next, then go to the opposite side.
- Check your owner’s manual for exact torque specs.
- Recheck torque after 50 to 100 miles.
This sequence helps maintain alignment, stability, and safe clamping force. Don’t over-torque or improvise; precision gives you freedom from wheel failure and keeps your ride secure.
Even Pressure Sequence
After you hand-thread and lightly snug each lug nut, use a torque wrench to tighten them in a star pattern so pressure spreads evenly across the wheel. You’ll tighten one wheel lug nut, move to the opposite side, and continue across the pattern until every fastener reaches spec. This even pressure distribution keeps the wheel seated squarely, supports alignment, and helps prevent brake rotor warping. Apply torque in measured steps if needed, but don’t guess or overdo it. Precise tightening gives you safer control and more reliable performance. After you drive 50-100 miles, re-check the torque, because settling can change clamp load and loosen lug nuts. A disciplined sequence protects your freedom to drive confidently and keeps the wheel secure.
How to Tighten Lug Nuts Step by Step
Start by cleaning the wheel and hub surfaces so the lug nuts seat properly and the wheel sits flush. During wheel installation, you free the assembly from hidden misalignment and set a safe foundation.
Clean the wheel and hub surfaces first so the lug nuts seat properly and the wheel mounts flush.
- Hand-thread each lug nut to prevent cross-threading.
- Snug them lightly until the wheel stays flush.
- Tighten in a star or criss-cross pattern.
- Use a torque wrench, not an impact gun.
- Recheck torque after 50–100 miles.
Set your torque wrench to the vehicle’s spec, usually 80–120 ft-lb, and tighten each nut evenly in stages. This controlled method keeps clamping force balanced and protects the studs, wheel, and hub from damage. Don’t guess, don’t force it, and don’t let speed outrun safety. A precise final torque gives you secure retention and the confidence to drive on your own terms. After the first drive cycle, verify torque again so the fasteners have settled and remain locked in place. Additionally, keeping your tires properly inflated can enhance all-season traction and improve overall vehicle handling.
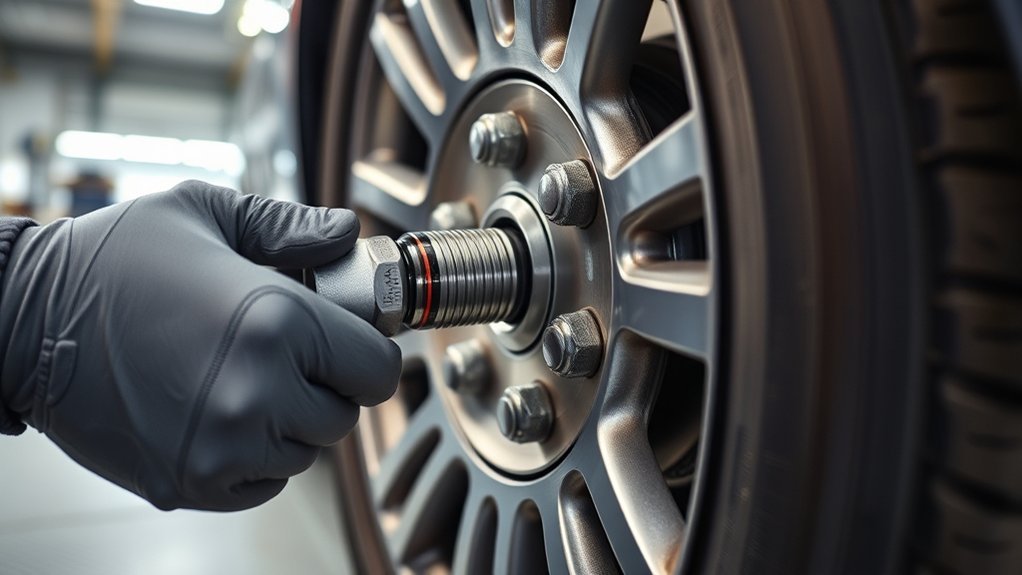
Why Dry Threads Matter
Dry threads matter because they give you consistent friction, which lets the torque wrench deliver the clamping force the vehicle manual assumes. You keep the load predictable, so your wheel stays secure without guesswork. Most manufacturers specify dry threads because oil, grease, or dirt changes friction and can skew the reading. A tire’s tread life rating can also be affected by improper installation, making dry threads essential for safety.
| Condition | Effect |
|---|---|
| Dry threads | Stable torque |
| Oily threads | Higher stretch |
| Dirty threads | Erratic reading |
| Corroded threads | False resistance |
| Clean, dry fit | Safer clamp |
Inspect each lug nut and stud before installation. If you see contamination, clean it and recheck the surface. That small step protects the component threads and helps the wrench work as designed.
When you follow dry threads, you’re aligning with the manual’s assumptions and freeing yourself from hidden variables. You get accurate torque, dependable wheel retention, and a safer drive.
Common Torque Mistakes to Avoid
You shouldn’t skip a torque wrench, because guesswork can leave lug nuts too loose or too tight for safe wheel retention. If you overtighten lug nuts, you can stretch threads, distort the wheel, and make removal more difficult later. After installation, you should re-torque the nuts at the recommended interval, since settling and thermal changes can reduce clamp load. Additionally, proper tire maintenance is crucial for ensuring safety and longevity of your tires.
Skipping Torque Wrench Use
Skipping a torque wrench is a common mistake that can leave lug nuts under-tightened or over-tightened, both of which compromise wheel safety. You need a torque wrench to match manufacturer specs, often 80 to 120 ft-lbs, and to keep clamping force even across the wheel.
- Check the spec before tightening
- Use a calibrated torque wrench
- Tighten in a star pattern
- Recheck after driving if required
- Trust measurements, not feel
Without it, hand-tightening can create a false sense of security while wheel stress stays uneven. A torque wrench helps you prevent loose wheels, preserve stud threads, and keep removal straightforward later. That precision gives you freedom on the road because your wheels stay secured by verified force, not guesswork.
Overtightening Lug Nuts
Overtightening lug nuts is a serious mistake because excessive torque can strip threads, damage the wheel hub, and make future removal difficult. You also risk deforming studs and wheels, which can create unsafe driving conditions and costly repairs. Follow your vehicle’s torque specification, usually 80–120 ft-lb, and use a calibrated torque wrench for final tightening. Don’t rely on an impact gun to finish the job; it can push fasteners beyond safe limits fast. When you apply the correct torque, you protect the wheel assembly and keep control in your hands, not in guesswork. If you want safer, freer maintenance, respect the spec and tighten each lug nut evenly to the manufacturer’s exact requirement every time.
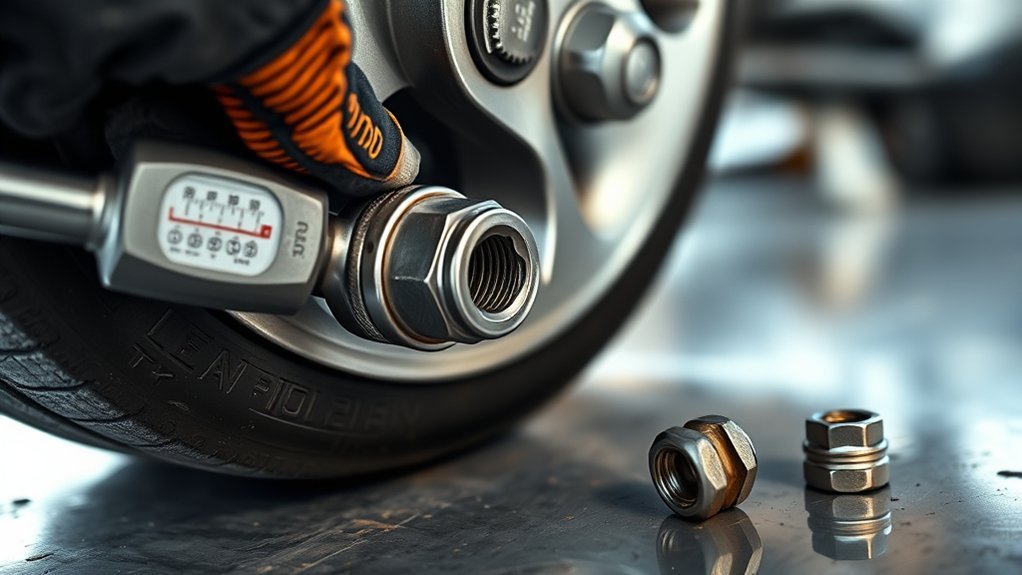
Ignoring Re-Torque Checks
Even when the initial lug nut installation meets spec, the clamping load can change after the first 50–100 miles as components settle and heat cycles expand and contract the wheel assembly. You should re-torque to the manufacturer’s specified value, because initial tightening alone isn’t enough. Skipping this check can let lug nuts loosen, raise wheel-detachment risk, and create costly repairs or crash conditions.
- Re-torque after 50–100 miles
- Use the correct torque wrench
- Follow vehicle specs exactly
- Inspect for uneven load
- Add re-torque to maintenance
Treat this as a safety step, not busywork. When you verify torque periodically, you protect your freedom to drive with confidence and keep the wheel clamped securely over time.
When to Re-Torque Your Wheels
After you install your wheels, re-torque the lug nuts once they’ve settled and again after driving 50 to 100 miles. This re-torque step lets you verify clamping force after the wheel seats against the hub, reducing the chance of loosening. Then check torque every few months, or sooner if you drive on rough roads, haul loads, or face heat and corrosion. Always re-torque after tire changes, rotations, flat repairs, or tire replacement, because each service can alter nut preload. If you notice vibration, wheel shake, or unusual noises, stop and inspect the fasteners immediately. Those symptoms can signal a loss of torque that threatens control and safety. Keep your torque wrench calibrated, follow the manufacturer’s spec, and avoid guessing. Precise maintenance gives you the freedom to drive confidently without surrendering safety to chance. Additionally, consider the treadwear ratings of your tires, as they can affect overall safety and performance.
When and Where to Get a Torque Check?
Once your wheels have been installed and the initial 50 to 100 miles are on the odometer, plan a torque check right away to confirm the lug nuts are still at the correct spec. Use a calibrated torque wrench, or have a technician do it, so you can trust the reading and keep your ride secure.
- Schedule checks after wheel or tire changes.
- Repeat them during routine maintenance intervals.
- Visit a local service center for a free torque check.
- Inspect immediately if you feel vibrations or looseness.
- Contact a wheel expert for exact torque specifications.
You don’t need to guess or overpay to stay safe. Many service centers verify torque at no charge, and professional support helps you avoid stripped threads, warped rotors, and wheel loss. If you’ve driven hard, hit potholes, or swapped components, get checked sooner. Staying proactive gives you control, protects your wheels, and keeps your freedom rolling. Additionally, tire maintenance ensures optimal performance and safety, especially in varying driving conditions.
Frequently Asked Questions
How Do I Know if My Wheel Nuts Are Tight Enough?
Your wheel nuts are tight enough when you torque them to your vehicle’s specified ft-lbs with a calibrated wrench and the socket stops moving at the target value. Use Torque Indicators only as a supplement, not a substitute. Tighten in a star pattern, then recheck after 50–100 miles. Inspect for rust, deformation, or looseness. If you’re guessing, you’re risking safety. Precision gives you freedom on the road.
How Tight to Put on Tire Nuts?
Tighten your tire nuts to the vehicle’s Torque Specifications, usually 80–120 ft-lbs, but you should verify the exact value in your owner’s manual. Use a torque wrench, and you’ll avoid stripping threads or leaving the wheel loose. Tighten in a star pattern for even clamping, and recheck after 50–100 miles. That way, you keep your ride secure and your own freedom on the road intact.
Is 450 Ft/Lbs Enough Torque for Lug Nuts?
No—450 ft-lbs is usually way too much for lug nuts. That’s a sledgehammer where you need a scalpel. You should follow your vehicle’s Torque Measurement specs, often 80–120 ft-lbs, and use a calibrated torque wrench. Over-tightening can strip threads, warp rotors, and risk wheel failure. Check your owner’s manual, tighten in a star pattern, and re-torque after driving for safety and freedom.
How Tight Should Lug Nuts Be Without a Torque Wrench?
You should tighten lug nuts until they feel snug and firm, usually around 80–100 ft-lbs, but you shouldn’t force them past strong resistance. Use a star pattern for even seating and better Lug Nut Safety. If you’re unsure, stop and recheck after driving. Over-tightening can strip threads, so keep control, protect your wheel, and use the manufacturer’s specs whenever you can.
Conclusion
You’ve just seen that lug nut torque isn’t “good enough” when it’s close—it has to be dead-on. Tighten your tire nuts to the exact spec, use a torque wrench, follow a star pattern, and keep threads dry so the reading stays accurate. Miss the mark, and you can warp a wheel or lose one at speed. Recheck after installation, then get a torque check if anything feels off. Your wheels deserve zero guesswork.
Related Articles

How Do You Get a Bubble in Your Tire: Complete Guide, Tips & Expert Advice
Know how tire bubbles form and why they’re dangerous before it’s too late—discover the warning signs, causes, and what to do next.
Read More
Does Insurance Cover Tire Slashing? What Your Policy May Cover
Likely covered under comprehensive insurance, but tire slashing claims have fine print—learn what’s included before assuming your policy helps.
Read More
Can I Drive With a Bubble in My Tire? Why It’s Dangerous
Why driving with a tire bubble is risky and what warning signs could save you from a sudden blowout.
Read More