
How to Replace a Corroded Wheel Stud on a 4Runner
First, lift your 4Runner on jack stands at the frame points and remove the wheel. Use a 17mm socket to detach the caliper with a 12mm bolt, hang it with a bungee cord, and tap off the rotor. Knock out the corroded stud with a rubber mallet, checking brake shoe clearance. Install a new Dorman stud using the washer stack method and an impact wrench, torquing lug nuts to 81 ft-lbs and caliper bolts to 91 ft-lbs. There are more clearance tricks and stubborn stud techniques below.
Remove a Seized 4Runner Wheel Stud Without Brake Disassembly
Grab your rubber mallet and position yourself behind the wheel hub, where you’ll find the seized stud protruding through the brake drum or rotor. Examine the clearance between the brake shoes and hub carefully—you need minimal space to drive this wheel stud out without dismantling anything. Strike the stud‘s backside firmly with your mallet until it breaks free and slides out. If it’s stubborn, use a small sledgehammer for controlled, gentle taps.
Now prepare for installation techniques that save time. Apply lubricant to the new stud‘s splines—this prevents future seizing and eases insertion. Check the stud length against your available clearance. If it’s too long, temporarily manipulate the springs and clips to create just enough room; avoid full brake disassembly. Use a telescoping magnetic tool or tweezers to guide the wheel stud precisely into position. Drive it home steadily. You’ve liberated yourself from unnecessary brake work.
Lift and Secure Your 4Runner: Jack Stand Placement for Hub Access
With the seized stud finally out and your replacement technique ready, you’re now positioned to create the working space this job demands. Engage your emergency brake and chock the wheels to prevent any movement—non-negotiable safety measures before lifting.
Position your jack under the designated frame lift points. Proper jack maintenance guarantees reliable operation when you need it most. Crank steadily until the tire clears the ground, then slide jack stands beneath, locking them on flat, stable ground. Never rely solely on your jack.
Lower the 4Runner onto the stands and verify they’re securely locked. Test stability by rocking the vehicle—any shift demands repositioning. Only when it’s solid do you proceed.
This foundation grants you unimpeded hub access and the confidence to work without fear of collapse. Your liberation from shop dependency starts with respecting these fundamentals. Now you’re ready to install that new stud.
Essential Tools: Impact Wrench, 17mm Socket, and Magnetic Pickup
You’ll need an impact wrench rated for at least 400 ft-lbs to break free corroded studs without stripping the threads. Pair it with a quality 17mm six-point socket that fits snugly over your 4Runner’s lug nuts to prevent rounding. Keep a magnetic pickup tool within arm’s reach—you’ll appreciate it when a nut drops into the wheel well cavity.
Tool Selection Tips
Your essential toolkit includes:
- 17mm socket – matches 4Runner lug nuts precisely, preventing rounded edges
- Telescoping magnetic pickup – retrieves dropped washers or nuts from cramped wheel wells
- Rubber mallet – taps out old studs without marring knuckle surfaces
- Dorman replacement studs – meets OEM strength specs for reliable retention
Select quality tools once; you’ll replace studs faster and safer every time.
Magnetic Pickup Uses
A magnetic pickup earns its place in your toolkit the moment a washer slips past the brake rotor and disappears into the hub assembly. You will use this tool to retrieve dropped nuts, bolts, and washers from tight spaces where your fingers cannot reach. When replacing corroded wheel studs, you rely on the magnetic pickup to hold new studs in alignment during installation, freeing both hands for wrench work.
| Magnetic Pickup Advantages | Magnetic Pickup Techniques | Combined Tool Efficiency |
|---|---|---|
| Retrieves fasteners from deep crevices | Extend tool slowly to maintain magnetic contact | Pair with impact wrench for rapid stud seating |
| Prevents lost hardware under vehicle | Angle pickup head to navigate around brake components | Use 17mm socket to guide stud onto pickup tip |
| Secures new studs for alignment | Clean tip between uses to maintain pull strength | Transfer stud directly from pickup to hub |
| Reduces retrieval time considerably | Apply steady withdrawal motion to avoid dropping load | Eliminate fumbling during under-vehicle work |
| Enables one-handed fastener handling | Store within arm’s reach on magnetic tray | Streamline entire replacement sequence |
You will cut frustration and time by mastering these magnetic pickup advantages and magnetic pickup techniques.
Remove the Wheel, Caliper, and Rotor in Sequence
Start by using your impact wrench to remove the cross-threaded lug nut, then back out the remaining lug nuts to free the wheel. Once the wheel is off, detach the caliper by removing the wire clip and pins—use a 12mm socket for the brake line bracket and a 17mm socket for the caliper bolts—then secure it with a bungee cord to protect the brake line. If the rotor resists removal, tap it gently with a rubber mallet or small sledgehammer to break it loose from the hub.
Wheel Removal Steps
Loosen the lug nuts with a tire iron while the vehicle remains on the ground, then raise it onto jack stands and remove the wheel completely. Wheel stability demands secure positioning before proceeding.
- Detach the caliper: Remove the wire clip and pins, then use a 17mm socket to unscrew the caliper bolts. Secure the caliper with a bungee cord to prevent damage.
- Free the rotor: If seized, tap it gently with a rubber mallet or small sledgehammer to loosen it from the hub.
- Inspect the hub: Clear debris and rust that could block new stud installation.
- Reassemble correctly: Torque caliper bolts to 91 ft-lbs and lug nuts to 81 ft-lbs.
These maintenance tips guarantee reliable performance and safe liberation from corrosion constraints.
Brake Component Access
Remove the wheel using an impact wrench after you’ve safely lifted the vehicle—this exposes the corroded wheel stud and gives you clear access to the brake assembly. Next, remove the wire clip and pins from the brake caliper, then use a 17mm socket to unscrew the caliper bolts. Hang the caliper with a bungee cord to protect the brake line—this brake maintenance step prevents costly damage. If the rotor resists removal, tap it with a rubber mallet or small sledgehammer to break corrosion’s grip. Once free, slide the rotor off to reveal the wheel hub. This sequence guarantees corrosion prevention by eliminating moisture-trapping debris. Reassembly demands precision: torque caliper bolts to 91 ft-lbs and lug nuts to 81 ft-lbs for secure, lasting performance.
Knock Out the Old Stud: Hammer Technique and Clearance Tricks
Before committing to this extraction, assess your workspace carefully:
- Check brake shoe clearance—tight quarters demand patience
- Remove brake shoes if needed—freedom of movement beats struggle
- Inspect the hub flange hole—ensure it’s clean for new stud insertion
- Prepare your magnetic tool—you’ll need it for precise new stud positioning
Once the old stud drops free, you’re ready for installation. The path to self-sufficient maintenance opens with each mastered technique.
Feed and Seat the New Stud: Alignment Without Removing Brake Shoes
With the old stud cleared from the hub flange, you’re ready to thread in its replacement—brake shoes intact. First, assess clearance between shoes and hub. Limited space demands smart stud alignment techniques; grab a telescoping magnetic tool or tweezers to guide the new stud through. Dab lubricant on splines—this conquers installation challenges and eases seating.
| Tool | Purpose | Pro Tip |
|---|---|---|
| Magnetic tool | Navigate tight gaps | Extend fully, lock position |
| Rubber mallet | Seat stud gently | Tap, don’t pound |
| Anti-seize | Smooth spline entry | Thin layer suffices |
Align splines with hub holes. Tap carefully with your mallet until flush. Thread a lug nut to verify engagement—cross-threading destroys progress. Tighten partially, confirm proper bite, then finish. You’ve fed the stud without dismantling brakes. Freedom from extra labor: achieved.
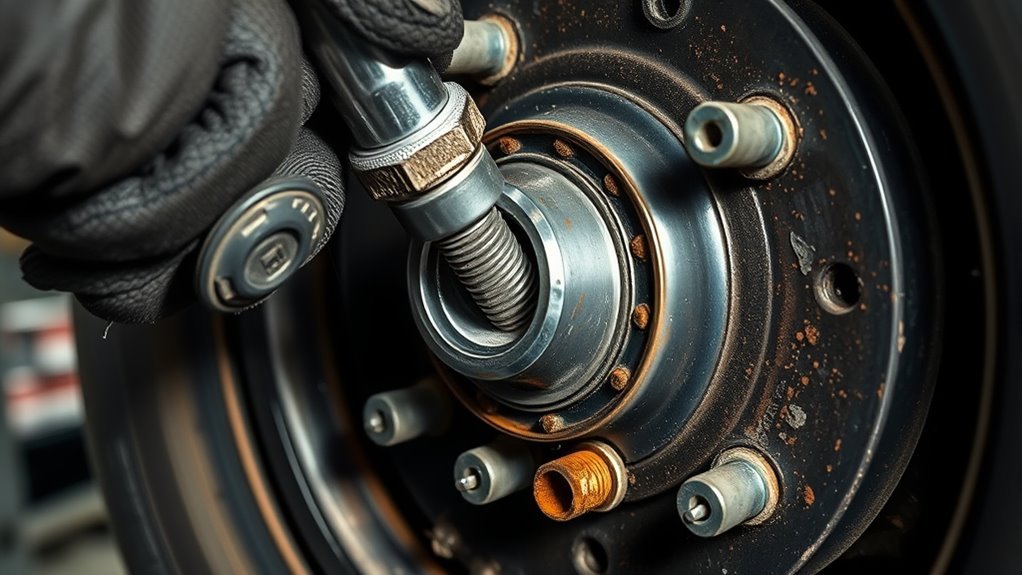
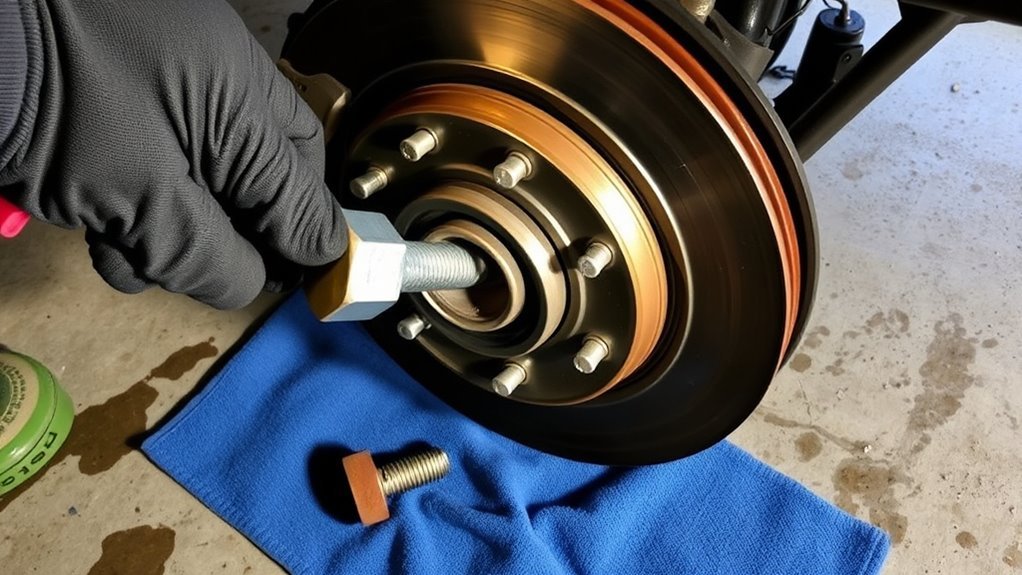
Pull It Tight: Washer Stack Method and Impact Wrench Technique
Stack washers onto your new stud until they’re flush with the hub face—this creates a solid pull surface without marring the threads. Proper washer alignment prevents cross-threading and guarantees even pressure distribution as you draw the stud into the hub.
Now you’ll leverage the impact benefits for rapid, efficient installation:
Leverage the impact benefits for rapid, efficient installation—thread, press, and pull with precision force.
- Thread a lug nut onto the stud, pressing against your washer stack
- Run your impact wrench to pull the stud tight against the hub
- Verify the stud seats fully—no gaps between shoulder and hub
- Torque to 81 ft-lbs with your torque wrench
This technique eliminates thread damage risks while securing the stud rapidly. The washers act as a buffer, preserving thread integrity throughout the pulling process. You’re not fighting the stud—you’re guiding it home with precision force. Double-check final torque; liberation means confidence in every mile ahead.
Torque to Spec: 81 Ft-Lbs for Lug Nuts, 91 for Caliper Bolts
You’ll torque the lug nuts to 81 ft-lbs and the caliper bolts to 91 ft-lbs using a calibrated torque wrench. Tighten the lug nuts in a star pattern to guarantee even pressure distribution across the wheel. Verify each fastener reaches its specified torque without exceeding it, as over-tightening risks thread damage and under-tightening compromises safety.
Critical Torque Values
Three torque specifications demand your attention during this repair: 81 ft-lbs for the lug nuts and 91 ft-lbs for the caliper bolts. Understanding maintenance importance prevents catastrophic failures.
- Lug nuts at 81 ft-lbs: Prevents wheel loosening during operation.
- Caliper bolts at 91 ft-lbs: Eliminates caliper movement, ensuring braking integrity.
- Precision application: Use a calibrated torque wrench—never guess.
- Manufacturer compliance: Deviating risks stripped threads and compromised safety.
Incorrect torque specifications destroy threads and endanger lives. You’ll strip fasteners by over-tightening; under-tightening invites component failure. Your torque wrench liberates you from repeated repairs and roadside emergencies. Verify calibration, apply steady pressure until clicking occurs, and recheck after initial installation. Precision today guarantees freedom from tomorrow’s breakdowns.
Proper Tightening Sequence
Two distinct tightening sequences govern this repair, each demanding methodical execution to prevent component damage. Start with the lug nut first, then the wheel—this order prevents uneven stress on the wheel hub. Apply your torque tools methodically: set your wrench to 81 ft-lbs for lug nuts, securing them in a star pattern to distribute clamping force evenly. For caliper bolts, switch to 91 ft-lbs, ensuring brake assembly integrity. These tightening methods aren’t suggestions—they’re engineered safeguards. You’ll feel the resistance as threads engage; trust your tools, not your gut. After installation, drive briefly, then re-torque both fasteners. Heat cycling loosens metal. Your vigilance transforms specification into security. Precision liberates you from roadside failure.
Reassembly Checkpoints: Verify Before You Lower the Vehicle
Before you lower your 4Runner back to the ground, take a moment to verify that every critical component is properly secured—skipping these checks risks brake failure or wheel separation.
- Torque caliper bolts to 91 ft-lbs—this maintains proper brake function and peak brake performance.
- Confirm wheel stud installation—verify it’s flush with the hub surface and properly tightened for secure wheel attachment.
- Torque lug nuts to 81 ft-lbs—this prevents future wheel separation issues and guarantees your safety.
- Inspect rotor alignment and clean the hub—remove debris and rust for rust prevention and a secure wheel fit.
Double-check each point. Misaligned brake components compromise stopping power. A clean hub surface eliminates variables that could cause vibration or loosening. You’re minutes from completing this repair—precision here liberates you from comebacks and roadside failures. Lower your 4Runner with confidence.
When the Stud Won’t Budge: Last-Resort Moves and Replacement vs. Repair
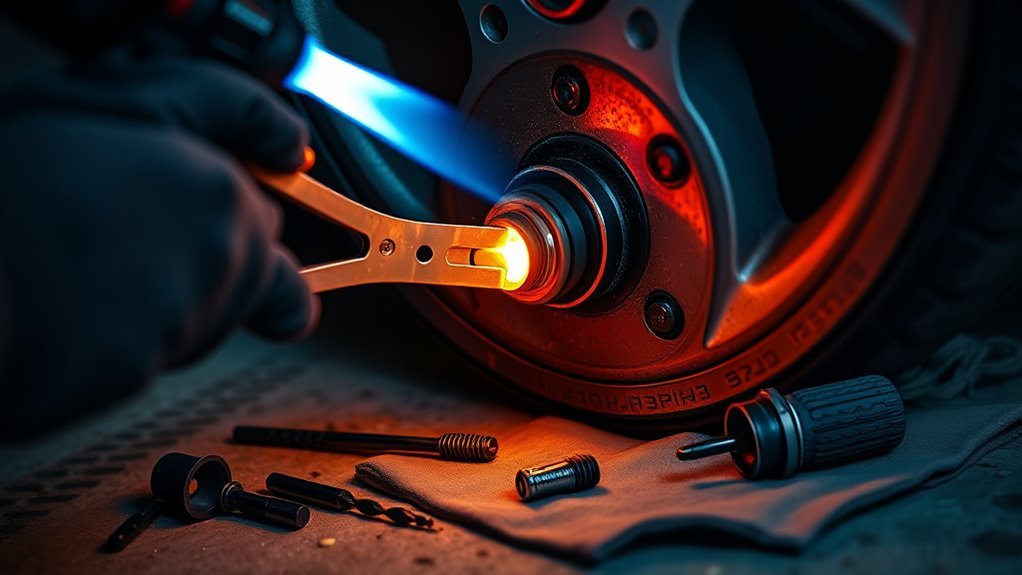
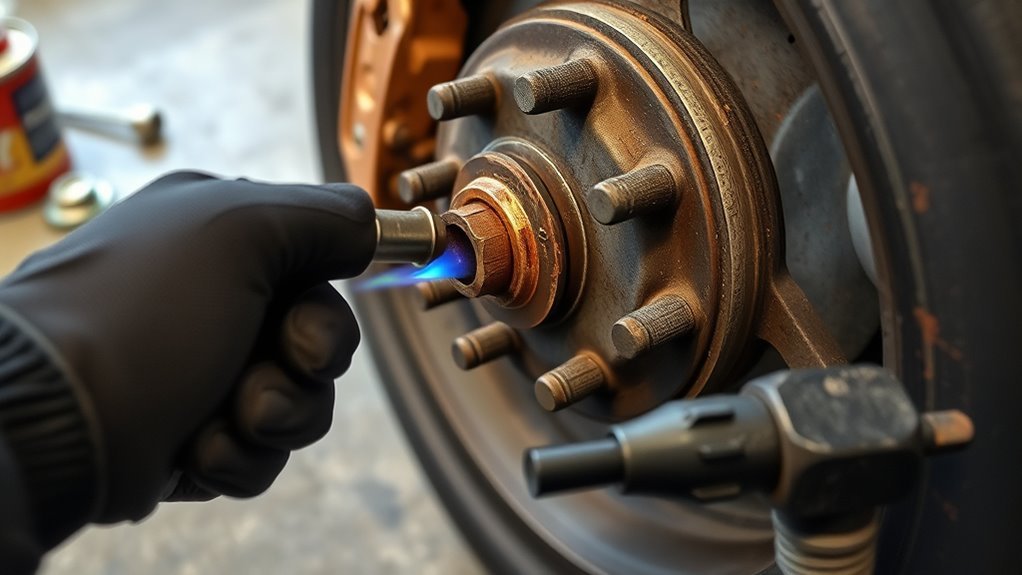
Even when you’ve followed every proper procedure, you’ll occasionally encounter a wheel stud that’s fused to the hub by years of corrosion and heat cycles—don’t force it with excessive hammer blows that risk warping the hub or damaging the bearing.
First, apply penetrating oil generously and wait 15-30 minutes. Tap the stud’s rear with a rubber mallet, working around its circumference. If it still won’t move, you’ll need to cut it flush with the hub using an angle grinder, then drill out the remainder carefully.
| Frustration | Liberation |
|---|---|
| Stripped threads from forcing it | Clean ARP replacement installed |
| Hours wasted on a lost cause | 30-minute fix with proper tools |
| Recurring corrosion nightmares | Permanent stud corrosion prevention |
| Doubt about your mechanical skills | Confidence in rust treatment techniques |
Don’t repair—replace. Standard studs fail again; upgraded ARP studs resist corrosion and handle higher torque. Your 4Runner deserves hardware that won’t strand you.
Frequently Asked Questions
How to Fix Rusty Wheel Studs?
Clean rust off your wheel studs with a wire brush, apply rust inhibitor for corrosion prevention, and maintain proper torque during wheel maintenance. Replace severely corroded studs with upgraded ARP studs if needed.
Conclusion
You’ve conquered the mountain of metal that was your seized wheel stud. With fresh hardware torqued to spec and every bolt double-checked, you’re ready to roll. Don’t skip that final inspection—your safety depends on it. Pat yourself on the back; this repair would’ve cost a fortune at the shop. Lower your 4Runner, torque those lugs again after fifty miles, and drive confidently into your next adventure.
Related Articles

Toyota 4Runner Tire Size by Year: Complete Reference
A comprehensive guide to Toyota 4Runner tire sizes by year awaits you—discover vital insights that could enhance your vehicle’s performance.
Read More
How to Find and Fix a Slow Tire Leak on a 4Runner
A slow leak in your 4Runner's tire could strand you miles from help—here's how to hunt it down before disaster strikes.
Read More
How to Rotate Five Tires Including the Spare on a 4Runner
I’ll guide you through the essential steps to rotate five tires on your 4Runner, ensuring optimal performance and safety—discover the complete process inside!
Read More