
How to Find and Fix a Slow Tire Leak on a 4Runner
Start by inspecting your 4Runner’s valve stems and bead seals for cracks or corrosion, then apply a concentrated soapy water solution to inflated tread, sidewalls, and rim areas to locate bubbling leaks. Address rim corrosion by cleaning the bead seat with a wire brush and applying sealant compounds before remounting. Choose interior patching for small punctures, temporary plugging for larger breaches, or full replacement for sidewall damage. You’ll find the systematic methods below resolve even stubborn pressure loss.
Check Valve Stems and Bead Seals First
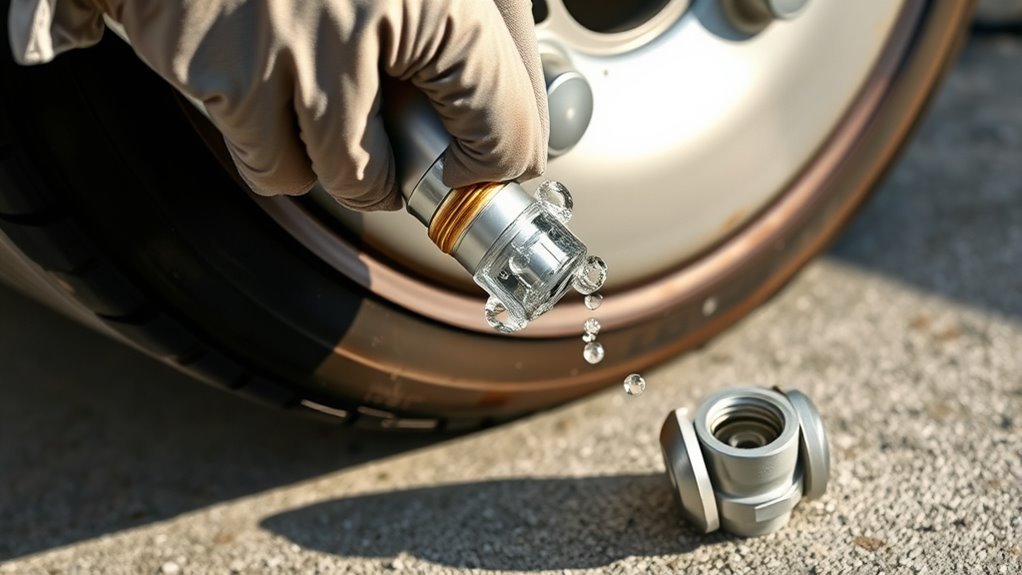
Two primary culprits dominate slow tire leaks: the valve stem and the bead seal. Begin your valve inspection by examining stems for cracks, corrosion, or damage at the grommet and Schrader valve—these weak points surrender pressure gradually. Mix soapy water and apply it liberally around the stem and bead area; emerging bubbles betray escaping air invisible to casual observation.
Move methodically to the bead seal. Inspect where tire meets rim, particularly if you’ve encountered corrosion or impact damage. Contaminants sabotage seating; clean debris thoroughly before reseating. Ascertain uniform bead placement—uneven seating invites persistent leakage.
This systematic approach embodies leak prevention. Replace deteriorated valve stems promptly; worn components guarantee recurring failure. You’re not merely patching symptoms—you’re dismantling vulnerability. Each inspection restores autonomy over your machine’s reliability. Document findings. Address deficiencies immediately. Your 4Runner demands precision, and you deliver it through disciplined maintenance that transforms potential roadside captivity into confident, self-directed mobility.
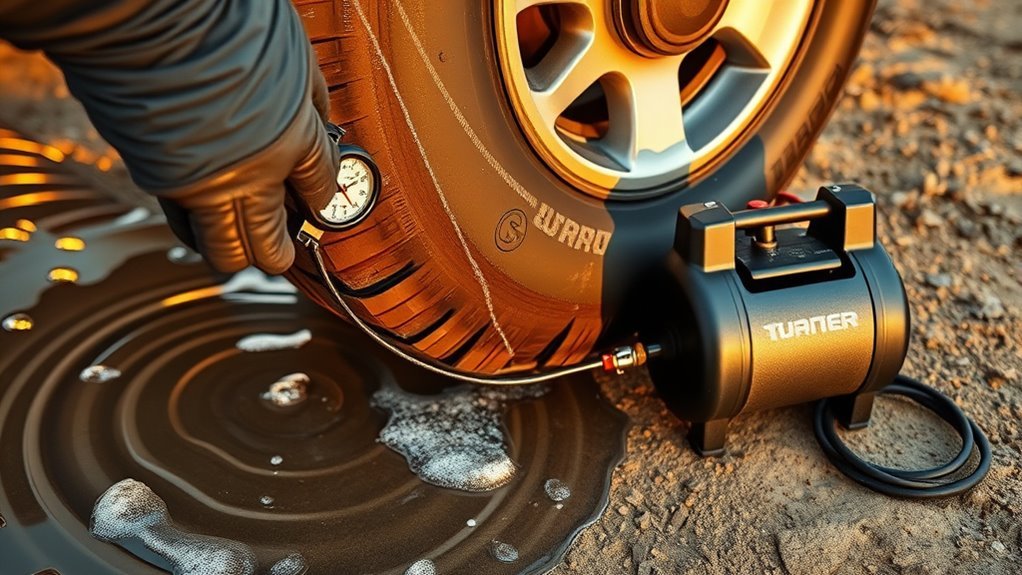
Find Hidden Leaks With the Soapy Water Test
You’ll need nothing more than dish soap and water to expose what the naked eye cannot detect. Mix a concentrated solution—generous dish soap in water—and inflate the tire 5-10 PSI above recommended pressure. This overinflation amplifies escaping air, making bubble detection unmistakable during your tire inspection.
Apply the solution systematically: coat the tread, sidewalls, and bead area where tire meets rim. Rotate the tire slowly; movement reveals leaks hidden in static positions. Watch for bubble clusters forming at punctures, cracks, or porous spots. Target the valve stem base and core specifically—spray thoroughly and observe for telltale foam expansion indicating micro-leaks.
For thorough tire inspection, submerge sections in water if feasible; submerged leaks produce immediate, visible streams superior to surface bubble detection. Document each leak location with chalk. This methodical approach eliminates guesswork, delivering precise diagnostic data. You’ve now isolated failure points efficiently—no specialized equipment, no wasted motion, complete control over the repair process.
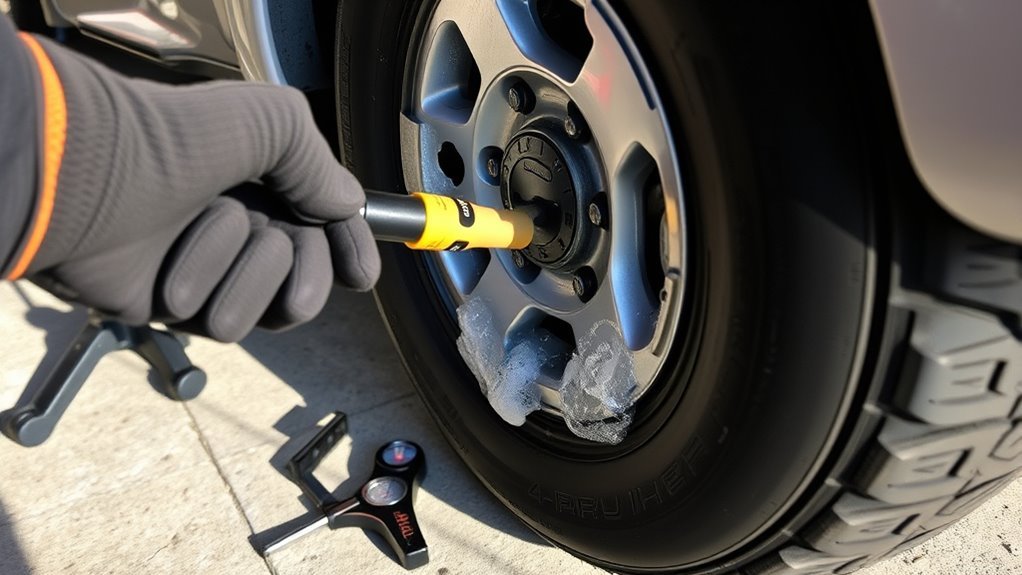
Fix 4Runner Rim Corrosion That Causes Slow Leaks
Your soapy water test exposed bubbles at the bead area, yet no puncture marks the tread or sidewall—rim corrosion now demands your attention.
Begin your rim inspection by removing the tire and examining the bead seat for visible pitting or oxidation. Aluminum 4Runner rims particularly suffer electrolytic degradation where they contact the tire.
Aluminum 4Runner rims suffer electrolytic degradation at the tire contact point—inspect the bead seat for pitting or oxidation after removing the tire.
Restore the sealing surface through this methodical process:
- Strip the old rubber residue and corrosion using a wire brush—work methodically until bare metal emerges
- Clean the entire bead area with brake cleaner to eliminate contaminants
- Apply a corrosion inhibitor specifically formulated for aluminum wheels
- Seal the tire with bead sealer compound before remounting
Corrosion prevention requires ongoing vigilance. Polish your rims quarterly, especially after winter exposure to road salt. Severe pitting exceeding 0.5mm depth necessitates professional reconditioning or replacement—temporary fixes fail when structural integrity degrades.
Patch, Plug, or Replace: Repair Your 4Runner’s Slow Leak
A precise diagnosis of your tire’s injury dictates whether you’ll patch, plug, or replace it entirely. You’ll apply a patch from the tire’s interior for punctures under ¼ inch—this tire puncture repair seals the wound permanently. For larger breaches, you’ll insert a plug as a temporary measure, trimming it flush to prevent noise and failure. You’ll replace the tire outright when multiple punctures, excessive tread wear, or sidewall damage compromise structural integrity.
You’ll deploy leak detection methods to isolate the breach: submersion tests reveal bubbles at the wound site, while leak tanks pressurize the tire for microscopic seepage. You’ll inspect valve stems meticulously—air loss often originates here, demanding immediate replacement. You’ll seek professional assessment for persistent mysteries; technicians wield ultrasonic detectors and pressure decay analysis to expose elusive failures. You’ll prioritize safety over convenience, knowing your 4Runner’s reliability hinges upon methodical repair execution.
Maintain Your 4Runner’s Tires to Prevent Slow Leaks
Since proactive maintenance outperforms reactive repairs, you’ll establish a rigorous inspection routine that intercepts slow leaks before they compromise your 4Runner’s performance.
- Inspect monthly – Examine tires for punctures, cuts, and uneven wear patterns that signal impending failure.
- Monitor pressure precisely – Deploy pressure monitoring devices weekly; maintain manufacturer-specified PSI to eliminate gradual air loss.
- Protect wheel integrity – Clean and polish aluminum wheels to prevent corrosion that degrades tire bead seals.
- Secure hardware – Fasten valve stem caps firmly to block moisture and debris from compromising valve cores.
Rotate tires per schedule to distribute wear uniformly. These tire maintenance tips liberate you from roadside emergencies and costly replacements. Your vigilance transforms routine checks into freedom from mechanical dependency—ensuring your 4Runner remains expedition-ready without interruption.
Frequently Asked Questions
Can a Slow Leak Be Easily Repaired?
You can easily repair most slow leaks yourself. First, apply leak detection with soapy water to identify punctures, valve stems, or bead issues. Then employ proper repair methods: patch small holes, replace damaged valves, or reseal the rim.
How Much Does It Cost to Get a Slow Tire Leak Fixed?
You’ll pay $10-$25 for most slow leak repairs, coinciding with your discovery of the puncture. Tire repair costs stay low when leak detection methods catch damage early—valve stems add $5-$15, while rim repairs hit $50-$150.
Conclusion
You’ve now diagnosed and repaired your 4Runner’s slow leak using systematic troubleshooting. Remember: tires lose 1–2 PSI monthly naturally, but 25% of drivers unknowingly operate on underinflated tires, reducing fuel economy by 0.2% per PSI drop. Check pressures monthly, inspect valve stems seasonally, and address rim corrosion promptly. Your methodical maintenance prevents costly blowouts and guarantees reliable off-road performance. Safe travels.
Related Articles
How to Rotate Five Tires Including the Spare on a 4Runner
I’ll guide you through the essential steps to rotate five tires on your 4Runner, ensuring optimal performance and safety—discover the complete process inside!
Read More
Can You Repair a Run-Flat Tire or Must You Replace It
The truth about run-flat tire repairs might shock you—here's what manufacturers don't want you to ignore.
Read More
How to Calculate Correct Tire Pressure After Upsizing
Noting the importance of accurate tire pressure after upsizing can enhance safety and performance; discover essential steps to ensure optimal tire function.
Read More