
Tire Bead Leak Fix: 30–60 Min DIY Reseal Guide
What’s in This Article
- Quick Answer: Can You Reseat a Tire Bead Yourself?
- What a Tire Bead Leak Is and Why It Matters
- How to Tell If You Have a Tire Bead Leak
- Safety Checks Before You Remove the Tire
- Tools and Supplies You Need
- When You Should Not Reseat a Tire Bead Yourself
- Step-by-Step: Remove the Tire and Pop the Bead
- Clean the Rim and Reseat the Bead Properly
- Apply Bead Sealer and Confirm the Repair
- Common Mistakes to Avoid
- Temporary Fixes, Inner-Tube Caveats, and When to Use Them
- Time, Cost, and When to Get Professional Help
- Frequently Asked Questions
A slow tire leak can turn a normal drive into a roadside problem fast. If the air escapes at the rim, you may have a tire bead leak rather than a puncture. You can often reseat a tire bead yourself, but only when the rim, tire, and valve stem are in safe condition.
Quick Answer: Can You Reseat a Tire Bead Yourself?
Yes, you can often reseat a tire bead yourself if the tire and rim have no serious damage. You’ll lift the vehicle, remove and deflate the wheel, clean the rim, lubricate the bead with soapy water, and inflate the tire while you watch the seating line. Use bead sealer only after you clean the sealing surface, then test for bubbles and monitor pressure. If the leak returns, the rim looks bent, or the tire bead looks torn, get professional tire service.
Key Takeaways
- Clean the rim before you reseat the bead because dirt, corrosion, and old sealant block a tight seal.
- Use soapy water to lubricate the bead during inflation and to find leaks after the repair.
- Stop the DIY repair if you see rim cracks, bead tears, sidewall damage, or repeated air loss.
- Use jack stands, wheel chocks, gloves, and eye protection before you remove the wheel.
- Check the tire pressure again after driving because a weak bead seal can leak slowly.
Estimated total time: Plan for about 30 to 60 minutes for one wheel if you have the right tools, a safe work area, and no rim damage.
What a Tire Bead Leak Is and Why It Matters
A tire bead leak happens where the tire bead meets the wheel rim. Dirt, corrosion, old sealant, rim damage, or poor seating can break the metal-to-rubber seal and let air escape.
You may lose a few pounds of pressure over days or weeks, which can hurt handling and wear the tire unevenly. Low pressure also builds heat in the tire, and heat can raise the risk of tire failure.
Routine tire maintenance should include a close look at the bead seating surface. Early cleaning and resealing can stop repeat leaks and help you avoid a flat tire away from home.
How to Tell If You Have a Tire Bead Leak
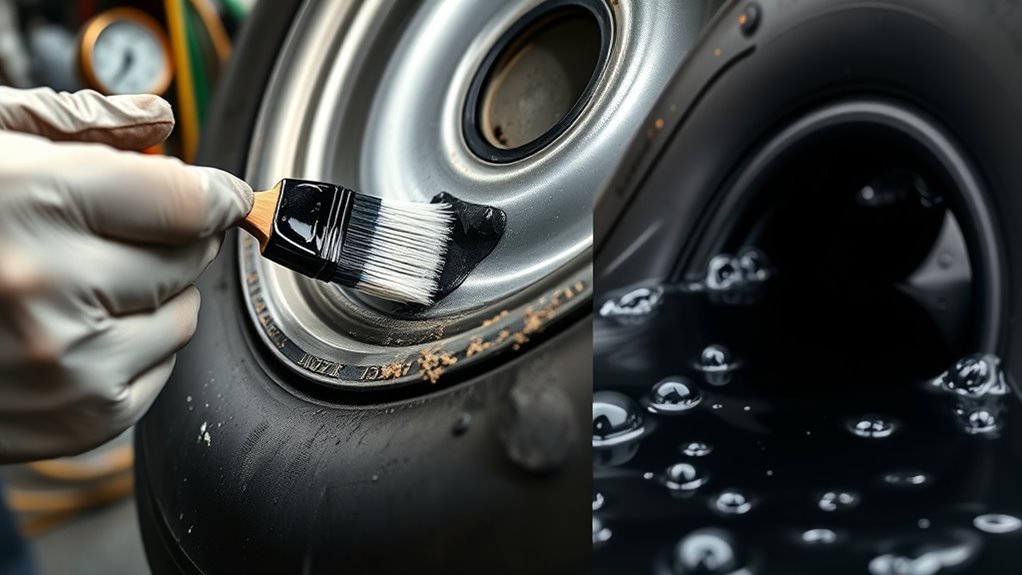
You can spot many bead leaks with a simple soap-and-water test. Inflate the tire enough to seat the bead, then spray soapy water around the rim where the tire meets the wheel.
Steady bubbles mark the leak. Clean the area first if heavy dirt hides the bead, then inspect the rim and tire edge for corrosion, debris, or seating problems.
| Sign | What to check |
|---|---|
| Slow pressure loss | Monitor PSI over 24 to 72 hours |
| Visible bubbles | Use a soapy water test around the bead |
| Uneven wear | Inspect tread and bead area |
| Corrosion or debris | Clean the rim and bead surface |
| Seating issues | Check bead alignment on the rim |
If you confirm a bead leak, remove the tire for close inspection before you reseat it. Bead sealer can help with small gaps, but it won’t fix a bent rim or damaged tire bead.
Safety Checks Before You Remove the Tire
Park on level ground, engage the parking brake, and chock the wheels opposite the one you’re removing. Use a jack rated for your vehicle, then place jack stands under the lift points your vehicle maker recommends. Wear gloves and safety glasses, inspect the valve stem and bead area, and confirm the tire has no air pressure before you break the bead.
Warning: Don’t use fire, starter fluid, or explosive seating methods to reseat a tire bead.
Park On Level Ground
Start on a firm, level surface so the vehicle can’t roll or shift while you work. Engage the parking brake and place wheel chocks on the opposite side of the tire you’re removing.
Check the ground for debris and soft spots before you place the jack. Keep your tools and safety gear close so you don’t reach under an unstable vehicle.
After you set the brake and chocks, gently rock the vehicle at the contact points. If it moves, reposition the chocks and check again before you lift.
Chock Wheels Securely
Before you lift the car, press sturdy wheel chocks tightly behind the wheels opposite the one you’ll remove. Use rubber or hardwood chocks that won’t crush, slip, or crack under load.
Place each chock against the tire tread, then check contact by hand and by sight. Replace worn chocks if you see cracks, rot, or deep compression marks.
Use Jack Stands
Set the hydraulic jack under the manufacturer-specified lift point and raise the car only high enough to fit a jack stand. Place stands under approved support points, then lower the vehicle until the stands carry the weight.
Never trust the jack alone. Once the vehicle rests on the stands, give it a firm push to confirm stability before you remove the wheel.
| Step | Check | Action |
|---|---|---|
| 1 | Surface | Choose level, firm ground |
| 2 | Lift points | Use manufacturer lift points |
| 3 | Stands | Inspect stands and test stability |
Tools and Supplies You Need
You need the right tools before you try to fix a tire bead leak. Gather everything first so you can work safely without rushing.
- Use a jack and jack stands to lift and support the vehicle safely.
- Wear gloves and eye protection to protect your hands and eyes.
- Clean the rim with a wire brush, wire wheel, or suitable rim-cleaning tool.
- Apply a soap-and-water mix to lubricate the bead and spot leaks.
- Use bead sealer, such as Xtra Seal, only after you clean and dry the bead seat.
- Check pressure with a reliable tire gauge and a regulated air source.
- Finish with a torque wrench so you can tighten lug nuts to the correct specification.
A tire repair kit can help with basic maintenance, but it won’t repair bead tears, sidewall damage, or a cracked wheel.
When You Should Not Reseat a Tire Bead Yourself
Skip the DIY repair if the rim has cracks, heavy pitting, deep bends, or a damaged bead seat. A bead sealer can’t restore wheel strength or make a torn tire safe.
You should also stop if the tire sidewall bulges, the valve stem leaks, or the bead won’t seat evenly during slow inflation. These signs point to damage that needs shop equipment and a trained tire technician.
Note: Reseating fixes only the tire-to-rim seal, not punctures, valve leaks, or structural tire damage.
Step-by-Step: Remove the Tire and Pop the Bead
Start by safely lifting the vehicle and removing the wheel with the right tools. Fully deflate the tire, then use a bead breaker or pry bar to break the bead seal around the rim. Inspect the seating surface for corrosion or dirt before you reseat or seal the tire.
Lift Wheel Off Vehicle
Break the lug nut torque while the wheel still touches the ground so the wheel doesn’t spin. Then jack the vehicle at the correct lift point, set the jack stands, remove the lug nuts, and take the wheel off.
- Engage the jack at the designated lift point on solid ground.
- Loosen the lug nuts while the tire still rests on the ground.
- Lift the vehicle, set jack stands, and remove the wheel.
- Inspect the bead and rim before you use sealer or air pressure.
Break Bead Seal
Lay the wheel flat and use a bead breaker or a stout flat pry tool to move the tire lip away from the rim. Apply steady pressure around the full circumference, and don’t puncture the sidewall.
If the bead resists, apply tire lubrication with a soap-and-water mix to reduce friction. After the bead separates, inspect the rim and bead seating surface for dirt, corrosion, old sealer, or sharp edges.
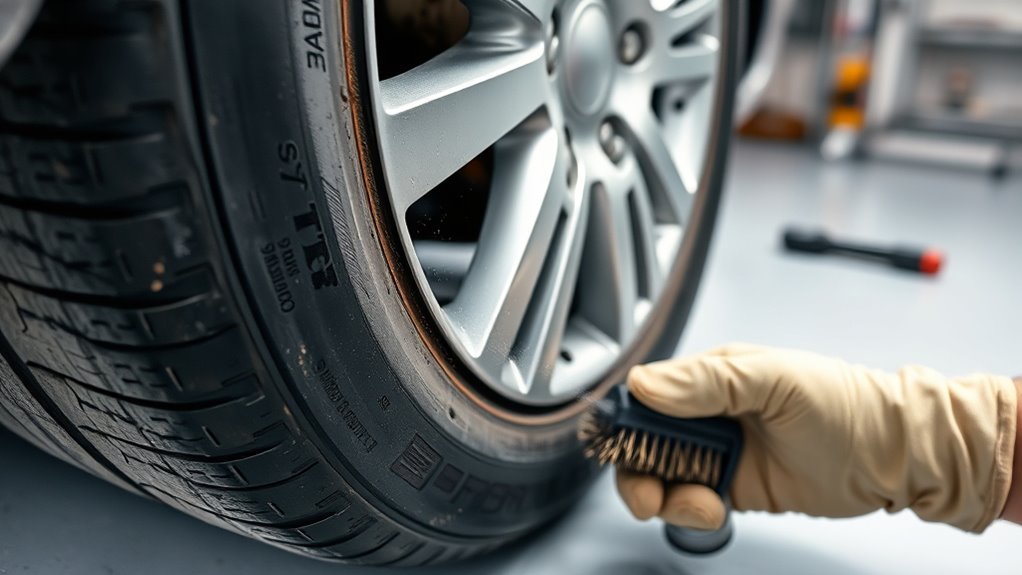
Clean the Rim and Reseat the Bead Properly
Clean the rim with a wire brush or wire wheel until you remove corrosion, dirt, and old sealant. Inspect the bead seating area for nicks, gouges, or raised spots that can stop the tire from sealing.
Clean the rim, remove rust and debris, then use soapy water to pinpoint bead leaks.
- Prep the rim by brushing, degreasing, and drying the bead seat.
- Check for leaks by spraying soapy water around the bead and watching for bubbles.
- Lubricate the bead with a soap mix so it can slide into place during inflation.
- Inflate gradually while you watch the bead seating line on both sides of the tire.
- Verify the repair with soapy water and confirm that bubbles stop.
Don’t exceed the tire or wheel maker’s pressure limits while seating the bead. If the bead won’t seat with controlled air pressure, stop and use professional tire equipment.
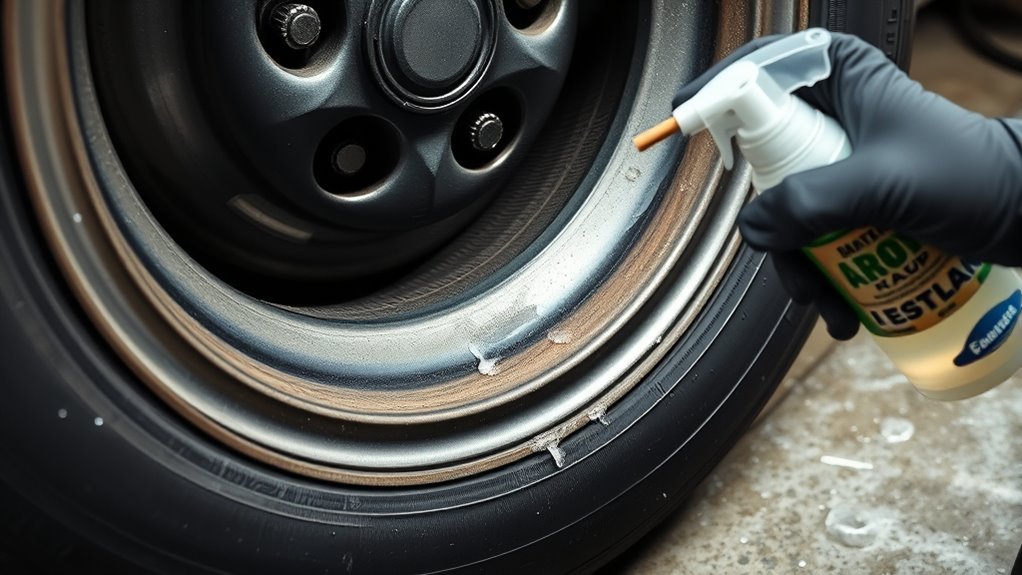
Apply Bead Sealer and Confirm the Repair
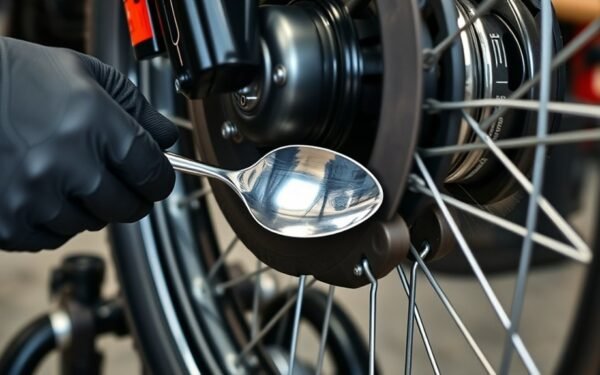
After you clean and dry the rim, apply Xtra Seal bead sealer or another suitable bead sealer evenly around the bead seat. Inflate slowly while the bead seats, then let the sealer cure according to the product label. Spray soapy water around the bead after inflation, because steady bubbling means the seal still leaks.
Apply Bead Sealer Evenly
Apply bead sealer in a continuous, even coat around the rim seat where the tire meets the wheel. Use a brush or applicator to cover small gaps, but don’t apply it over loose rust, dirt, or wet surfaces.
- Scrape the rim seat so the sealer bonds to clean metal.
- Brush on an even coat and avoid heavy puddles.
- Cure the sealer for the time listed on the product label.
- Recheck tire pressure after the tire returns to service.
Pro tip: Mark the leak area with chalk before you deflate the tire so you can clean the exact spot.
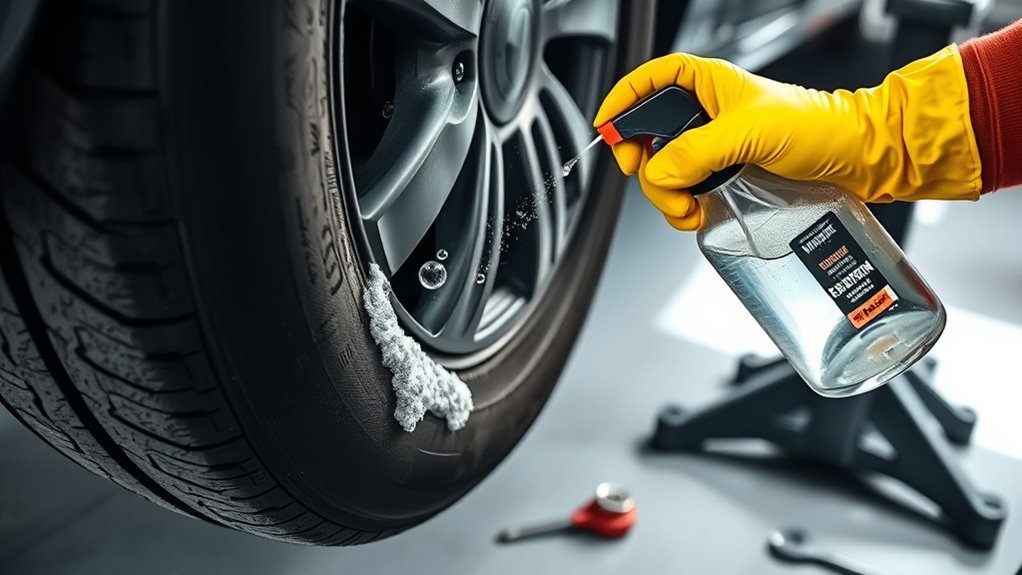
Verify Seal With Water
Once the bead sealer cures, reinflate the tire to the recommended pressure and coat the bead area with a soap-and-water solution. Rotate the wheel and inspect the full circumference for steady bubbles.
If bubbles appear, deflate the tire, clean the surface again, reapply sealer, and allow full cure before you retest. Return the tire to service only after the bead shows uniform contact and no visible air escape.
Common Mistakes to Avoid
Small mistakes can turn a simple bead leak into a repeat repair. Work slowly and check each part before you add air.
- Don’t seal over corrosion because the sealer needs a clean surface to bond.
- Don’t skip the valve stem check because valve leaks can mimic bead leaks.
- Don’t inflate blindly because the bead seating line must rise evenly around the rim.
- Don’t ignore a bent rim because the tire can’t seal against an uneven wheel.
- Don’t drive without a follow-up pressure check after the first trip.
Temporary Fixes, Inner-Tube Caveats, and When to Use Them
Temporary fixes can help in limited situations, but they bring trade-offs. Sealants can unbalance wheels, affect tire pressure monitoring system (TPMS) sensors, and harden over time.
Inner tubes can help with some persistent bead leaks, but they can rub against the tire liner and build heat. That heat can raise blowout risk, especially at sustained highway speeds.
Temporary sealants and inner tubes can get you moving, but they don’t replace proper tire and rim repair.
- Use sealant only as a short-term aid when you need limited, careful travel.
- Protect a fitted inner tube with tire-safe powder to reduce liner friction.
- Avoid sustained high-speed driving with an inner tube installed in a tubeless tire.
- Plan proper tire service because sealants can harden and make later repairs harder.
Time, Cost, and When to Get Professional Help
A typical bead reseal can take about 30 to 60 minutes if the rim needs only cleaning and sealer. Costs vary by shop, wheel condition, tire size, and whether the rim needs repair or replacement.
Choose the repair based on the damage you find. Simple cleaning and bead sealer can help with small leaks, while deep corrosion, bead damage, or a bent wheel needs professional service.
Get professional help when leaks return, you see structural rim damage, the tire won’t seat evenly, or you don’t have the right tools. A trained technician can dismount the tire, inspect hidden damage, and reseat it with tire equipment that controls pressure safely.
Frequently Asked Questions
How Much Does It Cost to Fix a Tire Bead Leak?
Repair costs depend on the shop, tire size, rim condition, and the amount of cleaning needed. A basic reseal usually costs less than replacing a wheel, but heavy corrosion or rim damage can raise the price.
Can You Drive With a Tire Bead Leak?
You should avoid driving on a tire that loses pressure quickly. Low pressure can damage the tire, hurt handling, and increase heat buildup.
Will Bead Sealer Fix Every Bead Leak?
No, bead sealer helps with small gaps after you clean the bead seat. It won’t fix a cracked rim, bent wheel, torn bead, bad valve stem, or sidewall damage.
How Do You Know the Bead Is Seated Correctly?
The bead seating line should run evenly around both sides of the tire. After inflation, a soapy water test should show no steady bubbles around the rim.
Should You Use an Inner Tube for a Bead Leak?
An inner tube can act as a short-term workaround in some tires, but it can create heat and friction inside a tubeless tire. Use it only when a tire professional confirms it’s safe for your tire and driving conditions.
Safety Disclaimer: This article gives general information about tire bead leaks and does not replace professional tire service. Always stop and contact a qualified tire technician if you see tire damage, rim damage, rapid pressure loss, or any condition you don’t feel safe handling.
Conclusion
You can often reseat a tire bead yourself when the leak comes from dirt, light corrosion, or poor seating at the rim. Start with safety, clean the bead seat well, use bead sealer only when needed, and confirm the repair with soapy water. Check pressure again after the tire returns to the road. If the tire or wheel shows real damage, let a pro handle it so your next drive starts with a safe seal.
Related Articles
How to Use a Tire Spoon: Pro Technique for Mounting Tires
Careful technique makes tire mounting easier, but the real pro trick for using a tire spoon starts with one overlooked step.
Read More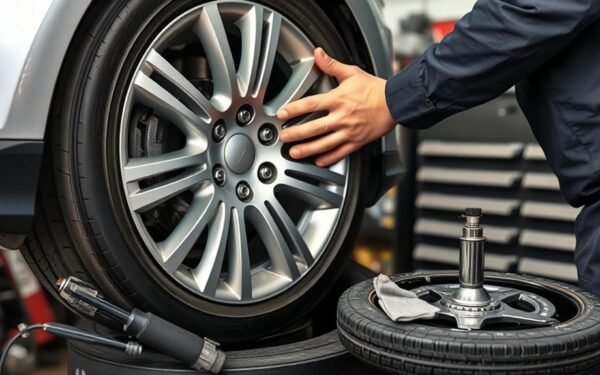
How to Unmount a Tire: Tools, Steps & Pro Tips for Clean Removal
Start unmounting a tire with the right tools and pro tricks, then discover the cleanest way to avoid costly damage.
Read More
How to Tie a Tire Swing: Safe Knot & Hanging Guide
D**iscover the safest knot, rope, and branch choices for a tire swing, plus expert tips that could prevent a dangerous mistake.
Read More