
How to Seat a Tire Bead With WD-40: Step-By-Step Guide
To seat a tire bead with WD-40, clean the rim, inspect the tire, and keep a compressor ready. Lightly spray a thin film of WD-40 around the bead, then inflate the tire steadily so air pressure pushes the bead into place. If it’s stubborn, use a ratchet strap to help the sidewalls expand. Check for leaks with soapy water, and stop if seating looks uneven. There’s more to know for safer, smoother results.
Key Takeaways
- Clean and inspect the rim and tire, then work in a safe, well-ventilated area with eye and hand protection.
- Spray a thin, even coat of WD-40 around the tire bead to help it slide and seal on the rim.
- Use an air compressor or strong air source to inflate the tire until the bead pops into place.
- For stubborn beads, use a ratchet strap to press the tire outward while inflating carefully.
- Check for even seating and leaks with soapy water, then finish inflating to the recommended pressure.
Prep the Tire and Rim
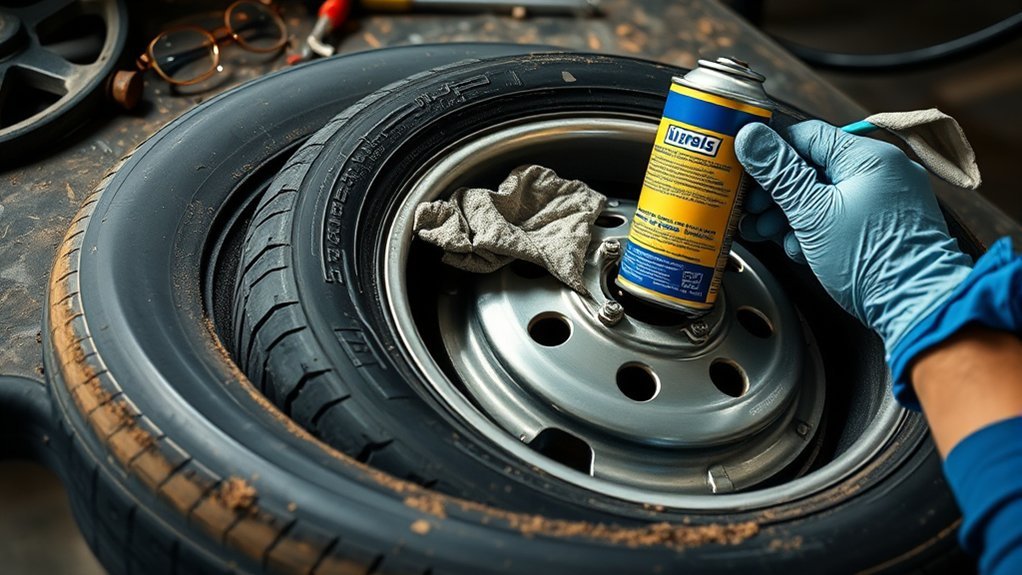
Before you try to seat the bead, clean the rim thoroughly so dirt and debris do not block a proper seal, then inspect the tire for cracks, punctures, or other visible damage. Wipe the rim until it’s free of rust, grease, and grit, and check the tire sidewall and bead area for damage that could stop inflation. If you find a problem, change the tire instead of forcing it. Next, make sure the tire sits properly aligned on the rim; a misaligned bead won’t seat evenly. Apply a thin layer of WD-40 as a lubricant around the bead and rim edge, just enough to help movement, not flood the surface. You don’t need heat gun tricks here; focus on prep. Keep a backup air source ready, since WD-40 won’t add air. Use a compressor, or if you’re stuck at a gas station, plan for quick inflation. This last minute setup helps the bead lock in cleanly, especially as proper tire inflation is crucial for optimal performance.
Gather WD-40 and Inflation Tools
Once the rim and bead are clean and aligned, get your tools ready: a can of WD-40, an air compressor or other backup air source, and a ratchet strap if you may need extra bead pressure. Keep WD-40 within reach so you can act fast in an emergency, but don’t treat it as a full fix. You still need an air compressor to build enough pressure to seat and inflate the tire for driving. If you’re working with a stubborn bead, a ratchet strap can add the squeeze you need, though Load E tires may fight back. Wear protective gear and keep flames, sparks, and other ignition sources away from the work zone. Handle WD-40 carefully; its thin film fades quickly, so plan for a rapid shift to inflation. Organize everything before you start, because readiness gives you control and cuts wasted motion. Additionally, consider using high-speed stability tires designed for varied conditions to ensure a smooth ride.
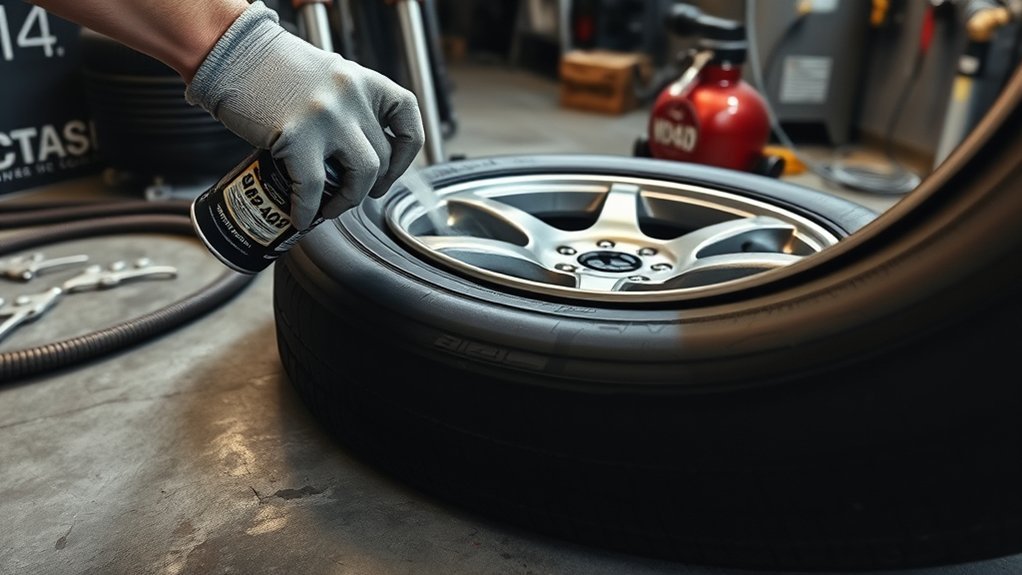
Apply WD-40 to the Bead
Lightly spray WD-40 around the tire bead where it meets the rim to add just enough lubrication for reseating. You want a thin, controlled film, not a soak. When you apply WD-40 to the bead, work evenly around the full circumference so the bead can slip into place without binding. Its water-like consistency helps it spread fast and dissipate quickly, which limits lingering effects on the rubber. Use only a small amount; too much can interfere with sealing and make the bead harder to lock. Keep the can pointed away from brake parts, flames, sparks, and other ignition sources, because aerosol mist can ignite. Don’t treat WD-40 as an inflation substitute. It only helps reduce friction during reseating, so your air source still does the real work. Additionally, consider the durability of all-season tires, as proper reseating can contribute to their overall lifespan. Stay deliberate, stay safe, and let the bead move freely under controlled pressure.
Inflate the Tire to Seat the Bead
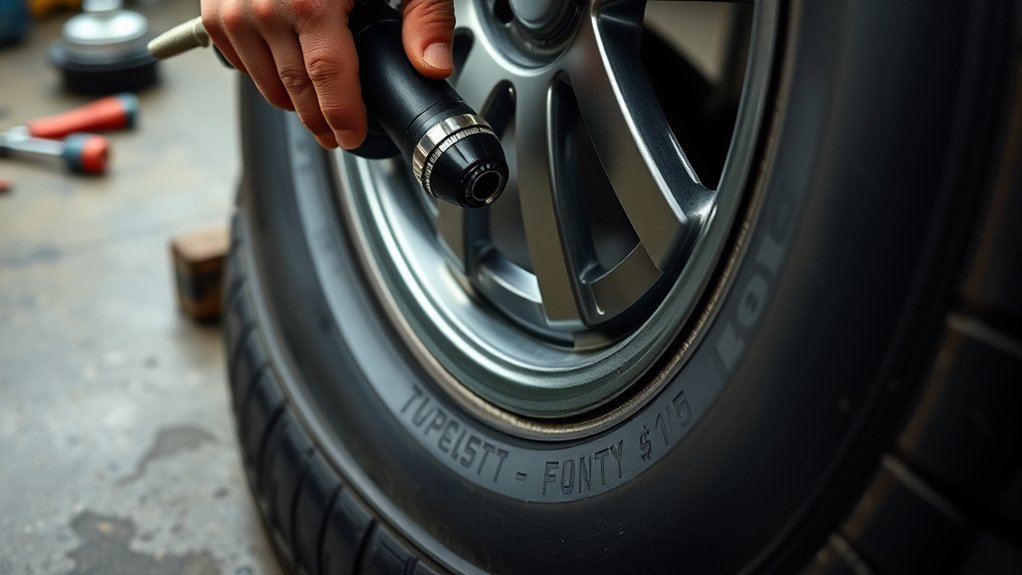
Use a compressor to inflate the tire with enough air pressure to force the bead against the rim and help it seat evenly. Watch the bead closely as you inflate, since it may need a steady rise in pressure to pop into place. Keep your fingers clear of the rim and tire during inflation, and use a backup air source if the compressor alone doesn’t fully seat the bead. Consider the treadwear ratings of your tires, as they can influence overall performance and longevity.
Air Pressure Basics
Air pressure is what forces the tire bead to snap and seal against the rim, so inflate the tire with a compressor until it reaches the manufacturer’s recommended pressure, usually listed on the sidewall. Use steady air pressure, and watch the gauge closely so you don’t exceed the limit.
| Check | Target | Risk |
|---|---|---|
| Sidewall spec | Listed PSI | Underseat |
| Compressor output | Match spec | Overinflate |
| Hand position | Clear of bead | Injury |
Keep your fingers and other body parts away from the bead while you work. A compressor gives you the airflow needed to seat the bead properly, but control matters more than speed. If pressure climbs too fast, stop and reset. You’re not chasing force; you’re directing it. When the tire reaches spec, the bead should lock in place and stay there.
Bead Seating Technique
Start by spraying a small amount of WD-40 around the tire bead so it can slip into place more easily on the rim, then inflate the tire with a compressor until the bead seats. This bead seating technique works best as a quick, practical fix.
- Apply only a light film around the bead.
- Attach a backup air source and start inflation.
- Watch the bead snap into the rim groove.
- Keep your fingers clear and stop once seated.
WD-40 can help reseat the bead, but it won’t fully inflate the tire. Use this method for emergencies or temporary repairs, not as a permanent solution. Wear protective gear, avoid ignition sources, and take control of the process with calm precision.
Safety During Inflation
As you inflate the tire to seat the bead, wear goggles and gloves, keep bystanders clear, and stay out of the tire’s direct path in case of a sudden blowout. Your protective gear is nonnegotiable during safety during inflation. Keep WD-40, fuel, and other flammables away from sparks or open flame, since aerosol can ignite fast. Inflate slowly and watch the bead on both sides; you want it to rise evenly and lock without twists, bulges, or leaks. Keep your fingers off the rim and bead area, and hold a safe stance with room to move if the tire shifts. In any tire change, control the pressure, monitor the seating, and stop immediately if you hear popping, see damage, or feel instability.
Use a Ratchet Strap for Stubborn Beads
For especially stubborn beads, wrap a ratchet strap around the tire’s circumference to apply even pressure and help the sidewalls push outward against the rim. Use ratchet straps to compress the tread just enough to widen the bead area without stressing the casing. Then inflate with a strong compressor while the strap stays in place.
Wrap a ratchet strap around stubborn tires to widen the bead area and help the bead seat cleanly.
- Position the strap evenly around the tire.
- Tighten it until it’s snug, not crushing.
- Add air steadily and watch the bead.
- Stop once the bead seats, then release the strap.
This method works well on larger or tougher tires because it gives the bead a better chance to break free and lock onto the rim. Additionally, having a good understanding of tire durability can help you choose the best tires for your needs. Stay focused as you inflate; over-inflation can burst the tire. If the bead doesn’t seat, reset the strap and try again with controlled pressure. You’re using leverage, not force, to free the tire and get it seated cleanly.
Skip Starting Fluid Unless Necessary
Skip starting fluid unless you truly need an emergency pop; it’s flammable and adds real risk. You can usually seat the bead with safer methods like WD-40 or compressed air. If you do use starting fluid, work in a ventilated area, keep ignition sources away, and fill the tire immediately after the bead sets. Consider using temporary tire sealants as a safer alternative for quick fixes in emergencies.
Skip Starting Fluid
Starting fluid can seat a stubborn tire bead fast, but you should treat it as an emergency method because it’s highly flammable and can be hazardous if used carelessly. If you choose it, keep the rim clear, loosen Lug Nuts only as needed, and stay away from sparks.
- Work in open air.
- Wear eye and hand protection.
- Aim for a brief, controlled spray.
- Have a backup air source ready.
Unlike WD-40, it ignites and expands gas quickly, so the bead may snap into place. That speed doesn’t replace proper inflation. You still need enough air pressure to drive safely. Use this method only when you’re stuck and other tools aren’t available. If you can, choose compressors or ratchet straps instead.
Safer Reseating Options
A compressor is the safest, most reliable way to reseat a tire bead because you can wiggle the tire on the rim as you inflate it, helping it seal without relying on flammable chemicals. For safer reseating options, start with controlled air and check the bead line as pressure rises. If the tire won’t catch, add a heavy-duty ratchet strap around the tread to push the sidewalls outward; this works, but Load E tires can fight back with stiff carcasses. Use WD-40 only as a light lubricant, not a solution, because it flashes off fast. Community experience shows compressors and straps beat starting fluid for safe tire maintenance. Stay methodical, keep your hands clear, and let pressure, not fire, do the work.
Check Bead Seating and Look for Leaks
Once the bead is reseated, inspect the rim-to-bead interface for any gaps, uneven seating, or other irregularities that could indicate a poor seal. To check bead seating, rotate the tire and compare both sidewalls to the rim edge. Keep it fully inflated to the recommended pressure first; that lets the bead lock down evenly and gives you a reliable baseline. Then look for leaks with simple, direct tests.
- Spray soapy water around the bead.
- Watch for bubbles that mark escaping air.
- Listen for hissing, especially near suspect spots.
- Recheck any area that shifts, bubbles, or sounds active.
If you spot a leak, correct the seating and test again until the seal holds. A clean check now keeps you rolling with confidence and protects your freedom to ride without setbacks. Additionally, using waterproof repairs ensures durability and effectiveness in maintaining your tire’s integrity.
Know When WD-40 Won’t Work
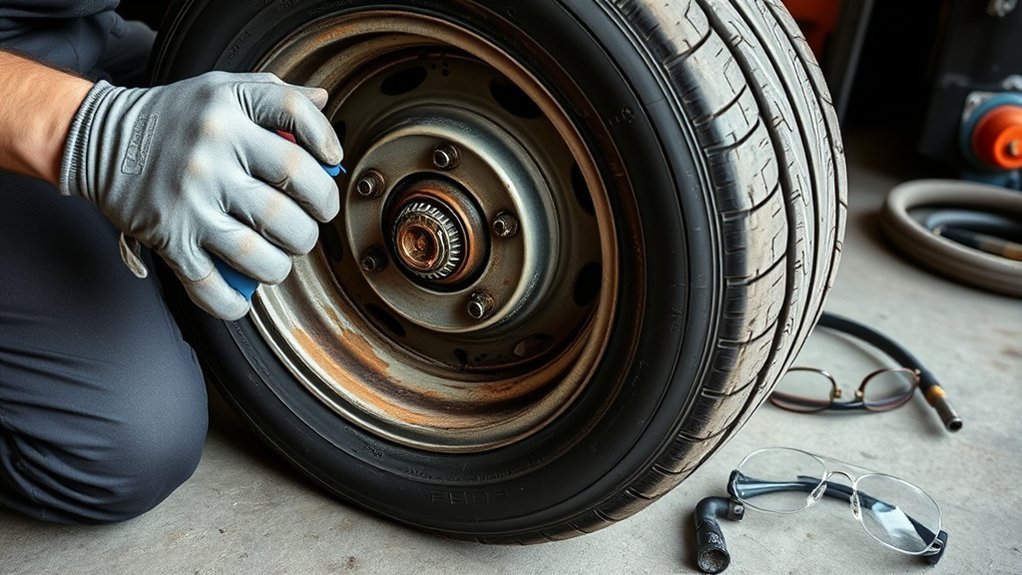
WD-40 can help a stubborn bead start to move, but it won’t reliably inflate the tire or keep it sealed for long. You should treat WD-40 as a temporary aid, not a complete fix. Its thin, water-like film dissipates quickly, so the bead can lose support before the tire fully seats. If you’re working on a larger or heavy-duty tire, especially a Load E tire, WD-40 often won’t deliver enough hold or consistency to finish the job. You also shouldn’t keep applying it repeatedly; excessive use can raise concerns about tire integrity and chemical exposure. Keep a backup air source ready, because WD-40 can’t generate the pressure you need for safe seating. If the bead still won’t lock as soon as you add air, stop and switch methods. Use stronger tools, proper inflation equipment, and a clean rim to reclaim control and seat the tire on your terms. Additionally, consider that the tread depth of the tire can affect how easily the bead seats, especially with off-road tires that have deeper patterns.
Avoid Unsafe Tire-Inflation Mistakes
As you inflate the tire, keep your fingers clear of the bead area so a sudden pop or pressure release can’t injure you. Stay focused, because the bead can snap into place without warning. Don’t chase pressure with WD-40 alone; it’s only for reseating, not for final inflation. After the bead starts to seat, finish the job using a compressor and monitor the sidewall for even movement. Keep all flammable products away from sparks, motors, and heat, and don’t spray random chemicals on the tire.
- Stand clear of the bead line.
- Inflate only with controlled air.
- Use WD-40 sparingly, then stop.
- Inspect the tire for leaks or damage.
You want control, not luck. Check the tire’s integrity before driving, and refuse shortcuts that trade freedom for risk. Safe inflation protects you, your wheels, and the road ahead.
Use a Safe Backup Air Source
Keep a reliable backup air source ready, because WD-40 can help reseat the bead but can’t provide safe driving pressure. You should use a safe backup air source, like a compressor or portable air tank, to finish inflation after the bead snaps into place. That gives you the pressure needed to reach the manufacturer’s recommended PSI and keep the tire stable on the road. Watch the sidewall and bead area closely as you inflate; stop if you see uneven seating, bulging, or rising pressure too fast. A compressor makes fine control easier, which improves safety and performance. Keep a valve core remover and inflation adapters nearby so you can move quickly and avoid delays. WD-40 is a reseating aid, not a road-ready solution, so don’t rely on it alone. With the right backup setup, you stay in control and move freely.
Frequently Asked Questions
How to Get a Stubborn Tire Bead to Seat?
Spray WD-40 lightly on the bead and rim, then check Bead Alignment so you’ve got an even seat all around. You’ll need the tire fully mounted, then hit it with a compressor and watch for two sharp pops. If it won’t seat, deflate, reset, and try again. Don’t trust WD-40 for pressure; it only lowers friction. Finish by inflating with a reliable air source to spec.
Can You Use WD-40 to Mount a Tire?
Yes, you can use WD-40 to help you seat a bead, but you shouldn’t rely on it to mount a tire fully. You still need a proper air source and correct tools for inflation. Use it sparingly, since it’s a temporary aid, not a long-term solution. For Tire Safety, choose a bead lube or approved tire mounting lubricant whenever possible, and follow manufacturer guidance to avoid damage and risk.
What Do You Lubricate a Tire Bead With?
You lubricate a tire bead with Tire Lubricants: soapy water, commercial bead lube, or a light WD-40 mist. Think of the bead as a gate that won’t open without a key; the right lubricant frees it. Clean the rim first, then apply a thin, even coat to the bead and rim edge. Don’t overdo it—too much can interfere with seating and long-term rubber health.
How to Seat a Tire Bead Without a Compressor?
You can seat the bead without a compressor by using a ratchet strap to squeeze the tire, then applying soapy water at the bead and rim for slip. If needed, warm the tire a bit, then use a heavy-duty air tank or portable canister for fast Tire Inflation. For stubborn cases, a brief starting-fluid pop can help, but use extreme caution and keep clear.
Conclusion
Now you know how to seat a tire bead with WD-40 and the right inflation steps. Prep the rim, apply lubricant sparingly, and inflate until the bead snaps into place. If the bead stays stubborn, use a ratchet strap or a safer backup air source. Always check for leaks and proper seating before driving. Treat this process like tuning a machine: small, careful moves keep the whole system running safely and smoothly.
Related Articles

How to Manual a Bicycle: Lifting the Front Tire Off the Ground
Manualing a bicycle starts with the right body position, but one small shift can make all the difference—discover the key to lifting the front tire.
Read More
How to Find Tire Diameter: Read the Sidewall in 30 Seconds
Check your tire’s sidewall code to uncover its true diameter fast—and discover the detail most drivers overlook.
Read More
How to Determine Tire Diameter: Easy Calculation & Reading Guide
How to determine tire diameter from sidewall numbers and a simple formula, then discover the stock-size checks that can save your fitment.
Read More