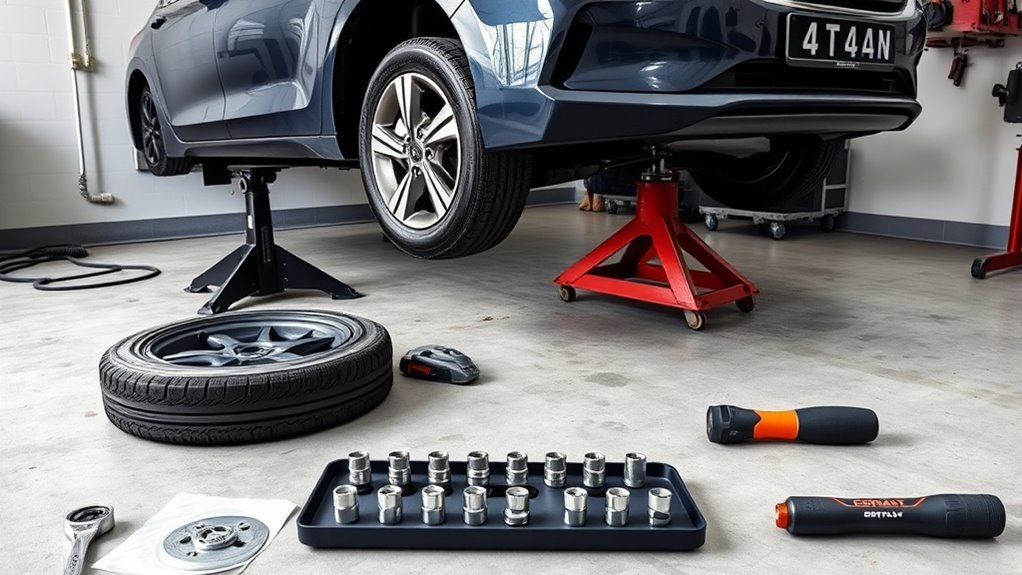
Rotating tires the wrong way can create poor handling, uneven wear, or an unsafe wheel setup. You’ll protect your Hyundai Sonata by checking the tire type, lifting the car with proper supports, using the correct rotation pattern, and tightening the lug nuts to the factory torque spec. This guide walks you through the safe DIY process, including tools, patterns, inspections, pressure checks, and common mistakes to avoid.
Quick Answer
To rotate tires on a Hyundai Sonata, park on level ground, loosen the lug nuts, lift the car at the factory jack points, and support it with jack stands. Most front-wheel-drive Sonata models use a forward-cross pattern: move the front tires straight back and cross the rear tires to the front. Keep directional tires on the same side, set tire pressures after rotation, and tighten the lug nuts to the torque value in your owner’s manual.
Key Takeaways
- Confirm your Sonata’s drive type and tire type before choosing a rotation pattern.
- Use jack stands every time you work under or around a raised vehicle.
- Use the forward-cross pattern for most non-directional front-wheel-drive Sonata tires.
- Keep directional tires on the same side and swap them front to rear only.
- Check tread, tire pressure, and lug nut torque before you drive.
How to Rotate Tires on a Hyundai Sonata (Quick Steps)

Plan on about 45 to 90 minutes for a careful DIY tire rotation. Work only on a flat, solid surface, and gather your jack, jack stands, lug wrench, torque wrench, wheel chocks, gloves, and tire pressure gauge before you start.
- Park your Sonata on level ground, set the parking brake, and place wheel chocks behind the wheels that stay on the ground first.
- Loosen each lug nut slightly while the tires still touch the ground.
- Lift the vehicle at the factory jack points, then support it with jack stands.
- Remove the wheels and follow the correct rotation pattern for your tires and drive type.
- Inspect each tire for cuts, bulges, exposed cords, uneven wear, and low tread depth.
- Reinstall the wheels, hand-start the lug nuts, and snug them in a star pattern.
- Lower the vehicle, torque the lug nuts to the value in your owner’s manual, and set tire pressure to the door placard spec.
Most Sonata owners should rotate tires about every 6,000 to 8,000 miles, unless the owner’s manual or tire warranty gives a different interval.
Warning: Never rely on a jack alone while changing wheel positions, because a jack can slip or fail.
Which Sonata Models and Drive Types Are Covered (FWD, AWD, Year Notes)
Check your Sonata’s model year, drivetrain, and tire setup before you rotate the tires. Most Hyundai Sonata models use front-wheel drive, but some recent trims offer all-wheel drive (AWD), and those models may need a different pattern.
Always follow the owner’s manual for your exact year and trim. Hyundai can change tire sizes, pressure specs, service notes, and rotation guidance between model years.
Model Years Covered
This guide covers common Hyundai Sonata tire-rotation steps for late-model and older front-wheel-drive Sonata sedans. The basic safety process stays similar across many years, but the correct torque, tire pressure, and rotation pattern can vary.
For most front-wheel-drive Sonata models with non-directional tires, move the front tires straight back and cross the rear tires to the front. If your car has directional tires, staggered sizes, or AWD, follow the owner’s manual instead of a generic pattern.
Drive Type Variations
For front-wheel-drive (FWD) Sonata models, the front tires handle steering, much of the braking load, and engine power. That extra work usually wears the front tires faster, so a forward-cross rotation helps balance wear.
For AWD Sonata models, confirm the tire pattern in the manual before you move any wheel. AWD systems can react poorly to mismatched tire size, tread depth, or rolling circumference.
What You’ll Need: Tools and Safety Gear
Gather the right tools before you lift the car. You’ll work faster, avoid unsafe shortcuts, and reduce the chance of damaging the vehicle.
- Jack rated for your vehicle weight
- Jack stands rated for your vehicle weight
- Lug wrench or breaker bar
- Torque wrench
- Wheel chocks
- Tire pressure gauge
- Gloves and eye protection
- Tread depth gauge or a tread wear check method
| Tool | Purpose | Why It Matters |
|---|---|---|
| Jack | Lifts the vehicle at specified points | Lets you raise each corner safely |
| Jack stands | Support the vehicle while you work | Prevent the car from relying on the jack |
| Torque wrench | Tightens lug nuts accurately | Helps prevent loose or over-tightened wheels |
| Gloves and goggles | Protect your hands and eyes | Reduces injury risk while handling wheels |
| Tire pressure gauge | Checks and adjusts pressure | Helps restore safe tire contact and even wear |
Use the jack only at the lift points shown in your owner’s manual. After lifting, lower the vehicle onto jack stands before you remove any wheel.
[Products Worth Considering]

Monitor tire tread wear with a smart, color-coded depth gauge that shows clear condition ranges at a glance. The bar is range marked for fast, easy readings, helping you maintain safer traction and performance. Each gauge is portable with a pocket clip, and the set includes 20 units for daily use and sharing.

This 1/2-inch drive breaker bar delivers powerful leverage for loosening and tightening stubborn lug nuts and automotive fasteners. The 180-degree flex head helps you reach tight spaces at the angle you need, making tire and brake jobs easier. A spring-loaded ball detent design holds 1/2-inch sockets securely while the chrome-moly head provides durable strength for everyday use.

The Trivd Frol 1/2" air impact wrench delivers high performance torque up to 1500 ft-lbs with a twin hammer impact mechanism for strong, balanced blows. It features an ergonomic grip, compact lightweight design, and quick-stop control with 3 forward speeds up to 8000 RPM plus a reverse speed. Built for demanding automotive repair and tire shop work, the rear exhaust helps keep debris away from the surface.
How to Check If Your Tires Are Directional or Non-Directional
Before you rotate the tires, identify whether each tire uses a directional or non-directional tread. This choice controls whether you can cross tires from one side of the car to the other.
Look for Directional Arrows
Check each tire sidewall for an arrow, the word “Rotation,” or a marking that shows the required rolling direction. If you find one, the tire must keep rolling that same direction after rotation.
Directional tires should stay on the same side of the car unless a tire shop dismounts and remounts them correctly. For DIY rotation, swap them front to rear only.
Inspect the Tread Pattern
Directional tires often use a V-shaped or arrow-like tread pattern that points in one rolling direction. Non-directional tires usually have a more even tread design that can work on either side.
Also check for uneven wear across the inner edge, outer edge, center, or shoulder. Uneven wear can point to low pressure, overinflation, worn suspension parts, or alignment issues.
Check Sidewall Markings
Some tires also show “Inside” and “Outside” markings. Those tires are asymmetrical, which means the correct side must face outward after installation.
If the markings confuse you, stop and check the tire maker’s information or ask a tire shop. Guessing can reduce wet traction and cause poor handling.
Sonata FWD Rotation Pattern: Forward-Cross Explained and Directional Exceptions

Most non-directional tires on a front-wheel-drive Sonata use a forward-cross pattern. Move the front-left tire to the rear-left position and the front-right tire to the rear-right position.
Then move the rear-left tire to the front-right position, and move the rear-right tire to the front-left position. This pattern helps even out front-to-rear wear and side-to-side wear.
- Move the front-left tire straight back to the rear-left position.
- Move the front-right tire straight back to the rear-right position.
- Cross the rear-left tire to the front-right position.
- Cross the rear-right tire to the front-left position.
Directional tires create the main exception. Keep them on the same side, and swap only front to rear so the tread still rolls in the marked direction.
Note: If your Sonata has staggered tire sizes, do not rotate front and rear tires unless the manual allows it.
[Products Worth Considering]

The Dr.Roc spare tire tool kit helps you release, lower, or raise your spare tire with reliable extension tools and a lug nut wrench. It is made from rustproof automotive-grade steel and includes an organized carry case for convenient storage. Designed for compatibility with select GM models from the late 1990s through 2019, it uses upgraded extension components to install and remove spare tires with less hassle.

The SAFELIFE dial tire tread depth gauge measures tread depth in 1/32 inch increments with clear, easy-to-read 2-inch dial face. Color zones using a traffic light system help you quickly judge whether tread is low, marginal, or ample for safer driving. Built with a durable zinc cast body and a metal detect probe for precise, comfortable use across cars, motorcycles, trucks, and buses.

Measure tire tread depth quickly and accurately with this LUMITECO dial gauge that reads in 1/32" increments up to 14/32". The color-coded green/yellow/red zones make it easy to judge tire wear and know when replacement is needed. A rugged, compact design with a protective pouch helps keep the gauge ready for use on cars, trucks, motorcycles, and more.
Including a Full-Size Spare or Different-Sized Tires in Rotation
A matching full-size spare can sometimes join the rotation, but only if it matches the other tires in size, type, load rating, and condition. Do not include a temporary spare in a normal rotation.
Including a Full-Size Spare
If your Sonata has a full-size spare that matches the other tires, treat it as a fifth tire only when the owner’s manual allows it. Check its pressure, age, tread depth, and sidewall condition before you use it.
Log each rotation so you know which tire moved to each position. Good records help you spot wear trends before they become expensive problems.
| Item | Action | Record |
|---|---|---|
| Spare check | Inspect tread and pressure | Date and mileage |
| Rotate interval | Follow the manual or tire warranty | New positions |
| Pattern | Use approved five-tire pattern | Wear notes |
Mixing Different Tire Sizes
Avoid mixing different tire sizes unless Hyundai permits that setup for your exact Sonata. Different sizes can change handling, braking feel, traction control behavior, and drivetrain load.
Mismatched tires matter even more on AWD models. Keep all four tires closely matched in size, type, and tread depth to help protect the drivetrain.
Rotation Patterns and Considerations
Choose the rotation pattern based on drivetrain, tread direction, and tire size. Do not force a forward-cross pattern onto directional or staggered tires.
- Use a forward-cross pattern for most non-directional FWD tires.
- Use front-to-rear swaps for directional tires mounted correctly on each side.
- Follow the owner’s manual or a tire professional’s guidance for AWD, staggered, or five-tire rotations.
Jack, Support, and Remove Wheels: Step by Step
Park on level ground, shift into Park, set the parking brake, and place wheel chocks before lifting. Slightly loosen the lug nuts while the tire still touches the ground.
Place the jack at the approved lift point and raise the vehicle until the tire clears the ground. Set a jack stand under the recommended support point, then lower the car gently onto the stand.
Shake the vehicle lightly at a solid body point to confirm it feels stable. Remove the lug nuts in a star pattern, pull the wheel straight off the hub, and place it on a clean surface.
Repeat the process for each wheel you need to move. Keep your hands clear of pinch points, and never place any part of your body under a vehicle supported only by a jack.
[Products Worth Considering]

This spare tire tool kit is designed for the 2004 to 2018 Ford F-150 to help you loosen and tighten wheel lug nuts and manage the spare tire and provided jack functions from underneath the vehicle. It includes the lug nut wrench and extension pieces plus a convenient storage carrying case for organized transport. The jack itself is not included.

Accurately measure tire tread depth with a calibrated gauge marked from 0 to 1 inch in 1/32 inch increments. The color-coded bar helps you quickly identify tread condition ranges, supporting safe driving for trucks, motorcycles, automobiles, and passenger vehicles.

Measure tyre tread depth precisely with a digital gauge that reads in both MM and inches, helping you monitor safe driving conditions. The large LCD screen is easy to operate, and the compact tool fits for cars, trucks, and motorcycles. It provides high accuracy with a 0-25.4mm range and includes a 1-year warranty for added peace of mind.
Inspect Tires and Suspension While Rotating: What to Look For
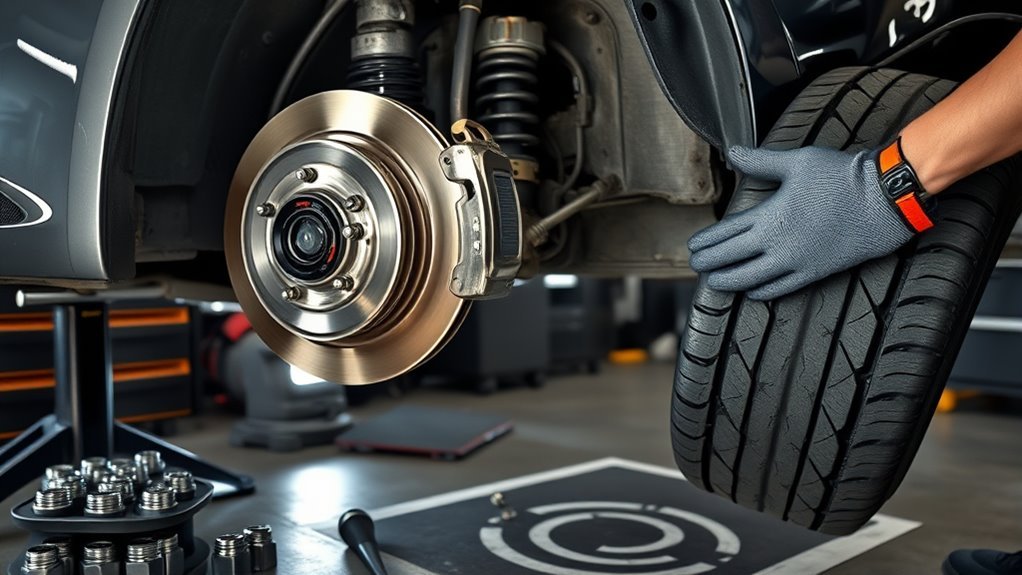
Before you remount the wheels, inspect the tires and visible suspension parts. A rotation can help even normal wear, but it can’t fix damage, bad alignment, or worn parts.
- Check each tire for cuts, bulges, cracks, exposed cords, nails, and low tread depth.
- Look for inner-edge wear, outer-edge wear, center wear, cupping, or feathering.
- Check tire pressure against the driver-side door placard after the tires return to the ground.
- Inspect visible shocks, struts, bushings, and joints for leaks, looseness, or damage.
Replace tires that show unsafe damage or tread worn to the legal minimum. If you see cupping or severe one-sided wear, schedule an alignment and suspension check.
Pro tip: Mark each tire’s old position with tape before removal so the new pattern stays clear.
Refit Wheels, Torque Bolts, and Final Post-Rotation Checks
Place each wheel on the hub and hand-start every lug nut. If a lug nut does not thread smoothly by hand, stop and check for cross-threading.
Snug the lug nuts in a star pattern while the vehicle remains supported. Lower the car until the tires touch the ground, then tighten each lug nut with a torque wrench in the same star pattern.
Use the lug nut torque value listed in your Sonata owner’s manual. After that, set all tire pressures to the driver-side door placard, not the number printed on the tire sidewall.
Take a short, slow test drive and listen for vibration, wobble, or clicking. Recheck the lug nuts after the first short drive if your owner’s manual or wheel maker recommends it.
When to Rotate, Recordkeeping, and Troubleshooting Uneven Wear
Rotate your Sonata’s tires about every 6,000 to 8,000 miles, unless your manual or tire warranty lists a different interval. Many owners pair tire rotation with oil changes to stay on schedule.
Log the date, odometer reading, tire positions, pressure readings, and any wear notes after each rotation.
- Inspect: Measure tread depth and note wear across the inner edge, center, and outer edge.
- Diagnose: Match wear patterns to likely causes, such as low pressure, overinflation, alignment issues, or worn parts.
- Act: Fix the cause before the next rotation, or uneven wear will return.
If the car pulls, shakes, or makes noise after rotation, stop driving when safe and recheck your work. Make sure every wheel sits flush, every lug nut feels tight, and every tire has the correct pressure.
Common Mistakes to Avoid When Rotating Sonata Tires
A safe tire rotation depends on small details. These mistakes can create wear problems or unsafe driving conditions.
- Do not cross directional tires from one side of the car to the other.
- Do not use a jack without jack stands while removing wheels.
- Do not guess the lug nut torque value.
- Do not ignore bulges, exposed cords, or severe tread wear.
- Do not set tire pressure from the tire sidewall maximum rating.
When something looks wrong, pause the job and check the manual. A few extra minutes can prevent wheel damage, tire failure, or a roadside problem.
Frequently Asked Questions
How do you rotate tires on a Hyundai Sonata?
For most front-wheel-drive Sonata models with non-directional tires, move the front tires straight back and cross the rear tires to the front. Use a front-to-rear-only pattern for directional tires.
How often should you rotate Hyundai Sonata tires?
Most Sonata owners should rotate tires about every 6,000 to 8,000 miles. Check your owner’s manual and tire warranty because some tire makers require a set interval to keep warranty coverage.
Can you rotate Sonata tires yourself?
You can rotate Sonata tires yourself if you have the right tools and can lift the vehicle safely. Use jack stands, a torque wrench, wheel chocks, and the correct factory lift points.
What should you not do when rotating tires?
Do not skip jack stands, mix tire sizes, cross directional tires, or guess torque specs. You should also avoid driving on tires with bulges, exposed cords, or very low tread.
Do you need an alignment after rotating tires?
You do not need an alignment after every normal tire rotation. Schedule one if the car pulls, the steering wheel sits off-center, or the tires show uneven edge wear.
Conclusion
A careful tire rotation helps your Hyundai Sonata wear its tires evenly and drive more predictably. Confirm your tire type, use the correct rotation pattern, support the car safely, and torque the lug nuts to the factory spec. Record the mileage and tire positions after each service. With a steady routine, you’ll catch tire problems early and keep your Sonata ready for the next drive.