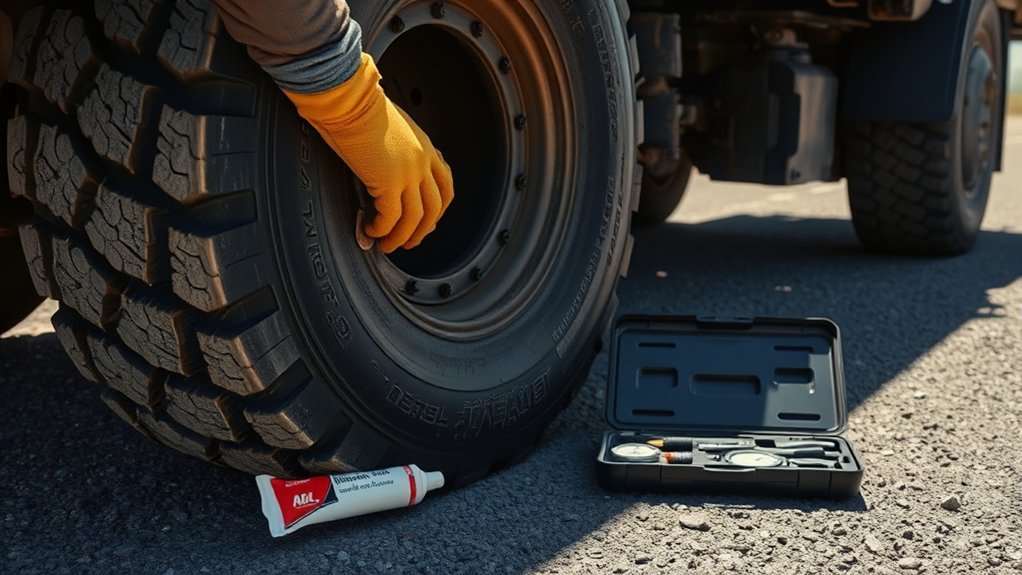
To patch a tire on a truck safely, first decide whether the tire is repairable at all. For most passenger and light-truck tires, a puncture should only be repaired when it is in the tread area, no larger than 1/4 inch, and the tire has no sidewall, shoulder, run-flat, or overlapping repair damage. A proper permanent repair is not just a patch or just a plug—it is a combination plug-patch repair done after the tire is removed from the wheel and inspected from the inside.
Quick Answer
You can patch a truck tire only if the puncture is in the tread, no larger than 1/4 inch, and the tire passes an inside inspection. The safest permanent repair is a plug-patch installed from inside the dismounted tire. Replace the tire if the damage reaches the sidewall, shoulder, cords, or previous repair area.
Key Takeaways
- Repair only small punctures in the tread area; sidewall and shoulder damage means replacement.
- A permanent repair requires removing the tire from the rim/wheel assembly and inspecting the inner liner.
- Use a combination plug-patch repair: the stem fills the injury and the patch seals the inner liner.
- Do not repair tires with exposed cords, bulges, severe tread wear, run-flat damage, or overlapping repairs.
At a Glance
| Time Required | 30–60 minutes at a tire shop; longer for DIY work if you have tire-changing equipment |
| Difficulty | Moderate to advanced; a permanent repair requires the tire to be dismounted from the wheel |
| Tools Needed | Jack, jack stands, wheel chocks, lug wrench, tire machine, plug-patch unit, vulcanizing cement, buffer, stitcher/roller, pressure gauge, air source, leak-test solution, wheel balancer, torque wrench |
| Cost | Usually low at a tire shop compared with replacement; cost rises if TPMS service, balancing, or replacement is needed |
Warning: Do not drive on or repair a tire with a sidewall puncture, shoulder damage, exposed cords, a bubble, severe cracking, or a puncture larger than 1/4 inch. If the tire was driven while flat or badly underinflated, have it dismounted and inspected before any repair is attempted.
When to Patch Your Tire: Key Criteria and Considerations
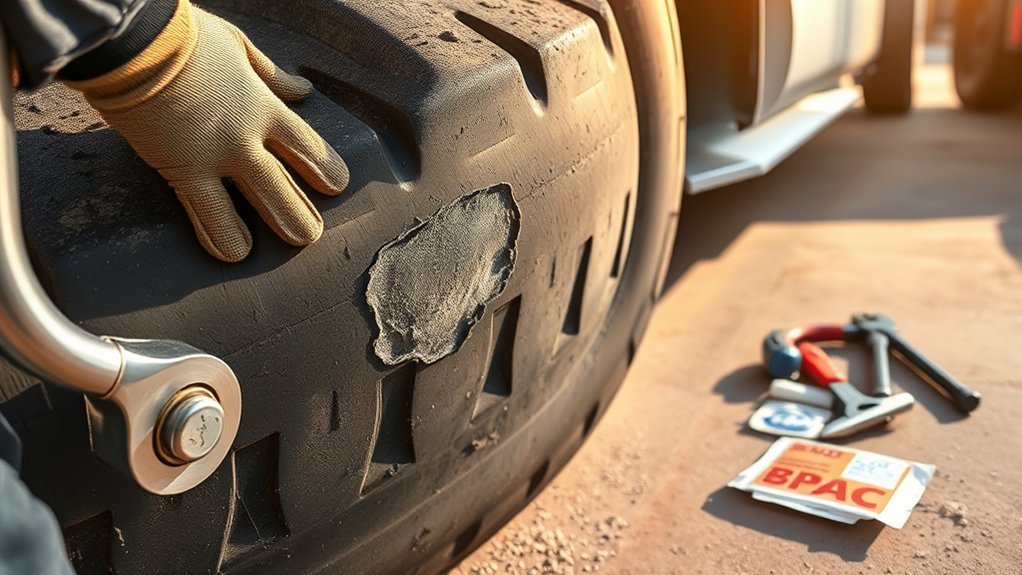
A truck tire can usually be repaired only when the damage is small, clean, and limited to the tread area. The U.S. Tire Manufacturers Association recommends repair only when damage is in the tread area and the puncture is no greater than 1/4 inch, or 6 mm, in diameter. The tire must also be removed from the rim/wheel assembly and inspected inside for hidden liner, belt, or sidewall damage.
Use this checklist before you decide to patch, plug, or replace the tire:
| Condition | Repair or Replace? | Why It Matters |
|---|---|---|
| Puncture is in the center tread area and no larger than 1/4 inch | May be repairable | This is the normal repair zone for passenger and light-truck tire punctures. |
| Damage is in the sidewall or shoulder | Replace | The sidewall flexes constantly and cannot safely hold a patch or plug. |
| Puncture is larger than 1/4 inch | Replace | Larger injuries can weaken the tire structure beyond safe repair limits. |
| New damage overlaps an old repair | Replace | Overlapping repairs are not considered safe under industry repair procedures. |
| Tread is at wear bars or below 2/32 inch | Replace | A worn-out tire does not have enough tread life or safety margin to justify repair. |
The Tire Industry Association also notes that puncture repairs are limited to the center tread area and that tires worn to treadwear indicators or 2/32 inch remaining tread depth should not be repaired. When in doubt, replace the tire or ask a trained tire technician to inspect it.
NHTSA reported 511 deaths in tire-related crashes in 2024, which is why tire repairs should be treated as a safety job, not just a quick fix.
Tools and Supplies Needed to Patch a Truck Tire
A true inside patch or plug-patch repair requires more than a roadside plug kit. You need access to the inside of the tire, which means the tire must be dismounted from the wheel.
- Wheel chocks, jack, and jack stands rated for the truck
- Lug wrench or impact wrench and a torque wrench
- Tire machine or professional tire-changing equipment
- Valve core tool and accurate tire pressure gauge
- Combination plug-patch repair unit sized for the puncture
- Vulcanizing cement made for tire repair
- Inner liner scraper, buffer, reamer, and stitcher/roller
- Soapy water or commercial leak-test solution
- Air source and wheel balancer
- Safety glasses and gloves
Note: A roadside plug kit can help you get off the road in an emergency, but it is not the same as a proper permanent tire repair. Schedule a full inside inspection and plug-patch repair as soon as possible.
[Products Worth Considering]

Vigorder rubber cement glue delivers superior adhesion and cures quickly within about 30 seconds for seamless rubber bonding. Once cured, it helps provide a strong, durable, waterproof seal that holds up to vehicle weight, pressure, and heat. Suitable for cars, motorcycles, trucks, bicycles, and off-road tires, it’s designed for emergency patch and maintenance repairs.

TP-M13W combination repair unit kit includes wrapped stems with matching patches for fast, reliable tire repairs. It’s suitable for both radial and bias ply tires and is designed for chemical or heat vulcanization. Gray vulcanizing gum with blue backing helps create a strong bond, with the stem portion wrapped for added effectiveness.

AUTOWN’s 68-piece tire repair kit helps you fix punctures and plug flats quickly and effectively. It includes a T-handle and spiral probe tool for easy insertion, while the steel patch and plug materials are designed for strong adhesion and long-lasting airtight performance. The compact case makes it convenient for roadside repairs across a wide range of vehicles.
Step-by-Step Guide: How to Patch a Tire on a Truck
Patching a tire on your truck requires careful inspection and the correct repair method. The safest approach is to use a trained technician, especially if you do not have a tire machine, balancing equipment, or experience lifting a truck safely.
- Park safely. Move to a flat, stable surface away from traffic. Turn on hazard lights, set the parking brake, and chock the wheels that stay on the ground.
- Loosen the lug nuts before lifting. Break the lug nuts loose while the tire is still touching the ground, but do not remove them yet.
- Lift and support the truck. Use the factory jack point and support the vehicle with jack stands. Never work under or around a truck supported only by a jack.
- Remove the wheel from the truck. Take off the lug nuts and remove the wheel assembly.
- Dismount the tire from the rim/wheel assembly. This step is essential because the inner liner must be inspected before a repair is approved.
- Inspect the tire inside and outside. Look for sidewall damage, run-flat damage, exposed cords, belt separation, inner-liner cracking, previous repairs, and punctures that angle toward the shoulder.
- Confirm the puncture is repairable. The injury should be in the tread area and no larger than 1/4 inch. If the puncture is near the shoulder or sidewall, replace the tire.
- Prepare the injury channel and inner liner. Remove the object, clean the puncture path, buff the inner liner according to the repair-product instructions, and remove dust or loose rubber.
- Apply vulcanizing cement. Use cement compatible with the repair unit and allow it to set as directed by the product manufacturer.
- Install a combination plug-patch. Pull or insert the stem through the puncture channel so it fills the injury, then press the patch firmly against the inner liner.
- Stitch the patch. Use a stitcher or roller from the center outward to remove trapped air and create full contact with the inner liner.
- Trim the stem and remount the tire. Trim the plug stem flush with the tread, remount the tire on the wheel, and inflate it to the pressure listed on the truck’s door placard or owner’s manual.
- Leak-test the repair. Apply soapy water or leak-test solution around the repaired area, valve stem, and bead. Bubbles mean the tire is still leaking.
- Balance and reinstall the wheel. Balance the wheel assembly, reinstall it on the truck, and tighten lug nuts with a torque wrench to the vehicle manufacturer’s specification.
Pro Tip: Ask the tire shop to show you the inside of the tire before repair. A nail that looks harmless from the outside can hide liner damage, sidewall scuffing, or evidence that the tire was driven while flat.
[Products Worth Considering]

This 4-in-1 tire valve core removal tool helps you deflate, unblock, and remove or install valve cores quickly for easier tire repair. The multifunction design also supports re-taping damaged threads and reaming inside the valve stem for smoother service. Included as a 2-pack, it’s compact for convenient carry and works for cars, bicycles, and motorcycles.

The SAFELIFE dial tire tread depth gauge measures tread depth in 1/32 inch increments with clear, easy-to-read 2-inch dial face. Color zones using a traffic light system help you quickly judge whether tread is low, marginal, or ample for safer driving. Built with a durable zinc cast body and a metal detect probe for precise, comfortable use across cars, motorcycles, trucks, and buses.

The Trivd Frol 1/2" air impact wrench delivers high performance torque up to 1500 ft-lbs with a twin hammer impact mechanism for strong, balanced blows. It features an ergonomic grip, compact lightweight design, and quick-stop control with 3 forward speeds up to 8000 RPM plus a reverse speed. Built for demanding automotive repair and tire shop work, the rear exhaust helps keep debris away from the surface.
Top Errors in Tire Patching and How to Avoid Them
Many truck owners make tire repair mistakes because the puncture looks small from the outside. The most serious error is repairing a tire without removing it from the wheel. Without an inside inspection, you cannot see inner-liner damage, sidewall breakdown, or evidence of underinflation damage.
- Using only an outside plug: A plug may stop air loss temporarily, but it does not seal the inner liner the way a proper plug-patch repair does.
- Using only an inside patch: A patch seals the liner, but the injury channel still needs to be filled to keep moisture from reaching belts and internal materials.
- Repairing sidewall or shoulder damage: These areas flex heavily and are not safe repair zones.
- Repairing a tire with overlapping damage: If a new injury overlaps an old repair, the tire should be replaced.
- Ignoring tread depth: If the tire is at the wear bars or below 2/32 inch, replace it instead of repairing it.
- Skipping balancing or torque checks: A repaired tire should be balanced, and lug nuts should be tightened to the truck manufacturer’s torque specification.
- Forgetting TPMS: If the TPMS light stays on after inflation, the system may need a reset, sensor service, or further leak inspection.
Patching vs. Plugging: Key Differences for Tire Repair

While both patching and plugging are common tire repair terms, they are not equal. For a safe permanent repair, the tire industry standard is to address both parts of the injury: the path through the tread and the air seal at the inner liner.
| Repair Method | What It Does | Best Use |
|---|---|---|
| Patch only | Seals the inner liner from inside the tire | Not preferred as a complete permanent repair because the injury channel remains unfilled |
| Plug only | Fills the puncture from outside the tire | Temporary roadside use only; the inside of the tire still needs inspection |
| Combination plug-patch | Fills the injury channel and seals the inner liner | Best permanent repair for qualifying tread punctures |
| Replacement | Removes an unsafe tire from service | Required for sidewall damage, shoulder damage, large punctures, exposed cords, bulges, severe wear, or overlapping repairs |
The Michelin tire repair guidance also states that proper repairs must be the combined-plug-and-inside-patch type and that the tire must be removed from the wheel for inspection before repair. That is why a “quick plug” should not be treated as the final repair on a truck tire.
[Products Worth Considering]

This chemical vulcanizing cement cures rubber at room temperature, creating a strong bond for reliable tire patch and plug repairs. The fast-drying formula helps reduce vulcanization time, while the built-in brush makes application quick and even. Suitable for car, motorcycle, and bicycle tires, it supports repairs for tubeless tires, outer tires, and inner tubes.

This Dr.Roc tire valve stem puller tools set helps install or remove snap-in tubeless valve stems safely and efficiently. It includes ozone-resistant EPDM snap-in valve stems, a valve stem installer, and a valve core remover for quick core removal or installation during tire service. Designed for reliable tubeless tire repair on motorcycles, ATVs, lawn equipment, cars, and trucks.

The GRAND PITSTOP tubeless tire gun puncture repair kit quickly seals tire injuries without removing the tire, making it an easy DIY solution for flats and punctures. The mushroom plug technology grips from inside to help prevent air loss, while the portable design suits cars and motorcycles, including long-distance travel. Ideal for roadside reliability and everyday maintenance when you want fast, dependable sealing performance.
How to Know When to Replace Your Tire?
Knowing when to replace your tire is just as important as knowing how to patch it. Replace the tire instead of repairing it when the puncture is too large, too close to the sidewall, or combined with other damage that weakens the tire.
Start by checking the tread depth. Under 49 CFR §570.9, tire tread should be not less than 2/32 inch deep. If the tread is at the wear bars, below 2/32 inch, or badly uneven, replace the tire. Also replace it if you see sidewall bulges, cracks, exposed cords, bead damage, belt separation, or damage from driving while flat.
Run-flat tires, foam-lined tires, commercial truck tires, and tires on heavy-duty work trucks may have additional manufacturer or fleet repair rules. When the tire type is unclear, follow the tire manufacturer’s repair policy or have a qualified tire service professional inspect it.
Truck-Specific Safety Notes
Truck tires carry heavier loads than many passenger-car tires, so shortcuts are risky. After any repair, inflate the tire to the pressure shown on the driver-door Tire and Loading Information Label or in the owner’s manual—not the maximum pressure molded on the sidewall unless the manufacturer specifies it for your load. NHTSA’s TireWise guidance emphasizes proper tire pressure, correct sizing, and regular maintenance for safety and tire life.
- Check load rating: Make sure the repaired tire still matches the truck’s required load range and service description.
- Inspect matching tires: Tires on the same axle should match in size, construction, and profile.
- Recheck pressure cold: Recheck pressure after the tire has cooled and before the next long trip.
- Watch for vibration: A vibration after repair can mean the wheel needs balancing or the tire has hidden damage.
Troubleshooting After a Tire Patch
If the repaired tire still loses air, do not keep adding air and driving. Recheck the repair, valve stem, bead seal, and wheel for cracks or corrosion. Bubbles during a soapy-water test mean the leak is still active.
- Bubbles at the repair: The repair failed or the injury was not repairable. Replace the tire or have it professionally reworked only if it still meets repair limits.
- Bubbles at the valve stem: Replace or service the valve stem or TPMS valve.
- Bubbles at the bead: The bead area may need cleaning and resealing, or the wheel may be damaged.
- TPMS light stays on: Confirm cold pressure first. If pressure is correct, the sensor may need reset, relearn, or replacement.
- Vibration after repair: Have the wheel assembly balanced and inspect the tire for belt damage or uneven wear.
Frequently Asked Questions
Why would a tire patch not work?
A tire patch may fail if the puncture is too large, the injury reaches the shoulder or sidewall, the tire was driven flat, the inner liner is damaged, or the repair area was not cleaned and prepared correctly. A patch by itself can also leave the puncture channel open, which is why a combination plug-patch is the safer permanent method for qualifying tread punctures.
What makes a hole in a tire unpatchable?
A hole is usually unpatchable if it is larger than 1/4 inch, outside the repairable tread area, in the shoulder or sidewall, directly across from another injury, overlapping a previous repair, or paired with exposed cords, bulges, bead damage, severe cracking, or tread worn to 2/32 inch.
Why can’t you patch a tire twice?
A tire may be repairable more than once only when the repairs are separate, within the repairable tread area, and do not overlap. If a new puncture overlaps an old repair or sits too close to another injury, the tire should be replaced because the repaired area can no longer maintain safe strength and sealing.
Can I drive on a plugged tire before getting it patched?
A roadside plug may get you to a safe location or tire shop, but treat it as temporary. Drive slowly, avoid heavy loads when possible, and have the tire dismounted and inspected. A permanent repair should fill the injury and seal the inner liner from inside the tire.
Can a truck tire sidewall be patched?
No. Sidewall damage should not be patched or plugged. The sidewall flexes constantly while carrying the truck’s load, so a repair in that area can fail suddenly. Replace the tire if the puncture, cut, bubble, or crack is in the sidewall.
Should a patched truck tire be balanced?
Yes. Once the tire is dismounted, repaired, remounted, and inflated, the wheel assembly should be balanced before it goes back on the truck. Balancing helps prevent vibration, uneven wear, and stress on steering and suspension parts.
Conclusion
A successful tire repair starts with knowing when not to repair the tire. Small tread punctures can often be fixed, but sidewall damage, shoulder damage, large punctures, overlapping repairs, exposed cords, bulges, and worn-out tread call for replacement. For a safe long-term fix, use a proper plug-patch repair after the tire is removed from the wheel and inspected from the inside. When the tire carries truck loads, the safer choice is always the one that protects the tire’s structure, air seal, and road performance.
Sources
- U.S. Tire Manufacturers Association — Tire Repair Basics — backs up tread-area repair limits, 1/4-inch puncture limit, off-wheel inspection, non-overlap rule, and plug-patch repair guidance.
- Tire Industry Association — Tire Repair — backs up center tread repair zone, sidewall/shoulder non-repairability, 2/32-inch tread limit, and improper repair warning.
- NHTSA TireWise — Tire Safety Ratings and Awareness — backs up tire pressure, tire maintenance, and tire-related crash safety context.
- eCFR 49 CFR §570.9 — Tires — backs up 2/32-inch minimum tread depth and treadwear indicator guidance.
- Michelin USA — Can My Tire Be Repaired? — backs up combined plug-and-inside-patch repair and off-wheel inspection guidance.
- Bridgestone Americas — Tire Repair — backs up repair-vs-replace conditions and plug-patch guidance.