
How to Pump Up a Tubeless Tire: Tips for Getting a Solid Seal
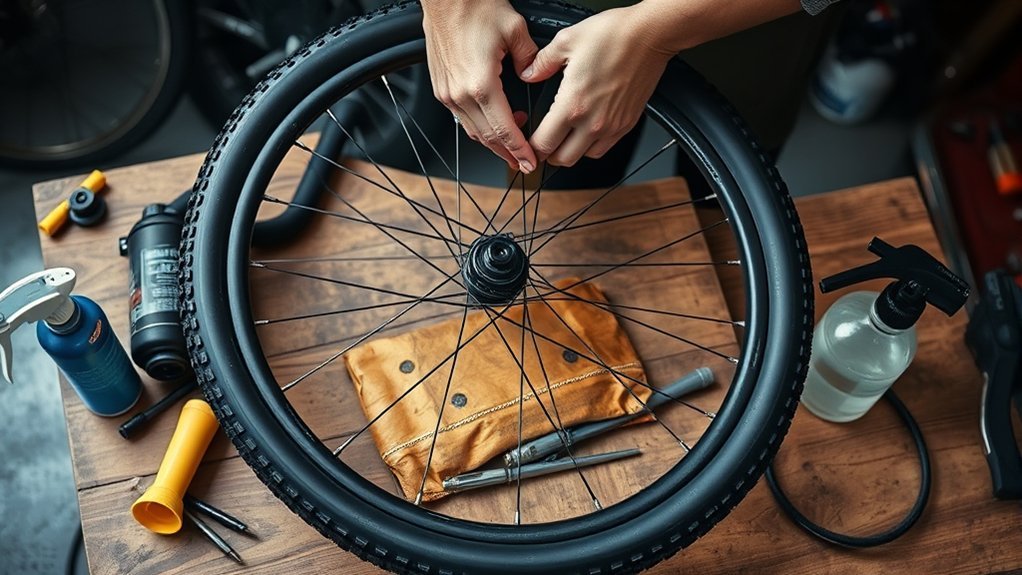
If your tubeless tire is already seated and only needs air, leave the valve core installed, open the Presta valve if applicable, attach a compatible pump, and inflate to your normal riding pressure. If the bead is unseated or air rushes out around the rim, switch to bead-seating mode: confirm tubeless compatibility, lubricate the beads, remove a removable valve core for more airflow, and use a floor pump, tubeless booster, or controlled compressor burst while staying below the tire and rim pressure limits.
Last updated: August 18, 2026
Quick Answer
For a routine top-up, keep the valve core installed, open the Presta valve if applicable, attach a compatible pump, and inflate to your normal riding pressure. Remove the valve core only when you need extra airflow to seat an unseated bead or to add sealant through the valve. For bead seating, lubricate both beads, inflate quickly with a floor pump, compressor, or tubeless booster, stay below the tire and rim pressure limits, then reinstall the core and check for leaks.
Key Takeaways
- Use only tubeless-compatible tires, rims, rim tape, valves, and sealant.
- Keep the valve core installed for a routine top-up; remove it only when you need more airflow for bead seating or access for sealant.
- Lubricate the bead with tubeless mounting fluid or light soapy water so it slides into place.
- A compressor or booster helps stubborn tires, but you must stay below the tire, rim, and booster pressure limits.
- Road and hookless tubeless systems can have stricter tire and pressure rules, so check the wheel maker’s compatibility chart first.
- If air leaks from the valve, spoke holes, bead, or sidewall, fix the leak before riding.
At a Glance
| Time Required | A few minutes for a routine top-up; initial setup or leak troubleshooting takes longer |
| Difficulty | Easy for a routine top-up; moderate for bead seating or leak troubleshooting |
| Tools Needed | Compatible pump with gauge for a top-up; valve core remover, sealant, injector or syringe, mounting fluid or light soapy water, rag, and optional compressor or booster for setup or troubleshooting |
| Cost | Varies; a routine top-up needs no new parts if you already have a compatible pump |
How to Pump Up a Tubeless Tire: Choose the Right Method
First decide whether you are simply adding air to a tire whose beads are already seated or trying to seat a new, unseated, or recently burped bead. A routine top-up needs normal pump airflow. Bead seating needs a much faster rush of air so the tire can seal against the rim before pressure escapes. If you need basic valve and pump-head instructions, see how to pump a bike tire.
| Situation | What to Do | Valve Core |
|---|---|---|
| Routine pressure top-up | Attach a compatible pump and inflate to your riding pressure | Keep it installed |
| New setup or unseated bead | Lubricate the beads and use fast airflow from a floor pump, booster, or controlled compressor | Remove it if removable and extra airflow is needed |
| Bead is seated but the pump feels blocked | Check the valve tip, core, and stem for dried sealant or a blockage before forcing the pump | Remove for inspection only after safely deflating the tire |
[Products Worth Considering]

This multi-function tire valve stem removal tool set makes it fast to remove, install, bleed, and clean valve cores for easier tire maintenance. It includes valve core removers, a 4-way spool tool, replacement valve caps, and spare cores to handle replacements and repairs with confidence. Universal compatibility suits cars, trucks, motorcycles, bicycles, and more for roadside convenience.

Convert Presta bicycle valves to accept standard Schrader pump nozzles for fast, hassle-free inflation. This kit includes durable brass adapters with leak-resistant connections, plus sports inflation needles and protective valve caps for convenient use on bikes and ball sports equipment.

This 4-pack kit converts Presta bike valves to standard Schrader valves so you can inflate with any regular pump or air compressor. The solid brass adapters include an O-ring for a tight, leak-proof seal and provide a simple screw-on setup. Compatible with road bikes, mountain bikes, e-bikes, and e-scooters, it’s designed for convenient, everyday carry readiness.
Routine Tubeless Tire Top-Up: Step by Step
- Check the tire and rim pressure guidance and choose your normal riding pressure within the approved limits.
- Remove the valve cap. If you have a Presta valve, loosen the small tip nut and briefly press the tip to confirm it opens.
- Attach a compatible pump head straight onto the valve and lock it in place if your pump uses a lever.
- Inflate while watching the gauge. Stop at your riding pressure; do not automatically inflate to the maximum printed pressure.
- Remove the pump head straight off the valve. If you have a Presta valve, tighten the tip nut gently and replace the cap.
- Listen for hissing and check the valve and bead if the tire loses pressure unusually quickly.
If air will not enter even though the bead is seated, do not jump straight to a compressor. Check that the Presta tip is open and inspect the valve core or stem for dried sealant. Bead-seating tools are for a bead that is unseated or leaking too much air to build pressure.
Tubeless Setup Essentials
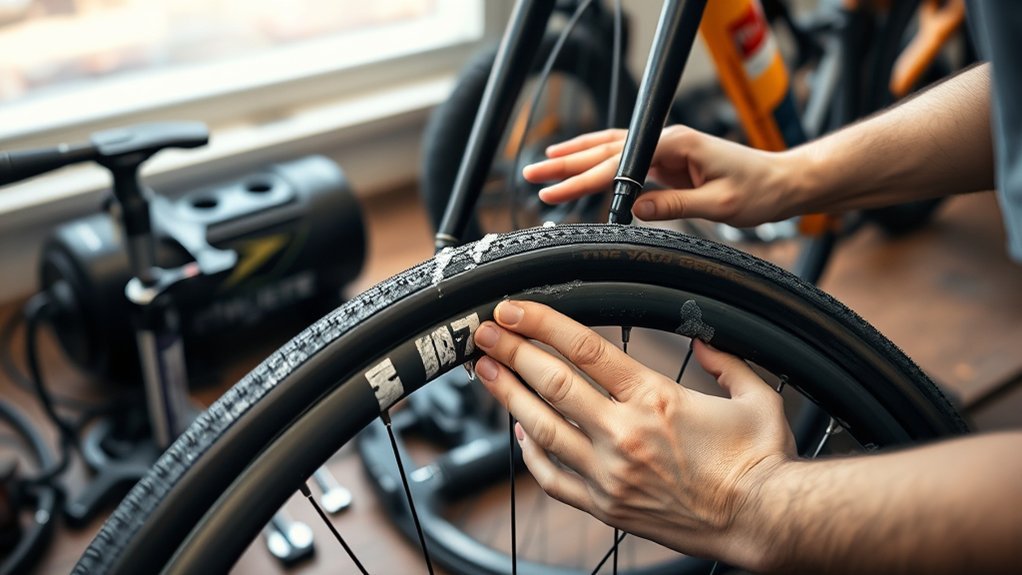
Before you inflate a tubeless tire, make sure the whole system is ready. You need a tubeless-compatible tire, an airtight tubeless rim or tubeless-ready rim with proper tape, a tubeless valve, sealant, and a pump with a pressure gauge. Schwalbe’s tubeless fitting guidance lists these core parts and also recommends mounting fluid, a rag, and a track pump with a gauge.
Check the tire sidewall and rim markings before you start. Many bicycle tires say “tubeless ready,” “TLE,” “TLR,” “TR,” or similar. Your rim must also support tubeless use. If the tire or rim is not approved for tubeless, do not force it. Use an inner tube instead, or ask a bike shop to confirm compatibility. If you are unsure which valve you have, compare Presta vs. Schrader valves before attaching a pump.
Check Tire, Rim, and Pressure Compatibility
Do not treat every tubeless tire and rim as interchangeable. Match the tire size, rim internal width, valve type, and maximum pressure before you inflate. This matters most on high-pressure road tubeless systems, carbon wheels, and hookless rims, where the wheel maker may approve only certain tire models, tire widths, or pressure ranges.
Hookless road limits are system-specific. SRAM says Zipp road wheels remain limited to 73 psi, while ENVE cites ETRTO limits of 72.5 psi (5 bar) for 25–29 mm tires and 65 psi (4.5 bar) for 30–34 mm tires. These are examples, not universal limits. Use the approved tire list and pressure limit for your exact wheel and tire combination.
Use the lowest applicable maximum pressure listed by the tire, rim, or wheel maker, including any system-specific hookless limit. If one marking says 80 psi and another says 65 psi, stay below 65 psi. Seating a bead should never require unsafe pressure. If the tire will not seat before the safe limit, stop and fix the setup instead of adding more air.
Warning: Never exceed the lower maximum pressure listed on the tire or rim. A stubborn bead is frustrating, but extra pressure can damage the tire, rim, tape, or valve and may cause the tire to blow off the rim.
Inspect the rim tape closely. It should cover every spoke hole, sit flat in the rim bed, and overlap cleanly without wrinkles, bubbles, tears, or lifted edges. A small tape gap can leak air into the rim cavity and make it seem like the tire will not seat. If the tape needs replacement, follow a careful tubeless rim-tape installation process rather than patching over dirt or damaged tape. Press the tubeless valve firmly through the tape, tighten the valve nut by hand, and make sure the rubber base seals evenly against the rim bed.
Before You Start Checklist
A clean setup saves time. Wipe old sealant from the bead, remove grit from the rim bed, and check that the tire bead is not kinked or damaged. If the tire has been folded tightly in storage, let it relax in a warm room before mounting. Warm rubber may shape more easily and can help a tight tire sit more evenly on the rim. Use gentle ambient warmth only; do not use an oven, heat gun, or direct high heat on the tire.
- Confirm that the tire and rim are approved for tubeless use.
- Check the wheel maker’s tire-width and pressure rules, especially for road or hookless rims.
- Check that the rim tape is smooth, tight, and wide enough to cover the spoke holes.
- Make sure the tubeless valve has a good rubber base and a removable core if you plan to inject sealant through the valve.
- Use the sealant amount recommended by your tire or sealant brand.
- Keep a pressure gauge visible while you inflate.
- Use tubeless mounting fluid or a light soapy-water mix on the beads if the tire feels dry or tight.
Note: Not every Presta valve has a removable core. Many tubeless Presta valves do, but you should confirm before you plan to add sealant through the valve.
Seat a Tubeless Tire With a Floor Pump
This section is for a new setup or a bead that has unseated; you do not need to remove the valve core for a normal pressure top-up. A floor pump can seat many tubeless bicycle tires when the tire and rim fit well. Mount both beads onto the rim, then rotate the wheel so the valve sits near the top. This helps keep liquid away from the valve if sealant is already inside the tire. Remove a removable valve core when you need extra airflow. For more no-compressor options, see how to seat a tubeless tire bead without a compressor.
- Mount the tire fully on the rim and check that both beads sit inside the center channel.
- Brush tubeless mounting fluid or light soapy water around both beads.
- Remove the valve core with a core-removal tool.
- Attach the floor pump securely to the valve stem.
- Pump quickly and watch the tire as air pushes the beads outward.
- Listen for sharp pops or snaps as the beads lock into place.
- Stop before you reach the tire or rim pressure limit.
- Check the bead line on both sides to make sure it is even all the way around.
- If you are adding sealant through the open valve, inject it before reinstalling the core. Reinstall the valve core, then inflate to riding pressure.
The bead line is your best visual check. Most tires have a thin molded line just above the rim. That line should sit evenly around both sides of the wheel. If one section dips below the rim edge or bulges above it, deflate the tire, add more mounting fluid, massage that section into place, and try again.
Pro Tip: If the bead will not catch air, make sure the valve sits between the tire beads, push both sidewalls outward with your hands while you pump, and remove a removable valve core for more airflow. Use short, fast pump strokes instead of slow strokes.
Tubeless Seating Tips That Actually Help
If air escapes faster than you can pump, the beads are not touching the rim walls tightly enough. The goal is to close that gap long enough for pressure to build inside the casing. Start with the easiest fixes before moving to a compressor or booster.
| Problem | What to Try | Why It Helps |
|---|---|---|
| Air rushes out at the bead | Use mounting fluid or light soapy water | Lubrication helps the bead slide up to the rim shoulder |
| Pump cannot move enough air | Remove the valve core | The open stem lets more air enter at once |
| Tire is loose on the rim | Add a proper second layer of tubeless tape if the rim allows it | A slightly tighter rim bed can help the beads catch air |
| Tire is stiff or folded | Warm the tire gently before mounting | Warm rubber may conform to the rim more easily |
| Beads collapse inward | Wrap a strap or old tube around the tread lightly | Gentle compression can push the sidewalls outward |
| Pump feels unusually hard or little air enters | Check the Presta tip, valve core, and stem for dried sealant or blockage | A blocked valve can restrict airflow even when the bead is already seated |
Do not overtighten a strap. Use just enough pressure to help the beads touch the rim sidewalls. Remove the strap as soon as the tire begins to hold air. If the tire twists, bulges, or tries to climb off the rim, stop and deflate it before trying again.
Use an Air Compressor to Seat Tires
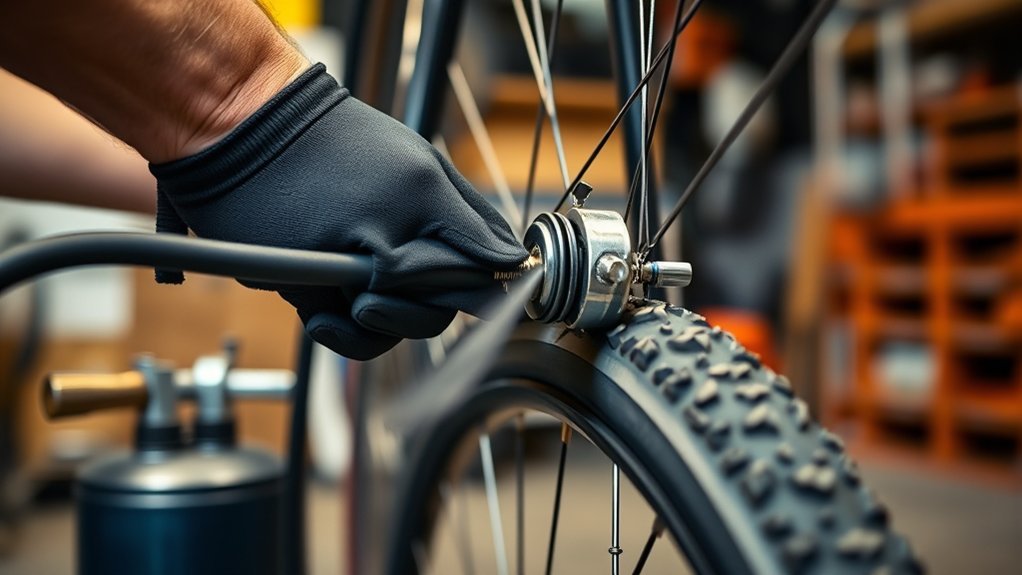
An air compressor or tubeless booster can seat a tire that a floor pump cannot move fast enough. The method is similar, but the airflow arrives in a sharper burst. Remove the valve core, lubricate the beads, attach the nozzle securely, and release air in short controlled bursts while watching the gauge.
Stop as soon as the beads seat. You do not need to keep blasting air after the tire locks into place. Check the bead line on both sides, then deflate slightly if needed, reinstall the valve core, and bring the tire back to your normal riding pressure.
Warning: Do not use a compressor to “force” an incompatible or damaged tire onto a rim. If the bead will not seat before the safe pressure limit, stop, inspect the rim tape and bead, and try a safer fix.
If you use a tubeless booster, follow the booster’s own pressure limit as well as the tire and rim limits. Schwalbe’s Tire Booster guidance, for example, warns users not to exceed the maximum pressure for the tire, rim, or booster bottle.
Fallback Methods: Inner Tube, Tubeless Booster, and CO2
If the tire still will not seat, the inner tube method can help shape the bead. Install a tube, inflate the tire so both beads settle into position, and leave it inflated for a while. Then deflate, unseat only one bead, remove the tube, install the tubeless valve, add sealant, and inflate again. Because one bead remains seated, the tire often catches air more easily.
A tubeless booster can also solve stubborn seating problems without leaving an air compressor in the garage. You charge the booster with a floor pump, attach it to the valve, and release a fast burst of air into the tire. This gives you compressor-like airflow in a more portable format.
CO2 guidance depends on the sealant brand. Schwalbe says not to use CO2 cartridges with its tubeless sealant because CO2 negatively affects the sealant. Stan’s allows CO2 when no other inflation source is available, but recommends releasing the CO2 afterward and replacing it with regular air because prolonged exposure can separate the sealant or shorten its life. Follow the instructions for the sealant you actually use.
[Products Worth Considering]

Tiakia’s mini high-pressure frame pump delivers up to 260 PSI for faster, more efficient inflations with an optimized intake volume. It features a double-head valve design compatible with Schrader and Presta, plus a conversion for Donlop, making it versatile for bikes and many inflatables. The lightweight anodized aluminum build includes a mounting bracket for convenient carry, while the flexible high-pressure hose and IPX4 waterproof body support outdoor use.

This PXZBLG bike repair kit helps you tackle common tire and on-the-ride issues with a compact, ride-ready tool collection. It includes a mini tire pump supporting both Presta and Schrader valves, a 16-in-1 bike multitool, tire levers, glueless patches with a plastic box, plus 4mm and 5mm Allen wrenches. A convenient bike bag stores everything so you can mount it on your road bike or mountain bike for lightweight, portable preparedness.
Add Sealant Through the Valve Core
You can add tubeless sealant in two common ways. You can pour it directly into the tire before the final bead is mounted, or you can seat the tire first and inject sealant through a removable valve core. Injecting through the valve is cleaner when you are not sure the tire and rim will seat easily.
Use the amount recommended by your tire or sealant brand because tire volume changes the needed amount. Schwalbe lists 60–90 ml for 23–60 mm tires and 90–120 ml for 62–100 mm tires. Stan’s recommends 60 ml for road and cyclocross tires and 89–118 ml as a starting point for a 29 x 2.0–2.2 in XC tire. These brand examples show why a single universal sealant amount is not reliable; follow the instructions for your exact tire volume and sealant.
Remove Core First
Deflate the tire fully before removing the valve core. Use a valve-core tool, turn gently, and keep the tiny core somewhere clean. Once the core is out, the valve stem has a wider opening for sealant and air. This also helps when you need more airflow to seat the bead.
- Remove the core only after the tire is safely deflated.
- Use a clean injector or syringe so grit does not enter the valve.
- Measure the sealant amount recommended by your sealant or tire brand.
- Reinstall the core snugly, but do not crush or strip it.
- Inflate the tire, then spin and shake the wheel to spread sealant around the casing.
Inject Sealant Cleanly
Shake the sealant bottle first so the sealing particles mix evenly. Draw the correct amount into the injector, attach it to the valve stem, and push the sealant in slowly. Wipe the valve area before reinstalling the core so dried sealant does not clog the threads.
After inflation, rotate the wheel and shake it side to side. Then lay the wheel flat for a few minutes on each side. This helps sealant coat the bead, sidewall, and rim-tape edge. Check pressure again after a short rest and again before your first ride.
Note: Sealant life depends on brand, tire volume, climate, storage, and riding conditions. Stan’s says its sealant lasts about 2–6 months on average and recommends quarterly checks, while Schwalbe says Doc Blue can remain effective for about 2–7 months. Check your sealant before long rides and more often in hot, dry weather.
After the Tire Seats: Set Pressure and Recheck
Once both beads sit evenly, inflate the tire to a normal riding pressure, not the maximum printed pressure. Riding pressure depends on tire width, rider weight, terrain, rim type, and manufacturer guidance. Use a reliable gauge and avoid guessing, especially on road tubeless setups.
Spin and shake the wheel so sealant coats the casing, bead, and rim-tape edge. If the tire holds pressure and the bead line looks even, take a short, gentle ride close to home to help spread the sealant. Avoid hard cornering or fast descents until you know the tire holds pressure.
Check the pressure again after the first ride and the next day. A small drop can be normal with a fresh setup, but a large drop means you still have a leak at the valve, bead, rim tape, or sidewall. For your first few rides, carry a mini pump or CO2, a tubeless plug tool, a spare tube, a valve core, and tire levers.
Fix Common Tubeless Leaks and Seating Issues
If the tire seats but will not hold pressure, listen for hissing and use light soapy water to find bubbles. The leak location tells you what to fix. Do not keep adding pressure without finding the source.
If the bead is still seated but the pump suddenly feels unusually hard and little air enters, check the valve before you assume the tire needs reseating. A closed Presta tip, clogged valve core, or dried sealant in the stem can restrict airflow. Deflate the tire safely before removing a core for cleaning or replacement.
| Leak Location | Likely Cause | Fix |
|---|---|---|
| Valve base | Loose valve nut, dirty seal, damaged valve base, or tape gap | Deflate, reseat the valve, clean the base, and tighten the nut by hand |
| Spoke holes or rim joint | Rim tape leak or damaged rim bed | Remove the tire, clean the rim bed, and retape the rim carefully |
| Bead | Dry bead, uneven seating, or low sealant coverage | Add mounting fluid, reinflate, rotate the wheel, and check the bead line |
| Sidewall | Porous casing, small puncture, or dried sealant | Add fresh sealant, shake the wheel, and let sealant coat the area |
| Valve core | Loose, clogged, or damaged core | Tighten gently or replace the core |
If bubbles come from multiple spoke holes, the leak usually starts under the rim tape. Sealant may hide the problem for a short time, but proper retaping is the real fix. Remove the tire, peel off old tape, clean the rim bed, let it dry, and apply new tubeless tape with firm tension and a clean overlap.
When to Stop and Get Help
Stop inflating if the tire bead bulges, the tire climbs above the rim, the rim tape tears, the valve leans sharply, or the tire repeatedly pops off. Also stop if you see rim cracks, dents near the bead seat, cut tire beads, or sidewall damage. These are not normal tubeless setup problems.
A bike shop can check rim and tire compatibility, tape width, valve shape, and bead condition. This is worth it for high-pressure road tubeless systems, hookless rims, carbon rims, or any wheel where the tire manufacturer and rim manufacturer list specific pressure limits.
A tubeless tire should seat evenly before you ride. If you need unsafe pressure or repeated compressor blasts to make it work, something in the setup needs fixing.
Frequently Asked Questions
Do you need to remove the valve core every time you inflate a tubeless tire?
No. Keep the valve core installed for a routine pressure top-up. Remove a removable core when you need extra airflow to seat an unseated bead, when the core needs cleaning or replacement, or when you are adding sealant through the valve.
Can you pump up a tubeless tire with a normal floor pump?
Yes. A normal floor pump is enough for routine pressure top-ups and can seat many tubeless tires when the tire and rim fit closely. If an unseated bead leaks air faster than the pump can supply it, remove a removable valve core for more airflow and try mounting fluid, a tubeless booster, or a controlled compressor.
How do you inflate a tubeless tire that is not sealed on the rim?
Remove the valve core, apply tubeless mounting fluid or light soapy water to the beads, and use fast airflow from a floor pump, compressor, or tubeless booster. If air still escapes, check the rim tape, valve base, bead shape, and tire-rim compatibility before adding more pressure.
Why won’t my tubeless tire inflate with a floor pump?
Air is usually escaping faster than the pump can build pressure. Remove the valve core, lubricate both beads, make sure the valve sits between the beads, and push the sidewalls outward while pumping. If the tire is still loose, inspect the tape and consider a tubeless booster.
How do you get a good seal on a tubeless tire?
Use compatible tubeless parts, clean the rim bed, apply smooth tubeless tape, seat the valve firmly, lubricate the beads, and add the correct amount of sealant. After inflation, rotate and shake the wheel so sealant coats the bead, sidewall, and rim-tape edge.
How do you inflate a stubborn tubeless tire?
Start by removing the valve core and adding mounting fluid to the beads. Push the sidewalls outward, pump quickly, and check that the valve sits between the beads. If that fails, use a tubeless booster or compressor in short bursts while staying below the tire and rim pressure limits.
How much sealant should you put in a tubeless tire?
Use the amount listed by your sealant or tire brand. Tire volume matters, so a narrow road tire usually needs less sealant than a gravel, mountain, or fat tire. Shake the sealant first, measure it, and check it regularly because it dries over time.
Can you inflate tubeless tires without sealant?
Yes, you can seat many tubeless tires without sealant during setup, especially if you plan to inject sealant through the valve afterward. Do not ride without sealant unless your tire and rim system specifically allows it. Most tubeless-ready bike tires need sealant for reliable air retention and puncture protection.
Why is air coming out of the spoke holes?
Air coming from spoke holes usually means air has entered the rim cavity through a tape leak or valve leak. Deflate the tire, inspect the valve base, and retape the rim if the tape has wrinkles, gaps, tears, or deep spoke-hole dimples.
Should you use CO2 to seat a tubeless tire?
Follow your sealant maker’s instructions. Schwalbe says not to use CO2 cartridges with its tubeless sealant, while Stan’s permits emergency CO2 but recommends releasing it afterward and replacing it with regular air because prolonged exposure can separate the sealant or shorten its life.
Conclusion
For a routine tubeless tire top-up, keep the valve core installed, use a compatible pump with a gauge, and inflate to your normal riding pressure. Reserve valve-core removal, mounting fluid, boosters, and compressor bursts for initial bead seating or troubleshooting when air escapes too quickly to build pressure.
Once the tire seats evenly, add the sealant amount specified for your setup, reinstall the valve core, inflate to riding pressure, and check for leaks. Recheck pressure after the first ride and again the next day. If the setup will not hold air, troubleshoot the valve, bead, rim tape, and sidewall before riding. If seating requires unsafe pressure or repeated uncontrolled attempts, stop and correct the compatibility or sealing problem first.
Sources
- Schwalbe Tubeless FAQ — supports tubeless setup parts, mounting fluid, valve-core removal for airflow, compressor or booster use, sealant amounts, CO2 caution, rim tape, valve troubleshooting, and pressure-limit warnings.
- Stan’s Sealant Support — supports brand-specific sealant amounts, typical sealant life, quarterly checks, and emergency CO2 guidance.
- SRAM/Zipp Tubeless Troubleshooting — supports hookless tire-compatibility requirements and the 73 psi maximum for Zipp road wheels.
- ENVE Hookless Rim Technology 101 — supports ETRTO pressure examples for hookless road tire widths and the need to follow compatibility and pressure guidance.
- SILCA: How to Seat a Tubeless Tire — supports practical floor-pump, strap, warmth, inner-tube, compressor, and CO2 fallback techniques.
- Bicycling: Bike Tire Valves Explained — supports Presta valve context, removable valve cores, tubeless valve replacement, and pump compatibility.
- Cycling Weekly: Tubeless Puncture Repair Tools — supports carrying a plug tool for punctures that sealant alone cannot handle.

Related Articles
305 Tire Size Explained: How Big Is It?
I explain how big a 305 tire really is—and why the exact fit can surprise you.
Read More
Tire Ply Rating Explained: What the Numbers Mean
Tire ply ratings reveal more than numbers, hinting at strength, load capacity, and hidden tradeoffs you’ll want to understand before choosing.
Read More
2 Ply Vs 4 Ply Tires: What’s the Real Difference?
I’ll explain the real difference between 2-ply and 4-ply tires, and the choice may surprise you depending on where you drive.
Read More