
How to Apply Tubeless Rim Tape: Setup, Sealing, and Troubleshooting
Pick tape 2 to 5 mm wider than your rim’s internal width, plus scissors, alcohol wipes, a tubeless valve, and an optional heat gun. Strip old tape, wipe the bed with isopropyl alcohol, and dry it fully. Start about 10 cm before the valve hole, then stretch and smooth the tape under tension over the spoke holes. Overlap the ends by 10 to 15 cm and cut at a 45-degree angle. Press firmly, align the valve, add sealant, and test with soapy water. Follow the next steps for troubleshooting and maintenance.
Quick Answer: What Tubeless Rim Tape and Tools to Use
For a solid tubeless setup, pick rim tape about 2 to 5 mm wider than your rim’s internal width. That extra width covers the spoke bed and seals every hole. Brands like Tesa 4289 or DT Swiss are well-proven choices. You will also need scissors, alcohol wipes, a tubeless valve, and optionally a heat gun to help adhesion.
Tape types differ by thickness and adhesive strength. Thicker tape fills deeper rim bed cavities, while high-adhesion tape resists peeling over time. Material matters too: butyl rubber or reinforced PVC both hold up well for durability and sealing.
Clean the rim before you start. Begin the tape about 10 cm before the valve hole, keep steady tension to avoid wrinkles, and smooth it over the spoke holes as you go. Overlap the ends by at least 15 cm, then cut a precise valve hole beneath the tape. Seat the valve and check for leaks with soapy water. Adjust if needed.
[Products Worth Considering]

GOING TUBELESS?: Our bike rim tape is the perfect choice if you’re looking to make the switch to tubeless bike tires. High quality rim tape is the first step in your tubeless conversion - so grab yourself a roll and let's get cracking!

Sealing: Using pressure-sensitive adhesive, strong adhesion and certain flexibility allow it to stick tightly to the rim. High strength, durability, heat resistance, form a long-lasting airtight seal. Satisfy cyclists who have high demand on tubeless tape
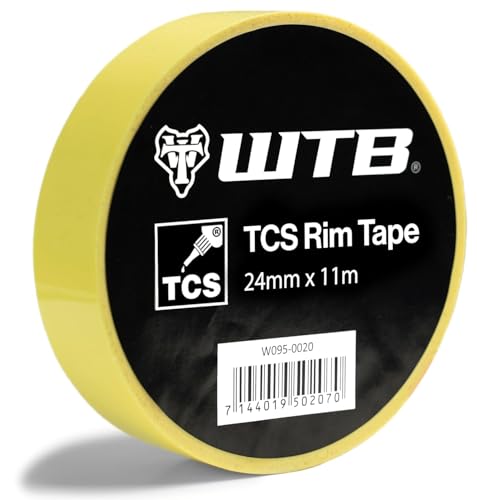
PERFECT FIT: Our TCS tubeless rim tape ensures a reliable and airtight seal, preventing leaks and optimizing tubeless tire performance for mountain bikes. WTB recommends using tape that is 5mm wider than the inner rim width, which is measured as the distance between the inside edges of the bead hooks of a rim.
Prep the Rim: Clean, Remove Old Tape, and Inspect
Start by stripping any old tape and wiping the rim with isopropyl alcohol to remove grease and adhesive residue. Let the rim dry completely so the new tape bonds properly. Then inspect the bed and spoke holes for cracks, sharp edges, or thin tape remnants that could break the seal.
Clean and Degrease
Before applying new tubeless tape, clean and degrease the rim bed and bead seats with isopropyl alcohol. This removes grease, dirt, and old adhesive. Dry the surface completely. A hair dryer helps soften and peel away stubborn tape or thin spoke-hole covers, leaving you with a residue-free rim.
Work methodically around the rim with alcohol wipes or a lint-free cloth until no film or tacky residue remains. Remove all old tape and spoke-hole covers, since leftover bits will weaken the seal. Let the rim air-dry or speed things up with gentle heat, then confirm the surface is clean and dry.
Good rim prep sets the stage for your adhesive selection and helps the new tape bond without fail.
Inspect for Damage
Once the rim is clean and dry, look closely at every inch for damage that could ruin a tubeless seal. Use basic rim inspection techniques: run a fingernail along the bead and bed to feel rough spots, and check spoke holes for thin tape remnants. Look inside and outside the rim for corrosion or sharp edges that could cut tape.
- Dents or bends in the bead that stop uniform tire seating
- Cracks or splits in the rim wall or bed
- Residual adhesive or thin tape over spoke holes
- Corrosion, burrs, or sharp edges that can pierce tape
Fix any of these issues before applying new tubeless tape.
Choose the Right Tubeless Rim Tape (Width, Stretch, Brand)
Pick tape that is 2 to 5 mm wider than your rim’s internal width. This gives full coverage of the spoke bed and proper hole sealing. Choose a product with good stretch and strong adhesive so it conforms to the rim profile without lifting.
Check tape material. Butyl rubber or reinforced PVC both work well for durability and appropriate thickness. Confirm rim compatibility: some tapes suit narrow road rims, others wider MTB rims.
Reputable brands like DT Swiss or Teravail offer proven durability. Tesa 4289 is a solid budget-friendly option. Avoid tapes that are too thin or have weak adhesive. Finally, verify the tape will extend slightly up the sidewalls but not interfere with the tire bead area.
[Products Worth Considering]

STRONG TUBELESS SEAL: Made from a 75um PET base coated with silicone, this tubeless rim tape provides excellent airtightness, keeping your tubeless setup stable and reducing air leakage over time

GOING TUBELESS?: Our bike rim tape is the perfect choice if you’re looking to make the switch to tubeless bike tires. High quality rim tape is the first step in your tubeless conversion - so grab yourself a roll and let's get cracking!
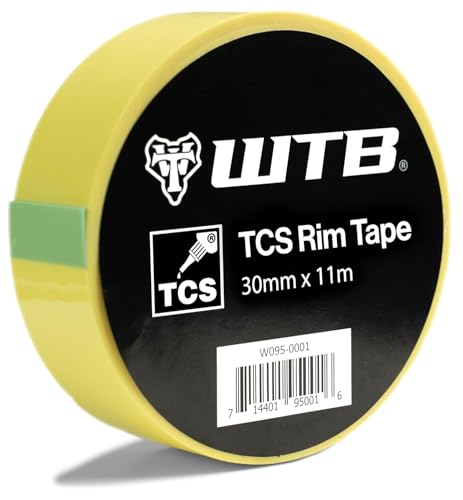
PERFECT FIT: Our TCS tubeless rim tape ensures a reliable and airtight seal, preventing leaks and optimizing tubeless tire performance for mountain bikes. WTB recommends using tape that is 5mm wider than the inner rim width, which is measured as the distance between the inside edges of the bead hooks of a rim.
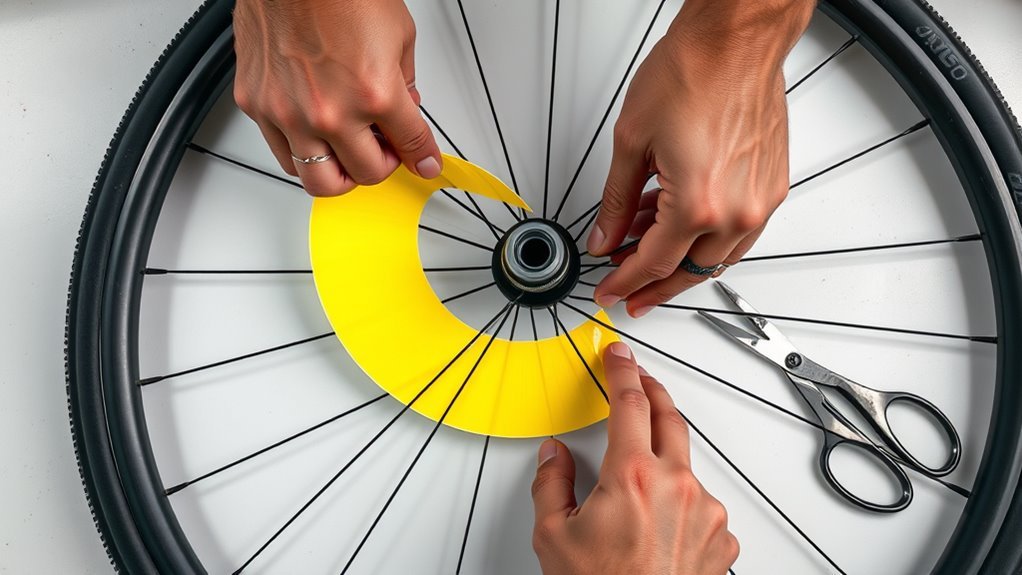
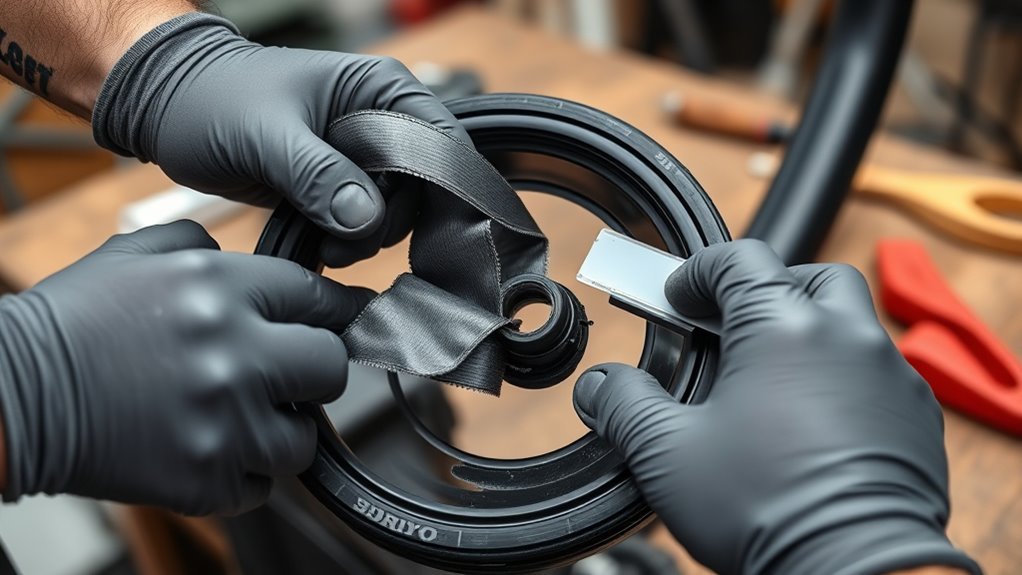
Apply the Tape: Step-by-Step (Valve Hole to Overlap)
Start at the valve hole and position the tape end about 10 cm (4 in) before it so the rim gets full coverage when you wrap around. Peel and press the tape down under tension while rotating the wheel. Pay special attention to spoke holes, smoothing out wrinkles or air bubbles as you go. Finish by overlapping the tape 10 to 15 cm (4 to 6 in), cutting the end at a 45-degree angle, and inspecting the seal before fitting the valve.
Start at Valve
Locate the valve hole and peel back about 10 cm (4 in) of tape. Position the adhesive side down and press it firmly around the valve area with your thumb to form a tight seal. This step sets the correct valve placement and initial tape tension. Keep the tape centered over the hole so the stem sits perpendicular when you insert it. Hold the tape taut with one hand and smooth with the other to avoid wrinkles.
- Keep steady tape tension to prevent bubbles.
- Center tape over the valve for consistent sealing.
- Use a thumb or small roller to press around the hole.
- Inspect for gaps before continuing to unroll.
Continue unrolling while smoothing over spoke holes. Maintain tension and firm contact so the tape bonds cleanly to the rim.
Overlap and Finish
Once you have circled the rim and are nearing the starting point, keep the tape under steady tension. Overlap the end by about 10 to 15 cm so the joint seals well. Cut the tape at a 45-degree angle and press the overlap down firmly to eliminate lifts or air gaps.
Keep rotating the wheel as you smooth the overlap. Use even adhesive contact and avoid wrinkles. Check that the valve hole alignment remains intact and trim any excess beyond the intended overlap.
For finishing touches, run a firm fingertip or a soft tool along the entire tape, especially across the joint. This helps seat the adhesive and confirms there are no pinholes or bubbles before you install the valve and tire.
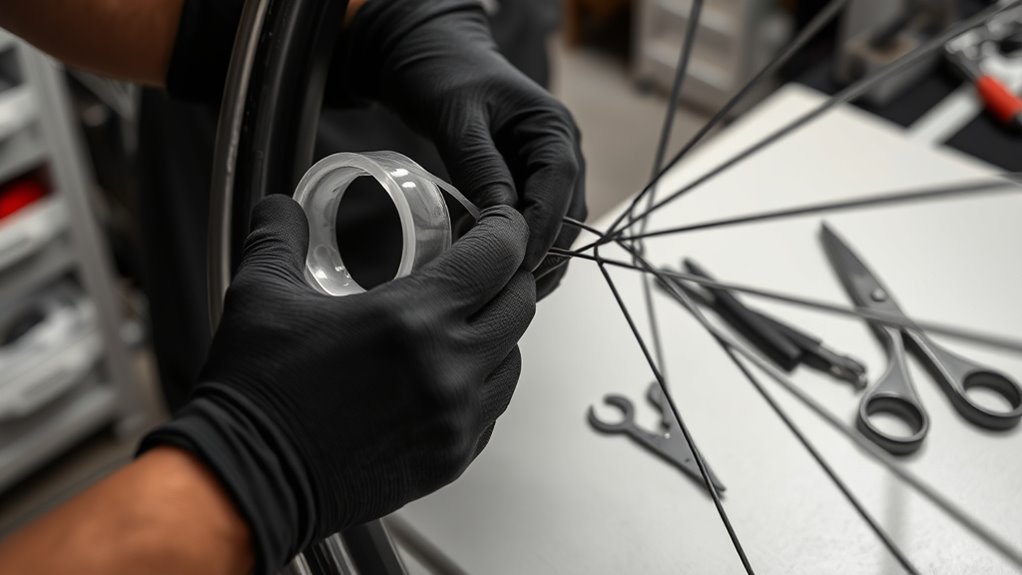
Installing the Tubeless Valve
With the tape smooth and fully pressed down, use a sharp tool like an awl or a small Phillips screwdriver to poke a clean hole through the tape at the valve opening. Keep the hole small so the rubber base of the valve creates a snug seal.
Push the tubeless valve stem through from the outside of the rim. On the inside, the rubber gasket should sit flat against the taped surface with no wrinkles or gaps underneath. Thread the lock nut by hand and then snug it with pliers or a valve wrench. Do not overtighten, as too much force can deform the gasket and actually cause leaks.
Give the valve a gentle wiggle to make sure it does not shift. If air escapes around the base later, slightly tighten the nut or reposition the gasket.
Seating the Tire Bead After Taping
With your tape applied and the valve installed, mount one side of the tire onto the rim. Add the recommended amount of tubeless sealant through the valve or by pouring it in before seating the second bead. Then inflate quickly using a floor pump with a reservoir or an air compressor. A strong initial burst of air helps the bead snap into the rim’s bead hooks.
If the bead will not seat, try removing the valve core to allow faster airflow. You can also try a tubeless-specific inflator or booster pump. Once the bead pops into place on both sides, reinstall the valve core and inflate to the tire’s recommended pressure. Bounce the wheel a few times to help distribute sealant evenly inside.
Leak Testing and Sealant: Soapy Water, Overnight Tube, and Sealant Tips
After you have applied the rim tape, check for leaks by spraying soapy water around the bead and valve area. Watch for bubbles. Any bubbling means you need to re-seat or replace the tape or valve core. Use this leak detection step first, then mount the tire for a quick pressure test. If you are unsure about adhesion, fit a tube and leave it inflated overnight to seat the tape under even pressure.
- Add recommended tubeless sealant during setup to address small, hidden leaks.
- Rotate the wheel to distribute sealant and pressurize beads fully.
- Recheck with soapy water after sealant application and settling.
- Wait several hours after sealing before a hard ride. Monitor regularly after rough use.
Common Mistakes: Wrinkles, Bubbles, Raised Edges, and Fixes
If you feel wrinkles, bubbles, or raised edges while fitting tubeless tape, do not ignore them. They will cause slow leaks or sealant loss. Keep the tape tense while unrolling, smooth with a roller or your fingers, and peel-and-reapply any flawed section while maintaining steady pressure.
For wrinkle prevention, keep consistent tension from start to finish. Stop and reapply any creased area right away. For bubble avoidance, roll outward from the center and press firmly around spoke holes. A small roller or your fingertips will pop and seat trapped air.
For edge sealing, clean the rim thoroughly so there is no grease or old adhesive. Then heat the tape lightly with a hairdryer to help edges conform. If a defect remains, peel back, clean, and reapply with steady tension until the tape lies perfectly flat.
When to Re-Tape or Upgrade Tape Brand (Tests and Cost Considerations)
If you notice persistent bubbles, sealant loss, or repeated air loss during rides, it is time to re-tape or upgrade your rim tape. Bubbles or active leakage mean re-taping now. Slow leaks or aging tape suggest planned replacement. Upgrade to proven brands like Teravail or DT Swiss, or use tape 3 to 5 mm wider than the rim to improve coverage.
- Inspect tape before long rides. Look for wrinkles, gaps, or adhesive failure.
- Perform a soap-bubble or submersion test to find micro-leaks quickly.
- Factor cost: reliable tape reduces future repairs compared to cheap alternatives.
- Track re-taping frequency by hours ridden or annual maintenance cycles.
[Products Worth Considering]

DT SWISS tubeless rim tape

Sealing: Using pressure-sensitive adhesive, strong adhesion and certain flexibility allow it to stick tightly to the rim. High strength, durability, heat resistance, form a long-lasting airtight seal. Satisfy cyclists who have high demand on tubeless tape

Tubeless Design: This rim tape is designed for tubeless bicycle wheels, allowing you to run tubeless tires and enjoy the benefits of lower rolling resistance and reduced risk of flats.
Frequently Asked Questions
How Many Layers of Rim Tape?
One layer usually works fine. Add a second only if the tape material or rim width requires extra thickness, or if you spot imperfections. Choose high-quality tape materials and consider rim width to guarantee full spoke-hole coverage and sealing.
Does Rim Tape Have to Be Perfect?
No. You do not need perfection. Cover the spoke holes and sidewalls properly, test for leaks, and use sealant plus regular inspections to catch flaws. Minor imperfections are fixable.
Do You Overlap Rim Tape?
Yes. Overlap rim tape by about 10 to 15 cm. This covers spoke holes, prevents sealant leaks, and strengthens the seal. Press firmly, check for bubbles, and trim the end at a 45-degree angle.
Conclusion
Your rim tape works like a raincoat for your wheel: thin, simple, but essential. Clean the rim, pick the right width, and press the tape smooth from valve hole to overlap. Test with soapy water, or fit a spare tube overnight, then add sealant. Avoid wrinkles and raised edges. Replace worn tape before it causes problems on the trail. Done right, it keeps you rolling with confidence.
“`
Related Articles

What Does THE P Stand For on a Tire? Full Meaning Explained
I’ll explain what the “P” on a tire really means and why it could change how you choose your next set.
Read More
How to Use a Tubeless Tire Repair Kit: Complete Field Guide
Learn how to fix tubeless tire punctures fast with the right kit, because one small mistake can leave you stranded on the trail.
Read More
How to Tell a Tire’s Diameter: Easy Guide to Reading Tire Size
Want to decode tire sidewall numbers and find the right diameter, but wonder what those hidden digits really mean?
Read More