
Why 4Runner Tires Wear on the Inside Edge
Your 4Runner’s inside-edge tire wear stems primarily from excessive toe-in settings, not camber as you might suspect. When your tires point inward too aggressively, they scrub against pavement during turns, grinding down inner tread blocks while leaving shoulders intact. Worn ball joints, degraded bushings, and loose tie rod ends amplify this geometry collapse by introducing uncontrolled suspension movement. Lift kits compound the issue by disrupting factory alignment specs. You’ll want to check your tread face for a chamfered slope or pronounced step—these diagnostics reveal whether you’re dealing with simple toe deviation or deeper suspension component failure that demands immediate attention before your next set of rubber meets the same fate.
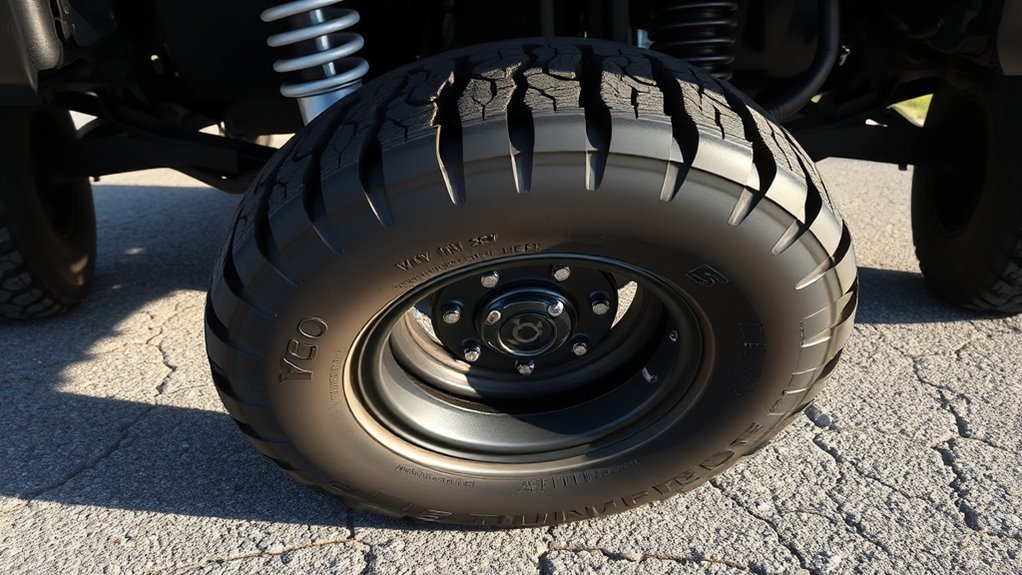
What Inside-Edge Tire Wear Looks Like on Your 4Runner

Inside-edge tire wear on your 4Runner presents as a distinct slope where the inner tread blocks wear considerably faster than the outer shoulder, creating a visible chamfered profile when viewed head-on. You’ll spot these tire wear patterns immediately—run your hand across the tread face and feel the pronounced step from shallow inner grooves to deeper outer rubber. The shoulder blocks remain intact while adjacent ribs have vanished entirely.
These alignment symptoms betray your suspension geometry. Negative camber angles the tire inward, concentrating load on the inner edge during straight-line travel. You’ll notice compromised wet-weather performance first; water evacuation channels disappear prematurely, extending stopping distances and inviting hydroplaning.
Inspect your tires monthly. Park on level ground, turn the wheels full-lock, and examine the inner shoulders where damage hides from casual observation. Document wear progression with photographs—this evidence empowers your negotiations with alignment technicians and protects your investment.
Why Alignment Issues Cause Inner Tread Wear (And How Toe Settings Matter Most)
When you’re chasing down the root cause of your 4Runner’s inner tread wear, you’ll find toe settings—not camber—wearing the blame. Excessive toe-in forces your tires to scrub against the road surface whenever you turn, grinding down the inner edges with every steering input. This tire scrub generates friction that accelerates wear precisely where you’re seeing it.
Your toe angle determines how much your tires point inward or outward when viewed from above. Even slight deviations from factory specifications create compound damage: the inner shoulders bear disproportionate load while scrubbing laterally against pavement. You’ll spot this pattern before catastrophic failure if you inspect regularly.
Correcting alignment demands precision equipment and factory spec adherence. Don’t guess—measure. Adjust toe to manufacturer tolerances, verify both sides match, and road-test immediately. You’ve eliminated the primary wear driver. Monitor pressure as secondary protection, but recognize that proper toe angle delivers the liberation from premature tire replacement you’re seeking.
How Worn Ball Joints and Bushings Speed Up Inner Wear
Although you’ve addressed your toe settings, your 4Runner’s inner tread wear persists—now you’re hunting deeper. Worn ball joints introduce excessive negative camber, forcing your tires to lean inward and grind the inner edges. Meanwhile, bushing deterioration permits uncontrolled suspension movement, amplifying alignment drift and accelerating destruction.
| Component | Failure Mode | Consequence | Action |
|---|---|---|---|
| Ball joints | Excess play | Negative camber increase | Ball joint maintenance |
| Control arm bushings | Compression/cracking | Dynamic toe shift | Immediate replacement |
| Tie rod ends | Loose socket | Erratic tracking | Inspect quarterly |
| Frame mounts | Ovaling | Gross geometry loss | Professional assessment |
You lose handling stability as these components degrade, creating uneven wear patterns that demand premature replacement. Neglect proves expensive: ball joint replacement runs $250–$400, while four shredded tires cost triple. Inspect suspension components every oil change. Replace degraded bushings before they cascade into alignment chaos. Your vigilance liberates your wallet and your 4Runner’s performance.
Do Lift Kits and Suspension Mods Cause Inner Tire Wear?
Why does your 4Runner’s stance look aggressive yet its tires tell a different story? Lift kit effects disrupt your suspension geometry immediately. You’re altering factory angles—control arms, track bars, and steering linkages no longer sit where Toyota engineered them. Negative camber creeps in; tires tilt inward, concentrating load on inner edges. You feel the freedom of added clearance, but your weight distribution shifts upward, amplifying that inner shoulder wear.
You must perform professional alignment after any height increase. Don’t skip this—uncorrected toe and camber settings chew through rubber fast. Inspect modified components regularly: bushings compress differently, control arms bind, and geometry keeps changing as parts settle. You’re not stuck with premature wear. Maintain proper pressure, rotate aggressively, and monitor angles seasonally. Your modifications liberate capability; disciplined maintenance preserves your investment.
Why 4Runner Owners Overinflate (And How It Hides Alignment Wear)
Three pounds over factory spec, and you’re convinced you’ve solved the wandering steering. You’ve fallen for overinflation myths that promise sharper handling but deliver concealed damage. Your 32 psi baseline becomes 38, 40—whatever feels “tighter” in the wheel. You’re not fixing anything; you’re masking alignment wear behind a smaller contact patch.
Here’s how handling misconceptions betray you:
- False stability – Overinflation artificially stiffens sidewalls, simulating precision while camber pulls your tread into oblivion
- Hidden wear patterns – Center tread looks pristine; inner edges dissolve unnoticed until cords show
- Delayed diagnosis – You chase symptoms, not causes, burning months of tire life
- Compounded costs – Alignment issues metastasize while you pump pressure higher
You liberate yourself through measurement, not guesswork. Drop to factory pressure, inspect inner shoulders immediately, and align before your next rotation. Your tires reveal truth only when you stop manipulating the messenger.
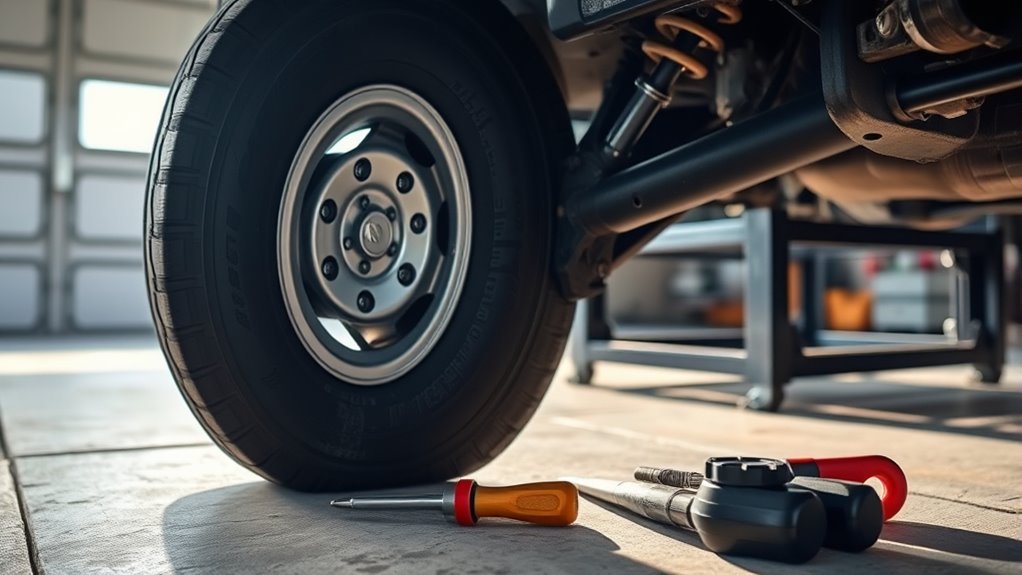
How to Check for Inner Tire Wear and Alignment Issues at Home
Inner shoulder wear announces itself in whispers you’ll miss if you’re not deliberate. Begin your tire inspection by turning the front wheels fully outward—this exposes the inner tread where damage concentrates. Run your palm across the surface; feel for feathering, cupping, or a sharp drop-off at the shoulder edge.
For precise tread analysis, grab a depth gauge. Measure at three points: outer shoulder, center groove, inner shoulder. Document the readings. A variance exceeding 2/32 inch between edges signals camber or toe misalignment demanding immediate correction.
No gauge? Deploy the penny test—insert Lincoln head-first into the inner groove. Visible hair means you’re already compromised.
Check cold pressure against your door placard (typically 32 psi). Overinflation masks wear patterns; deflate to spec before judging alignment health.
Finally, inspect your driving data. Aggressive cornering and overloaded cargo accelerate inner degradation. You’ve now diagnosed without a lift or shop visit.
DIY vs. Shop Alignment: What You Can Actually Fix Yourself
While you can spot alignment trouble from your driveway, the gap between recognizing a problem and correcting it separates weekend mechanics from precision work.
DIY alignment demands DIY Tools—camber gauges, toe plates, and measuring instruments most owners lack. Here’s what you’re actually up against:
Most driveway toolboxes hide a critical gap: you can spot misalignment, but precision correction demands equipment you don’t own and expertise you can’t borrow.
- Toe adjustments sit within reach; a tape measure and string line get you close
- Camber Settings and Caster Issues exceed home Adjustment Limits, demanding professional equipment
- Alignment Accuracy suffers without calibrated machinery; your driveway slopes compromise measurements
- Suspension Geometry requires three-dimensional assessment impossible with basic tools
You can tweak toe angles, but camber and caster corrections need Professional Expertise. Misalignment destroys Tire Longevity—uneven wear compounds handling dangers. After any lift, leveling kit, or bushing replacement, book a shop visit. Your garage diagnosis identifies problems; precision correction preserves rubber and safety. Know your boundaries.
What a 4Runner Alignment Actually Costs (Stock vs. Lifted)
Whether you’ve just finished a weekend lift install or you’re tracking down uneven tread wear on a stock rig, knowing what you’ll pay for proper alignment keeps your maintenance budget grounded in reality.
For stock 4Runners, alignment cost typically runs $75–$100. Lifted models demand more: $100–$150 baseline, plus $50–$100 extra for suspension geometry corrections. You’re paying for specialized equipment and expertise that stock bays simply don’t need.
Consider the math. A $200 lifetime alignment plan pays for itself after two visits—critical when you’re adjusting coilovers, correcting caster, or dialing pinion angle every 5,000 miles. Skipping checks accelerates inside-edge wear and burns through expensive all-terrains faster than you’d imagine.
Not all shops understand lifted 4Runner specifications. Vet your shop. Ask about their experience with modified suspension, camber bolt access, and adjustable upper control arms. Precision now prevents premature tire replacement later. Your rig—and your wallet—deserve that diligence.
How to Prevent Inside-Edge Wear on Your Next Tire Set
Start by checking your alignment, particularly camber and toe angles, as misalignment accelerates inside-edge wear before you’ve logged significant miles. Rotate your tires every 5,000 to 7,500 miles to redistribute load and prevent localized wear patterns from establishing. Maintain manufacturer-specified tire pressure consistently; underinflation concentrates stress on the edges and compounds alignment-related wear.
Check Alignment First
Three warning signs—uneven tread depth, persistent pulling, and premature inner-edge feathering—signal that your 4Runner’s alignment demands immediate attention before you mount that next tire set.
Here’s your diagnostic protocol:
- Inspect suspension components—worn bushings or bent control arms corrupt camber angles, destroying inner shoulders.
- Measure alignment frequency—check every 6,000 miles or after any lift, leveling kit, or hard impact.
- Verify alignment tools—demand laser or camera-based systems at your shop; old string methods lack precision.
- Document pre-replacement angles—capture camber, caster, and toe readings to establish your baseline.
Skip this step, and you’re trapping yourself in a cycle of premature tire death. Master your 4Runner’s geometry first—liberation from inside-edge wear starts with disciplined measurement, not guesswork.
Rotate Tires Regularly
Execute your tire rotation protocol every 5,000 to 7,500 miles to interrupt the wear cycle before it etches permanent damage into your next set. Tire maintenance demands this cadence; you’ll redistribute wear patterns systematically, preventing the front-loaded degradation that plagues 4Runner geometry. Front tires shoulder steering and braking loads, concentrating stress on inside edges. Rotation liberates rubber from fixed positions, equalizing exposure across all four contact patches.
Select your pattern precisely: directional tires demand front-to-back exchanges, while asymmetrical or non-directional sets permit cross-rotation. Execute side-to-side swaps when specifications allow. Post-rotation alignment verification closes the diagnostic loop, catching drift before it compounds. Maintain 32-36 psi consistently—pressure deviations amplify edge-loading. You’re engineering longevity through procedural discipline, transforming predictable failure into distributed resilience.
Monitor Tire Pressure
Check your tire pressure weekly with a calibrated digital gauge, maintaining 32 psi cold to shield your next set from the inside-edge degradation that compromises 4Runner tread life. Tire maintenance demands vigilance against pressure fluctuations that accelerate uneven wear patterns.
Execute this diagnostic protocol:
- Chalk-test your contact patches — apply chalk across the tread, drive 50 feet, and inspect for even stripping to identify pressure imbalances
- Monitor monthly minimums — temperature swings alter inflation 1 psi per 10°F, requiring proactive adjustment
- Deploy TPMS technology — install aftermarket sensors if your 4Runner lacks factory monitoring to catch deviations before they destroy shoulders
- Inspect before departure — long trips amplify underinflation consequences; verify cold pressure when ambient shifts occur
Your liberation from premature tire replacement starts with disciplined pressure discipline.
Frequently Asked Questions
Can Tire Rotation Reverse Existing Inner Edge Damage?
No, tire rotation cannot reverse existing inner edge damage—that wear is permanent. You must replace damaged tires, then commit to tire maintenance and alignment checks every 5,000 miles to liberate yourself from premature wear cycles.
Does 4WD Mode Accelerate Inner Tire Wear Problems?
Yes, 4WD mode accelerates inner edge wear when your tire pressure runs low or your alignment settings push camber too negative. You’ll compound damage faster by ignoring these fundamentals while engaging four-wheel drive regularly.
Will Larger Tires Hide or Worsen Alignment Wear Signs?
Larger tires mask alignment angles issues—you’ll miss early warning signs until damage becomes severe. They also amplify uneven wear patterns when tire pressure isn’t optimized, ultimately accelerating component failure and costing you more freedom.
Is Inner Wear Covered Under Toyota Warranty Policies?
Your tire warranty likely excludes wear coverage for inner-edge wear, as Toyota considers this alignment-related damage rather than manufacturing defect. You’ll need to prove defective materials to claim replacement—standard wear isn’t liberating you from responsibility.
How Soon After Lifting Should Alignment Be Checked?
Like a hawk eyeing its prey, you should check alignment immediately after lifting—before rubber meets road. Your suspension components shift dramatically; alignment adjustments preserve tire life and grant you freedom from premature wear.
Conclusion
Catch creeping camber concerns before they carve costly canals through your rubber. Stay sharp, scrutinize settings, and schedule steady alignments to safeguard your 4Runner’s tread. Remember: proper prevention protects your purchase, preserving performance and pocket. Don’t delay—detect, diagnose, and defend your tires today.
Related Articles

35 Inch Tires on a 4Runner: What Modifications You Need
Understanding the essential modifications for fitting 35-inch tires on your 4Runner can elevate your off-road experience; discover what you need to know.
Read More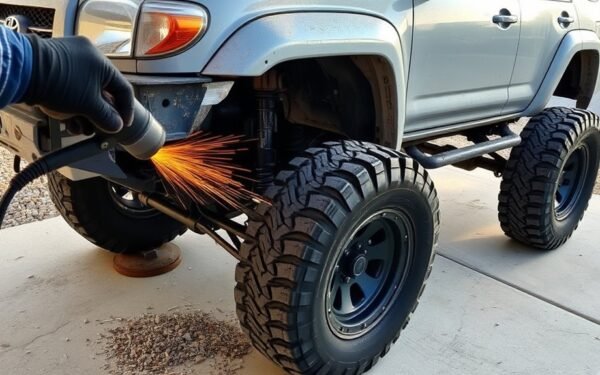
4Runner Fender Trimming for Tire Clearance: A Simple Guide
Discover the one fender modification that lets 33-inch tires fit without a lift—but the cutting technique makes all the difference.
Read More
Can You Run 33 Inch Tires on a 4Runner Without Issues
People often wonder if 33-inch tires can fit a 4Runner smoothly; discover the necessary modifications to ensure a flawless ride.
Read More