
4Runner Tires Overinflated From the Dealer: What to Do

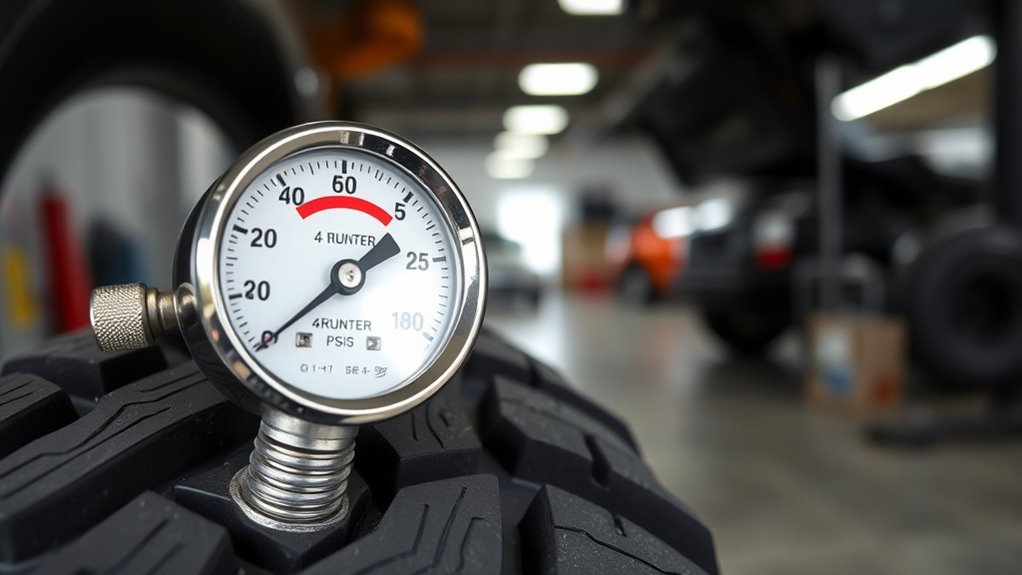
Your 4Runner likely arrived with tires inflated to 45 PSI or higher for shipping, not driving. You’ll find the correct cold pressure—typically 32-36 PSI—on the driver’s door jamb sticker. Grab a quality digital gauge, check the tires when cold, and release air gradually using the valve core until you hit spec. Document any dealer overinflation and notify your service manager. Monthly checks protect your tread life, handling, and safety on wet roads. There’s more you should know about holding dealers accountable and the tools that make this effortless.
Why Your 4Runner’s Tires Arrived Overinflated
Your dealership holds responsibility here. Technicians must deflate tires during pre-delivery inspections, yet this step frequently gets overlooked. You may collect your vehicle with pressures at 45 PSI or higher, compromising handling and accelerating uneven wear patterns.
This isn’t mere inconvenience—it’s a systemic gap between shipping protocols and consumer handoff. You’re entitled to a vehicle configured for actual driving conditions, not cargo logistics. Recognizing this disconnect empowers you to inspect pressures yourself before leaving the lot. Your vigilance closes the accountability loop dealerships too often leave open.
How to Check Your 4Runner’s Tire Pressure
First, locate the manufacturer’s pressure sticker on your driver’s side door jamb to confirm your 4Runner’s specific PSI requirements. Next, you’ll use a quality digital or dial gauge—never rely on gas station air pumps—to measure pressure when your tires are cold, ideally before driving or after sitting for three hours. Check all four tires individually, including your spare, and record each reading to identify any discrepancies that require adjustment.
Locate Pressure Sticker
Before you can verify whether your 4Runner’s tires are properly inflated, you’ll need to locate the manufacturer’s pressure specifications on the driver’s side door frame—specifically, the vertical surface where the door latches when closed. This sticker reveals the precise tire pressure your vehicle requires, typically 30–36 PSI depending on your model year and trim. Don’t trust dealer practices that prioritize transport logistics over your safety. Many dealerships overinflate tires to prevent flat spots during shipping, leaving you with harsh ride quality and accelerated center tread wear. Find that sticker. Memorize those numbers. You’re taking control of your vehicle’s maintenance rather than accepting whatever pressure the dealer left behind. This small act of verification liberates you from assumptions and protects your investment.
Use Quality Gauge
A quality tire pressure gauge isn’t optional equipment—it’s your primary diagnostic tool for separating dealer negligence from manufacturer specification. You need reliable data, not guesswork, to reclaim control of your 4Runner’s tire maintenance.
| Gauge Type | Accuracy | Best Use |
|---|---|---|
| Digital | ±0.5 PSI | Precise pressure monitoring |
| Bourdon-tube | ±1 PSI | Durable, no batteries |
| Pencil-style | ±2-3 PSI | Emergency backup only |
| Stick-type | ±3-4 PSI | Avoid for 4Runner specs |
| Smart/Bluetooth | ±0.5 PSI | Continuous monitoring |
Check your tires cold—driving adds 1-2 PSI from heat. Press the gauge firmly onto the valve stem and read immediately. You’re verifying whether the dealer’s 40+ PSI negligence matches Toyota’s 32-36 PSI specification on your door frame. Don’t trust dealership handiwork; trust your own measurement.
Check All Tires
You’ve got your gauge—now put it to work on every tire, not just the one that looks suspicious. Dealers routinely overinflate inventory for lot storage, so assume all four need pressure calibration before you drive. Pop the valve cap, press the gauge firmly, and read the number. Cold tires deliver accurate readings—heat from driving skews data upward, masking true pressure levels. Document each tire’s reading; you’ll likely find 45 PSI or higher across the board, well above the 32-36 PSI range Toyota specifies on your door jamb label. This systematic tire maintenance prevents uneven wear and handling compromise. Don’t trust a single check—verify all four to reclaim control of your 4Runner’s safety and performance from the factory floor.
How to Read Your 4Runner’s Tire Pressure Sticker
You’ll find your 4Runner’s tire pressure sticker on the driver’s side door jamb, where Toyota specifies the exact cold pressure values for your front and rear tires. Always check your pressure when the tires are cold—meaning the vehicle has been stationary for at least three hours—to match the sticker’s readings accurately. This distinction matters because driving heats the tires and raises pressure, giving you a false measurement that could mask overinflation.
Door Jamb Location
When you open your driver’s side door, you’ll find the tire pressure sticker affixed to the door jamb—this placard contains the manufacturer-specified cold tire pressure for your 4Runner, typically ranging between 32 and 36 PSI, along with the maximum allowable pressure of approximately 51 PSI.
| Door Jamb Element | Tire Maintenance Action |
|---|---|
| Cold pressure value | Check monthly with gauge |
| Maximum PSI limit | Never exceed when inflating |
| Tire size designation | Verify matches your tires |
| Load capacity ratings | Adjust pressure for cargo |
| Manufacture date | Cross-reference with manual |
Dealers frequently overinflate tires for lot storage. You must verify actual pressure against this sticker immediately after purchase. Proper tire maintenance begins here—this data empowers you to reject improper inflation and demand correct pressure before accepting delivery. Your safety depends on this verification.
Cold Pressure Reading
Three numbers on your door jamb sticker demand your attention: the specific cold pressure value for each axle, the maximum PSI ceiling, and the tire size code.
You need to read these figures correctly to reclaim control over your vehicle’s safety. Follow this process:
- Locate the driver’s side door jamb sticker before touching anything
- Identify your front and rear axle cold tire pressure specifications separately
- Note the maximum PSI—never exceed this hard ceiling
- Cross-reference the tire size code with your actual sidewall markings
Temperature creates pressure effects you cannot ignore. For every 10°F rise, your tires gain roughly 1 PSI. Check pressure when cold—three hours parked minimum—using a quality gauge. Dealers routinely overinflate; you’ll spot their errors immediately with this knowledge.
How Overinflation Hurts Your 4Runner
While you might assume firmer tires equal better performance, overinflating your 4Runner’s rubber creates a cascade of problems that compromise both safety and your wallet.
Your tire longevity suffers immediately. Overinflation forces the tire’s center section to bear excessive load, generating rapid center wear that slashes usable tread life by thousands of miles. You’ll replace tires prematurely—liberating your money straight to the dealer’s pockets.
Safety concerns escalate proportionally. Your contact patch shrinks, reducing grip when you need it most. Wet roads become skating rinks. Emergency stops take longer. That 45-55 PSI delivery pressure transforms your capable 4Runner into a liability.
The ride quality degrades too. Every pavement imperfection transmits directly through the chassis, fatiguing you on long drives and compromising control on uneven terrain.
You’re not powerless. Grab a quality pressure gauge. Check monthly. Set cold pressures to factory specifications—typically 32-36 PSI. Reclaim your vehicle’s engineered performance, your safety margin, and your investment.
How to Deflate Your 4Runner’s Tires
Grab your tire pressure gauge—you’re about to reclaim control from overinflation.
Your 4Runner deserves precision tire maintenance, not factory excess. Here’s your pressure adjustment protocol:
- Locate each valve stem and measure current pressure with your gauge—cold tires deliver truth, heat lies.
- Press the valve core using a pen tip or small tool to release air steadily toward 32-36 PSI.
- Pause frequently, re-measure—overshooting forces you to reinflate, wasting precious minutes.
- Verify final pressure across all four tires; uneven distribution compromises handling and accelerates wear.
Temperature swings manipulate readings dramatically—always check before driving when rubber rests. If dealer overinflation proves severe, a portable inflator with integrated gauge becomes your ally, enabling precise bidirectional control. This isn’t mere maintenance; it’s asserting autonomy over your machine’s contact with earth. Master pressure adjustment, and you’ve stripped away another layer of dealership dependency.
When to Visit a Tire Shop for Your 4Runner
Though you’ve mastered the art of deflation in your driveway, certain scenarios demand professional intervention—recognizing these moments separates competent owners from those who compromise their 4Runner’s capability and safety.
When your tire pressure exceeds 36 PSI consistently, visit a tire shop immediately. Professionals deliver precise pressure monitoring techniques that home gauges cannot match, ensuring your tires sit within Toyota’s 32-36 PSI specification. Post-purchase inspections prove essential; dealers routinely overinflate, and you’ll want verification before accumulating mileage.
Employ tire maintenance tips from certified technicians who identify uneven wear patterns and handling irregularities you’ve overlooked. Rough ride characteristics signal overinflation requiring expert evaluation, not guesswork. Services like Discount Tire offer complimentary pressure assessments—utilize these when uncertainty persists. Accurate inflation prevents premature tread degradation and restores factory-engineered handling dynamics. Your liberation from dealer negligence demands professional partnership; recognize when DIY solutions end and expertise begins.
Tools to Fix and Monitor 4Runner Tire Pressure
Professional intervention has its place, but you’re better served owning the right equipment for routine pressure management. Empowering yourself with proper tools transforms tire maintenance from dealership dependency into personal control.
Own your tire maintenance—proper tools transform dealership dependency into personal control.
Your essential toolkit includes:
- Reliable digital tire pressure gauge — Accurately measure your 4Runner’s pressure against the 32-36 PSI specification found on your driver’s door frame
- Portable tire inflator — Adjust overinflation or underinflation anywhere without service center queues
- TPMS maintenance kit — Preserve sensor functionality and guarantee pressure monitoring systems deliver trustworthy readings
- Monthly inspection routine — Check pressure after temperature shifts, as heat expansion affects readings during operation
This equipment liberates you from reactive service visits. You detect deviations immediately, correct them swiftly, and maintain ideal contact patch geometry. Precision pressure monitoring prevents uneven wear patterns and maximizes tire longevity. Own your 4Runner’s rubber interface with the road—don’t outsource basic vigilance.
How Often to Check Your 4Runner’s Tire Pressure

You should check your 4Runner’s tire pressure at least once a month using a reliable digital or manual gauge, ensuring readings are taken when tires are cold for accuracy. Before any significant road trip, you’ll want to conduct a thorough inspection, as overinflation above the recommended 32–36 PSI threshold commonly occurs and compromises handling safety. Seasonal temperature shifts also demand your attention, since pressure drops approximately 1 PSI for every 10°F decrease and requires proactive adjustment to maintain peak performance.
Monthly Pressure Checks
Master your tire maintenance with this systematic approach:
- Check cold pressure before driving, as heat adds 1-2 PSI artificially
- Invest in a quality gauge; accuracy varies dramatically between tools
- Log readings to catch leaks early through pressure monitoring trends
- Adjust immediately when you spot deviation from specifications
Your vigilance prevents uneven wear and handling degradation. Temperature swings and permeation cause gradual loss—you’ll spot these before they compromise safety. Documentation empowers you against warranty disputes and identifies patterns dealers might dismiss. Precision protects your investment.
Pre-Trip Inspections
Monthly diligence forms the foundation, but departure-day verification catches what gradual loss conceals. You must integrate tire safety into your pre trip checklist every single time you load up for adventure. Cold tires deliver accurate readings—check before you drive, not after your first coffee stop. Your 4Runner demands 30–36 PSI depending on year and trim; verify this yourself with a quality gauge, never trusting dealer delivery pressures alone. Overinflation risks hide silently: uneven wear, compromised handling, blowout potential on remote trails where help won’t reach you. You liberate yourself from breakdown vulnerability through five minutes of inspection. Document pressures, adjust as needed, and roll out with confidence. Your journey’s safety rests on this ritual—own it completely.
Seasonal Adjustments
While monthly checks establish your baseline rhythm, seasonal changes demand heightened vigilance—temperature swings of 10°F shift tire pressure roughly 1 PSI, meaning a hard freeze or summer heatwave can push your 4Runner’s tires well outside the 30–36 PSI window before you’ve clocked a thousand miles.
You need a proactive seasonal protocol:
- Pre-season calibration – Check pressure before weather shifts, not after damage occurs
- Winter adjustments – Cold contracts air; you’ll likely need 2-4 PSI above standard to maintain contact patch integrity
- Summer considerations – Heat expands air; verify levels before dawn drives when tires are truly cold
- Load recalibration – Heavy cargo or towing demands immediate post-trip verification, as friction compounds thermal expansion
Your owner’s manual specifies seasonal variants—consult it. Precision here liberates you from blowouts, uneven wear, and compromised handling.
How to Verify Your Dealer’s Tire Pressure Check
How exactly can you trust that your dealer performed a proper tire pressure check before handing over the keys? You can’t. Tire pressure myths persist—many assume dealerships handle PDI flawlessly. Reality proves otherwise. You must verify their work yourself.
Grab a quality gauge and check cold tires against the door jamb specifications. Don’t accept “it looks fine.” Measure. Document discrepancies. You’re entitled to proper inflation; dealership responsibilities include delivering vehicles within manufacturer parameters, not 45 PSI shortcuts that protect their lot storage needs.
Verification beats assumption—grab a gauge, check cold tires against the door jamb, and hold your dealer accountable to manufacturer specs, not lot storage shortcuts.
Spot overinflation? Release air manually. Match spec exactly. Photograph readings. Email your service advisor with evidence. This isn’t nitpicking—it’s holding professionals accountable. Your safety, fuel economy, and tread life depend on precision.
Liberation comes through verification, not blind trust. Own your 4Runner’s maintenance from day one. The dealer’s oversight ends where your vigilance begins.
What to Do When Your Dealer Overinflates Your Tires
Your dealer handed you the keys, but that doesn’t mean your 4Runner’s ready for the road. Overinflation compromises tire maintenance and creates legitimate safety concerns you can’t ignore.
Here’s your action plan:
- Verify immediately — Grab a quality gauge and check all four tires cold before driving. Don’t trust the dealer’s word.
- Deflate precisely — Use the valve stem cap or a manual release tool to bleed air gradually. Hit 32-36 PSI, rechecking often.
- Document everything — Photograph the high readings, note your corrections, and email the service manager. Hold them accountable for sloppy pre-delivery work.
- Monitor relentlessly — Check pressures monthly and before road trips. Set phone reminders. Your vigilance prevents repeat failures.
You’re not powerless here. Proper inflation protects your tread life, ride quality, and handling integrity. Demand excellence from your dealer, then maintain it yourself.
Frequently Asked Questions
Why Would a Dealership Overinflate Tires?
Dealerships overinflate your tire pressure to prevent flat spots during transport and avoid liability risks, though this reflects sloppy dealership practices rather than manufacturer standards—you must verify pressures yourself before accepting delivery.
Conclusion
Don’t let dealer overinflation roll you over. Remember: a chain is only as strong as its weakest link, and your tires are the critical link between your 4Runner and the road. You’ve got the knowledge, tools, and specifications to maintain precise pressure. Check monthly, verify dealer work, and keep that placard visible. Your diligence protects performance, safety, and tire longevity—proving that informed ownership beats blind trust every single mile.
Related Articles

4Runner Limited Tire Size: 20 Inch Wheel Specifications
Wondering about the 2025 4Runner Limited's tire specifications and how they impact performance? Discover essential details that could enhance your driving experience.
Read More
Toyota 4Runner TRD Pro Tire Size Across Model Years
A deep dive into the evolving tire sizes of the Toyota 4Runner TRD Pro reveals crucial insights for performance enthusiasts. Discover what’s next!
Read More
Why 4Runner Tires Wear on the Inside Edge
Here's why your 4Runner's tires are wearing on the inside edge—and the fix might surprise you.
Read More