
How to Use a Tire Air Compressor: Quick Guide for Proper Inflation
Check your vehicle’s recommended PSI on the door jamb or owner’s manual, then gather a tire gauge, air compressor, and valve cap. With the tires cold, remove the cap, attach the chuck firmly, and set your target pressure if your inflator allows it. Inflate slowly, watching the gauge until you hit the correct PSI, then disconnect, replace the cap, and check for leaks with soapy water—there’s more to keeping pressures right over time.
Key Takeaways
- Check the recommended PSI on the door jamb sticker or owner’s manual before inflating.
- Use a compressor, tire gauge, and secure valve stem connection for an airtight seal.
- Inflate the tire in short bursts, monitoring pressure closely to avoid overfilling.
- Stop at the target PSI, then disconnect the hose and replace the valve cap tightly.
- Recheck pressure when tires are cold and look for leaks with soapy water if needed.
Check the Recommended PSI
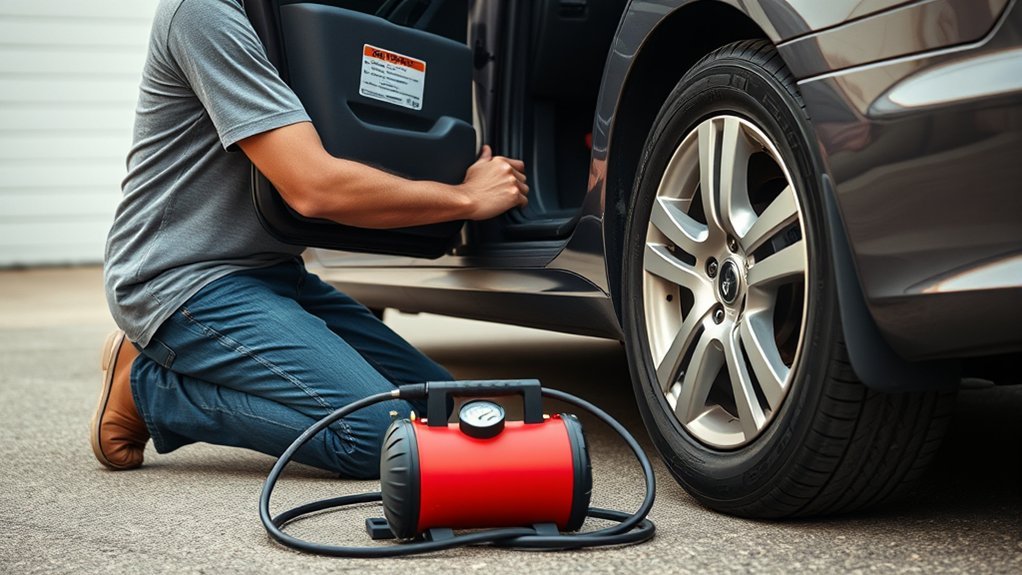
Before you inflate a tire, check the recommended PSI in your owner’s manual or on the sticker in the driver’s side door jamb. That spec tells you the vehicle’s recommended PSI (pounds per square inch) for your exact load and setup, so you can reach the correct tire pressure without guesswork. Passenger cars often need 30-35 PSI, SUVs and light trucks 35-45 PSI, and heavy-duty trucks 50-80 PSI, depending on cargo. Because pressure drops about 1-2 PSI for every 10°F temperature change, check the recommended psi when tires are cold for the most accurate reading. Use a tire pressure gauge to verify each tire before tire inflation. Holding proper tire pressure supports stable handling, better fuel economy, and longer tread life. Additionally, consistent tire pressure checks can enhance overall vehicle performance, making this part of routine tire maintenance, not a once-a-year chore, so you keep control over your vehicle and avoid preventable wear.
Gather Your Tire Inflation Tools
Before you start inflating, gather a reliable air compressor that matches your vehicle’s voltage, a tire pressure gauge accurate to ±1 PSI, and a tire chuck that seals securely on the valve stem. Keep safety glasses and gloves on hand to protect yourself during compressor use and tire handling. You’ll also need a valve stem cap nearby so you can reinstall it immediately after inflation. Additionally, ensure your compressor has an automatic shut-off feature to prevent overinflation and ensure safety.
Essential Inflation Tools
Gather your inflation tools before you start: an air compressor, a tire chuck, a calibrated tire pressure gauge, safety glasses, and gloves. Plug the air compressor into the correct outlet; smaller units use two-prong plugs, while larger models need a three-prong outlet with matching voltage. Attach the tire chuck firmly to the valve stem so the tire inflator seals and air flows without leakage. Use the calibrated tire pressure gauge often to verify accurate pressure as you inflate tires. Watch the gauge, stop at the target, and avoid overfilling. Safety glasses and gloves help guard your hands and eyes from debris and moving parts. With the right tools, you control the process, maintain proper inflation, and keep your vehicle ready for the road.
Safety Gear Checklist
A complete inflation kit keeps the job safe and efficient. Before you start, gather your air compressor, tire chuck, and pressure gauge so you can reach the target pressure fast and keep each tire properly inflated. Wear safety glasses to shield your eyes from dust or debris, and use gloves to improve grip and protect your hands from hot surfaces or sharp edges. Keep a valve cap within reach so you can reseal the valve immediately after inflation and block contamination. Check that your air compressor has a reliable power source and matches the required voltage before you connect it. With the right gear ready, you control the process, reduce risk, and move with confidence.
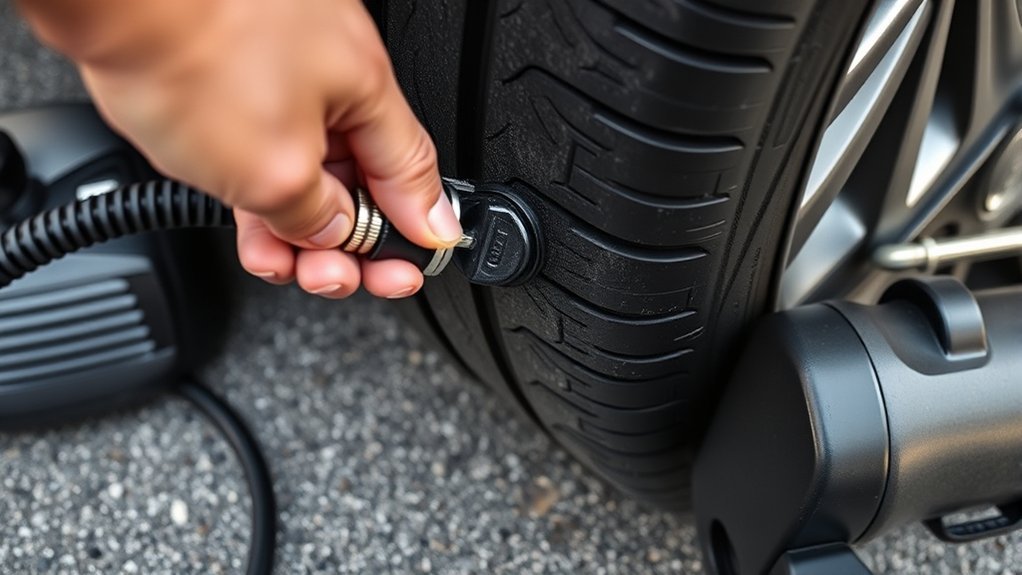
Prepare the Tire Valve Stem
Remove the valve cap slowly and keep it in a secure place so you don’t lose it or bleed off unnecessary air. Inspect the valve stem for dirt, cracks, or other damage that could prevent a proper seal. Then attach the compressor nozzle firmly to the stem so you get a clean, airtight connection before inflation. Make sure to check the temporary seals to ensure they hold up during inflation.
Remove Valve Cap
Locate the valve stem on the tire, which is usually a small cylindrical protrusion on the wheel, and make sure it’s clean and free of debris before you begin. Then remove the valve cap only when you’re ready to attach the inflator, limiting air escaping and preserving pressure. Keep the cap secure so you don’t lose it.
| Step | Action | Purpose |
|---|---|---|
| 1 | Remove the valve cap | Expose the valve stem |
| 2 | Attach the inflator | Create a tight seal |
| 3 | Reattach the valve cap | Protect from contamination |
Align the tire inflator, secure the hose, and connect it firmly to the valve stem. Work efficiently and deliberately; that gives you control and keeps the task simple. After inflation, reattach the valve cap tightly to shield the valve from dust and moisture.
Inspect Stem Condition
With the valve cap off, inspect the tire valve stem for cracks, corrosion, leaks, or other wear before you attach the inflator. Look closely for damage that could trigger air loss during inflation. If the cap wasn’t secure, check the stem opening for dirt or moisture, then clean debris away with a dry cloth or brush. Keep the removed cap in a safe place so you can secure the cap later without delay. Confirm the tire valve stem feels solid and threads aren’t stripped. If you see swelling, bends, or pitting, replace the stem before inflating; a worn stem won’t hold pressure well. This quick inspection protects your freedom from roadside failure and supports ideal air retention, so you can inflate with confidence and move on.
Secure Clean Connection
Check the valve stem again to make sure it’s clean, dry, and free of visible damage before you connect the inflator. Remove the cap carefully so you don’t lose it or dump air. | Step | Action |
| — | — |
|---|---|
| 1 | Clean the valve area |
| 2 | Inspect for leaks |
| 3 | Fit the inflator nozzle |
| 4 | Secure the connection |
| 5 | Replace the cap |
A secure, clean valve connection keeps air where it belongs, inside your tire. If dirt enters the stem, it can contaminate the seal and weaken inflation performance. If you see cracks, bends, or bubbling, replace the valve before proceeding. Press the inflator nozzle straight onto the valve and tighten it firmly until the seal feels airtight. That direct fit helps you preserve pressure, reduce loss, and inflate with control. After you finish, replace the cap to block dust and debris and protect the valve for the next use.
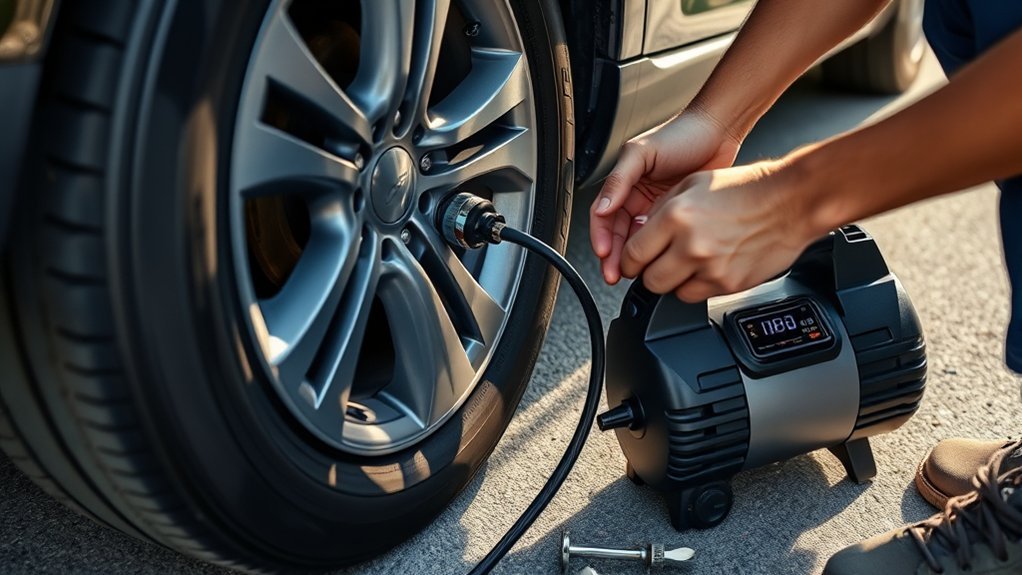
Connect the Air Compressor
Plug the air compressor into a suitable outlet before you begin; smaller units typically use a two-prong plug, while larger models require a three-prong connection. Place the air compressor close to the tire so you can work without strain, then attach the air hose firmly to the unit. Remove the valve cap from the tire’s valve stem carefully and keep it within reach. Next, connect the inflator nozzle to the valve stem and press it on until you feel a secure connection. That tight seal helps you control inflation and protects tire pressure from unwanted loss. After the hookup, check for leaks by listening for hissing around the connection points. If you hear air escaping, adjust the nozzle and reseat it until the sound stops. This step keeps your tires ready for the next phase and lets you move forward with confidence, precision, and freedom. Additionally, using an inflator with auto shut-off ensures you won’t overinflate your tires, maintaining optimal pressure.
Set the Target PSI
Before you inflate, set the target PSI from your vehicle owner’s manual or the driver’s side door jamb sticker so you’re using the pressure specified for your tire and vehicle type. This is how you set the target psi with confidence and protect performance. Match the recommended tire pressure to your vehicle class: passenger cars usually need 30–35 PSI, while SUVs often need 35–45 PSI. If your tire inflators let you enter a desired pressure, program it now and let the unit handle shutoff. Work with cold tires, because heat can raise or lower readings by 1–2 PSI for every 10°F shift. Then check tire pressure with calibrated tire pressure gauges to verify an accurate reading. Repeat the check if needed until the tire sits within ±1 PSI of the target. When you trust the numbers, you move with freedom, not guesswork, and your ride stays stable, efficient, and ready for the road. Additionally, understanding recommended tire sizes can help ensure you’re using the correct specifications for your specific vehicle model.
Begin Inflating the Tire
Attach the compressor chuck securely to the valve stem, and make sure it seals tightly. Start the compressor and begin inflation. Watch the pressure gauge rise until it reaches the target PSI. Ensure you have adequate safety features in place to prevent accidents during the inflation process.
Start Compressor
Once the hose is securely attached to the tire’s valve stem, make sure the compressor is plugged into a suitable outlet with the correct voltage and set the target pressure on the inflator if it has a digital display or regulator. Then press Start or Power to start compressor and let the air hose work. Watch the pressure gauge, because it tells you when to stop. | Action | Result |
| — | — |
|---|---|
| Plug in correctly | Safe operation |
| Set desired tire pressure | Accurate inflation |
| Start compressor | Air flows |
| Monitor pressure gauge | Prevent overfill |
| Replace the valve cap | Hold pressure |
Keep the valve stem sealed, inflate your tires steadily, and stop at the desired tire pressure. Detach the hose, then replace the valve cap securely to preserve freedom from leaks and repeat checks.
Attach Chuck Securely
With the compressor running and the target pressure set, secure the chuck to the tire’s valve stem by pressing it on or twisting it firmly until it clicks or seats fully. Before you attach chuck securely, check that the valve stem is clean and free of debris so the seal holds. A tight fit helps avoid air escaping and lets the air compressor work efficiently. If you use a screw-on nozzle, twist it firmly; if you use a clip-on chuck, press down until it locks. Watch the pressure gauge as you inflate and stop at the recommended PSI listed in your owner’s manual or door sticker. When you finish, detach the chuck quickly to minimize air loss, then replace the valve cap immediately to protect pressure.
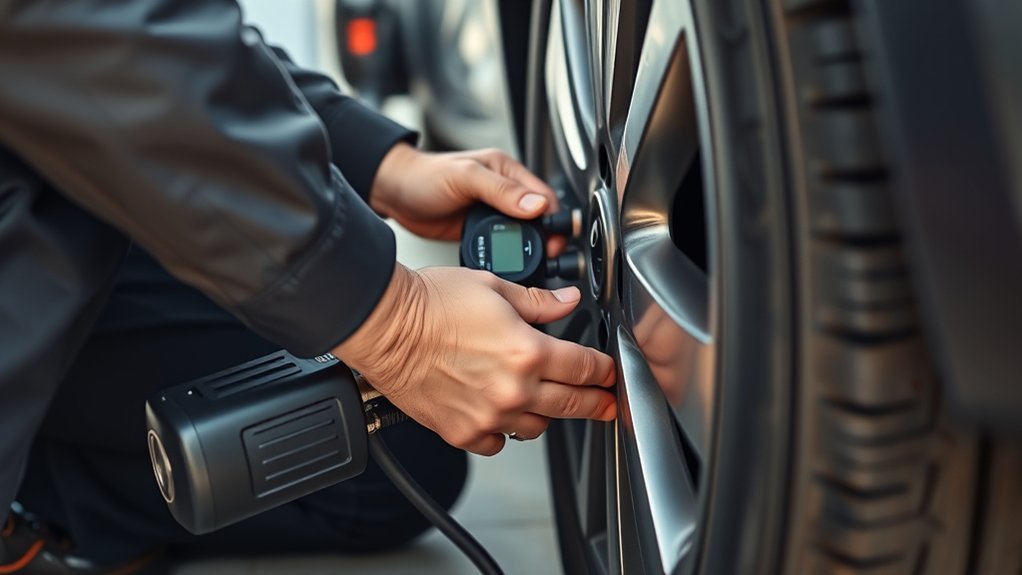
Watch Pressure Rise
Start the compressor and watch the pressure gauge climb as the tire inflates. Keep the inflator nozzle sealed on the valve stem so air doesn’t escape. Use the air compressor’s built-in pressure gauge, and make tire pressure checks often as the reading rises toward the recommended PSI. Inflate gradually; quick bursts can overshoot the target and stress the casing. If your unit has an automatic shut-off, let it stop the flow once it reaches set pressure. If not, pause and check tire pressure manually to stay accurate. Tires can lose air naturally, so adjust as needed. When the gauge shows the correct PSI, remove the hose carefully from the valve stem and replace the cap immediately. This protects the seal and helps maintain tire integrity.
Stop at the Correct PSI
Aim for the exact tire pressure your vehicle specifies, using the owner’s manual or the driver-side door jamb sticker as your target. Before you use the tire inflator, check tire pressure with a reliable gauge so you know the starting point. Inflate slowly and watch the reading until it matches the recommended pressure, usually 30-80 PSI depending on your vehicle. If your inflator has automatic shut-off, set the correct PSI and let it stop there; that helps avoid losing control of the final fill and prevents you from overinflate the tire. Keep the tire cold for the most accurate measurement, since driving heats air and skews the result. Recheck pressure after inflation and confirm accuracy within ±1 PSI. If you go past the target, release a small amount of air with the gauge until you’re back at spec. Hitting the correct PSI protects handling, wear, and ideal tire performance, and it keeps you free from guesswork. Additionally, maintaining proper tire pressure can enhance fuel economy and overall vehicle efficiency.
Disconnect the Hose and Replace the Cap
Once you’ve confirmed the tire is at the correct PSI, carefully disconnect the hose from the valve stem to avoid bleeding off air. Use a tire pressure gauge if you need to verify the reading before you disconnect the hose. If you notice excess air, release it with the gauge or by briefly pressing the valve core, then recheck the correct PSI. After you remove the hose, immediately replace the valve stem cap and tighten it snugly by hand. This cap seals the valve, blocks dirt and moisture, and helps maintain tire pressure over time. A good valve stem cap isn’t decorative; it’s a functional barrier that supports a stable system. Keep the cap clean and in good condition so it can protect the valve and prevent air loss. When you replace the valve stem cap, you lock in your work and preserve the inflation you set. Regularly checking tire pressure can enhance your tire’s lifespan and performance.
Check for Leaks After Inflation
With the hose removed and the valve cap secured, check the tire for leaks right away. Apply soapy water around the valve stem and tire bead, then inspect for bubbles. Any bubbling means air loss, and you should address it before driving. Listen near the tire and valve stem for a hissing noise, which often points to escaping air. Use your tire inflator’s gauge, or a separate gauge, to check tire pressure after inflation. If the reading drops noticeably over a short period, you likely have a slow leak that needs repair. Make sure you secure the cap tightly, because a loose cap can also let air escape. If your checks show a leak, don’t ignore it or keep topping off the tire. Contact a professional for repair or replacement so you keep control over your vehicle and protect performance, safety, and your own freedom on the road. Additionally, having a reliable spare tire kit can make addressing these issues much easier during emergencies.
Maintain Tire Pressure After Inflation
After you inflate a tire, check its pressure at least once a month and before long trips, since tires can lose about 1.45 PSI per month and another 1–2 PSI for every 10°F change in temperature. Use a reliable gauge to check tire pressure and set each tire to the desired PSI, not the sidewall maximum. Keep a tire inflator handy, but store it in a cool, dry place and inspect it regularly so it’s ready when you need it. Replace the valve stem cap firmly after every fill; it blocks dust and moisture that can destabilize pressure. If your vehicle has TPMS, use it to monitor the pressure in real time, but don’t treat it as a substitute for regular checks. Schedule professional inspections periodically to catch slow leaks or valve faults early. These simple habits help you maintain tire pressure, preserve handling, and keep your vehicle free to move safely. Additionally, consider the importance of tire rotation to ensure even tread wear and extend tire lifespan.
Frequently Asked Questions
How to Properly Use a Tire Inflator?
You use a tire inflator by matching PSI to the door-jamb spec, then checking valve integrity before attaching the nozzle. Set the target pressure, watch understanding pressure gauges, and stop at the exact PSI. Follow compressor safety precautions, avoid common inflation mistakes, and value portable compressor benefits for quick tire maintenance tips. When choosing the right inflator, account for seasonal tire adjustments, then replace the cap securely.
What PSI Should My Mini Cooper Tires Be?
Your Mini Cooper tires should usually sit around 30–35 PSI, but you’ve got to verify the exact tire pressure on the driver’s door jamb or owner’s manual. Use a pressure gauge when the tires’re cold to get ideal inflation. Correct tire maintenance improves driving performance, boosts fuel efficiency, and supports safety tips on every trip. Don’t guess—check each tire regularly, especially before long drives or changing loads.
What Tire Pressure Should My Kia Carnival Be At?
Your Kia Carnival’s tire pressure should usually sit between 33 and 36 PSI, like a compass keeping your ride steady. You should check the driver’s door jamb for exact specs, then use a pressure gauge when the tires are cold for ideal inflation. Watch seasonal changes, because pressure drops in cold weather. These safety tips support regular maintenance checks, improve fuel efficiency, and help extend tire lifespan.
How Do You Use an Air Compressor Step by Step?
You connect the compressor, set pressure, attach the hose, and inflate until you hit target PSI. Check tire pressure basics first, then choose from Air compressor types; portable compressor advantages help on the road. Watch tire pressure monitoring, follow inflation safety precautions, and avoid common inflation mistakes. Do seasonal tire checks, then shut off, bleed the line, and store it. Regular compressor maintenance tips keep you free from downtime.
Conclusion
Now you can use your tire air compressor with confidence and keep your tires at the recommended PSI. By checking pressure, attaching the hose correctly, and stopping at the target PSI, you avoid underinflation and overinflation, both of which can wear tires faster than you’d ever want. Finish by replacing the valve cap and checking for leaks. With a few careful steps, you’ll maintain safer handling, better fuel efficiency, and longer tire life.
Related Articles
How to Seal a Tire: Repair Methods From Plugs to Sealants
When should you use a plug, patch, or sealant to seal a tire safely?
Read More
How to Reseal a Tire Bead: Step-by-Step Fix for Leaking Beads
Fix a leaking tire bead fast with these simple steps, but there’s one critical detail that could make the repair finally hold.
Read More
How to Get Tire Marks Off a Driveway: Effective Cleaning Tips
A simple method can erase stubborn tire marks from your driveway, but the best results depend on one surprising step.
Read More