
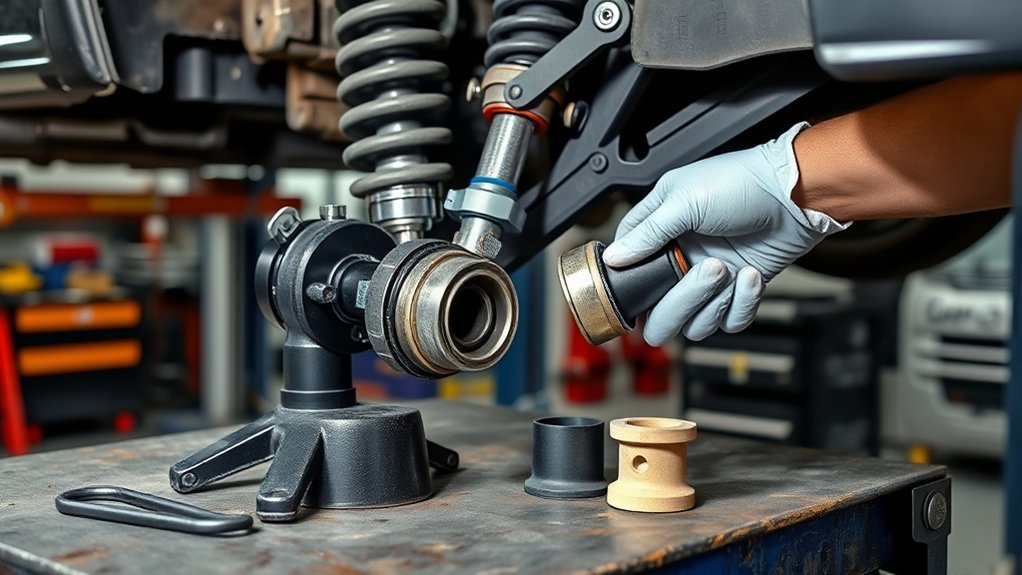
Replacing lower control arm bushings is a manageable suspension repair when you have the correct tools, the vehicle-specific service procedure, and a clear plan for the type of bushing fitted to your control arm. The safest method is usually to remove the arm and use a suitable press or bushing tool. Some polyurethane kits reuse the original outer shell and allow controlled heat to release the bonded rubber, while other bushings must be pressed out completely. Always confirm the replacement-kit instructions before you start.
Quick Answer
To replace lower control arm bushings, safely support the vehicle, remove the control arm according to the service manual, and press or otherwise remove the old bushings using the method required by their design. Clean and inspect the arm, install the new bushings squarely with the specified lubricant, reinstall the arm, torque the hardware correctly, and check wheel alignment.
Key Takeaways
- Check the service manual and bushing-kit instructions first because removal, orientation, fasteners, and torque values vary by vehicle.
- Use properly rated stands or a vehicle lift at the approved lift points; never depend on a hydraulic jack alone while working underneath the vehicle.
- A press or dedicated bushing tool is the preferred removal method for many sleeved bushings. Heat is appropriate only when the bushing manufacturer specifically allows it.
- Clean and inspect the control arm before installation, but do not grind away enough metal to enlarge or damage the bushing bore.
- Install replacement bushings in the specified orientation and use only the lubricant recommended or supplied by the bushing manufacturer.
- Torque suspension hardware according to the factory procedure and arrange a wheel-alignment check after the repair.
At a Glance
| Time Required | Roughly 2–4+ hours for many DIY jobs; corrosion, press work, suspension design, and seized hardware can make it substantially longer. |
| Difficulty | Intermediate to advanced DIY. Press work, suspension preload, seized fasteners, or unusual suspension layouts may justify professional service. |
| Tools Needed | Floor jack or lift, rated jack stands, wheel chocks, hand tools, torque wrench, penetrating oil, bushing press/removal kit or hydraulic press, suitable support cups, wire brush, cleaner, and kit-specified lubricant. |
| Cost | Varies widely by vehicle and bushing design. Budget for the bushing kit plus possible press service, replacement hardware, and a wheel alignment. |
Warning: A lower control arm may interact with a loaded coil spring, torsion bar, air spring, or other suspension component. Do not loosen or remove the arm until you have checked the factory service procedure and safely controlled any stored spring force. Work on a hard, level surface, use the vehicle’s approved lifting points, and never work beneath a vehicle supported only by a hydraulic jack.
Confirm the Lower Control Arm Bushings Need Replacement
Before taking the suspension apart, make sure the bushings are actually the source of the problem. Worn lower control arm bushings can contribute to clunks, wandering, unstable braking, steering changes, irregular tire wear, or excessive movement of the control arm. However, similar symptoms can come from ball joints, tie rods, strut mounts, wheel bearings, tires, or other suspension parts.
Inspect the bushings for separated rubber, major cracks, torn material, a sleeve that has shifted out of position, obvious deterioration, or abnormal movement while the suspension is checked using an appropriate inspection method.
If the ball joint is also worn, the arm is bent, the bushing bore is damaged, or a complete replacement arm is inexpensive for your vehicle, replacing the entire control arm can be more practical than pressing individual bushings in and out.
Note: Bushings are not all constructed the same way. A bonded rubber bushing, a polyurethane insert that reuses the factory shell, and a polyurethane bushing supplied with a new shell can require different removal and installation procedures.
Tools for Lower Control Arm Bushing Replacement
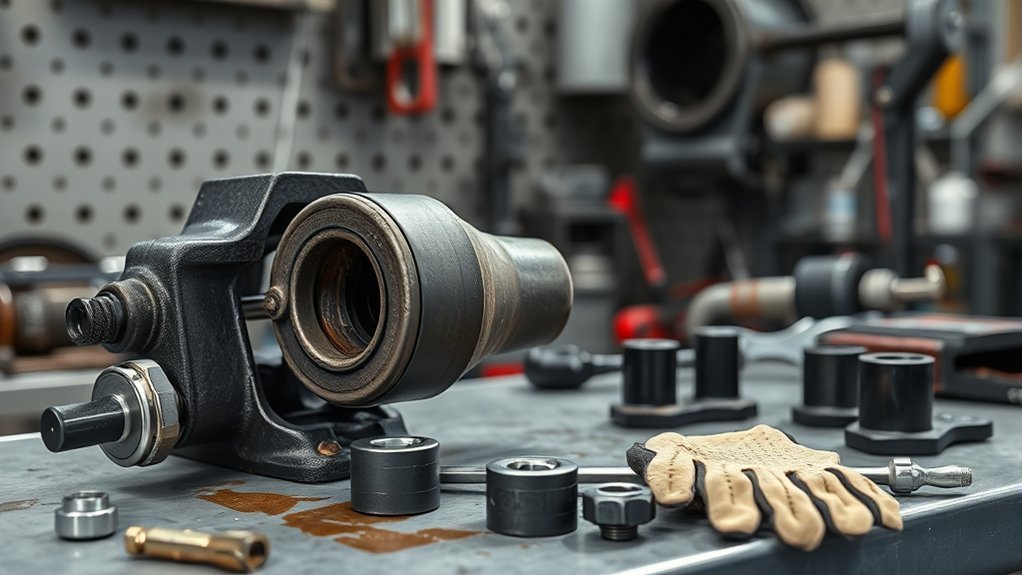
For most lower control arm bushing replacement jobs, start with a floor jack or suitable vehicle lift, correctly rated jack stands, wheel chocks, sockets and wrenches, penetrating oil, a breaker bar, and a calibrated torque wrench.
A compatible bushing removal tool or hydraulic press with correctly sized drivers and receiver cups is the preferred setup for many factory-style bushings. The tooling should press on the correct part of the bushing while supporting the control arm close to the bushing bore. This is especially important with stamped-steel arms that can bend if they are poorly supported.
A drill, suitable saw blade, hammer, punch, or chisel may help with a badly seized bushing after the rubber center has been removed, but these are secondary methods rather than a substitute for the correct press tooling.
If your polyurethane kit specifically instructs you to reuse the original metal shell, controlled heat may be permitted to release the bonded factory rubber. Follow the kit instructions exactly rather than assuming every bushing should be heated.
For cleaning, have degreaser or an appropriate parts cleaner, a wire brush, shop towels or lint-free cloths, and eye and hand protection ready. If the replacement bushing requires grease, use the lubricant supplied or specified by its manufacturer.
[Products Worth Considering]

The Ziopetru adjustable magnetic wheel alignment tool helps you check and restore camber and caster positioning after removing and reinstalling undercarriage components. With a clear leveling/bubble measurement system and an easy zeroing adjustment knob, it supports precise horizontal angle checking. The strong magnetic base mounts to metal surfaces for convenient use at home on cars, motorcycles, trucks, vans, and SUVs.

This 1/2-inch drive breaker bar delivers powerful leverage for loosening and tightening stubborn lug nuts and automotive fasteners. The 180-degree flex head helps you reach tight spaces at the angle you need, making tire and brake jobs easier. A spring-loaded ball detent design holds 1/2-inch sockets securely while the chrome-moly head provides durable strength for everyday use.

ROBLOCK rubber wheel chocks help prevent vehicle rolling with a non-slip grip for trucks, trailers, RVs, and small aircraft. The chocks include three yellow reflective strips to improve visibility in low-light parking and outdoor use. Lightweight and portable design makes them easy to place in front of or behind a tire during camping, loading, or maintenance.
Prepare the Vehicle and Remove the Control Arm
Park on a hard, level surface, apply the parking brake as appropriate for the repair, and chock the wheels that remain on the ground. Loosen the wheel fasteners as required before raising the vehicle. Lift only at the manufacturer’s approved points and support the vehicle securely with properly rated stands or a professional lift.
Remove the wheel and inspect the suspension layout before loosening the control arm. Check for brake hoses, ABS sensor wiring, ride-height sensors, sway-bar links, or other components that could be stretched or damaged as the arm moves.
Apply penetrating oil to corroded control-arm fasteners in advance. If the vehicle uses eccentric cam bolts or alignment washers at a control-arm pivot, mark their original positions before removal. These marks can help with reassembly, although they do not replace a proper alignment afterward.
Support the steering knuckle or related suspension components as required so their weight does not pull on a brake hose or wiring harness. Disconnect the ball joint, sway-bar link, shock, or other components only in the sequence specified for your vehicle.
Warning: Do not improvise a spring-release procedure. If a coil spring bears on the lower control arm, a torsion bar loads the arm, or the vehicle uses air or self-leveling suspension, use the factory unloading procedure and the required special tools before removing suspension fasteners.
Remove the Lower Control Arm Bushings
Once the lower control arm is safely removed, identify exactly what must come out. Some replacement bushings include a new outer metal shell, while some polyurethane kits are designed to fit inside the original factory shell. Removing a shell that the replacement kit requires you to keep can ruin the installation.
[Products Worth Considering]

The 22800 wheel stud installer makes replacing wheel studs quick and secure, saving time and effort during tire service. It uses a ratchet or impact wrench to pull new studs firmly into place, helping when existing studs are too long. Compatible with most automotive wheels and light-duty truck wheel studs, it’s designed for easy, tool-assisted installation.

This universal wheel alignment tool helps you accurately restore tire tilt angles after tire or suspension repairs using an adjustable camber gauge. It features a powerful magnetic base that firmly attaches to brake rotors for stationary, slip-free readings, improving consistency during measurement. Built from durable PC plastic, it resists wear and corrosion and is compact enough for car, truck, RV, and motorcycle alignment tasks.
Lock the Maxchock X-style wheel stabilizers between tandem tires to reduce sway and keep your RV travel trailer secure while camping. The adjustable design fits a wide range of wheel gaps, and included hardware lets you install quickly with a power drill. Built from heavy-gauge steel with zinc plating, the chocks include locks and an organizer case for safer, more convenient use.
Bushing Removal Methods
The best removal method depends on the bushing design and the tools available. A properly supported press or dedicated bushing tool is normally the cleanest choice when the complete factory bushing and shell must be removed.
| Method | Best Use | Main Risk |
|---|---|---|
| Bushing tool or press | Removing or installing sleeved bushings with proper adapters | Bending the arm or cocking the bushing if it is poorly supported |
| Controlled light heat | Only where the bushing-kit instructions permit heat to release bonded rubber while retaining the factory shell | Fire, fumes, damaged coatings, overheated parts, or nearby component damage |
| Drilling rubber | Creating relief around a stubborn rubber center before removing it | Drill-bit walk or bore damage |
| Careful shell cut | Relieving a remaining metal shell after the center is out | Cutting into or gouging the control-arm bore |
| Hammer and punch | Light assistance after the bushing or shell has been properly relieved | Distorting the arm, sleeve, or bore |
Press Out a Sleeved Bushing
Support the control arm immediately around the bushing eye and choose a receiver cup large enough for the old bushing or shell to move into. On the pressing side, use a driver sized for the part that must move without contacting the control arm itself.
Keep the arm square to the press and increase pressure gradually. Stop if the bushing begins to cock sideways, the arm starts bending, or the required force rises unexpectedly. Recheck the adapter sizes and removal direction before applying more force.
If the control arm has open flanges or a U-shaped section around the bushing, use the appropriate spacer or internal support required by the bushing instructions. This prevents the sides of the arm from collapsing toward each other during pressing.
Heat And Cut Technique
Do not treat a torch as the default bushing-removal tool. First determine whether the replacement kit requires the factory outer shell to remain in place.
For certain polyurethane kits that reuse the original shell, the manufacturer may instruct you to apply light, even heat around the outside of the control arm just until the rubber bond releases. Do not deliberately ignite or burn the rubber. Stop if the rubber flames, and keep heat away from fuel components, brake hoses, wiring, boots, undercoating, and other heat-sensitive parts.
After the inner sleeve and rubber have been removed, allow the parts to cool before cleaning. If the old outer shell must also come out and pressing alone is not successful, a carefully made relief cut can help collapse the shell inward. Cut only through the old shell and stop before touching the control-arm bore.
Pro Tip: Before pressing anything, compare the new kit with the old bushing and read the installation sheet. Confirm whether the factory shell, sleeves, washers, or cam hardware must be reused. That one check can prevent an otherwise avoidable control-arm replacement.
Clean the Control Arm Before Installation
Before installing new bushings, clean the control arm thoroughly so the replacement can seat correctly. Remove loose rubber, corrosion, grease, burrs, and debris from the bushing bore or reusable shell without removing unnecessary base metal.
| Step | Tool | Purpose |
|---|---|---|
| Degrease | Appropriate parts cleaner or degreaser | Remove oil and old lubricant |
| Scrub | Wire brush | Remove residue and loose corrosion |
| Wipe | Lint-free cloth | Clear remaining contaminants |
| Dry | Air time | Leave the installation surface clean and dry where required |
| Inspect | Visual and dimensional check as applicable | Find cracks, distortion, corrosion, or bore damage before assembly |
Check the control arm for cracks, bends, enlarged or oval bushing bores, damaged welds, heavy corrosion, and distorted flanges. If the bushing previously moved in the arm or the bore no longer holds the replacement correctly, replacing the control arm may be safer than attempting to reuse it.
Do not aggressively grind or enlarge the bore to make a tight new bushing easier to install. A press-fit bushing depends on the dimensions specified for that application.
Install Polyurethane Bushings
Before installing polyurethane bushings, confirm that the kit matches the vehicle, model year, control-arm position, and suspension configuration. Compare the supplied bushings, sleeves, shells, spacers, and washers with the installation instructions.
Some polyurethane kits reuse the original metal outer shell. Others supply new shells that must be pressed into the control arm. Never assume the procedure is identical between kits.
If the new bushing or shell has an offset, molded arrow, index mark, different flange thickness, or other directional feature, match its orientation to the manufacturer’s instructions or the position recorded from the original bushing.
A bushing that fits the bore is not necessarily installed correctly: shell retention, orientation, lubrication points, sleeve position, and arm support can all be application-specific.
For a press-fit shell, support the arm around the bushing eye and press the new part in squarely with the correct driver. Watch the orientation as pressure increases and stop if the bushing begins to tilt or the arm deforms.
For polyurethane components, apply only the lubricant supplied or specified by the manufacturer and coat the surfaces identified in its instructions. Depending on the design, these can include the bushing bore, metal sleeve, flange faces, or shell contact surfaces.
Verify that the bushing, sleeve, washers, and shell are fully seated before reinstalling the arm.
[Products Worth Considering]

Secure your parked vehicle quickly with AFA Tooling 4T rubber wheel chocks in a 4-pack for two dual-wheel sets. The ribbed design and textured base grip fast without pounding, so you can chock tires on trailers, RVs, ATVs, and work vehicles with confidence. EZ rustproof handles with rope ties keep the pair together for easy placement and removal, while nylon-reinforced rubber stands up to dirt, ice, salt, and harsh weather.

This professional wheel and rim cleaning brush set lifts brake dust, grime, and dirt with soft, scratch-free microfiber and synthetic wool fibers. The rim brush bends up to 360 degrees for easy access to hard-to-reach areas around spokes, lips, and faces. Ideal for thorough cleaning of car, truck, motorcycle, bicycle, RV, and more wheel and tire surfaces.

MaxxHaul solid rubber wheel chocks provide dependable vehicle stabilization for cars, trucks, trailers, and RVs across driveways, slopes, garages, and campsites. The molded non-slip traction surface helps prevent tire movement on pavement, gravel, and smooth floors, while the solid rubber resists cracking, crushing, deformation, and weather wear. A built-in handle enables quick, tool-free placement and removal for convenient use in all seasons.
Polyurethane vs. Rubber Control Arm Bushings
Polyurethane bushings generally reduce compliance compared with soft factory-style rubber. That can produce a more immediate steering or suspension response in applications designed for them.
The tradeoff is that firmer bushings can transmit more road texture, noise, vibration, or harshness into the chassis. They may also require correct lubrication to avoid noise. Factory-style rubber is often the better choice when maintaining original ride isolation is the priority.
Neither material is automatically better for every driver. Choose a bushing that is designed for the vehicle and matches your goals for comfort, response, maintenance, and durability.
Reinstall the Control Arm and Torque to Spec
Position the control arm at its mounting points without forcing the bushings sideways. Reinstall the fasteners, washers, eccentric cams, brackets, ball-joint hardware, and other parts in the correct locations and orientation.
If the vehicle manufacturer specifies new one-time-use nuts or bolts, replace them rather than reusing the old hardware. Start fasteners by hand where possible to reduce the chance of cross-threading.
| Check | Action |
|---|---|
| Mounting position | Verify the arm, sleeves, washers, and brackets sit correctly without side-loading the bushing. |
| Alignment hardware | Return marked cam bolts or eccentric washers close to their original positions before final alignment. |
| Ride height | Load the suspension as required by the factory procedure before final tightening of bonded rubber pivot bushings. |
| Torque | Use a calibrated torque wrench and the exact factory specifications for that vehicle and fastener. |
| Final check | Confirm all suspension, brake-hose, sensor-wire, sway-bar, and ball-joint connections are secure. |
Bonded rubber suspension bushings are normally tightened at the specified ride-height or preloaded position because tightening them while the suspension hangs at full droop can twist the bonded rubber when the vehicle is lowered. MOOG specifically recommends ride-height tightening for bonded rubber suspension bushings.
Polyurethane designs can work differently because the bushing or sleeve may rotate rather than relying on bonded rubber flex. Follow the polyurethane kit instructions and the vehicle service manual rather than applying a rubber-bushing rule blindly.
After final assembly, reinstall the wheel and torque its fasteners to the vehicle manufacturer’s specification.
Check Wheel Alignment After the Repair
Removing a lower control arm can disturb camber, caster, or toe directly or indirectly, especially where the arm uses alignment cams or adjustable mounting points. Arrange a wheel-alignment inspection after the repair and adjust the alignment if it is outside specification.
A previous paint mark on an eccentric bolt can help you get close enough for reassembly and the trip to an alignment shop, but it does not prove that the finished alignment is correct.
After the vehicle is safely back on the ground, perform a cautious test drive. Listen for clunks, squeaks, or rubbing and pay attention to steering pull, an off-center steering wheel, binding, or instability. Stop and inspect the repair if anything feels abnormal.
Avoid These Bushing Replacement Mistakes
- Using brute force before checking the bushing design: You can bend a stamped arm, damage a reusable shell, or distort the bore.
- Burning the rubber out: Some kits permit controlled light heat, but deliberately setting rubber on fire creates unnecessary heat, fumes, and component-damage risk.
- Pressing against unsupported control-arm flanges: Use appropriate spacers and support tooling so the arm stays square.
- Cutting too deeply: When relieving an old metal shell, stop before the blade reaches the control-arm bore.
- Grinding the bore oversized: Remove rust and burrs without removing excessive base metal.
- Installing a directional bushing randomly: Check arrows, offsets, voids, flange positions, and indexing marks.
- Using the wrong grease: Use the supplied or manufacturer-approved lubricant for polyurethane bushings.
- Torquing bonded rubber pivots at full droop: Follow the service procedure and tighten at the specified loaded position.
- Guessing torque values: Suspension fastener specifications are vehicle-specific.
- Skipping alignment: Control-arm removal can change wheel geometry even when the original hardware positions were marked.
Troubleshooting Common Installation Problems
The Old Bushing Will Not Press Out
Stop adding force and confirm that you are pressing in the correct direction, the receiver cup is large enough, the driver is contacting the correct shell surface, and the arm is properly supported. Heavy corrosion can make a shell extremely tight. Penetrating oil, proper tooling, or professional press service may be safer than increasing force until the arm bends.
The New Bushing Starts Going In Crooked
Release the press before it travels farther. Re-square the bushing and control arm, confirm the driver contacts the shell evenly, and check whether the bushing has a required installation direction. Forcing a cocked bushing can damage the new part and enlarge or deform the bore.
The Polyurethane Bushings Squeak
Check that the kit was assembled with the recommended lubricant on all specified contact surfaces and that washers, sleeves, and flange faces are installed correctly. Do not automatically spray an unrelated lubricant onto the assembly because it may be incompatible with the bushing material or may not reach the actual friction surface.
The Control Arm Bore Is Damaged
If the bore is cracked, badly corroded, enlarged, oval, or unable to retain the bushing correctly, do not try to compensate with extra grease, adhesive, or improvised shims unless a manufacturer-approved repair specifically calls for them. Replacing the control arm is usually the safer solution.
Frequently Asked Questions
Can You Replace Lower Control Arm Bushings Yourself?
Yes, an experienced DIYer can replace many lower control arm bushings with the right lifting equipment, hand tools, press or bushing-removal kit, and torque information. The job becomes much more advanced when the arm carries spring or torsion-bar load, fasteners are badly seized, or special press fixtures are required. In those cases, professional service is the safer choice.
How Do You Replace Bushings Without a Press?
A dedicated screw-type bushing tool can replace a hydraulic press on many vehicles. Some polyurethane kits that reuse the factory shell also allow the bonded rubber center to be removed separately according to their instructions. Drilling or carefully cutting a remaining shell can help in stubborn cases, but hammering or heating should not be treated as a universal substitute for proper tooling.
Can You Replace Control Arm Bushings Without Replacing the Whole Control Arm?
Yes, if replacement bushings are available separately and the control arm, ball joint, bushing bore, and mounting surfaces remain serviceable. Replacing the complete arm may make more sense when the ball joint is also worn, the arm is bent or heavily corroded, the bore is damaged, or the labor and tooling required for bushing replacement outweigh the cost of a complete arm.
How Long Does It Take to Change Lower Control Arm Bushings?
A straightforward job may take roughly 2–4 hours for an experienced DIYer, but that is only a planning range. Rusted fasteners, multiple bushings, spring preload, difficult press work, damaged hardware, unfamiliar suspension layouts, and the need for a wheel alignment can extend the total time considerably.
Do You Need an Alignment After Replacing Lower Control Arm Bushings?
A wheel-alignment check is a good practice after lower control arm removal or bushing replacement. It is especially important if eccentric alignment bolts were loosened, the new bushings change the arm’s resting position, or the vehicle had uneven tire wear or steering problems before the repair.
Should Control Arm Bolts Be Tightened at Ride Height?
Bonded rubber control-arm bushings are commonly tightened with the suspension at the manufacturer’s specified ride-height or preloaded position so the rubber is not permanently twisted when the vehicle is lowered. Polyurethane designs vary, so use the replacement-kit instructions and factory service procedure for the final tightening method.
Conclusion
Replacing lower control arm bushings successfully depends more on using the correct procedure than on using maximum force. Identify the bushing design first, support the vehicle and suspension safely, use a press or compatible removal tool where required, and protect the control arm from distortion.
Clean and inspect the bore before installation, orient and lubricate the replacement bushings exactly as directed, and use factory torque specifications during reassembly. For bonded rubber bushings, pay particular attention to the required ride-height tightening procedure. Finish with a careful road test and wheel-alignment check so the repair restores predictable suspension movement without introducing new noise, binding, tire wear, or handling problems.
Sources
- Occupational Safety and Health Administration — Jacks Standard — supports safe load-rating and securing requirements for raised loads.
- MOOG — How to Torque Rubber Suspension Bushings — supports tightening bonded rubber suspension bushings at ride height.
- Whiteline — Control Arm Bushes Installation Guide — supports pressing old bushings out, supporting the arm, lubricating specified surfaces, and using manufacturer torque settings.
- Whiteline — Control Arm Fitting Instructions — supports polyurethane lubrication, manufacturer torque specifications, post-installation checks, and wheel alignment.
- Mevotech — Control Arm Installation Best Practices — supports inspection of mating surfaces, calibrated torque at the correct preloaded ride height, and post-repair alignment.
