
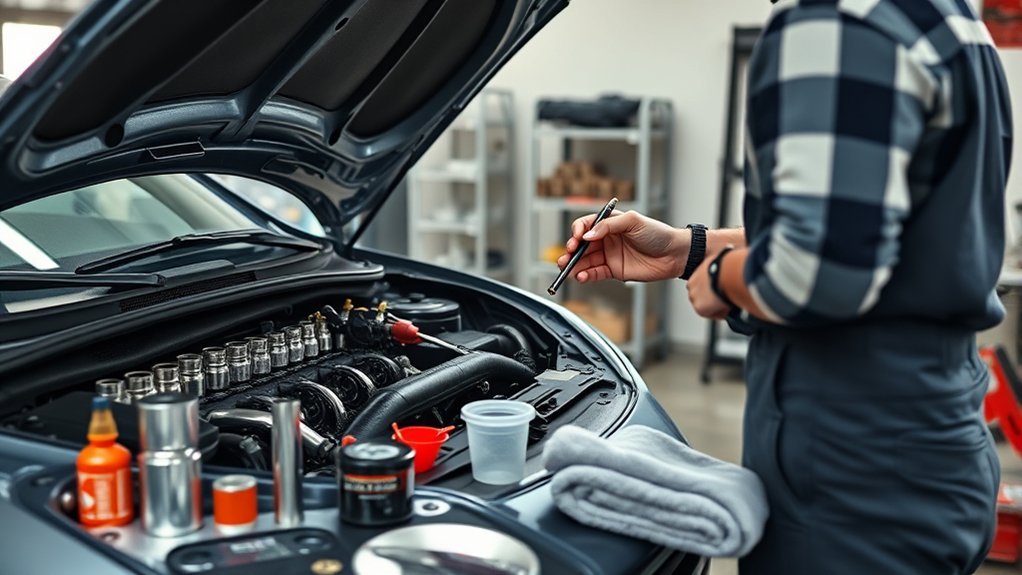
You can save money by handling basic car maintenance yourself, especially routine inspections and simple replacement jobs. Check fluids, filters, tire pressure, tread, lights, wipers, and battery terminals on a regular schedule, and use your vehicle’s owner’s manual for exact specifications. Oil changes and tire rotations can also be DIY jobs when you have the right equipment. Minor cosmetic care can protect the finish, while a punctured tire needs proper inspection rather than a plug-only permanent repair. The key is knowing which tasks are beginner-friendly and when a professional should take over.
Quick Answer
Basic car maintenance you can safely do yourself includes checking accessible fluids, tire pressure and tread, lights, wipers, battery terminals, and air filters, plus cleaning and small cosmetic touch-ups. Follow your owner’s manual for intervals. Use proper lifting equipment for under-car work, and leave major tire, brake, high-voltage, or complex repairs to a professional.
Key Takeaways
- Use the maintenance schedule and specifications in your owner’s manual instead of relying on one mileage interval for every vehicle.
- Check tire pressure at least monthly when the tires are cold, and replace tires that reach 2/32 inch of tread or have unsafe damage.
- Replace wipers, filters, bulbs, and other simple service items when they are worn or when your vehicle’s schedule calls for them.
- Never work under a vehicle supported only by a jack, open a hot cooling system, or touch high-voltage hybrid/EV components.
- A plug-only tire repair is not an acceptable permanent puncture repair under current U.S. tire-industry guidance.
- Keep records of inspections and maintenance so you can spot recurring problems and avoid missing scheduled service.
At a Glance
| Time Required | About 5–30 minutes for most inspections and simple replacements; oil changes and tire rotations take longer. |
| Difficulty | Beginner for inspections, wipers, washer fluid, and many filters; intermediate when the vehicle must be lifted or fluids must be drained. |
| Tools Needed | Owner’s manual, flashlight, gloves, tire-pressure gauge, clean rags, screwdrivers, funnel, and task-specific tools. Lifted work also requires properly rated lifting/support equipment and a torque wrench. |
| Cost | Varies by vehicle and task. Visual inspections can cost nothing once you have basic tools; fluids, filters, bulbs, oil, and specialty equipment add to the cost. |
Warning: Never work under a vehicle supported only by its jack. Use properly rated ramps or jack stands at the manufacturer-approved lift/support points. Never remove a radiator or pressurized coolant cap while the engine is hot. On hybrids and EVs, do not service orange high-voltage cables, the traction battery, or other high-voltage components unless you are properly trained.
Start With Your Owner’s Manual
Before buying a fluid, filter, bulb, or replacement part, check your vehicle’s owner’s manual or factory maintenance guide. It is the best source for the correct oil viscosity, capacities, fluid specifications, tire pressure, lift points, lug-nut torque, filter types, warning-light meanings, and service intervals.
This matters because there is no single maintenance schedule that fits every vehicle. Oil-change intervals vary, some cars use electric power steering and have no power-steering fluid, some transmissions have no owner-serviceable dipstick, and many newer vehicles calculate oil life electronically.
AAA also recommends treating the owner’s manual as the primary maintenance reference because schedules vary by vehicle and driving conditions. AAA’s beginner maintenance guidance provides a useful general framework, but your factory schedule should control.
Pro Tip: Keep a simple maintenance log with the date, mileage, task, fluid or part used, and any unusual wear you noticed. That makes future troubleshooting easier and helps prevent missed service.
Build a Simple Maintenance Routine
A basic schedule keeps small problems from disappearing between major service visits. Use this as a reminder system, not as a replacement for your manufacturer’s schedule.
| When | What to Check |
|---|---|
| About monthly and before long trips | Tire pressure and tread, exterior lights, washer fluid, visible leaks, wiper condition, accessible fluid levels, and battery condition. |
| When symptoms appear | Replace streaking wipers, investigate warning lights, check new leaks, inspect unusual tire wear, and address weak starting or charging symptoms. |
| At factory-specified mileage/time | Oil and filter, air filters, tire rotation, coolant, brake fluid, transmission service, spark plugs, and other scheduled maintenance. |
| Seasonally | Inspect battery condition, tires, washer-fluid freeze protection, belts, hoses, and cooling-system condition before extreme heat or cold. |
Check Fluids First
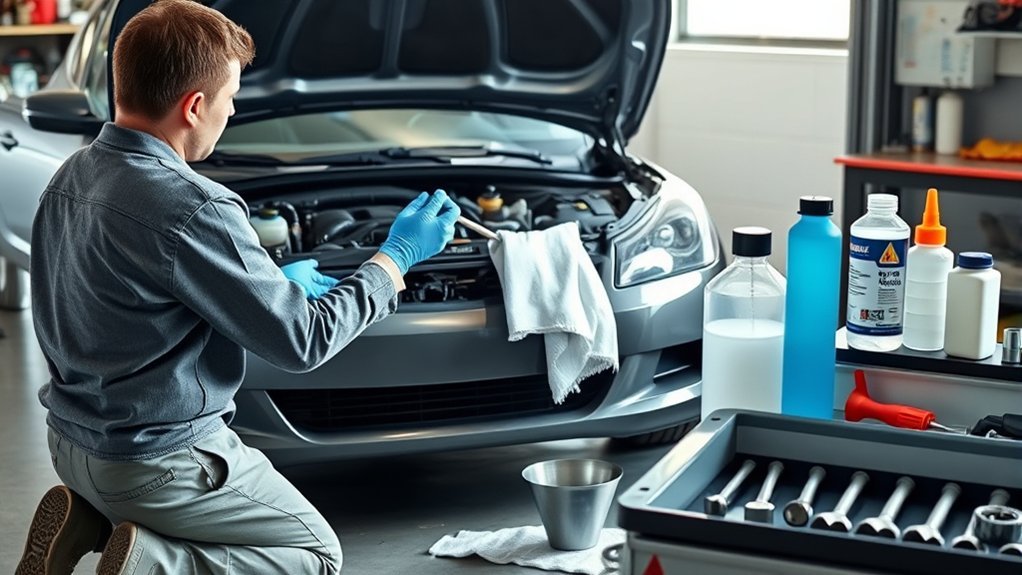
Start by checking your vehicle’s fluids, because low fluid can signal a leak or contribute to mechanical problems. Park on level ground, use the procedure in your owner’s manual, and compare each serviceable reservoir or dipstick with its specified range.
For engine oil, many vehicles use a dipstick, while some newer models use an electronic level display. Follow the manual for whether the engine should be cold, warm, or allowed to sit for a set time before checking. Keep the oil within the specified range and investigate repeated drops in level.
Check brake fluid through the reservoir when the manual permits. Do not assume low brake fluid simply needs topping off; a falling level can accompany brake-pad wear or a leak. If the brake pedal feels soft, braking performance changes, or fluid is leaking, stop treating the problem as routine DIY maintenance and have the brake system inspected.
For power steering, first determine what system your vehicle has. Many modern cars use electric power steering and have no hydraulic reservoir. If yours has hydraulic power steering, use only the specified fluid and service method. Do not perform an improvised turkey-baster fluid exchange unless the manufacturer’s procedure specifically supports that approach.
Transmission fluid is even more vehicle-specific. Some transmissions have a dipstick, while others are sealed or require a precise fluid-temperature procedure. Check or service it only as your manual directs.
Also inspect the coolant level in the appropriate reservoir when the engine is fully cool, and top off washer fluid with a climate-appropriate product when needed. If any fluid repeatedly becomes low, look for the cause instead of repeatedly refilling it.
Warning: Hot cooling systems can release pressurized coolant and steam that cause severe burns. Never remove a radiator or pressurized coolant cap until the vehicle has cooled and the manufacturer’s instructions say it is safe.
Change Your Engine Oil
Change your engine oil and filter according to the interval in your owner’s manual or the vehicle’s oil-life monitoring system rather than assuming every engine needs the same 5,000- to 7,500-mile schedule.
Use the specified viscosity, performance standard, filter, fill capacity, drain-plug procedure, and torque specification. These details matter because overfilling, underfilling, using the wrong oil, or damaging a drain-plug thread can create expensive problems.
When you finish, verify the oil level using the manufacturer’s procedure and inspect around the filter and drain plug for leakage.
[Products Worth Considering]

Wykodra tire plugs provide quick vulcanizing repairs for tubeless tires, helping you seal punctures and get back on the road. The industrial-strength rubber creates a long-lasting, leak-resistant bond and is designed for emergency fixes without removing the tire. Choose between two standard plug sizes with color-matched options for small to larger damage across many vehicles and off-road uses.

Monitor tire tread wear with a smart, color-coded depth gauge that shows clear condition ranges at a glance. The bar is range marked for fast, easy readings, helping you maintain safer traction and performance. Each gauge is portable with a pocket clip, and the set includes 20 units for daily use and sharing.

This 9-piece detailing brush set helps you clean interior and exterior vehicle areas with versatile sizes and ergonomic handling. Stiff bristle brushes tackle heavy grime on tires, carpets, and floors, while smaller brushes are suitable for tight engine and cabin gaps. Designed for thorough car care across wheels, vents, seats, and hard-to-reach detailing spots.
Oil Change Basics
For DIY car maintenance, an oil change can reduce labor costs and help you become familiar with your vehicle, but it moves beyond a simple inspection because you may need to lift the car and work near hot components.
Start with the owner’s manual. Confirm the oil specification, capacity, filter, drain-plug location, safe lift points if lifting is necessary, and the correct tightening torque.
Warm oil drains more easily, but the engine and exhaust should not be hot enough to burn you. Shut the engine off, secure the vehicle on a level surface, apply the parking brake, and use wheel chocks where appropriate.
Used motor oil should never go down a drain, onto the ground, or into household trash. The U.S. Environmental Protection Agency recommends collecting it in a leak-proof container and taking it to an approved collection or recycling location. EPA used-oil recycling guidance also covers used oil filters.
Tools And Steps
Gather the tools and supplies required for your particular car. Common items include the correct oil and filter, a drain pan, funnel, sockets or wrench, filter tool if necessary, gloves, rags, and a torque wrench. If the car must be raised, use properly rated ramps or a suitable jack plus jack stands at approved points.
| Task | Action |
|---|---|
| Prepare vehicle | Park level, secure the vehicle, and let excessively hot components cool. |
| Position drain pan | Place it securely under the drain point before loosening the plug. |
| Drain oil | Remove the drain plug and allow the old oil to drain without contacting hot surfaces. |
| Replace filter | Install the specified filter and prepare its seal exactly as the filter/vehicle instructions require. |
| Reinstall drain plug | Use a new sealing washer if required and tighten to the manufacturer’s torque specification. |
| Refill and verify | Add the specified amount gradually, check the level correctly, run the engine if instructed, inspect for leaks, and recheck the level. |
Collect the used oil and filter without mixing the oil with coolant, solvents, or other chemicals. Transport them securely to a facility that accepts used automotive oil.
Replace Wiper Blades
Replacing worn wiper blades is one of the easiest maintenance jobs and directly affects visibility in rain, snow, and road spray.
Inspect the blades regularly and replace them when you notice streaking, skipping, chatter, torn rubber, or areas that no longer clear the windshield. A fixed six- or twelve-month rule can be a useful reminder, but condition and the manufacturer’s recommendation matter more.
Confirm both blade sizes before buying replacements because the driver and passenger sides may differ. Lift each arm carefully and place a folded towel on the windshield so an accidentally released arm cannot snap down onto the glass.
Release the old blade according to its hook, tab, pin, or adapter design. Install the new one using its instructions and make sure it locks in place before lowering the arm.
After installation, spray washer fluid and test the blades. They should sweep smoothly and make consistent contact without leaving large unwiped areas.
[Products Worth Considering]

Measure tire tread depth quickly and accurately with this LUMITECO dial gauge that reads in 1/32" increments up to 14/32". The color-coded green/yellow/red zones make it easy to judge tire wear and know when replacement is needed. A rugged, compact design with a protective pouch helps keep the gauge ready for use on cars, trucks, motorcycles, and more.
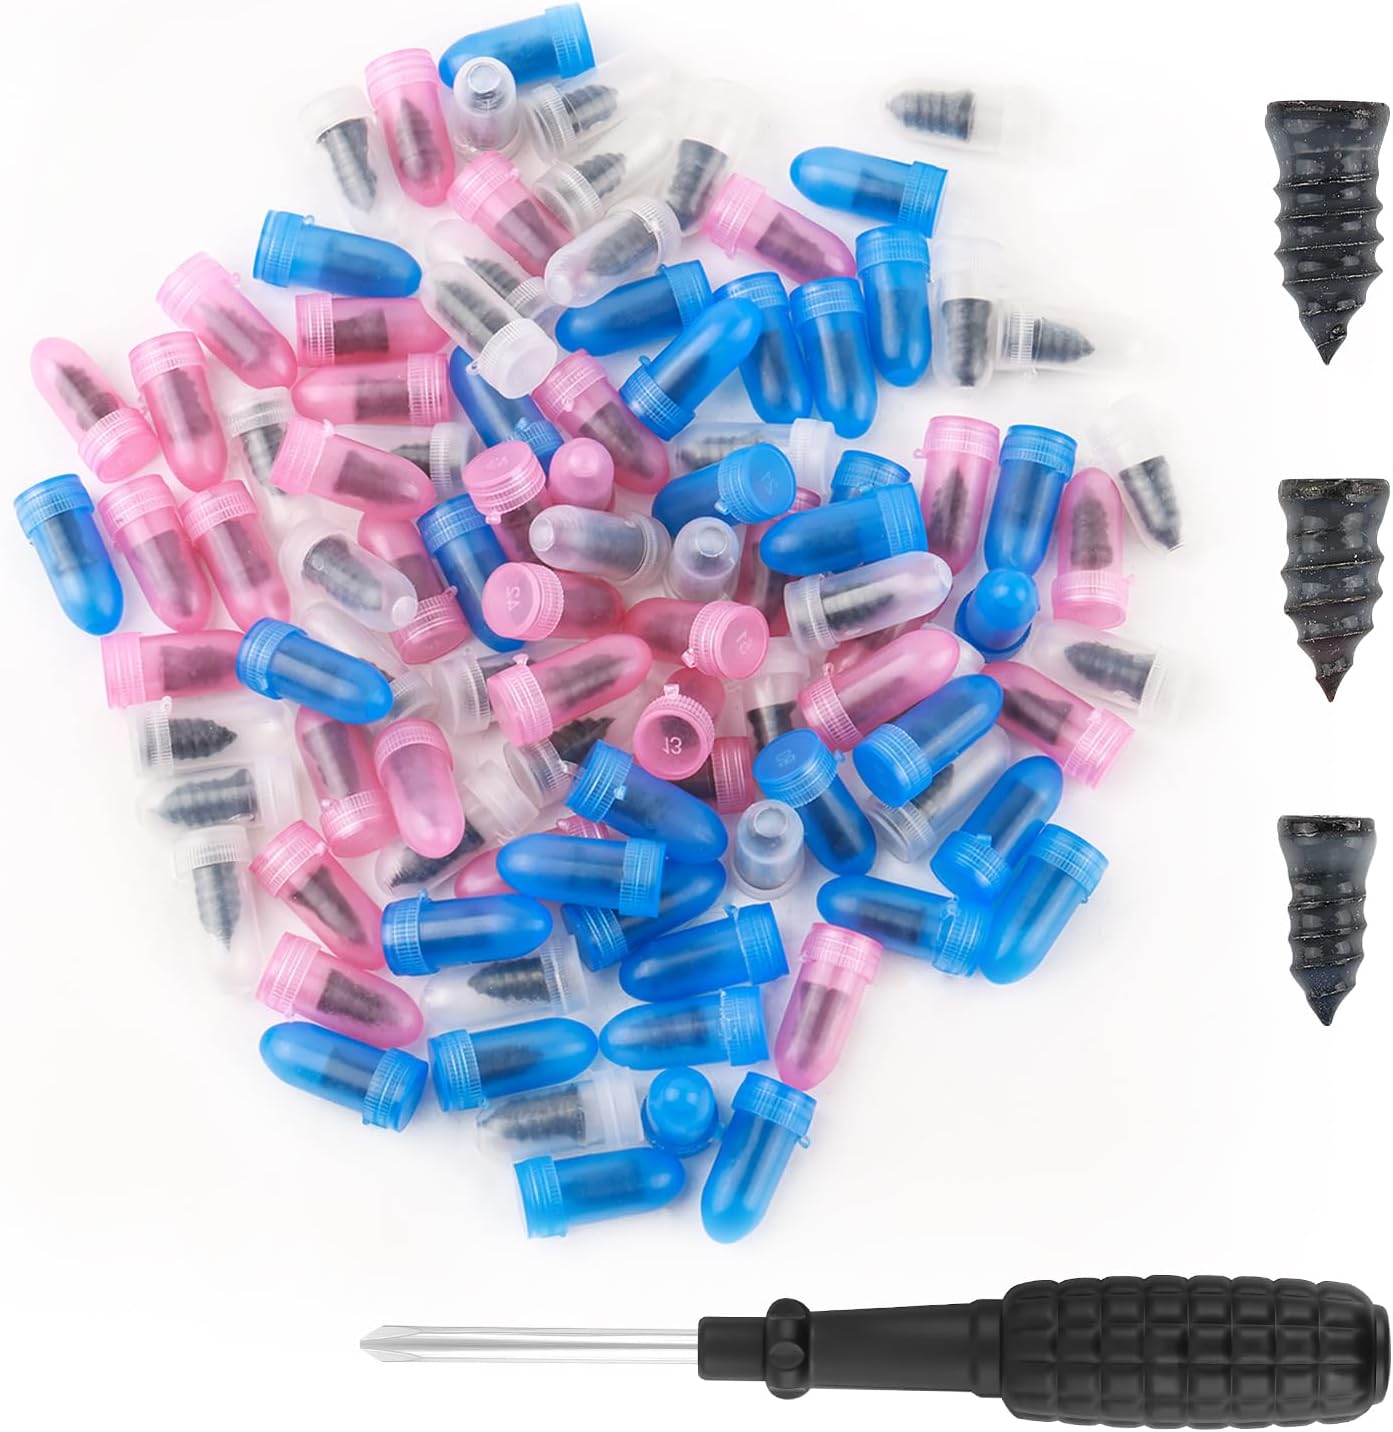
This 100-piece tire repair screw plug kit provides a fast, self-service solution for punctures on the road. Choose the correct plug size, insert it into the break, and screw it in to help seal the puncture and temporarily restore tire pressure. Thickened threads and rubber-wrapped plugs improve bite and sealing while remaining compact and easy to carry.

This tire repair screw plug kit includes 60 pieces in two sizes to help you fix punctures quickly on the road. Choose the right screw by puncture size, then drive it in with a screwdriver for an effective seal without needing a flaring tool. The coated screws help prevent leaks and are designed for convenient emergency use across cars, trucks, ATVs, motorcycles, and bicycles.
Check Tire Pressure and Tread
Tires affect traction, braking, steering, ride quality, and fuel use, so inspect them at least monthly and before long trips. The National Highway Traffic Safety Administration recommends checking tire pressure at least once a month when the tires are cold.
“Cold” generally means the vehicle has been parked long enough for the tires to cool rather than checking immediately after highway driving. Use the pressure shown on the vehicle placard—usually on the driver-side door jamb—or in the owner’s manual. Do not inflate to the maximum pressure molded on the tire sidewall unless that value also happens to match the vehicle specification.
| Check Tire Step | What to Do |
|---|---|
| Pressure | Measure each tire when cold, including the spare if equipped. |
| Specification | Use the vehicle placard or owner’s manual pressure, not the tire’s sidewall maximum. |
| Tread depth | Use the built-in wear bars, a tread-depth gauge, or the penny test. |
| Damage | Look for cuts, bulges, exposed cords, cracking, embedded objects, and uneven wear. |
For the penny test, insert a penny into a main tread groove with Lincoln’s head upside down. If the top of his head remains visible, the tread has reached about 2/32 inch and the tire should be replaced. Damage, repeated air loss, severe cracking, or other unsafe conditions can require replacement before the tread reaches that point.
Also watch for uneven shoulder wear, center wear, cupping, or feathering. Those patterns can point to pressure, alignment, balancing, suspension, or rotation problems.
FuelEconomy.gov estimates that keeping tires properly inflated can improve gas mileage by about 0.6% on average and up to 3% in some cases.
The current figure comes from FuelEconomy.gov, which also notes that under-inflation increases fuel use. That evidence is more reliable than assigning one universal annual dollar cost to low tire pressure.
Rotate Tires and Fix Flats
Rotate your tires at the interval and in the pattern specified by your vehicle and tire manufacturer. Regular rotation can promote more even wear, but there is no single pattern that works for every vehicle.
Front-wheel-drive, rear-wheel-drive, all-wheel-drive, directional, staggered, and different-size tire setups can all require different patterns. Directional tires may be limited to front-to-rear movement on the same side, while some staggered setups cannot be rotated front to rear at all.
If you rotate tires yourself, park on a hard, flat surface, set the parking brake, chock the wheels as appropriate, loosen fasteners before lifting when instructed, and support the vehicle using properly rated equipment at the factory lift/support points.
Warning: A tire-changing jack is not a substitute for proper service support. Never crawl under a vehicle that is supported only by a jack.
After installing the wheels, tighten the lug nuts in the manufacturer-specified sequence—commonly a star or crisscross sequence on wheels with multiple fasteners—and use a torque wrench to reach the specified torque. Recheck tire pressure and perform any TPMS relearn procedure your vehicle requires.
If a tire loses air, a soap-and-water solution can help locate some leaks because escaping air may form bubbles. Do not automatically remove an embedded nail or screw if doing so could make a slow leak become a rapid one before you reach a safe repair location.
Current U.S. Tire Manufacturers Association tire-repair guidance limits standard repair to qualifying tread-area punctures no larger than 1/4 inch (6 mm). The tire should be removed from the wheel and inspected internally. The injury is filled with a stem or plug and the inner liner is sealed with a patch; a plug by itself is not an acceptable permanent repair.
Do not repair punctures in the sidewall or shoulder using a simple plug kit. If a temporary roadside repair product is supplied with your vehicle or tire, use it only as its instructions allow and arrange a proper inspection afterward.
[Products Worth Considering]

Replace worn or missing TPMS sensors with a pre-programmed 4-pack designed for compatible GM vehicles. These 315MHz sensors provide real-time tire pressure monitoring and alert you if pressure is too high, too low, or if a rapid air leak occurs. Most installations are ready with minimal relearn effort after mounting, helping improve safety and driving confidence.

Keep your tires properly inflated with this analog VONDIOR tire pressure gauge, designed for fast, easy readings without batteries. The swiveling, two-axis hose and large glow dial help you measure at any tire angle with instant visibility. Built with a protective rubber shield, it supports durable, low-maintenance use for cars and trucks.

The Chemical Guys Big Blue Stiffy Heavy Duty Cleaning Brush is designed for deep scrubbing of tires, upholstery, and carpets. Stiff synthetic bristles help lift tough dirt, grime, and tar while the ergonomic grip makes scrubbing comfortable and controlled. Use it with wheel and tire cleaners followed by dressings and protectants to help enhance and extend a lasting shine.
Inspect Battery Terminals
Inspect your battery terminals, case, hold-down, and cables periodically for corrosion, looseness, damage, or signs of leakage. White, blue, or green buildup around the posts can increase electrical resistance and contribute to starting problems.
Wear eye protection and suitable gloves around a conventional lead-acid battery, keep sparks and flames away, and avoid placing metal tools across the terminals.
If you use a digital multimeter on a conventional 12-volt battery, a fully charged battery that has rested with the engine off often reads around 12.6 volts. A lower reading can indicate partial discharge, but voltage alone does not prove whether the battery is healthy. A battery with starting problems may need a proper load or conductance test.
Also remember that hybrids, EVs, and newer vehicles can have multiple battery systems and special shutdown procedures. Do not assume a procedure for a conventional gasoline vehicle applies to every car.
Swap Out Air Filters
After checking under the hood, inspect the engine air filter and cabin air filter according to your vehicle’s maintenance schedule and the conditions in which you drive.
For the engine filter, locate the air-cleaner housing, release its clips or fasteners, and note how the old filter sits before removing it. Install the correct replacement in the same orientation and make sure the housing seals fully.
Do not rely on a universal 10,000- to 15,000-mile replacement interval. Dusty roads and severe operating conditions can shorten filter life, while other vehicles may specify a longer interval.
Replacing a clogged engine air filter on a modern fuel-injected or diesel vehicle can restore restricted performance, but it generally does not improve fuel economy.
That distinction is supported by FuelEconomy.gov. Older carbureted vehicles are different, but the “new air filter equals a large MPG gain” claim does not apply to modern fuel-injected cars.
For the cabin air filter, check the owner’s manual for its location and interval. Many are behind the glove box or under a cowl panel. A dirty filter can reduce HVAC airflow and hold dust or debris, but replacement intervals vary by vehicle and environment.
Top Off Washer Fluid
Keeping washer fluid topped off helps maintain clear visibility in rain, snow, road salt, and spray. Open the hood and locate the washer-fluid reservoir, usually identified by a windshield/wiper symbol.
Then follow these steps:
- Check the reservoir regularly and before long trips.
- Use the washer fluid recommended for your climate and vehicle.
- Pour slowly, using a clean funnel if necessary.
- Stop at the indicated fill level or when the reservoir reaches its designed capacity.
- Close the cap securely and test the washers.
In freezing weather, use a washer-fluid formula with adequate freeze protection instead of relying on plain water. Never substitute engine coolant or household chemicals for windshield-washer fluid.
Replace Car Light Bulbs
Check your headlights, brake lights, turn signals, taillights, reverse lights, and license-plate lights regularly and before long trips. A walk-around or reflection from a wall can help you spot a failed lamp.
When a replaceable bulb fails, use the exact type and specification listed by the vehicle manufacturer. Some cars use simple replaceable halogen bulbs, while others use integrated LED assemblies or high-intensity systems that are not practical beginner repairs.
Many bulb jobs require only basic hand tools, but access varies dramatically. Follow the vehicle instructions rather than forcing a connector or housing that does not release easily.
Choosing The Right Bulb
The right replacement starts with your owner’s manual or manufacturer parts information. Match the bulb or lamp specification before buying.
- Identify whether the failed lamp uses a replaceable bulb or an integrated assembly.
- Match the bulb number, base and electrical specification.
- Confirm whether the system is halogen, LED, HID, or another design.
- For halogen bulbs, avoid touching the glass with bare fingers; use clean gloves or handle the bulb by its base.
Do not assume that fitting a different LED replacement into a housing designed for another bulb type will preserve the correct beam pattern or legal performance. Use components approved for the vehicle and lamp assembly.
Safe Bulb Replacement
Before replacing a bulb, park safely, switch the vehicle and lights off, remove the key or keep the key/fob away as appropriate, and allow hot lamps to cool.
You do not need to disconnect the battery for every bulb replacement. Do so only when the vehicle’s service instructions call for it, because battery disconnection can affect memory settings, security systems, window calibration, and other electronics.
Handle a halogen bulb by its base or with clean gloves, connect it securely, reinstall any covers, and test the light before closing everything up.
If the light still does not work, check the bulb seating, connector, relevant fuse, and vehicle instructions. Repeated fuse failure, melted connectors, moisture inside the lamp, or an integrated LED/HID failure deserves further diagnosis.
Clean Battery Terminals
Keeping battery terminals clean can preserve a reliable electrical connection when corrosion develops. Clean only when necessary rather than disturbing a clean, secure connection without reason.
Inspect battery terminals periodically and clean corrosion before it becomes heavy enough to interfere with the cable connection.
Before disconnecting a conventional 12-volt battery, check your manual for any special reset, security, memory, or hybrid/EV precautions. If the manufacturer permits ordinary battery disconnection, the common sequence is negative cable first and positive cable second. Reconnection is usually positive first and negative last.
- Switch the vehicle off and keep ignition sources away.
- Wear eye protection and suitable gloves.
- Disconnect the cables in the vehicle-specified sequence.
- Use a battery-terminal cleaner or a small amount of baking-soda-and-water solution on external corrosion while keeping liquid out of battery vent openings or cells.
- Scrub gently with a terminal brush until the contact surfaces are clean.
- Dry the area and reconnect the cables in the correct sequence.
- Make sure the clamps are secure without overtightening or damaging the posts.
If the battery case is swollen, cracked, leaking, unusually hot, or heavily damaged, do not treat it as a routine cleaning job. Have the battery handled and replaced safely.
Inspect Belts, Hoses, and Visible Leaks
A quick under-hood inspection can catch developing problems without removing parts. With the engine off and cool, look for frayed or cracked accessible belts, cracked or swollen hoses, loose-looking clamps, wet areas, and fresh fluid underneath the vehicle.
Do not put your hands near belts, pulleys, cooling fans, or other moving components while the engine is running. Electric cooling fans can sometimes start unexpectedly even when the engine itself is not running, so follow the vehicle’s precautions.
If you find an active fuel leak, significant coolant leak, brake-fluid leak, strong burning smell, smoke, or rapidly dropping fluid level, stop treating the issue as routine maintenance and arrange professional diagnosis.
Do a Basic Brake Check
You can monitor brake condition without immediately taking the braking system apart. Pay attention to how the brake pedal feels and how the vehicle behaves when stopping.
Warning signs include grinding, a new persistent squeal, a soft or sinking pedal, pulling while braking, vibration, a brake warning light, visible fluid leakage, or noticeably longer stopping distance.
Warning: Brakes are a safety-critical system. If braking performance changes, brake fluid is leaking, or you are not confident about the correct lifting, torque, bleeding, or repair procedure, use a qualified technician instead of experimenting.
Fix Minor Scratches and Dents
Minor scratches, chips, and small dents can sometimes be improved at home, but the safest beginner method starts with identifying how deep the damage goes.
First, clean the area thoroughly with automotive-safe products so dirt and grit do not create new scratches during repair.
If a mark is only in the clear coat, a mild automotive hand polish may reduce its appearance. Work gently and follow the product instructions. Avoid jumping directly to a random-orbit sander, aggressive compound, or heat gun, because those tools can quickly remove clear coat, distort plastic, or damage paint in inexperienced hands.
For a small chip or scratch that reaches the color or primer layer, use manufacturer-matched touch-up paint according to its instructions. If bare metal is exposed, repair it promptly so corrosion does not develop.
Small dents with intact paint may sometimes respond to paintless dent repair techniques, but sharp creases, stretched metal, cracked paint, or damage near structural areas usually deserves professional body repair.
Sanding a panel, feathering paint edges, applying autobody filler, priming, color coating, and clear coating are valid body-repair processes, but they are more advanced than the other beginner maintenance jobs in this guide. If you choose to do that level of work, use a vehicle-specific refinishing process, proper respiratory/eye protection, ventilation, and compatible materials rather than treating it as a quick driveway fix.
Deep Clean Your Car Interior
Start by vacuuming seats, carpets, floor mats, and tight gaps with appropriate attachments to remove loose dirt before using liquid cleaners.
Then clean carpets and upholstered surfaces with products approved for the material. Avoid saturating seats, electrical connectors, switches, occupancy sensors, heating elements, or modules hidden under the upholstery.
If your car has leather, use products compatible with that specific finish. Modern automotive leather often has a protective coating, so more conditioner is not always better.
Vacuum and Debris Removal
Regular vacuuming keeps grit from grinding into upholstery, mats, and carpet fibers. Use crevice and brush attachments to reach between seats, around console edges, under mats, and along seat tracks.
- Clear loose trash and personal items first.
- Remove floor mats and shake loose debris outside the vehicle.
- Vacuum seats, carpeting, seat tracks, and tight gaps.
- Use a soft brush attachment on surfaces that scratch easily.
- Empty the vacuum bin or bag when suction begins to drop.
A portable car vacuum can make regular cleaning easier, but the most important factor is removing abrasive dirt before it becomes embedded.
Consistent interior care improves comfort and can help preserve the condition buyers see when the vehicle is eventually sold.
Upholstery and Carpet Care
For deeper upholstery and carpet care, vacuum first and test any cleaner on a small hidden area before treating a visible section.
Apply a fabric or carpet cleaner according to its label, agitate only as much as the material allows, then extract or blot away residue. Do not soak foam padding underneath the upholstery because trapped moisture can cause odors and other problems.
A rental carpet-cleaning or extraction machine can help with heavily soiled carpet, but rental prices vary by location and machine.
Avoid assuming a homemade vinegar mixture is safe for every fabric, coating, adhesive, leather surface, or interior trim. Use a product approved for the material whenever possible.
If you have leather seats, clean them gently and use a compatible conditioner only when the vehicle or product manufacturer recommends it.
Check for Safety Recalls
Maintenance cannot correct a safety defect that requires a manufacturer recall. Check your vehicle periodically using the NHTSA recall lookup.
You can search using the vehicle identification number or other supported vehicle information. If your vehicle has an unrepaired safety recall, follow the manufacturer’s instructions and arrange the recall remedy through an authorized dealer. Safety recall repairs are generally provided without charge to the owner under the recall program.
Know When to Call a Professional
Good DIY maintenance includes knowing when to stop. Some tasks have consequences that are too serious for trial-and-error work.
Use professional help when a job involves an active brake problem, air bags, steering or suspension faults, fuel leaks, internal engine/transmission work, air-conditioning refrigerant, significant electrical diagnosis, structural body damage, high-voltage hybrid/EV components, or a tire injury outside the repairable tread area.
You should also stop if you do not have the correct service information, lift/support equipment, torque specification, protective gear, or tools. Paying for the right repair is usually cheaper than correcting damage caused by guessing.
Note: EVs do not need engine-oil changes, but they still require tire, brake, coolant, cabin-filter, wiper, washer-fluid, 12-volt battery, and other manufacturer-specified maintenance. Hybrid and EV high-voltage systems require special training and procedures.
Sources
- National Highway Traffic Safety Administration — TireWise — tire pressure, tread depth, wear, and tire-safety guidance.
- U.S. Tire Manufacturers Association — Tire Repair Basics — repairable puncture limits and proper puncture-repair procedure.
- FuelEconomy.gov — Keeping Your Vehicle in Shape — tire-inflation fuel-economy data and modern air-filter findings.
- U.S. Environmental Protection Agency — Managing, Reusing, and Recycling Used Oil — safe handling and recycling of used engine oil and filters.
- AAA — Car Maintenance Schedule for Beginners — general maintenance planning, inspections, wipers, lights, fluids, and battery care.
- National Highway Traffic Safety Administration — Recall Lookup — checking vehicles for unresolved safety recalls.
Frequently Asked Questions
How Much Money Can You Save Doing Your Own Car Maintenance?
Savings vary widely. Checking fluids, tire pressure, lights, and wipers yourself can avoid paying labor for simple inspections, while oil changes, filters, and other replacements may save more if you already own the tools. Compare the cost of parts, tools, disposal, and your time with local shop pricing before deciding whether a job makes financial sense.
What Are the Easiest Car Repairs to Do Yourself?
Good beginner jobs include checking tire pressure and tread, topping off washer fluid, replacing many wiper blades, changing some engine or cabin air filters, checking accessible fluid levels, cleaning mild battery-terminal corrosion, and replacing simple serviceable bulbs. Jobs requiring vehicle lifting, brake work, difficult electrical diagnosis, or major disassembly require more skill and equipment.
What Car Maintenance Should I Do Myself?
Handle the maintenance you can perform safely with the correct service information and tools. Fluid-level checks, tire inspections, wipers, filters, lights, basic cleaning, and battery inspection are realistic starting points. Oil changes, tire rotations, spark plugs, or other mechanical work are reasonable only when you understand the procedure, torque specifications, and safety requirements for your vehicle.
How Much Money Should I Have Saved for Car Maintenance?
There is no single annual amount that fits every driver. A newer vehicle with warranty coverage can have very different costs from an older high-mileage car. Review your factory maintenance schedule, upcoming tires or brakes, vehicle age, recent repair history, and local labor rates, then set aside a monthly maintenance and repair fund based on those expected costs.
How Often Should I Do Basic Car Maintenance?
Do quick checks such as tire pressure, tread, lights, visible leaks, washer fluid, and wiper condition about monthly and before long trips. Use the vehicle’s maintenance schedule or oil-life monitor for oil, filters, tire rotation, coolant, transmission service, brake fluid, spark plugs, and other mileage- or time-based work.
Is a Tire Plug a Permanent Repair?
A plug by itself is not the tire industry’s recommended permanent repair. USTMA guidance calls for removing the tire from the wheel, inspecting the inside, filling a qualifying tread puncture with a stem or plug, and sealing the inner liner with a patch. Sidewall and shoulder injuries are not repaired with a simple plug.
What Maintenance Should I Avoid Doing as a Beginner?
Avoid experimenting with safety-critical or high-energy systems. Active brake faults, high-voltage hybrid/EV systems, air bags, fuel leaks, major steering or suspension repairs, internal engine/transmission work, refrigerant service, and structural collision repair are better handled by trained technicians unless you have the correct training and equipment.
Do Electric Cars Need the Same Maintenance?
Not exactly. A battery-electric vehicle has no engine oil to change, but it still needs tires, wipers, washer fluid, cabin filters, brakes, cooling-system service where specified, 12-volt battery care, and other inspections. Follow the EV manufacturer’s schedule and leave high-voltage components to trained personnel.
Conclusion
By handling appropriate beginner tasks yourself, you can reduce some routine maintenance costs, learn what normal wear looks like, and catch problems earlier. Start with fluids, tires, lights, wipers, and filters, then move into oil changes, battery cleaning, or tire rotation only when you have the correct procedure and safety equipment.
Do not let DIY savings override safety. Use the owner’s manual for specifications, never rely on a jack alone, treat tire plugs as something other than a proper permanent repair, and leave brake faults, major mechanical work, and high-voltage systems to qualified technicians.
Proper tire inflation is one example of a simple check with a measurable benefit: FuelEconomy.gov estimates an average fuel-economy improvement of about 0.6% from correct inflation, with gains of up to 3% in some cases. Consistent maintenance matters most when it follows your vehicle’s real needs instead of one-size-fits-all rules.

