
How to Fix a Nail Puncture in a Honda Accord Tire
If you’ve got a nail puncture in your Honda Accord tire, act quickly. First, check the puncture size; it shouldn’t exceed 3/16 inch. Use your temporary repair kit to inject sealant before adding air. Confirm the sealant hose is attached securely to avoid leaks. Drive for about ten minutes at under 50 mph to distribute the sealant. Don’t forget to recheck your tire pressure afterwards. Continue exploring to understand further steps and troubleshooting tips.
Understanding Flat Tires: Causes and Solutions
Flat tires can be a real hassle, and understanding their causes is key to prevention. Commonly, punctures from nails or sharp objects compromise tire integrity, leading to flats. To avoid this, prioritize tire maintenance. Regularly checking tire pressure guarantees proper inflation, making your tires less susceptible to damage.
For puncture prevention, inspect your tires frequently for foreign objects and signs of wear. If you spot a nail or similar object, act quickly. Minor punctures (less than 3/16 inch) can often be repaired, while larger ones may require a replacement. A temporary tire repair kit can offer a quick fix, allowing you to drive safely for a limited distance and speed. Additionally, using thorn-resistant tubes can significantly enhance your tire’s protection against punctures.
Initial Steps to Take After a Flat Tire
After discovering a flat tire, it’s important to handle the situation safely and efficiently. First, firmly grasp the steering wheel and gradually brake to bring your vehicle to a stop on a firm, level surface. Once stopped, apply the parking brake and shift the transmission to Park (P). This secures your vehicle, enhancing tire safety. Activate your hazard warning lights to alert other drivers of your situation.
Before exiting, set the power mode to VEHICLE OFF to guarantee safety during repairs. Carefully assess your surroundings; make sure the area is free from traffic and hazards. This step is vital for emergency preparedness. After confirming it’s safe, exit the vehicle to inspect the flat tire. Following these initial steps will not only protect you but also streamline the repair process, making you feel empowered to tackle the issue ahead. Additionally, remember to check for visual cues that indicate a flat tire, such as a deflated appearance.
How to Use Your Temporary Repair Kit Effectively
To effectively use your temporary repair kit, start by preparing all components and checking the puncture size. Next, inject the sealant properly while monitoring the tire pressure to guarantee a safe and reliable fix. Remember that a plug is a temporary solution and should be followed up with a professional repair. Finally, check the tire pressure again after the repair and stow the kit for future emergencies.
Preparing the Repair Kit
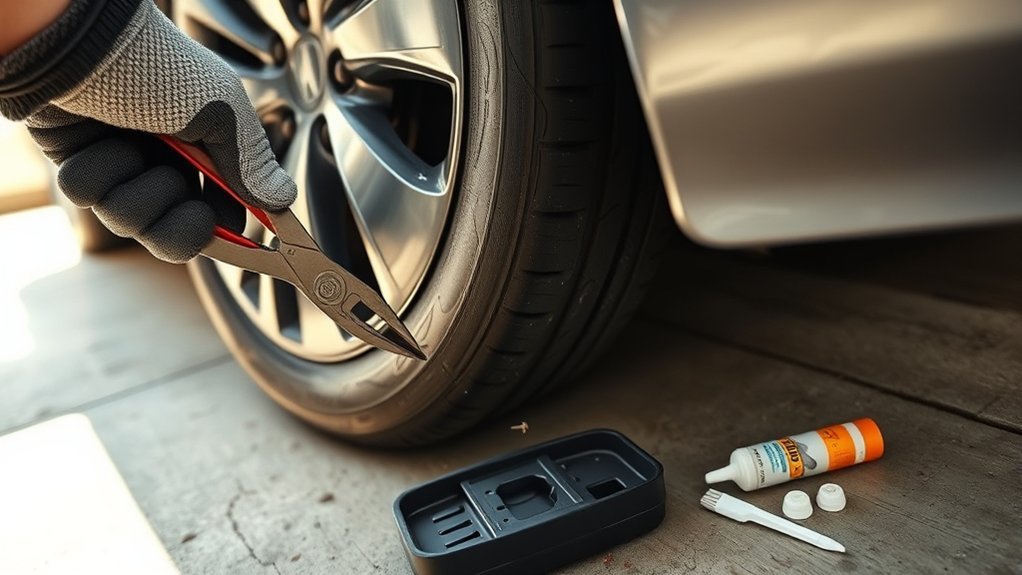
When you encounter a nail puncture, effectively preparing your temporary repair kit is essential for a successful fix. Start by opening the trunk floor lid of your Honda Accord to access the kit, making sure it’s face up and away from traffic. Check the sealant expiration date; using expired sealant can compromise your repair. Avoid removing the puncturing object from the tire, as this can cause rapid air loss. Work on a firm, level surface and turn on your hazard lights for safety. Once you’ve completed the repair, apply the speed restriction label from the kit. Drive for about 10 minutes, not exceeding 50 mph (80 km/h), to make certain the sealant adheres properly.
Injecting Sealant Properly
Having prepared your repair kit, it’s time to focus on injecting the sealant correctly. First, confirm the puncture is no larger than 3/16 inch (4 mm) and that the tire’s sidewall remains intact. Remove the valve cap from the tire valve stem and securely attach the sealant hose, ensuring no leaks occur during injection. Plug the compressor into the accessory power socket, activating the power system while injecting the appropriate sealant types compatible with your tire. Monitor the pressure gauge closely and turn off the compressor once you reach the specified psi, typically between 30-35 psi for Honda Accord tires. After driving for about 10 minutes at a speed not exceeding 50 mph, recheck the air pressure and repeat if necessary.
Monitoring Tire Pressure
Monitoring tire pressure is essential for guaranteeing your temporary repair kit functions effectively and safely. After applying sealant, always check the tire pressure using the compressor’s gauge to confirm it reaches the specified psi for safe driving. If the pressure isn’t within the recommended range, repeat the sealant and air injection process until you achieve proper pressure. Importantly, avoid running the air compressor when checking tire pressure; this guarantees gauge accuracy and safety. Once repaired, drive your vehicle for about 10 minutes at a maximum speed of 50 mph (80 km/h) to allow the sealant to settle. Regularly inspect and maintain your repair kit to guarantee it remains complete and functional for future emergencies.
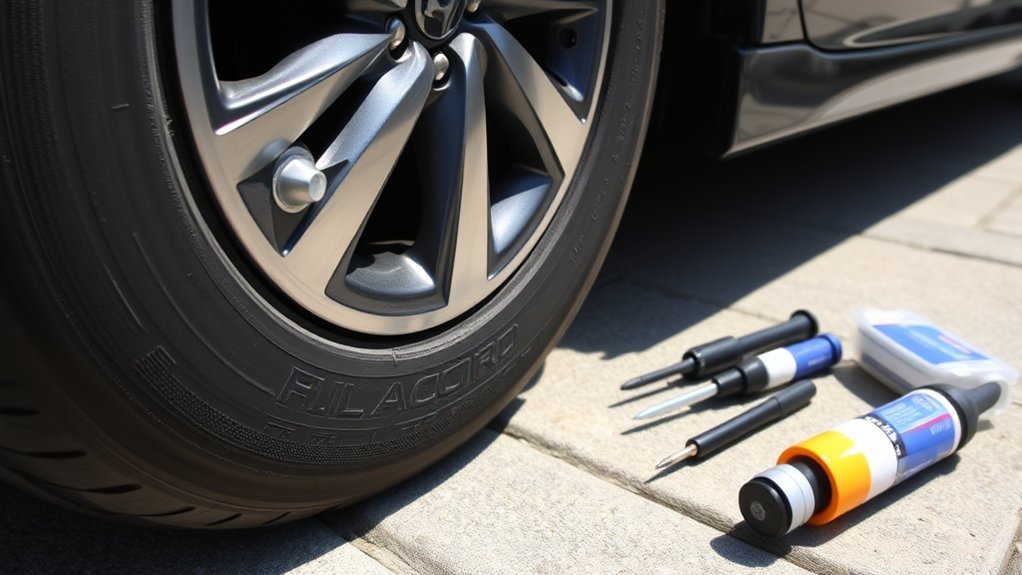
How to Inject Sealant and Air Properly

To inject sealant and air properly into a tire, start by removing the valve cap from the tire valve stem. Attach the sealant hose tightly to guarantee a secure connection. Plug your compressor into an accessory power socket and turn on the power system. Begin injecting both sealant and air into the tire. Use inflation techniques to monitor the pressure gauge closely during this process. Turn off the compressor once the tire reaches the specified psi, typically found in your vehicle’s manual. After inflating for about 10 minutes, drive the vehicle, keeping your speed below 50 mph (80 km/h) to help distribute the sealant types evenly throughout the tire. Always recheck the tire pressure afterward, making sure the compressor is off when you check. If the pressure isn’t within the specified range, repeat the injection process as needed. Additionally, using a longer service life sealant can reduce the need for frequent maintenance and ensure better performance over time.
Essential Guidelines for Driving Post-Repair
Once you’ve repaired your tire, it’s vital to drive carefully to guarantee the sealant effectively fills the puncture. Start by driving your Honda Accord for about 10 minutes at speeds not exceeding 50 mph (80 km/h). This controlled speed allows the sealant to settle properly, enhancing the effectiveness of your temporary repairs.
Be sure to recheck the tire pressure after this initial drive. Use the air hose to gauge the pressure accurately; avoid turning on the air compressor during this check. It’s important to monitor for any unusual vibrations or handling issues, as these could signal further problems requiring inspection.
To remind yourself of the limitations imposed by the temporary repair, keep the speed restriction label visible on your dashboard. Following these driving precautions guarantees a safer experience while you plan for a more permanent fix. Additionally, remember that sealants provide temporary fixes and should be replaced with a professional repair soon after.
Why Rechecking Tire Pressure Matters
Rechecking tire pressure after a repair is essential for ensuring your tire’s safety and performance. Proper inflation not only enhances tire longevity but also boosts fuel efficiency, saving you money at the pump. Without regular checks, you risk increased wear and potential blowouts, compromising your driving experience. Additionally, maintaining proper tire pressure helps improve handling and stability while driving.
Importance of Proper Inflation
Maintaining proper tire inflation is essential not just for fuel efficiency but also for overall safety and performance. Under-inflated tires can reduce fuel economy by up to 3% for every 1 psi drop in pressure, costing you more at the pump. When you keep your tire pressure at the recommended levels, you enhance vehicle handling and stability, greatly lowering the risk of blowouts. This directly contributes to safety benefits, especially in adverse weather conditions where traction and braking performance are critical. Regularly checking your tire pressure, ideally once a month, can prevent unexpected flat tires and guarantee your tires operate within their designed specifications, ultimately leading to a safer, more economical driving experience.
Enhances Tire Longevity
Regularly checking your tire pressure not only boosts fuel efficiency but also plays a crucial role in extending the lifespan of your tires. Maintaining the recommended pressure prevents uneven wear, allowing for ideal tread depth and reducing the risk of blowouts. Under-inflated tires can compromise handling, increasing accident risk, especially in adverse conditions. By ensuring proper inflation, you enhance ride comfort and stability, making your driving experience safer. Remember, tire rotation is essential too; it promotes even wear across all tires. With nearly 30% of vehicles having at least one under-inflated tire, routine pressure checks are critical. So, take five minutes each month to check your tire pressure and protect your investment in safety and longevity.
Improves Fuel Efficiency
While you might not think about it often, tire pressure greatly impacts your vehicle’s fuel efficiency. Maintaining proper tire pressure can boost fuel efficiency by up to 3%. Under-inflated tires increase rolling resistance, leading to higher fuel consumption. A mere 1 PSI drop can decrease fuel economy by about 0.2%, making regular checks essential for peak performance.
Well-inflated tires guarantee better contact with the road, enhancing traction and reducing accident risk. They also contribute to a smoother ride, minimizing wear on your suspension system. By regularly checking and adjusting tire pressure, you can extend tire life, prevent uneven wear, and ultimately save on replacement costs—all essential aspects of effective tire maintenance that greatly improve your overall fuel efficiency.
Troubleshoot Your Flat Tire Sealant Kit Issues
Before you attempt to use your flat tire sealant kit, it’s crucial to troubleshoot any potential issues to guarantee an effective repair. First, check the sealant expiration date; expired sealant won’t work. Also, verify the puncture size doesn’t exceed 3/16 inch (4 mm). If multiple tires are flat, don’t use the kit, as it’s meant for single tire repairs only.
Next, follow these essential steps:
| Step | Action | Importance |
|---|---|---|
| Inspect Sealant | Check expiration date | Confirms effectiveness |
| Measure Puncture | Confirm size is ≤ 3/16 inch | Ensures proper sealing |
| Attach Hose | Securely connect to valve stem | Prevents leaks |
| Monitor Compressor | Limit usage to 15 minutes | Avoids overheating and damage |
Additionally, ensure punctures are located on the tread area to maintain safety during your repair.
How to Maintain Your Temporary Repair Kit
Maintaining your temporary repair kit is vital for guaranteeing it works effectively when you need it most. Start by regularly inspecting your kit for completeness; make certain all components are present and functional. It’s essential to check the expiration date of the tire sealant to confirm its effectiveness—replace it if it’s expired. Store the compressor and sealant kit in a dry, safe location to protect them from damage and make sure they’re ready for emergencies. Familiarize yourself with the operational limits of the compressor; it shouldn’t run for more than 15 minutes to avoid overheating. Finally, periodically test the air compressor to confirm it’s functioning properly. Good temporary kit maintenance will prepare you for unexpected tire issues, giving you peace of mind and the freedom to drive confidently. Remember that tire sealants are most effective on small punctures up to ¼ inch, so understanding their limits is crucial.
When to Seek Professional Help for Tire Issues?
When should you seek professional help for tire issues? If the puncture exceeds 3/16 inch (4 mm), it’s beyond the capabilities of most temporary repair kits, and you need a professional for a thorough puncture assessment. Multiple punctures in a single tire can render it unrepairable, so consulting an expert is advisable. Additionally, any damage to the sidewall or visible structural issues should prompt immediate professional evaluation, as these cannot be safely repaired. If you notice persistent air loss after using a temporary repair kit, it’s essential to have a professional examine the tire for underlying problems. Remember, if you’re ever unsure about the safety or repairability of your tire, it’s best to consult a tire professional. Taking these steps guarantees your safety and helps you explore all available repair options effectively. Furthermore, regular tire inspections can help identify issues before they become serious concerns.
Frequently Asked Questions
Can You Fix a Tire With a Nail Hole?
Yes, you can fix a tire with a nail hole using tire repair techniques. Just avoid nail removal until you start repairs, ensuring you maintain pressure and seal the puncture effectively for safe driving.
How Much Does It Usually Cost to Fix a Nail in a Tire?
When it comes to tire repair costs, you’re usually looking at $10 to $30 for a puncture repair. Explore various puncture repair options, but consider professional help for a reliable fix that lasts.
Which Type of Puncture Cannot Be Repaired?
Punctures over 3/16 inch, sidewall punctures, or those causing bulging can’t be repaired. For safety, focus on puncture prevention tips and effective tire repair methods to maintain your vehicle’s performance and integrity.
Can I Drive 2 Miles on a Flat Tire?
You shouldn’t drive two miles on a flat tire. Prioritize tire safety; even short distances can damage the tire, wheel, and suspension. Stop and assess the situation instead of risking control and safety.
Conclusion
In the journey of car ownership, a nail puncture is like a storm cloud threatening your sunny drive. Don’t let it rain on your parade; instead, wield your temporary repair kit like an umbrella, shielding your tires from further woes. Remember, while quick fixes can save the day, regular maintenance and professional check-ups are your trusty companions. Stay vigilant, keep your pressure checked, and navigate the roads with confidence, knowing you’re prepared for any detours ahead.
Related Articles

How to Get More Miles Out of Your Honda Accord Tires
Boost your Honda Accord tire lifespan with simple tips, but discover the crucial steps that could save you money and enhance your driving experience.
Read More
What Affects Honda Accord Tire Lifespan the Most
How your Honda Accord's tire lifespan is influenced by driving habits, maintenance, and road conditions will surprise you—discover the vital factors now!
Read More
How Long Do Honda Accord Tires Last on Average
By understanding tire longevity for your Honda Accord, you can optimize performance and safety—discover the key factors that affect their lifespan.
Read More