
How to Dismount a Tire: Step-By-Step Guide With Basic Tools
To dismount a tire, park on a flat surface, engage the parking brake, loosen the lug nuts, and remove the wheel. Deflate the tire by pulling the valve core, then use a bead breaker to separate both beads from the rim. With tire levers or a manual machine, pry the bead over the flange and work around the wheel until the tire comes off. Protect TPMS sensors and inspect the rim, and you’ll pick up the finer points next.
Key Takeaways
- Gather basic tools: jack, lug wrench, valve core tool, bead breaker, tire lever, and tire lubricant.
- Park on a flat surface, engage the parking brake, and loosen lug nuts before lifting the wheel.
- Remove the valve core to fully deflate the tire, then use a bead breaker to separate the bead from the rim.
- Work the tire edge over the rim flange with a lever, moving evenly around both sides until the tire comes free.
- Inspect the rim and TPMS sensor for damage, corrosion, or debris before remounting a new tire.
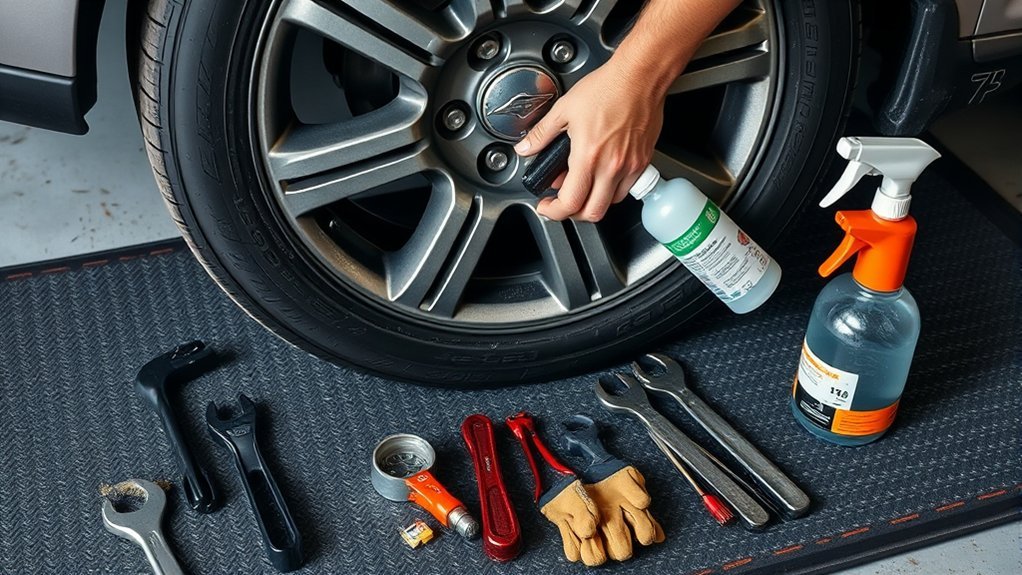
What You’ll Need to Dismount a Tire
To dismount a tire safely and efficiently, you’ll need the right tools and a stable setup. Gather the tools you need: a tire machine or manual tire lever, a bead breaker, an air compressor, and a valve core tool to remove the valve stem core for full deflation. Wear gloves and goggles so you can work with control and protect yourself from debris. Set the wheel on a sturdy tire changer or work surface that won’t shift under load. Apply lubricants, such as tire mounting paste, to the bead so you can cut friction and separate the tire cleanly from the rim. Keep your bead breaker positioned for controlled release, not force. With the right equipment, you don’t have to rely on brute strength; you can free the tire with precision, efficiency, and confidence. Additionally, using tires like the Fullway HP108 can enhance your overall driving experience due to their reliable performance.
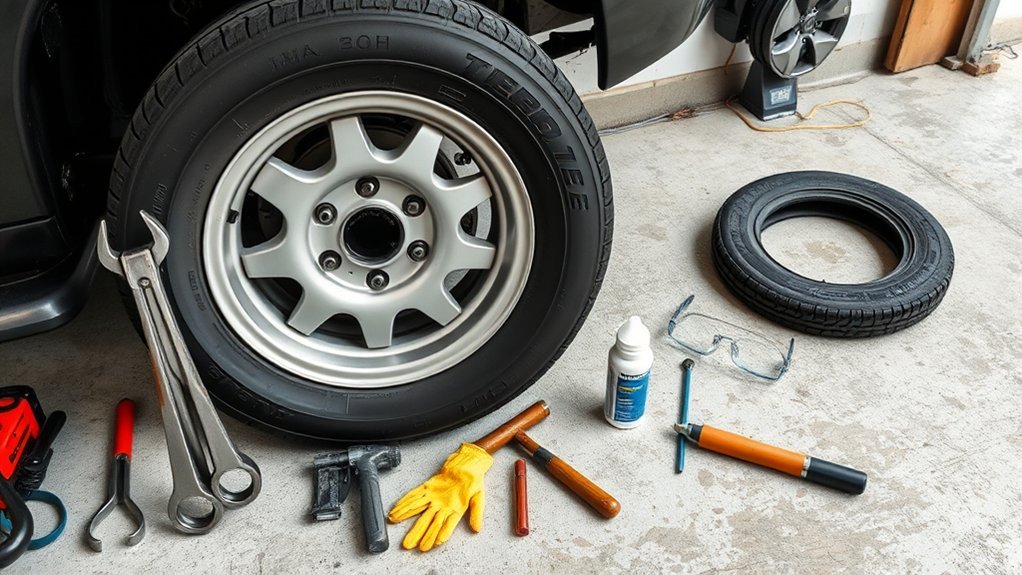
Park Safely and Prepare the Wheel
Park the vehicle on a flat, stable surface away from traffic, then engage the parking brake so the wheel can’t shift while you work. This Choose a Safe Location step gives you a secure base and keeps you in control. Before you touch the wheel, gather necessary tools: a lug wrench, tire iron, and jack. Keep them within reach so you don’t waste motion or expose yourself to unnecessary risk. If the wheel has a hubcap, remove it carefully with your hands or a flat tool to expose the lug nuts. Next, loosen lug nuts in a star pattern while the tire stays on the ground. Turn each nut slightly, then move across the wheel to the opposite nut. This crisscross sequence spreads force evenly, reduces distortion, and prepares the wheel for clean removal. Work deliberately; precision here protects your freedom to keep moving. Additionally, having a reliable spare tire kit can provide extra assurance during roadside repairs.
Deflate the Tire and Break the Bead
Remove the valve stem core with a valve core tool so you can lower tire pressure quickly and safely. Set the tire upright with the valve stem facing up near the bead breaker, then make sure all air is out before you activate the bead breaker arm. Once the bead is free, use a lever bar to separate the tire from the rim without damaging either surface. It’s important to ensure the tire is compatible with the original sizing to avoid complications during dismounting.
Remove Valve Core
Unscrew the valve core with a valve core removal tool to let the tire deflate completely; then wait a few minutes to be sure all air has escaped before you start dismounting. You remove the valve quickly, deflate the tire fully, and keep pressure from trapping you or the rim. Once the casing is dead flat, stand the wheel upright with the valve stem facing up. This position helps you break the tire bead with control. Use a bead breaker tool around the circumference, keeping it aligned with the rim so you don’t mar the metal. After the bead releases, you can remove the tire more safely with a lever bar, prying only as much as needed. Work deliberately, maintain your grip, and let the tool do the hard work.
Lower Tire Pressure
With the valve stem core already out, the tire will bleed down to a safe, workable pressure and you can position the wheel upright on a flat surface with the valve stem facing up near the bead breaker. Let it settle, then lower tire pressure fully by venting any remaining air. You’ll now have a controlled flat tire that’s ready for bead breaking. Wear gloves and goggles before you remove it from the work area. If you’re using a bead breaker, align the arm against the sidewall and apply steady force until the bead drops clear of the rim. If you’re working manually, use a tire iron or pry bar to remove the bead from the wheel with measured pressure, avoiding rim damage. This step gives you leverage and freedom for the next move.
Separate Bead Safely
Deflate the tire completely by removing the valve stem core, then set the wheel upright with the valve stem facing up near the bead breaker so you can reach the bead cleanly. Lock the tire and rim securely before you apply force. If you already remove the lug nuts, the wheel comes free for this stage. Use the bead breaker arm to press straight down at a right angle to the sidewall until you hear the bead release from the rim.
- A flat, silent tire
- The wheel clamped tight
- The bead breaking free
- A lever bar easing the edge away
Work around the circumference to separate each seat the bead fully. Then pry carefully with a lever bar, keeping control of the steel edge. This clean break gives you real freedom while changing your tire.
Dismount the Tire From the Rim
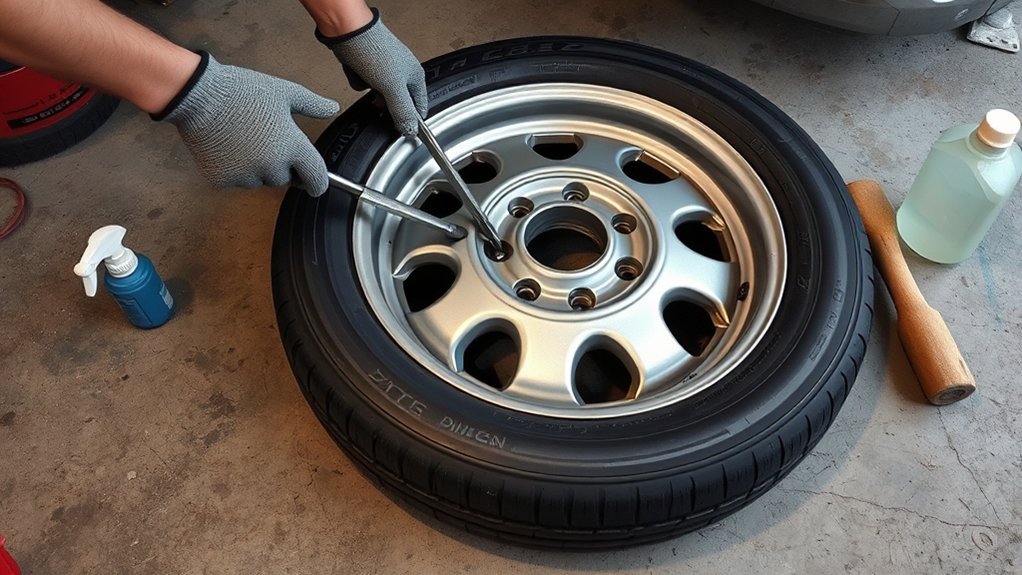
Once the bead’s loose, you can release the rim clamps and keep the assembly supported. You’ll then use the lever bar to lift the tire edge over the rim flange, working evenly around the wheel. Keep the tire controlled so it clears the rim without damaging either surface. Additionally, ensure that you have the right tools to make the dismounting process smoother and more efficient.
Break Bead Loose
Set the tire upright on a flat surface with the valve stem facing up so you can access the bead cleanly. Place the bead breaker against the sidewall, usually 90 or 180 degrees from the stem, and press to break bead loose.
- You see the tire standing firm, ready for action.
- The bead breaker bites into the sidewall with controlled force.
- The rim stays securely held while the bead releases.
- You repeat on the opposite side, then check for damage.
Work methodically so you free the tire without scarring the rim or tearing the bead. Keep pressure steady, verify both sides are detached, and move with precision. Your tire’s liberation starts here.
Release Rim Clamps
Pull the valve stem core to bleed off the tire’s remaining pressure, then keep the wheel locked firmly on the machine so it can’t shift while you work. Position the tire upright with the valve stem up near the bead breaker, then release rim clamps to free the tire and wheel interface. With the bead already loose, activate the bead breaker arm so it presses evenly around the circumference, reducing resistance without pinching the bead. Follow the steps involved with deliberate control, because precision matters when dismounting or mounting a tire. Once the rim is secured, use a lever bar to pry the tire edge past the rim lip. Work slowly, keep the tool aligned, and avoid scuffing the bead or bending the rim as you separate the assembly.
Lift Tire Off
With the tire fully deflated and the wheel locked in place, use a tire lever or pry bar to start lifting the tire bead over the rim lip. Position the wheel upright on a flat surface, valve stem up, near the bead breaker. Lock the bead breaker arm, then force the bead free from the wheel rim. Keep steady pressure and work the tire lever in small increments so you can lift tire off without warping the rim.
- The bead opens.
- The lever bites.
- The tire rises.
- The bead clears.
Continue around the rim until the tire loosens fully, then pull it away by hand. Watch for trapped rubber or pinched sections; if you find any, reset the lever and free them before continuing.
Protect TPMS Sensors and the Rim
Before you dismount the tire, inspect it for TPMS sensors so you don’t damage them during removal. Keep the valve stem at the top when you break the bead, and secure the tire firmly on the machine so it can’t shift and strike the sensor. Use plastic protectors on rim clamps to prevent scratches and dents, especially on polished or chrome wheels. That small move preserves the rim’s finish and reduces risk to the seal. Ensuring that the tire is properly secured can enhance tread life and overall performance.
| Control | Purpose | Result |
|---|---|---|
| TPMS sensors | Avoid pressure on the valve area | Less damage |
| rim clamps | Add plastic protectors | No scratches |
| Tire securing | Stop sudden movement | Stable removal |
| Rim check | Spot corrosion or dents | Better seal |
After dismounting, inspect the rim for damage or corrosion that could compromise the seal of the next tire and the TPMS’s performance. Work deliberately, and keep the process clean, controlled, and free.
Inspect the Wheel Before Remounting
Now inspect the wheel closely for cracks, bends, corrosion, and wear before you remount the tire, since any of these defects can affect safety and performance. You’re checking the wheel for hidden damage that can steal control and freedom on the road.
- Trace the bead seat for debris, rust, or sealant residue that could block a clean seal.
- Look at the valve stem for cuts, stiffness, or seepage that can cause air leaks.
- Scan the lug nut holes for elongation or wear that may let fasteners seat unevenly.
- Wipe the rim clean so the tire can sit flush without contamination.
Use a bright light and rotate the wheel slowly. If you spot damage, don’t remount it until you repair or replace the wheel. A sound wheel supports proper fit, stable inflation, and dependable service, so you can keep moving with confidence instead of fighting preventable failures. Additionally, ensure you are aware of the importance of selecting the right winter tires for enhanced performance and safety in winter conditions.
Frequently Asked Questions
How to Take a Tire off Step by Step?
You remove a tire by first deflating it fully, then extracting the valve stem core. Next, you break the bead with a bead breaker, secure the wheel, and use a lever bar to lift the tire off the rim. Follow tire removal techniques carefully, keep necessary equipment ready, and apply safety precautions throughout. Avoid common mistakes like rushing or prying too hard. Inspect the wheel and tire after dismounting.
How to Dismount a Tire by Hand?
You dismount a tire by hand by fully deflating it, removing the valve core, then breaking the tire bead from the rim with manual techniques. Use safety precautions: wear gloves, secure the wheel, and keep fingers clear. Insert a tire lever or pry bar under the bead, work around one side, then flip and repeat. Tool recommendations: tire irons, lubricant, and a bead breaker. Clean the rim before remounting.
What Is the 3 Tire Rule?
The 3 tire rule says you should replace the single bad tire when the other three are sound; don’t wheel a chariot with one rotten wheel. You keep matched tread depth, preserve handling, braking, and stability, and protect AWD drivetrains. Use tire maintenance tips, tire changing tools, tire installation techniques, and tire safety practices to keep your setup balanced, safe, and mechanically liberated from avoidable wear and risk.
How to Get a Tire to Come Off?
Deflate it fully, then break the bead with a bead breaker or lever. You’ll need to lock the wheel, apply lubricant at the bead, and work evenly around the rim until the tire loosens. Don’t force it; protect the rim with careful prying. In tire changing, this supports wheel alignment, tire maintenance, and rim inspection. Stay methodical, keep control, and you’ll free the tire without surrendering the wheel or your independence.
Conclusion
In the end, you’ve got the basics to dismount a tire safely and cleanly: secure the wheel, deflate it fully, break the bead, and work the tire off the rim with care. Check for TPMS sensors, rim damage, and debris before you stop. A careful hand now saves a costly mistake later. After all, what’s easier than removing a tire? Doing it right the first time.
Related Articles

Can’t Get Lug Nuts Off Your Tire? Proven Solutions That Work
Just when stubborn lug nuts seem impossible, discover proven fixes that can free your tire fast and safely.
Read More
Where to Place a Tire Jack: Safe Jacking Points by Vehicle
On the right jack points, a simple mistake can damage your car or put you at risk.
Read More
How to Tell the Height of a Tire: Reading Tire Size Numbers
Want to decode tire size numbers and uncover your tire’s true height before the surprising comparison tips?
Read More