
Where to Place a Tire Jack: Safe Jacking Points by Vehicle
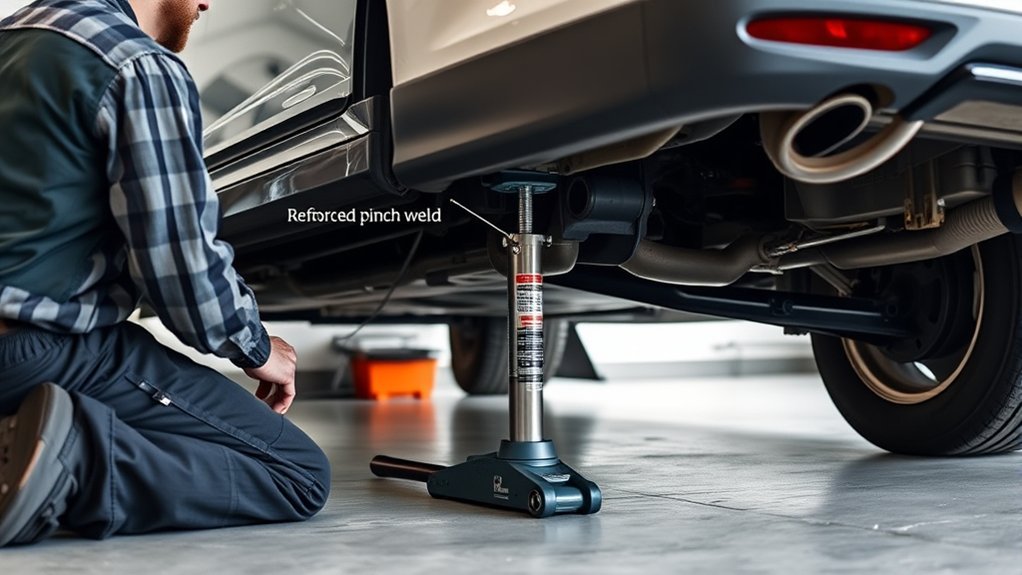
Place your tire jack at the vehicle’s approved jack points, usually the reinforced pinch welds behind the front wheels and ahead of the rear wheels, or the frame rails on trucks and SUVs. Set the jack on flat, solid ground, center it on the marked notch, and use a rubber pad if needed. Never lift on thin sheet metal, suspension parts, or plastic trim. Check your owner’s manual first, and you’ll see the details that matter.
Key Takeaways
- Check the owner’s manual for exact jack points before lifting any vehicle.
- Most cars use reinforced pinch welds behind front wheels and ahead of rear wheels.
- Sedans should be lifted at marked pinch welds or frame edges, using a rubber jack pad.
- SUVs and trucks should be lifted on approved frame rails, not thin sheet metal.
- Park on level, solid ground and place jack stands under approved support points before working.
Where Is the Jack Point on a Car?
To find the jack point on a car, look just behind the front wheels and just in front of the rear wheels, where most vehicles have reinforced pinch weld seams or small notches marking the lift points. These jack points are designed to support the vehicle’s weight while you work. Place the jack’s saddle under the marked seam, then add a rubber jack pad to protect the metal and keep the lift stable. If your vehicle has four main jack points, use the front pair or rear pair as needed, but verify the exact locations in the owner’s manual before lifting. On some trucks and SUVs, you may see approved frame rails listed as lifting points; use them only when the manual explicitly allows it. Some rear-wheel drive vehicles also offer a center lift point. You deserve a safe, controlled lift, so don’t guess—confirm the point, position the jack squarely, and lift with precision. Additionally, ensure that you select the right tires for optimal all-season performance to maintain safety and efficiency while driving.
How to Find Jack Points by Vehicle Type
On sedans, you’ll usually find jack points at the pinch welds or frame edges behind the front wheels and ahead of the rear wheels, marked by notches or reinforced seams. On SUVs and trucks, use the frame rails or other vehicle-specific lift points, but don’t assume their locations without checking the manual. Always verify the exact jacking points in your owner’s manual before lifting to avoid damage or instability, especially considering the importance of tire maintenance for safe driving.
Sedan Jack Points
For most sedans, you’ll find the designated jack points just behind the front wheels and just ahead of the rear wheels, along the pinch weld seam. Look for small notches or reinforced sections there; those marks show where you can safely place the jack. Keep the vehicle on a flat, stable surface before lifting, so the jack won’t shift, sink, or tip. Use a rubber jack pad at the pinch weld to protect the body and spread the load. Your owner’s manual is the final authority, because exact locations can vary by model. Once you confirm the front or rear jack point, position the jack squarely, raise the car slowly, and keep your focus on control. That precision gives you safe, open access.
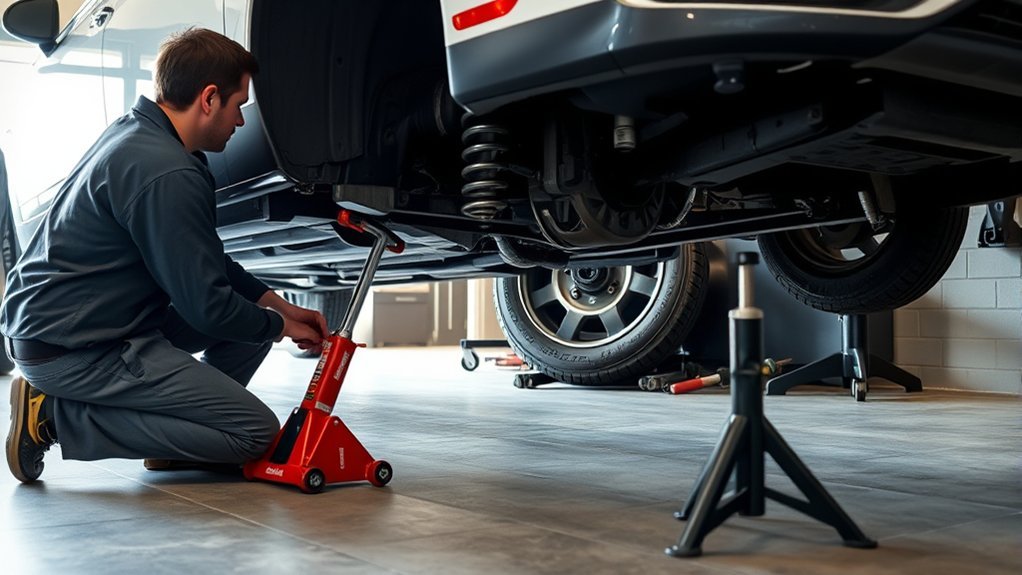
SUV And Truck Frames
With SUVs and trucks, you’ll usually find the safest jack points along the frame rails, often just inboard of the front and rear wheels, where the structure is built to carry the load. Use the frame rail, not thin sheet metal, and center your floor jack on the reinforced section.
| Area | Use | Check |
|---|---|---|
| Front frame rail | Lift front axle | No crush points |
| Rear frame rail | Lift rear axle | Clear suspension |
| Reinforced notch | Jack contact | Firm seating |
| Center lift point | Whole-end lift | Balanced load |
| Jack stands | Support vehicle | Lock before work |
After lifting, set jack stands under approved support points and give the vehicle a gentle shake. If it moves, lower it and reset.
Owner Manual Guidance
Your owner’s manual is the most reliable source for locating jack points because it gives the exact diagrams and descriptions for your vehicle type. You should use it before lifting, since the manual identifies designated jack points that protect the chassis and suspension. On passenger vehicles, you’ll often find these points behind the front wheels and ahead of the rear wheels, usually marked by notches or reinforced seams. For trucks and SUVs, the manual may specify frame rails, but don’t assume that without checking. Some rear-wheel drive models also use center lift points. By consulting the owner’s manual every time, you lift with confidence, preserve structural integrity, and keep your vehicle ready for the road.
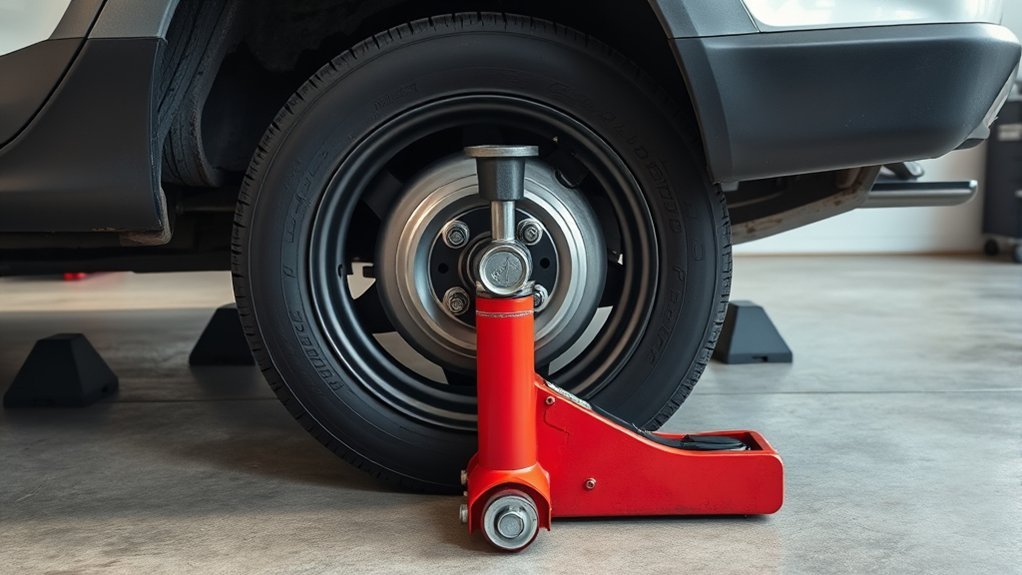
Where to Place a Tire Jack on Front Tires
For front tires, place the jack just behind the wheel at the designated front jack point, usually marked by a notch or reinforced seam in the pinch weld. Center the jack on that point so it stays level and doesn’t slip as you lift the vehicle. Before removing the lug nuts, engage the parking brake, verify the jack’s position, and raise the tire only until it clears the ground by about 1 to 2 inches. Ensuring the jack is positioned correctly enhances safety during tire changes.
Front Jack Point Location
The front jack point is usually just behind the front wheels along the pinch weld seam, which gives you a reinforced lifting area. Check your owners manual before you lift, because exact locations vary by make and model. Center the jack on the front jack point to keep the car stable and to stop tilting. Lift only until the tire clears the ground by one to two inches; that’s enough for removal and replacement. Don’t place the jack under suspension parts or other weak areas.
| Check | Action | Result |
|---|---|---|
| Location | Confirm front jack point | Accurate placement |
| Alignment | Center jack | Stable lift |
| Height | Raise 1–2 in | Safe clearance |
| Area | Avoid weak components | Prevent damage |
Pinch Weld Placement
Once you’ve found the front jack point, position the jack at the pinch weld just behind the front wheel. Center the saddle on the reinforced areas of the seam so the load sits squarely and the body stays stable.
- Find the notch or thicker seam that marks the correct lifting point.
- Align the jack directly under the pinch weld; don’t offset it.
- Verify your owner’s manual for the exact location on your vehicle.
Use a solid, level surface so the jack can work without shifting. When you place it correctly, you protect the chassis and gain clean, controlled lift. Precise placement gives you the freedom to service the front tires safely and without unnecessary strain.
Lift Safety Checks
Before you remove the lug nuts, make sure the front jack is set at the designated point just behind the front wheel, the vehicle is on solid, level ground, and the parking brake is engaged. Check your owner’s manual to confirm the exact jack point on the pinch weld seam or frame rail, because the wrong contact point can damage the structure. Use the jack to lift the vehicle until the tire clears the ground by about one to two inches; that’s enough for removal without sacrificing stability. Always use a stability check: grip the body and gently shake it to confirm the car doesn’t shift on the jack. If it moves, lower it and reset the jack before you continue working under or around the vehicle.
Where to Place a Tire Jack on Rear Tires
To lift a rear tire safely, place the jack just in front of the rear wheel at the vehicle’s designated jack point, usually marked by a notch or reinforced section of the body. Use your floor jack on flat, solid ground so the rear wheels stay stable and you keep control. Align the saddle exactly with the lifting point before you raise anything.
- Check the owner’s manual for the exact rear jack point.
- Center the jack under the marked area to prevent slip or body damage.
- Lift slowly, then confirm the vehicle’s stability before removing lug nuts.
You’re not surrendering your safety to guesswork; you’re taking command of the lift. If the car shifts, lower it and reset the jack. Once it’s secure, you can work with confidence and precision. Having a reliable spare tire kit can also enhance your preparedness for any roadside emergencies.
How to Position a Jack on Pinch Welds
Pinch welds run along the vehicle’s sides just beneath the door sills, and you should place the jack directly under the correct notch or reinforced section identified in the owner’s manual. Confirm the exact lift point for your model before you raise it, because precise placement protects the body and keeps the load stable. Set your Car Jack on a flat, solid surface so it won’t sink or shift while lifting. Align a rubber jack pad with the pinch welds to improve grip and reduce metal damage. Then center the jack under the notch, not beside it, so the force spreads evenly through the reinforced area. Raise the vehicle slowly and watch for movement; if the jack starts to slip, lower it and reset. With careful positioning, you keep control, preserve the structure, and work with confidence and independence. Additionally, using a jack designed for load capacity ensures safety while lifting.
Where You Should Never Put a Jack
Never place a jack under suspension arms, the exhaust system, or any rusted, bent, or compromised area, because these parts aren’t designed to support the vehicle’s weight and can fail under load. If you choose the wrong spot, you can damage components, create instability, and trap yourself in a dangerous setup. Don’t guess at the rear differential unless your owner’s manual explicitly approves it for your vehicle.
- Avoid suspension arms: they can shift, flex, or collapse.
- Keep clear of the exhaust system: heat, shape, and mounting points make it unsafe.
- Stay off soft, uneven, or damaged ground: the jack can sink or tip.
Always check your owner’s manual for designated jack points, as using the correct tire size specifications ensures safe lifting and stability. That’s how you lift with control, protect your machine, and stay free from unnecessary risk.
How to Check Jack Placement Before Lifting
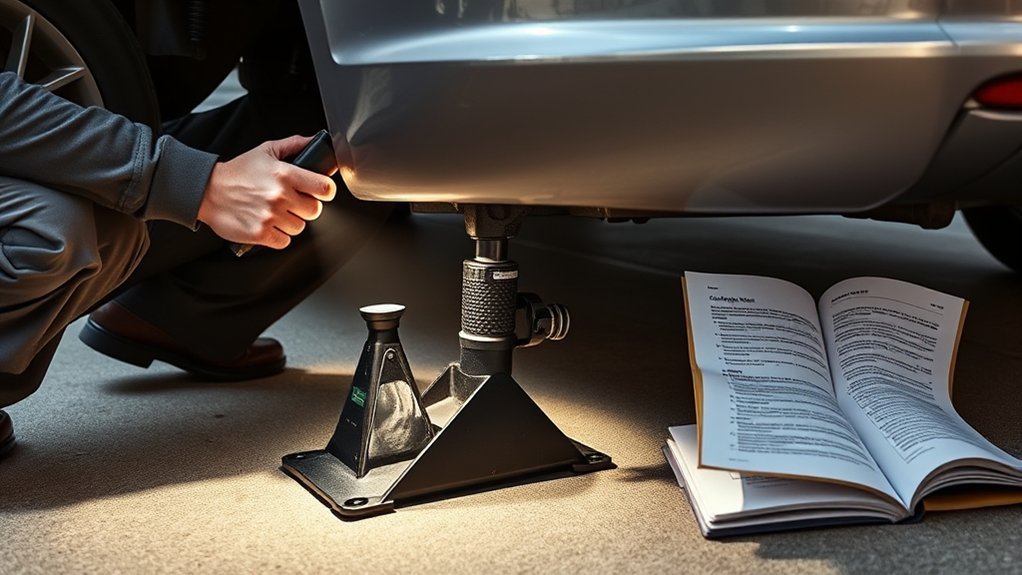
Before you lift the vehicle, confirm the jack points in your owner’s manual and line the jack up directly under the marked notch or reinforced seam. Center the jack so it bears evenly on the reinforced metal, not on trim or thin body panels. Check that the ground beneath it is solid and level; soft or uneven surfaces can let the jack shift and compromise stability. Before pumping, give the jack a slight shake and watch for movement. If it slips, reset it until it seats firmly against the pinch weld or frame contact point. Keep your hands clear while you verify placement. Once the vehicle rises slightly, pause and inspect the contact point again. A properly placed jack should stay square, steady, and aligned as you lift. This quick check protects the vehicle, preserves your freedom to work efficiently, and reduces the chance of damage or injury. Additionally, using a reinforced construction method for your jack can enhance stability while lifting.
Floor Jack vs. Scissor Jack Safety
When you’re choosing between a floor jack and a scissor jack, prioritize stability and the lifting method that matches the job. A floor jack gives you stronger, steadier lift control, so it’s better for garage repairs and heavier loads. Use it under the approved jack point, then set jack stands before you work; never trust hydraulic pressure alone. A scissor jack is lighter, compact, and useful for emergency tire changes, but its screw mechanism moves slower and takes more effort.
- Park on solid, level ground.
- Lift only at the correct jack point.
- Support the vehicle before reaching under it.
For a rear tire change, confirm the load path stays straight and the car can’t shift. If the surface is soft or sloped, stop and reset. You want the safest tool for the task, not the fastest shortcut. Additionally, consider the tire options overview when selecting tires that fit your vehicle’s specifications, ensuring safety and performance.
Frequently Asked Questions
Where to Put a Safety Jack on a Car?
Put the safety jack on the car’s designated jack point, usually behind the front wheel or in front of the rear wheel, as your owner’s manual specifies. Center it on the pinch weld and use a rubber pad to protect the body. Don’t lift on suspension parts. Follow proper jacking techniques and safety precautions, then shake the car gently to confirm it’s stable before you work underneath.
Is It Safe to Get Under a Car on Jackstands?
Yes, you can get under a car on jackstands if you verify jack stand safety first. No shortcuts—your freedom depends on vehicle stability. Park on solid, level ground, set the parking brake, and chock the wheels. Place the stands at the manufacturer’s jacking points, then lower the car onto them fully. Shake the vehicle gently to confirm it’s secure. Never trust a hydraulic jack alone.
What Is the Rule of Thumb for Jack Stands?
Always use jack stands whenever you’re under a vehicle; that’s the core rule of thumb for jack stand safety. You should position them on solid, level ground at the manufacturer’s designated points, then lower the vehicle onto them fully. Never trust a hydraulic jack alone. Check proper positioning before you work, and set the stands to the lowest stable height so you can move freely and safely.
Where Should I Put the Tire Jack?
You should place the tire jack at the vehicle’s designated jack point, usually on the pinch weld behind the front wheel or in front of the rear wheel, exactly where the manual specifies. That jack positioning preserves vehicle stability and protects the body. Don’t lift under suspension arms, exhaust parts, or floor panels. Raise the tire one to two inches, then remove the lug nuts and swap the wheel safely.
Conclusion
Now that you know where to place a tire jack, you can lift your vehicle with more confidence and control. Always verify the factory jack points, center the saddle on the pinch weld or frame, and keep the jack on a flat, stable surface. Why risk a crushed rocker panel or a slipping load when a few seconds of checking can prevent it? A proper setup keeps you safe and protects your vehicle every time.
Related Articles
How to Tell the Height of a Tire: Reading Tire Size Numbers
Want to decode tire size numbers and uncover your tire’s true height before the surprising comparison tips?
Read More
How to Remove a Motorcycle Tire: Complete Tutorial
Gear up to remove a motorcycle tire the right way, with expert tips that keep you reading for the full, safe tutorial.
Read More
How to Remove a Stripped Lug Nut From a Tire: Expert Methods
Discover expert methods to remove a stripped lug nut from a tire before damage worsens, and see which fix works best.
Read More