
How to Plug a Tire on a 4Runner in an Emergency

If you need to plug a tire on your 4Runner in an emergency, first gather a tire plug kit, an air compressor, and a jack. Park on a level surface and engage your parking brake. Inspect the tire for visible punctures. Use a reaming tool to clean the hole, then insert the plug securely. Inflate to the recommended pressure and check for leaks with a soapy solution. For further insights on tire maintenance, continue exploring the details.
Understanding the Basics of Tire Plugging
Tire plugging is a practical solution for addressing small punctures in the tread area of your 4Runner’s tires. This method isn’t suitable for sidewall damage, which requires tire replacement. Using a tire plug kit, you’ll find vital tools like plugs, a reaming tool, and a plug insertion tool. Start by cleaning and enlarging the puncture hole with the reaming tool to guarantee a proper seal. It’s important to insert the plug quickly after removing the reaming tool to minimize air loss, enhancing repair success.
Many repair myths suggest that plugging is a permanent fix, but it’s a temporary solution that requires ongoing tire maintenance. Familiarizing yourself with the process on old tires can boost your proficiency, allowing for quicker and more effective repairs during emergencies. Understanding these basics empowers you to take control of your tire issues and maintain your 4Runner’s performance on the road.
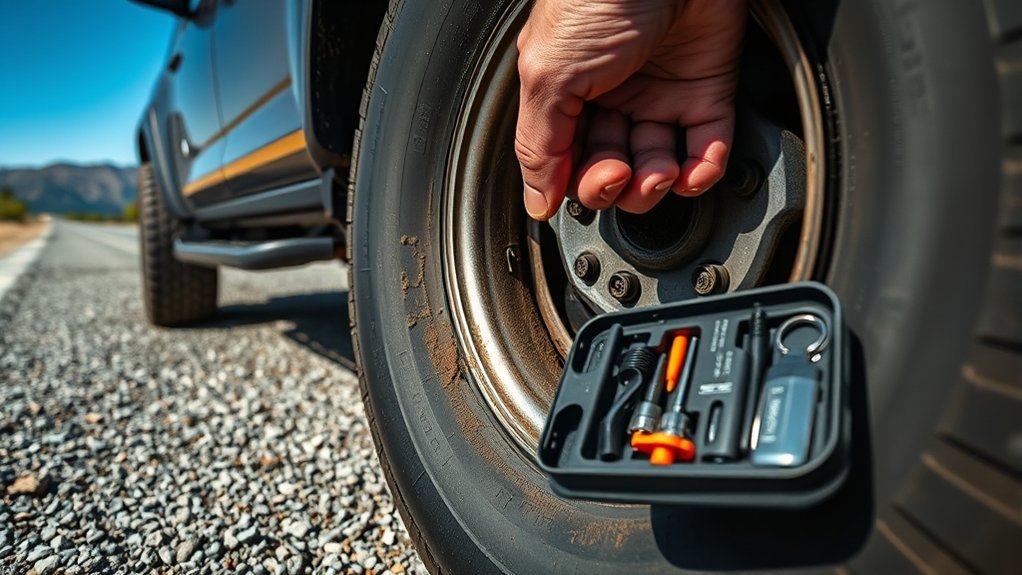
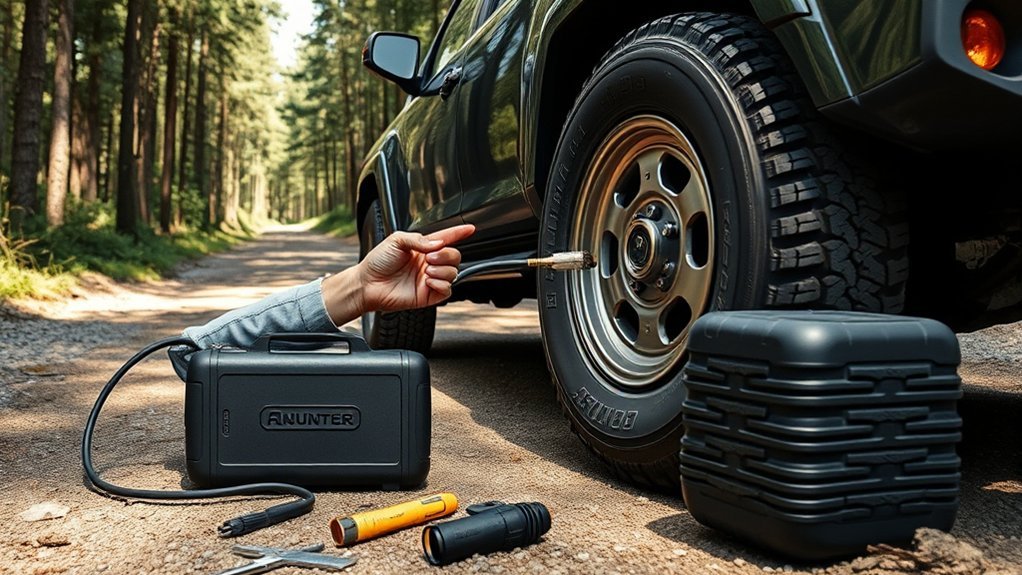
Essential Tools for Tire Repair on a 4Runner
When you’re faced with a flat tire on your 4Runner, having the right tools on hand can make all the difference in executing a quick and efficient repair. Essential tools for tire repair include:
| Tool | Purpose |
|---|---|
| Tire Plug Kit | Quickly repairs punctures using tire repair techniques. |
| Air Compressor/Tire Inflator | Re-inflates the tire post-repair for safe driving. |
| Needle-Nose Pliers | Removes objects that caused the puncture. |
| Jack | Safely lifts the 4Runner for tire access. |
Emergency preparedness means knowing where these tools are located in your vehicle. By familiarizing yourself with their positions, you can expedite the repair process, ensuring that you’re back on the road swiftly and safely. Remember, being equipped not only helps you fix a flat but also enhances your confidence in handling roadside emergencies.
Preparing Your Vehicle for Tire Repair
Before you start, make sure your 4Runner is parked on a flat surface and the parking brake is engaged. You’ll need to gather essential tools like a tire plug kit, inflator, and pliers, and locate your spare tire and jack. Inspect the flat tire for visible punctures to guide your repair efforts effectively.
Safety Precautions First
To guarantee a safe tire repair, start by parking your 4Runner on a flat, stable surface and engaging the parking brake. This prevents any rolling during the repair. Turn on your hazard lights to alert other drivers and enhance your safety. Before lifting the vehicle with a jack, locate the designated jacking point near the flat tire to avoid damage. Gather all necessary tools to streamline your repair process. Don’t forget to wear safety gloves and eye protection to guard against sharp objects and debris.
| Action | Purpose | Safety Tip |
|---|---|---|
| Engage parking brake | Prevent vehicle movement | Always check before repair |
| Turn on hazard lights | Alert other drivers | Visibility is key |
| Locate jacking point | Avoid vehicle damage | Refer to owner’s manual |
| Wear gloves and goggles | Protect against debris | Safety first |
Essential Tools Checklist
An effective tire repair on your 4Runner requires five essential tools. Being prepared for emergencies not only guarantees your safety but also empowers you to handle tire maintenance confidently. Here’s what you’ll need:
- Tire plug kit: Includes plugs and a reaming tool for puncture repairs.
- Air compressor or tire inflator: To reinflate your tire post-repair.
- Needle-nose pliers: For removing any objects that punctured the tire.
- Jack: Essential for lifting your 4Runner safely during repairs.
Familiarize yourself with the location of your spare tire and jack to expedite the process. Having these tools on hand will make all the difference when you face an unexpected tire issue on the road.
How to Identify a Tire Leak?
Identifying a tire leak is essential for maintaining your vehicle’s safety and performance. Start by visually inspecting the tire for any puncturing objects like nails or screws without removing it from the vehicle. Use a jack to lift the car, then rotate the tire to the 2 o’clock position for a better view.
Next, mix dish soap with water and apply this soapy solution to the tire’s surface. Watch closely for bubbles forming; these indicate the location of an air leak. Pay attention to areas of unusual tire wear or reduced tread depth, as these can also signal potential issues. Remember, sidewall holes can’t be patched and require tire replacement, while tread punctures may often be repaired. Regular inspections can help guarantee your tires remain safe and functional, ultimately enhancing your driving experience.
How to Use a Tire Plug Kit Effectively

To use a tire plug kit effectively, you’ll need a tire plug tool and a reaming tool to prepare the puncture. Start by cleaning and enlarging the hole with the reaming tool, then quickly insert the plug to prevent air loss. Finally, trim any excess material and check the tire pressure to guarantee the repair is secure.
Essential Tools Required
While you can tackle a tire puncture with confidence, having the right tools at hand is essential for a successful repair. Proper tire maintenance and emergency preparedness hinge on these tools:
- Tire plug kit: Includes plugs and a plug tool for effective sealing.
- Reaming tool: To clean and enlarge the hole for a perfect fit.
- Soapy water mixture: Helps identify punctures by revealing air leaks.
- Utility knife: For trimming excess plug material after insertion.
Equipping yourself with these essentials not only empowers you to handle tire issues but also enhances your sense of freedom on the road. Being prepared transforms unexpected setbacks into manageable challenges, allowing you to continue your journey without fear.
Step-by-Step Plugging Process
Having gathered the necessary tools, you’re ready to tackle the tire plugging process effectively. Follow these steps for reliable emergency tire solutions:
| Step | Action Description |
|---|---|
| Prepare the Plug | Thread the plug through the tool for easy insertion. |
| Clean the Hole | Use a reaming tool to enlarge the puncture for a tight fit. |
| Insert the Plug | Quickly push the plug fully into the hole, then pull the tool out sharply. |
After plugging, trim any excess material. Inflate the tire to the recommended pressure, then check for leaks by applying a soapy mixture to the repair site. Look for bubbles to confirm the seal. These tire repair techniques will get you back on the road safely.
Inflating Your Tire to the Correct Pressure
Inflate your tire to the manufacturer-recommended pressure for ideal performance, typically found on the driver’s side door jamb or in the owner’s manual. For a 2022 Toyota 4Runner, this is usually around 32-35 PSI for all-season tires. Use an air compressor or tire inflator to fill the tire, making sure the nozzle is securely connected to the valve stem. Monitor the pressure gauge closely to achieve the best inflation without over-inflating.
- Feel the freedom of the open road.
- Enjoy enhanced handling and performance.
- Avoid the risk of blowouts and accidents.
- Drive confidently, knowing you’ve taken charge.
After inflating, always recheck the tire pressure after a short drive. Tires can lose pressure when heated, so it’s essential they remain within the safe operating range to guarantee your safety and vehicle performance.
Checking for Leaks After Plugging Your Tire
After plugging your tire, it’s essential to check for leaks to guarantee the repair is effective. Mix dish soap with water and apply the solution to the plugged area, watching for any bubbles that indicate air escaping. Rotate the tire to inspect the entire repaired section thoroughly, as leaks can occur in different spots.
Inspect Plug Integrity Thoroughly
To guarantee your tire repair is secure, it’s crucial to thoroughly inspect the plug for leaks. Begin by inflating the tire to the recommended PSI. Then, mix dish soap and water, coating the repair area while observing for bubbles that signal air leaks. Rotate the tire to access the plug easily, applying pressure to check its integrity. If you notice bubbles, the plug may not be secure; you might need to re-plug or seek professional help. Remember to regularly check the plug’s integrity, especially before long trips. This vigilance guarantees tire plug longevity and enhances your safety.
- Feel empowered by mastering emergency repair techniques.
- Protect your freedom on the road.
- Avoid the anxiety of unexpected failures.
- Drive with confidence and peace of mind.
Monitor Air Pressure Regularly
While it might be tempting to overlook tire maintenance after a plug, monitoring air pressure is crucial for ongoing safety and performance. Regularly check your tire pressure with a reliable gauge, aiming for the manufacturer-recommended PSI of 32-36 for your 2022 Toyota 4Runner. After plugging a tire, inspect for leaks using soapy water to identify bubbles at the plug site. Maintain air pressure checks weekly, especially post-repair, as fluctuations can arise from temperature changes. Consider investing in a tire pressure monitoring system (TPMS) to receive real-time alerts about any pressure drops, enhancing both safety and tire longevity. Keeping a portable air compressor in your 4Runner allows you to quickly adjust tire pressure and guarantee peak performance on the road.
Visual Check for Bubbles
Once you’ve plugged your tire, conducting a visual check for leaks is essential to confirm it’s safe for the road. To perform leak detection, mix dish soap with water in a spray bottle or bowl, then apply it to the tire surface. Watch for bubble formation, which signals air escaping. Rotate the tire to inspect the entire surface, especially the plug area.
- Confirm your safety on the road.
- Avoid costly repairs later.
- Gain peace of mind during your travels.
- Embrace your freedom to explore.
If you spot bubbles, the plug may not have sealed correctly, requiring a re-plug or professional help. Always conduct this test in a safe location before hitting the road.
When to Call for Help With Your 4runner’s Tire?
When should you call for help with your 4Runner’s tire? If you notice a puncture on the sidewall, it’s essential to seek professional help immediately, as sidewall holes can’t be repaired and require tire replacement options. If your tire is losing air rapidly and you can’t locate the source, consult a mechanic to prevent further damage. Unsure how to safely use a jack or change the tire? Contact roadside assistance services to guarantee your safety and proper handling of the situation. Lack the necessary tools, like a tire plug kit or air compressor? Reaching out for help can save time and mitigate hazards. Additionally, if your vehicle’s TPMS warning light is on, it’s wise to call for assistance to avoid driving on a potentially unsafe tire. Prioritize your safety and the integrity of your 4Runner by knowing when to reach out for help.
Safety Tips to Remember During Tire Repairs
Before you start any tire repairs, it’s crucial to prioritize safety to guarantee a smooth and secure process. Here are some key safety tips to keep in mind:
Prioritizing safety is essential for smooth tire repairs; follow key tips to ensure a secure process.
- Always engage the parking brake and make sure your vehicle’s on a stable, level surface to prevent rolling.
- Wear safety glasses to shield your eyes from debris during inspections and repairs.
- Use a jack at designated points to lift the vehicle safely, avoiding damage or instability.
- Keep your tire repair kit, including plugs and tools, close at hand for quick access in emergencies.
Preventing Future Tire Problems: Maintenance Tips
To keep your 4Runner’s tires in peak condition, regular maintenance is essential. Start by inspecting your tires monthly for wear, punctures, or foreign objects. Maintaining proper tire pressure is vital; use a reliable gauge and check at least once a month, as under-inflated tires can lead to increased wear and decreased fuel efficiency.
Don’t forget about tire rotation—perform this every 5,000 to 7,500 miles to promote even tread wear and extend tire lifespan. Additionally, make sure your tires are aligned and balanced; check this whenever you notice vibrations or after hitting a pothole to prevent uneven wear.
Lastly, keep a tire maintenance kit in your vehicle with a plug kit, tire inflator, and basic tools. Being prepared for unexpected tire issues not only enhances safety but also empowers you to tackle problems head-on.
Frequently Asked Questions
What Can I Use as an Emergency Plug for a Tyre?
You can use emergency tools like rubber plugs, duct tape, or strips from an old inner tube as temporary fixes for a tire puncture. Make certain you inflate the tire to maintain pressure until a permanent repair is made.
Conclusion
In an emergency, knowing how to plug your tire can mean the difference between a quick fix and being stranded. While the process may seem challenging, the right tools and preparation can empower you. Balancing caution with confidence, you can address leaks effectively and safely. However, if the damage exceeds your skills, don’t hesitate to call for professional help. Remember, a well-maintained tire is your best defense against future mishaps, ensuring both safety and peace of mind on the road.
Related Articles

How Long Does a Tire Patch Last on a 4Runner Tire
Just how long can a vulcanized patch survive on your 4Runner's tire before hidden dangers emerge?
Read More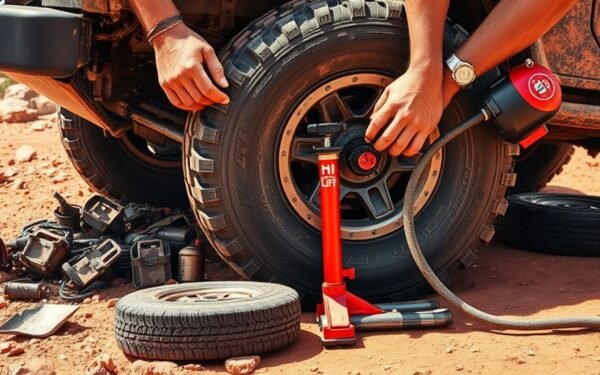
How to Reseat a Tire Bead Off-Road in an Emergency
Discover the ratchet strap trick that off-roaders use to reseat tire beads when stranded miles from help.
Read More
How to Register TPMS After Rotating Your 4Runner Tires
Step-by-step guidance on registering your TPMS after tire rotation in your 4Runner—discover the essential tips to ensure proper calibration.
Read More