
How to Reseat a Tire Bead Off-Road in an Emergency
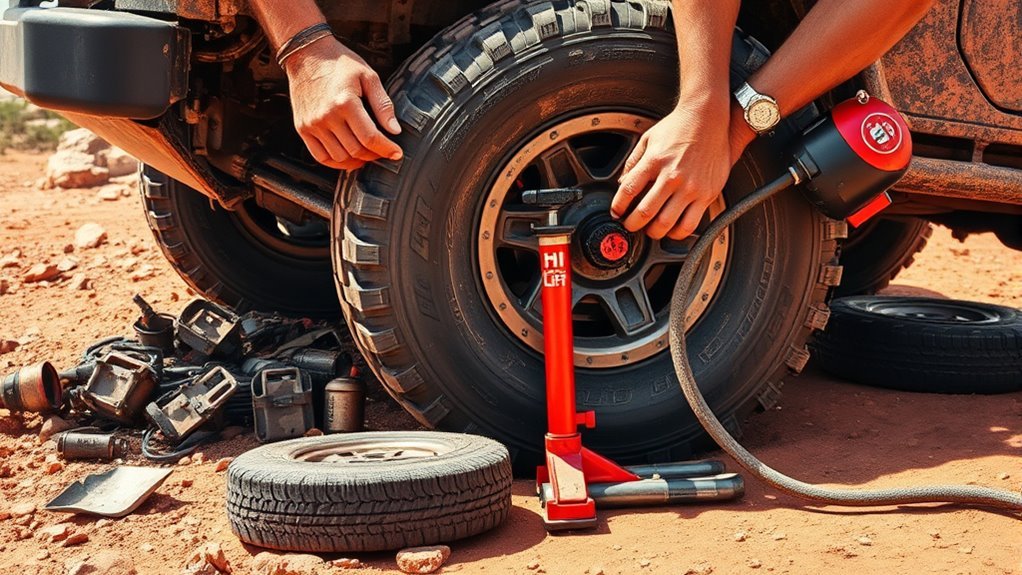
First, you’ll clean the rim and tire bead thoroughly to remove any dirt or debris that could sabotage your seal. Wrap a ratchet strap around the tire’s circumference near the rim edge, then tighten it gradually to compress the sidewalls and force the bead closer to the rim. Remove the valve core and hit the tire with a concentrated burst of air from your compressor, CO2 tank, or—if you’re desperate—an ignition method. Once the bead pops into place, spray soapy water around the rim to check for bubbles indicating leaks. Allow the tire to rest and recheck pressure before driving, as slow leaks often hide from immediate inspection. You can explore additional techniques below if you encounter stubborn beads or limited equipment.
Know When Your Tire Needs Bead Reseating

Three telltale signs should put you on alert: a tire that won’t hold pressure, visible gaps between bead and rim, or the unmistakable hiss of escaping air. You’ll feel the deflation—literally. When tire pressure drops fast, you’re losing your grip on terrain and control. Check for bulging sidewalls or uneven wear; both scream improper bead seating. Dirt and debris lodged between bead and rim sabotage your seal—clean it out before you blame the tire.
Listen closely during inflation. That persistent hiss means air’s escaping the seal, not the valve. If you’re fighting to get pressure up, the bead’s slipped. Off-road, you can’t afford weak points. Bead maintenance isn’t optional; it’s your insurance against getting stranded miles from pavement. Recognize these failures early, act decisively, and you’ll keep rolling through terrain that stops others cold.
Pick Your Air Source: Compressor, CO2, or Starting Fluid
Match your equipment to tire size and available resources. Precision preserves safety; desperation demands discipline.
Clean the Rim and Tire Bead First
Scrape away every trace of mud and grit from the rim and bead before you attempt reseating. You’ll compromise your seal if debris remains. Grab a clean rag and wipe aggressively—mud, dirt, and debris must vanish entirely. Now perform your rim inspection. Run your fingers along the rim surface, feeling for nicks, dents, or damage that’ll block proper bead seating. Damage here kills your chances.
| Cleaning Priority | Why It Matters | Consequence of Neglect |
|---|---|---|
| Remove all mud/debris | Guarantees direct bead-to-rim contact | Air leaks, failed reseating |
| Rim inspection | Identifies physical barriers | Chronic leakage, unsafe tire |
| Eliminate bead residue | Old sealant interferes with new seal | Poor adhesion, blowouts |
| Apply foaming cleaner | Lubricates for smoother seating | Difficult mounting, damaged bead |
| Final wipe-down | Confirms surface readiness | Wasted effort, repeated failure |
Attack the bead residue next. Old tire sealant and gunk prevent sealing—scrape it clean. Spray foaming window cleaner on bead and rim for lubrication. Thorough cleaning now prevents leaks and makes reseating efficient. Don’t rush this step.
Secure the Tire With a Ratchet Strap
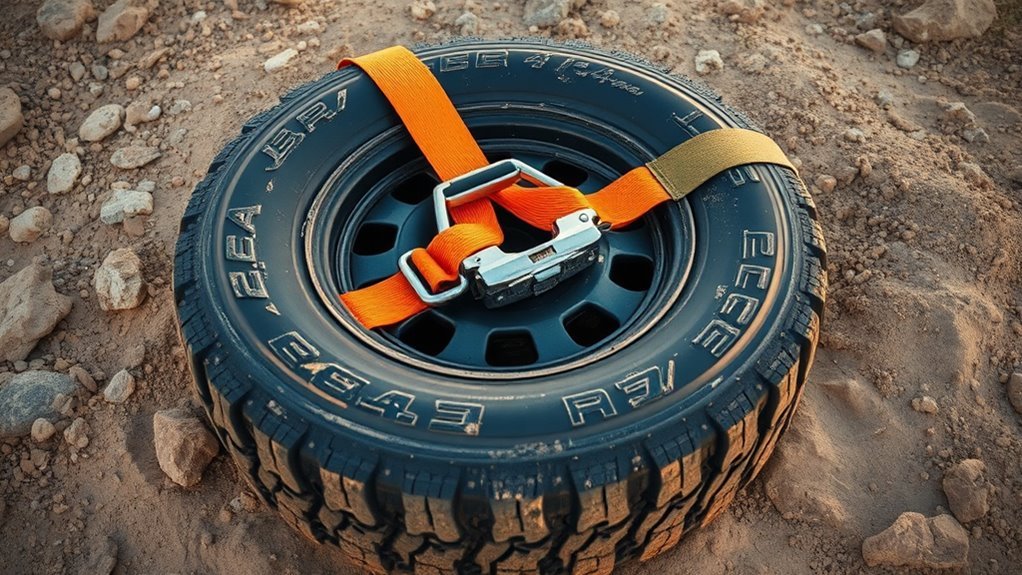
A ratchet strap compresses the tire sidewalls, forcing the bead against the rim flange so air pressure can build before escaping. You’ll wrap the strap around the tire’s outer circumference, position it near the rim edge, and tension it until the tire deforms slightly inward. Maintain that tension as you inflate, checking periodically to keep the strap snug against any shifting.
Why Ratchet Straps Help
Wrap a ratchet strap around the tire and rim, cinching it down to compress the sidewalls evenly against the wheel. This even pressure pushes the bead against the rim for a proper seal during bead seating.
You’ll minimize blowout risk by securing the tire while you handle tire inflation. The strap’s tension lets you control air introduction precisely—no slipping, no surprises. You’re eliminating the fire hazard of volatile methods like starting fluid. On larger tires demanding serious force, this tool proves essential. The ratchet strap transforms a sketchy roadside gamble into a calculated, repeatable procedure. Master this technique and you reclaim your mobility without waiting for rescue or risking catastrophe.
Step-by-Step Strap Method
First, you’ll clean the tire bead and rim with a wet rag—any dirt or debris here compromises your seal and wastes effort. Lay the tire flat and wrap a ratchet strap around its circumference. Tighten incrementally, compressing the sidewalls until the beads sit flush against the rim flanges. This mechanical pressure substitutes for a tire machine in the field.
With your emergency tools ready, connect a high-pressure compressor and inflate while monitoring both beads. You’ll hear a sharp pop when each seats—this is your target. Off road tips: never over-tighten the strap initially; gradual tension prevents distortion. Once pressure holds, release the strap slowly and soap-test for leaks. Eye protection is non-negotiable. Verify the tire clears the ground before final inflation.
Pop the Bead Into Place With a Blast of Air

Once you’ve positioned the tire evenly on the rim, you’ll need a concentrated burst of air to force the bead outward and create the initial seal. Connect your high-pressure compressor or CO2 tank directly to the valve stem. You’ll want maximum airflow—remove the valve core if necessary. Hit the tire with a quick, powerful blast rather than gradual inflation. The sudden pressure spike pushes both beads outward simultaneously, locking them against the rim flanges.
If the bead doesn’t seat immediately, don’t waste air. Stop, re-examine your positioning, and verify the rim and tire interface is clean—mud or debris kills your seal every time. Work the tire sidewalls by hand while your buddy triggers another blast. These emergency techniques demand precision, not patience.
For tire safety, never exceed the rim’s maximum pressure rating during this process. Once the bead pops audibly into place, reduce pressure immediately to your operating specification. A seated bead means freedom—mobility restored, trail conquered.
Lubricate the Bead for a Tighter Seal
Apply foaming window cleaner or soapy water to the tire bead using a wet rag to clean and lubricate simultaneously. Work the solution around the entire circumference to guarantee even coverage without excess. You’ll create the slippery surface needed for the bead to slide into position and seal properly against the rim.
Window Cleaner Application
Though the terrain has already tested your equipment, you’re now at the critical point where preparation determines success. Clean the tire and rim thoroughly—dirt compromises your seal. Now apply foaming window cleaner around the bead for these window cleaner benefits:
- Lubrication – The foam lets the bead slide into place during inflation
- Seal breaking – Soap dissolves stubborn residue between tire and rim
- Air retention – Thin, even layers seal better than thick globs
- Efficiency – You’ll reseat faster with less fighting
Follow these application tips: spray sparingly—excess foam complicates inflation—and spread a thin, uniform coat. Too much creates problematic bubbles that resist proper seating. You’re building the foundation for liberation from this trap. Precision here determines whether you’ll drive out or dig deeper.
Wet Rag Technique
Three factors determine whether your bead will seat: pressure, positioning, and lubrication. Tire lubrication with a wet rag addresses the third factor directly. You’ll take a clean, wet rag and apply it liberally to both the tire bead and rim surface. The moisture displaces dirt and debris that could compromise your seal. It reduces friction, allowing the bead to slide into proper position as you introduce air. You can combine this technique with a ratchet strap or high-pressure air for stubborn beads. Confirm your rag carries no contaminants—clean water only. No soaps, no chemicals. Work methodically, coating the entire circumference. The wet rag creates the temporary slip you need. Remove it once the bead seats. Inspect your seal before driving.
Bead Cleaning Methods
Contamination is your enemy when you’re fighting to reseat a bead in the field. You need aggressive residue removal techniques to win this battle. Here’s your systematic approach:
- Strip the debris — Grab that clean, wet rag and scrub every millimeter of bead and rim surface. Mud, dust, and grit destroy seals.
- Apply foaming window cleaner — Spray liberally. This lubricates while it cleans, letting the bead slip into position and lock down airtight.
- Deploy soap solution — Mix it strong. Coat the bead thoroughly; it reduces friction during inflation and promotes that critical tight seal.
- Inspect obsessively — Run your fingers along the entire circumference. Feel for contaminants you missed.
Master these bead maintenance tips now, and you’ll escape the trailhead without calling for rescue.
Check for Leaks and Confirm the Seal
Inspect your work immediately after reseating the bead—you’re not done until you’ve confirmed the seal holds. Run your eyes across the tire and rim, hunting for any visible gaps where air might escape. For precise leak detection, apply soapy water or foaming window cleaner around the entire bead circumference. Watch closely—bubbles betray every escaping breath of air. Listen, too. Press your ear near the valve stem and bead area; a faint hiss means you’ve got work remaining.
Once the soap stays still and silence reigns, let the tire rest. Pressure monitoring during this waiting period reveals slow leaks that immediate checks miss. Give it several minutes. If the gauge drops, you’ve failed.
Detect a leak? Deflate completely. Clean the rim and bead surfaces ruthlessly—dirt sabotages seals. Repeat the reseating process. Your freedom depends on this tire holding when you’re miles from rescue. Verify twice, trust once.
When the Tire Bead Won’t Seat: Quick Fixes
Even with a clean seal confirmed, you’ll eventually face a bead that refuses to cooperate. When standard tire pressure won’t cut it, deploy these emergency tools and techniques:
- Ratchet strap compression – Wrap a strap around the tire and rim, tightening to compress the sidewalls against the rim flange. This creates the tight seal needed for initial inflation.
- High-volume air delivery – Connect a high-pressure compressor or CO2 tank. The rapid air surge overwhelms leak paths before they defeat you.
- Manual bead manipulation – With low-volume systems, work the tire circumferentially while inflating. Your hands guide the bead into position as pressure builds.
- Controlled ignition method – As absolute last resort, apply starting fluid sparingly, ignite from distance with eye protection. The combustion wave forces immediate bead seating.
Each method demands respect for the forces involved. Master these, and no terrain traps you.
Frequently Asked Questions
Can I Use Starting Fluid on Aluminum Rims Safely?
You can use starting fluid on aluminum rims, but you must exercise extreme caution. Clean your tire maintenance area thoroughly, keep emergency tools ready, and expect potential rim damage. Liberation demands calculated risks, not reckless ones.
What Tire Pressure Is Too Dangerous for Reseating?
A swollen river bursts its banks—excessive tire pressure explodes the bead seating. You risk catastrophic failure above 40 PSI; liberation demands restraint. Keep it under 30 PSI, or you’re courting disaster.
Should I Remove the Valve Core Before Blasting Air?
Yes, remove the valve core. You’ll blast maximum air pressure directly into the tire bead cavity, forcing rapid seating without restriction. Reinstall it immediately once the bead seals to prevent dangerous overinflation.
How Long Should the Ratchet Strap Stay On?
Keep the ratchet strap cinched tight as a tourniquet until the tire bead pops into place like a stubborn cork—you’ll hear it snap home. Then release your emergency tools; freedom rolls on properly seated rubber.
Is It Safe to Reseat a Tire With Passengers Nearby?
No, you shouldn’t reseat a tire bead with passengers nearby. You must clear everyone at least 50 feet away—explosive unseating or strap failure makes passenger safety your absolute priority during this high-risk procedure.
Conclusion
You’ve cleaned the rim, you’ve secured the strap, you’ve blasted the bead. You’ve lubricated, you’ve checked, you’ve confirmed. When the trail breaks your seal, you break the problem—methodically, confidently, completely. Master this sequence, and you master the backcountry. Carry the tools, trust the process, transform the emergency into an anecdote. Your tires carry you; now you carry the knowledge to carry them back to pressure.
Related Articles
How to Register TPMS After Rotating Your 4Runner Tires
Step-by-step guidance on registering your TPMS after tire rotation in your 4Runner—discover the essential tips to ensure proper calibration.
Read More
Tire Plug vs Tire Patch: Which Is Safer for Your 4Runner
A tire patch outlasts plugs for your 4Runner, but one factor could change everything.
Read More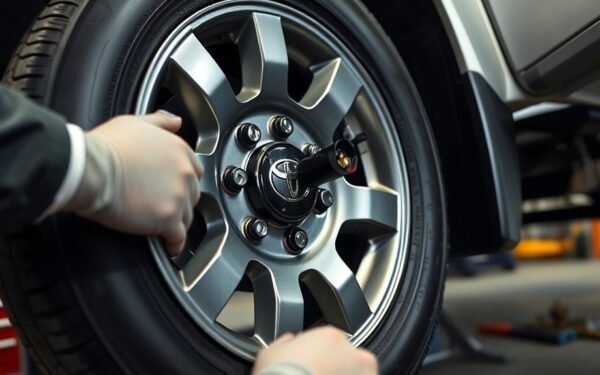
How to Install TPMS Sensors on a Toyota 4Runner
Step-by-step guide to installing TPMS sensors on your Toyota 4Runner—discover essential tips to ensure optimal performance and avoid common pitfalls.
Read More