
Where to Find the Hyundai Sonata Tire Placard (Door Sticker)
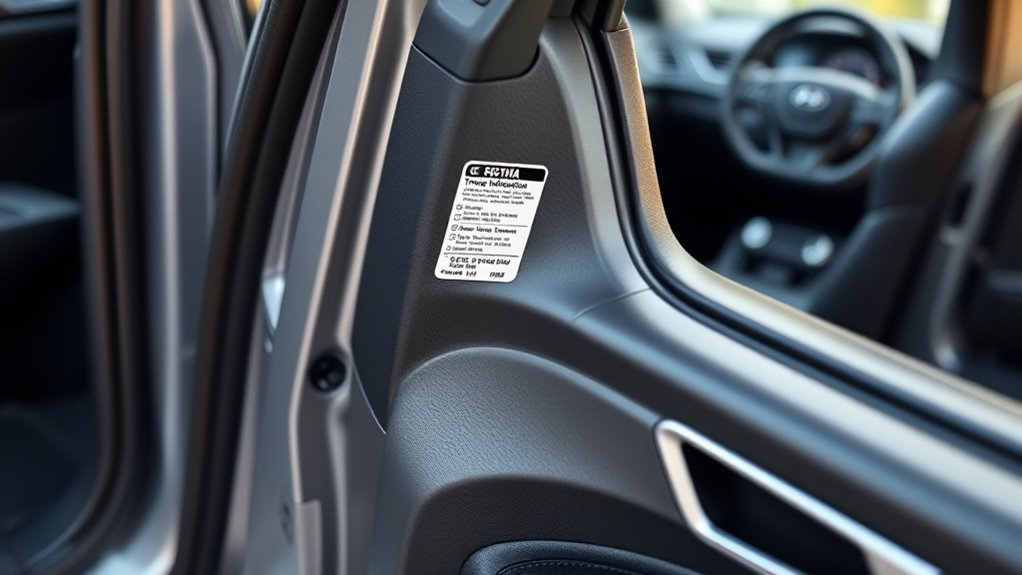
You’ll find the Hyundai Sonata tire placard by opening the driver’s door and looking at the driver’s side center pillar, also called the B-pillar or door jamb. That label is the factory reference for cold tire pressure, original tire size, and vehicle loading information, so use it before inflating tires, buying replacements, or troubleshooting a TPMS warning.
Quick Answer
The Hyundai Sonata tire placard is on the driver’s side center pillar, visible when the driver’s door is open. Look for the “Tire and Loading Information” label. It shows the recommended cold PSI, original tire size, spare tire information if equipped, and the vehicle’s occupant/cargo load limit.
Key Takeaways
- Open the driver’s door and check the driver’s side center pillar for the Sonata tire placard.
- Use the cold PSI printed on the placard, not the maximum pressure molded into the tire sidewall.
- Check pressure when the tires are cold: after the car has been parked at least 3 hours or driven less than about 1 mile.
- If the label is missing or unreadable, use the owner’s manual or ask a Hyundai dealer to look up the correct specs by VIN.
- After correcting pressure, follow your Sonata owner’s manual for TPMS reset or relearn steps because procedures vary by model year and equipment.
At a Glance
| Time Required | 5–10 minutes |
| Difficulty | Easy |
| Tools Needed | Good-quality tire pressure gauge, air pump or compressor, owner’s manual if the placard is damaged |
| Cost | Usually free; about $5–$20 if you need a gauge or paid air station |
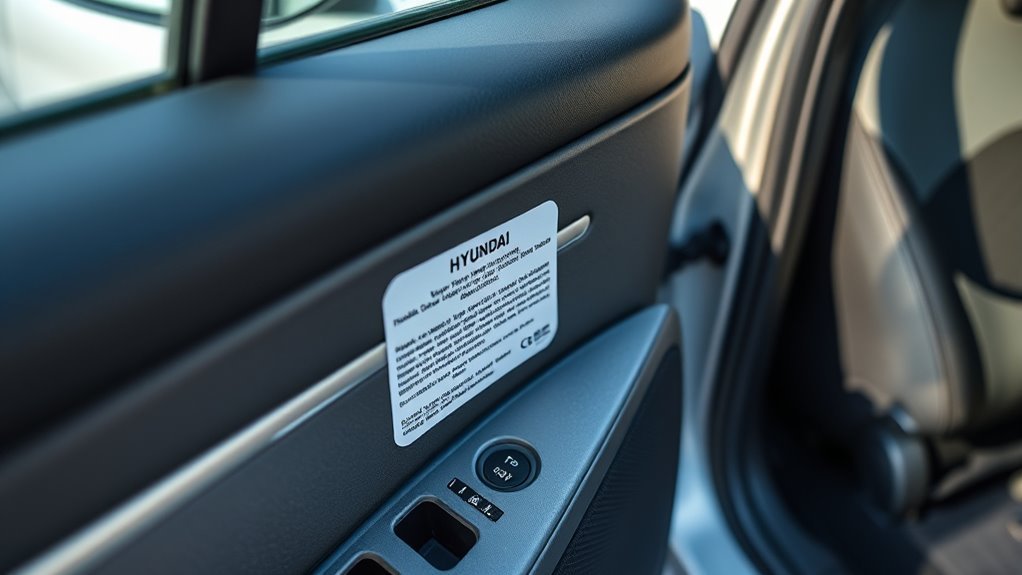
Find the Sonata Tire Placard on the Driver’s Door Jamb

To find the Sonata tire placard, open the driver’s door and look at the driver’s side center pillar. Hyundai’s owner-manual guidance identifies this center-pillar tire label as the place to find the recommended tire pressures for the vehicle. The label may be slightly above or below the door latch area depending on model year, but it should be visible from the driver’s doorway.
The label is usually titled “Tire and Loading Information.” Do not confuse it with the separate certification label that lists items such as VIN, GVWR, and manufacturing information. Both labels may be near each other, but the tire placard is the one that gives the cold inflation pressure and original tire size information.
Pro Tip: Take a clear photo of the placard with your phone. That gives you a backup reference when you are at an air pump, tire shop, or roadside service location.
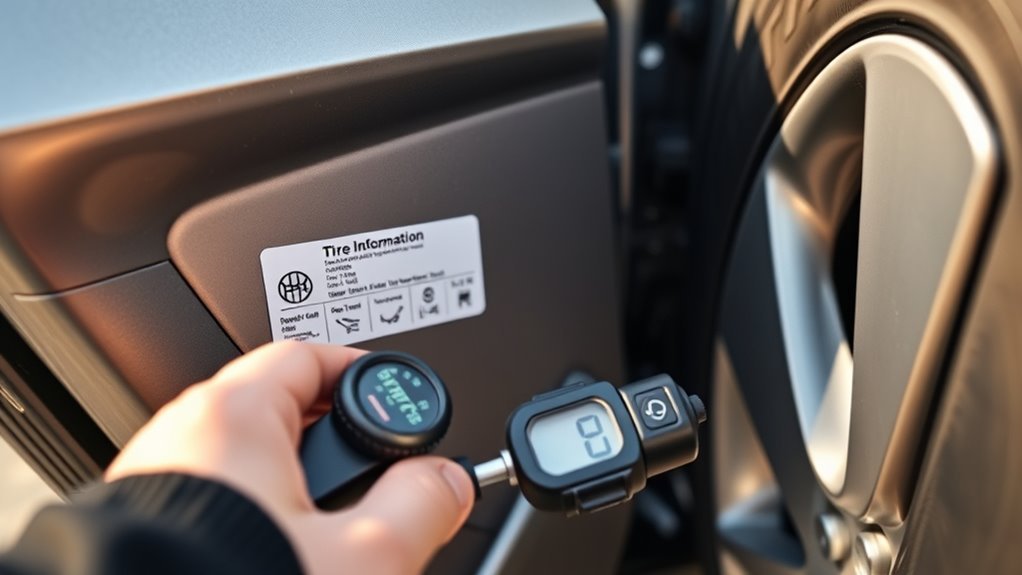
What the Sonata Tire Placard Tells You
The tire placard is the factory reference for normal tire inflation and loading. It commonly includes:
- Front tire cold PSI: The recommended pressure for the front tires when cold.
- Rear tire cold PSI: The recommended pressure for the rear tires when cold. It may match the front pressure, or it may be different; read the label instead of guessing.
- Original tire size: The tire size installed or approved for that vehicle configuration, such as the width, aspect ratio, and wheel diameter.
- Spare tire information: If the vehicle has a spare tire, the label or owner’s manual may list its size and pressure. If no spare is provided, the label may say “none.”
- Vehicle capacity weight: The combined weight of occupants and cargo that should not be exceeded.
- Optional tire details: Some labels may also show load index, speed rating, or load range information.
Federal placard rules require this type of label to show the vehicle capacity weight, seating capacity, manufacturer-recommended cold tire inflation pressure, and tire size information. That is why the door-jamb placard is more reliable than generic online PSI charts.
Read the Tire Placard: Front vs. Rear and Cold PSI
Start with the PSI values printed beside the front and rear tire positions. If the front and rear numbers are the same, inflate all four tires to that cold pressure. If they differ, match each axle to the number printed for that axle.
“Cold” matters. Check the tires after the Sonata has been parked for at least 3 hours, or after it has been driven less than about 1 mile. Driving warms the tires and raises pressure, so a hot reading can make an underinflated tire look closer to normal than it really is.
Warning: Do not inflate your Sonata tires to the maximum PSI molded on the tire sidewall unless that number also matches Hyundai’s placard guidance. The sidewall number is a tire limit, not the vehicle’s recommended operating pressure.
Use a good-quality tire pressure gauge. Hyundai notes that tires can look properly inflated even when they are low, so visual inspection is not enough. Remove the valve cap, press the gauge firmly onto the valve stem, read the pressure, add or release air as needed, and recheck before reinstalling the valve cap.
Which Sonata Years and Trims Use This Placard Location?
Most modern Hyundai Sonata models place the tire placard on the driver’s side center pillar. That includes current Hyundai owner-manual guidance for Sonata-family vehicles. Still, use your exact vehicle as the final authority because trim, wheel package, market, and model year can change tire sizes and pressure values.
Use this simple confirmation table:
| What You’re Checking | What to Do |
|---|---|
| Placard location | Open the driver’s door and inspect the driver’s side center pillar or door-jamb area. |
| Correct PSI | Use the cold PSI printed on your vehicle’s label, not another Sonata’s label. |
| Wheel or trim differences | Check the label and owner’s manual because larger wheel packages may use different tire sizes. |
| Aftermarket tire or wheel setup | Ask a qualified tire professional or Hyundai dealer to confirm the safe pressure and load rating. |
Note: Online tire-pressure charts can be useful for cross-checking, but the label on your Sonata and the owner’s manual are the best references for your exact vehicle.
If the Tire Placard Is Missing or Damaged
If the tire placard is missing, peeling, painted over, or unreadable, do not guess at the pressure. Use this order of priority:
- Check the owner’s manual. Hyundai owner manuals list tire and wheel information and point owners back to the tire label for vehicle-specific pressure.
- Use the VIN with a Hyundai dealer. A dealer can look up the factory tire and loading information for your exact Sonata.
- Check Hyundai’s digital owner-manual portal. Select your model year and Sonata model, then review the tire and wheel sections.
- Use tire-shop help for non-stock wheels. If the car has aftermarket wheels or a non-original tire size, confirm the correct load rating and pressure before driving long distances.
- Replace or document the label. If the original label is permanently damaged, keep a VIN-verified copy of the tire-pressure information in the glove box or ask a dealer about replacement-label options.
[Products Worth Considering]

The Milton 555e digital tire inflator delivers fast, accurate pressure readings with a backlit display and multiple unit options, making tire inflation quick and easy. Its durable 20" EPDM rubber hose and grip‑head chuck provide reliable connection, while the ±1 PSI accuracy ensures precise inflation for cars, bikes, and trucks.

This digital tire pressure gauge combines a sturdy pistol grip inflator with a backlit 0.1 PSI display for quick, accurate readings in any lighting condition. Its 360° swivel gauge and 20" rubber hose make it easy to use and store, while the integrated inflate/deflate trigger and ¼" NPT air inlet provide fast, reliable tire maintenance.

The Milton 507KIT delivers fast, accurate tire inflation, deflation and pressure measurement with a backlit LCD gauge and 14" rubber hose. Its 3‑in‑1 design meets ANSI/ASME standards and provides readings from 0‑250 PSI with 0.1 PSI resolution. The ergonomic pistol‑grip body and brass lock‑on chuck make one‑handed operation effortless, while the auto‑off feature conserves battery life.
TPMS Alerts and the Placard: What to Do and When to Reset
The TPMS warning is not a replacement for regular tire-pressure checks. It is a warning system that alerts you when one or more tires are significantly underinflated or when the monitoring system has a fault. Always start with the placard PSI, then follow the owner’s manual for reset or relearn steps.
[Products Worth Considering]

The Steelman Straight Air Chuck Tire Inflator offers a compact, durable solution for inflating tires with a built‑in gauge and flexible hose. Its push‑on chuck eliminates the need for clamps, while the polished steel casing and brass fittings ensure long‑lasting performance. Compatible with any portable or fixed tank air compressor, it delivers precise pressure readings from 10 to 90 PSI, making it ideal for cars, trucks, and other vehicles.

The AZUNO Digital Tire Inflator provides fast, accurate inflation with a 200 PSI capacity and a digital gauge that reads within 1% of true pressure. Its stainless‑steel braided hose resists cracking and bending, while the smart LCD displays clear units and auto‑shuts after inactivity. The built‑in air bleeder valve lets you switch between inflation and deflation with a single trigger, making tire maintenance quick and convenient.

【Save Time&Money】 The U508 is simple and fast, activates the individual TPMS sensor with the press of one button easily within 1-2 minutes. Save your money, It will save you many trips to the tire shop.
Low-Pressure Light Response
If the low-pressure TPMS light comes on, slow down, avoid sharp steering or hard braking, and stop somewhere safe. Check all four tires with a gauge and inspect for visible damage, nails, sidewall bulges, or a rapidly leaking tire. Inflate any low tire to the cold PSI shown on the placard.
If you recently drove several miles, the tires are warm. In that case, inflate enough to avoid driving on a seriously low tire, then recheck and fine-tune the pressure when the tires are cold.
When to Reset or Relearn TPMS
Reset or relearn the TPMS only after all tires are adjusted to the recommended pressure. Hyundai’s TPMS guidance says reset may be needed after tire or wheel repair, replacement, rotation, pressure adjustment, or when the low-pressure warning light is on. Your exact procedure may vary by model year and equipment.
A TPMS light that flashes for about a minute and then stays on usually points to a TPMS malfunction rather than simple low pressure. In that case, check the tires, then have the system inspected if the light continues.
TPMS Reset Procedure Steps
For Sonata models with a TPMS reset menu, use the owner’s manual procedure. Hyundai’s current reset guidance follows this general pattern:
- Adjust all four tires to the recommended cold tire pressures.
- Park the vehicle safely.
- Use the steering-wheel controls to open the tire-pressure display or TPMS setting in the cluster, if equipped.
- Select the tire-pressure reset or set option and hold the confirmation button as directed by the manual.
- Confirm that the TPMS warning responds as described in the owner’s manual.
If your Sonata does not show a TPMS reset menu, the system may update after driving for a few minutes once the tires are correctly inflated. If the warning remains after a cold-pressure correction and normal driving, check the manual or schedule service.
Quick Tire-Pressure Checklist: Maintain Placard PSI
Use this checklist once a month, before long trips, and whenever the weather changes sharply.
[Products Worth Considering]
Accurate, Dependable Readings: Factory‑calibrated to ±1 PSI, so you can confidently match your vehicle’s recommended PSI (check the door jamb sticker). Ideal for monthly checks and road trips — consistent results every time, cold or warm.

PROCESS LEVEL ACCURACY: Each ETENWOLF’s digital tire pressure gauge is calibrated manually to ANSI B40.7 Grade 2A(plus-minus 1 PSI).Presta valve adapter not included, if used for bicycles, it must be purchased separately

EXPERT-GRADE CALIBRATION: Each AstroAI Tire Pressure Gauge is calibrated with professional-grade tools, ensuring quick and accurate measurement results within plus-minus 1PSI. Stay prepared for any roadside emergency and travel with peace of mind.
Check Cold Tire Pressure
- Park the Sonata for at least 3 hours, or check after driving less than about 1 mile.
- Read the front and rear cold PSI on the driver’s side placard.
- Remove each valve cap and press the gauge firmly onto the valve stem.
- Compare each reading to the placard value.
- Add air if low, or release air if high.
- Recheck with the gauge before reinstalling valve caps.
Use a Reliable Pressure Gauge
A digital or dial gauge is usually easier to read than a cheap stick gauge, but any accurate gauge is better than guessing. Hyundai advises using a good-quality pressure gauge because radial tires may look properly inflated even when they are underinflated.
Do not rely only on the dashboard pressure display. Hyundai notes that cluster-displayed tire pressure may differ from a gauge reading and may appear only after a few minutes of driving.
Reset or Verify TPMS After Adjustments
After adjusting pressure, follow your owner’s manual for TPMS reset steps if your Sonata requires them. If your model updates automatically, drive normally and confirm the warning clears. If the light returns quickly, check for a leak, damaged tire, bad valve stem, incompatible wheel, or TPMS sensor issue.
The placard is the Sonata’s pressure authority. The tire sidewall tells you the tire’s limit; the door-jamb label tells you what Hyundai recommends for the vehicle.
Frequently Asked Questions
Where is the tire and load sticker found on a Hyundai Sonata?
Open the driver’s door and look at the driver’s side center pillar, also called the B-pillar or door jamb. The label is usually titled “Tire and Loading Information.”
Should I use the PSI on the tire sidewall or the Sonata placard?
Use the PSI on the Sonata placard. The sidewall number is the tire’s maximum pressure rating, not the vehicle’s recommended operating pressure.
Do front and rear Sonata tires always use the same PSI?
Not always. Some vehicles use the same front and rear pressure, while others list different values. Read the front and rear lines on your exact placard.
What does “cold tire pressure” mean?
Cold tire pressure means the tires have not been driven on for at least 3 hours, or the vehicle has been driven less than about 1 mile. Cold readings are more accurate because tire pressure rises as tires heat up.
What if my Sonata tire placard is missing?
Check the owner’s manual first. If the manual is unavailable or the car has non-original wheels, contact a Hyundai dealer with your VIN or ask a qualified tire professional to verify the correct pressure and tire specifications.
Do I need to reset TPMS after inflating my Sonata tires?
Possibly. Some Sonata models use a reset or set function in the cluster, while others may update after driving. Inflate all tires to the placard PSI first, then follow your owner’s manual for the correct TPMS reset or relearn procedure.
Conclusion
The Hyundai Sonata tire placard is not hiding in a dramatic place: it is on the driver’s side center pillar, waiting for you every time the driver’s door is open. Use it for cold PSI, tire size, and loading information. If the label is missing, use the owner’s manual or a VIN-based dealer lookup. If TPMS complains, check the tires first, reset only as the manual directs, and do not let the sidewall PSI talk you into a bad inflation decision.
Sources
- Hyundai Owner’s Manual — Tire specification and pressure label — supports the driver’s side center-pillar tire-label location.
- Hyundai Owner’s Manual — Tires and wheels — supports monthly tire inspection, gauge use, and using the tire label for cold pressure.
- Hyundai Owner’s Manual — Check tire inflation pressure — supports gauge-check steps and valve-cap guidance.
- Hyundai Owner’s Manual — Resetting TPMS — supports TPMS reset timing and cold-tire definition.
- NHTSA TireWise — supports using the vehicle placard/manual for proper PSI and checking pressure when tires are cold.
- 49 CFR § 571.110 — supports required tire and loading placard content and placement rules.
Related Articles

Danger of Using Summer Tires in Winter on a Hyundai Sonata
Potentially perilous, using summer tires in winter on your Hyundai Sonata can compromise safety—discover the hidden dangers that await you on icy roads.
Read More
Can You Mix Nitrogen and Air in Hyundai Sonata Tires? Answered
Discover the implications of mixing nitrogen and air in your Hyundai Sonata tires—are the benefits worth the risks? Explore the answer inside!
Read More
How to Tell If Hyundai Sonata Tires Are Too Old to Use Safely
Understand how to assess the age of your Hyundai Sonata tires and discover crucial signs of deterioration that could compromise your safety on the road.
Read More