
How to Change a Flat Tire on a Toyota Tundra: Tools, Steps, and Safety Tips
A flat tire on a Toyota Tundra can feel stressful because the truck is heavy, the spare is often stored under the bed, and the correct jack points matter. The safest approach is to slow down, park on hard level ground, use the factory tools correctly, and treat the spare as a temporary solution until the damaged tire is inspected or replaced.
Quick Answer
To change a flat tire on a Toyota Tundra, park on a hard, level surface, turn on the hazard lights, set the parking brake, chock the opposite wheel, loosen the lug nuts, raise the truck only at the approved jack point, install the spare, tighten the lug nuts in a star pattern, lower the truck, and check the spare tire pressure before driving.
Key Takeaways
- Use your exact Toyota Tundra owner’s manual for jack points, tool locations, spare instructions, and lug nut torque.
- Never change a tire in an active traffic lane, on soft ground, on a steep slope, or under a vehicle supported only by a jack.
- Loosen lug nuts before lifting the truck, then tighten them in a star pattern after the spare is mounted.
- Check the spare tire with a pressure gauge because a temporary spare may not be monitored by the tire pressure warning system.
- Drive carefully on the spare and go to a tire shop or Toyota dealer as soon as possible for a permanent repair.
At a Glance
| Time Required | About 20–45 minutes, depending on location, weather, wheel condition, and whether the spare carrier lowers easily. |
| Difficulty | Moderate. The steps are simple, but a Tundra wheel is heavy and the truck must be lifted safely. |
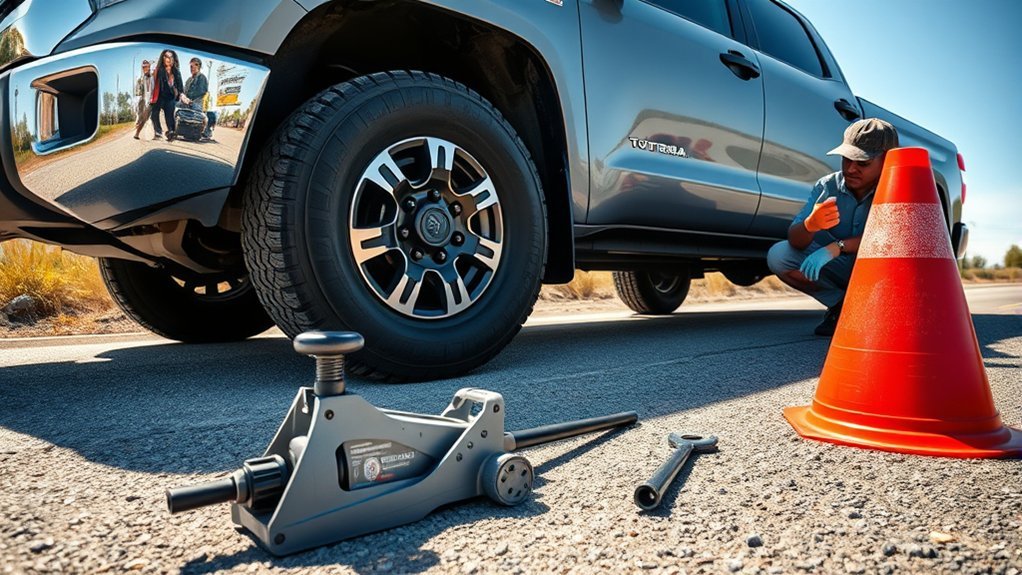
| Tools Needed | Spare tire, factory jack, jack handle/extensions, wheel nut wrench, wheel chocks, tire-pressure gauge, gloves, flashlight, reflective vest, and a torque wrench if available. |
| Cost | Usually $0 roadside if your spare and tools are usable. Tire repair, replacement, or professional service may cost extra afterward. |
Essential Tools for Changing a Tire

Before you touch the lug nuts, make sure you have the right tools and a safe work area. Most Toyota Tundra tire changes require the factory jack, jack handle, jack handle extensions, wheel nut wrench, and spare tire. A tire-pressure gauge is also important because you should confirm the spare tire is inflated before you drive on it.
Keep these items in your truck if you drive long distances, tow, or travel at night:
- Wheel chocks or sturdy wheel wedges
- Reflective vest or roadside warning triangles
- Work gloves
- Flashlight or headlamp
- Small kneeling pad or mat
- Portable air compressor
- Torque wrench for final lug nut tightening when available
For model-specific tool locations, jack points, and spare instructions, use the Toyota manuals and warranties page or the owner’s manual that came with your exact Tundra.
Note: Tool storage can vary by Tundra model year, cab style, and trim. On many Tundras, the jack and tool bag are stored behind or under a rear seat area, while the spare tire is stored underneath the truck bed.
[Products Worth Considering]

Secure your parked vehicle quickly with AFA Tooling 4T rubber wheel chocks in a 4-pack for two dual-wheel sets. The ribbed design and textured base grip fast without pounding, so you can chock tires on trailers, RVs, ATVs, and work vehicles with confidence. EZ rustproof handles with rope ties keep the pair together for easy placement and removal, while nylon-reinforced rubber stands up to dirt, ice, salt, and harsh weather.

This roadside assistance kit helps drivers and passengers in urgent situations after an accident or breakdown, providing practical support while waiting for help. It includes a lightweight, compact tire inflator for fast inflation of standard vehicle tires, plus reinforced jumper cable protection for safer handling. Ideal for winter weather, road trips, camping, and travel, with everything stowed neatly in a trunk bag.

EVOULTES heavy duty tire inflator with an integrated gauge delivers accurate pressure readings from 10–120 PSI, helping you inflate, deflate, and check tires in one tool. The 16.5-inch extended dual-head air chuck with swivel base reaches hard-to-access dual wheel valves on trucks and RVs. A brass trigger core and side-mounted air release valve make operation smooth, with standard 1/4" NPT threading and quick-connect compatibility for easy setup.
How to Ensure Your Safety When Changing a Tire
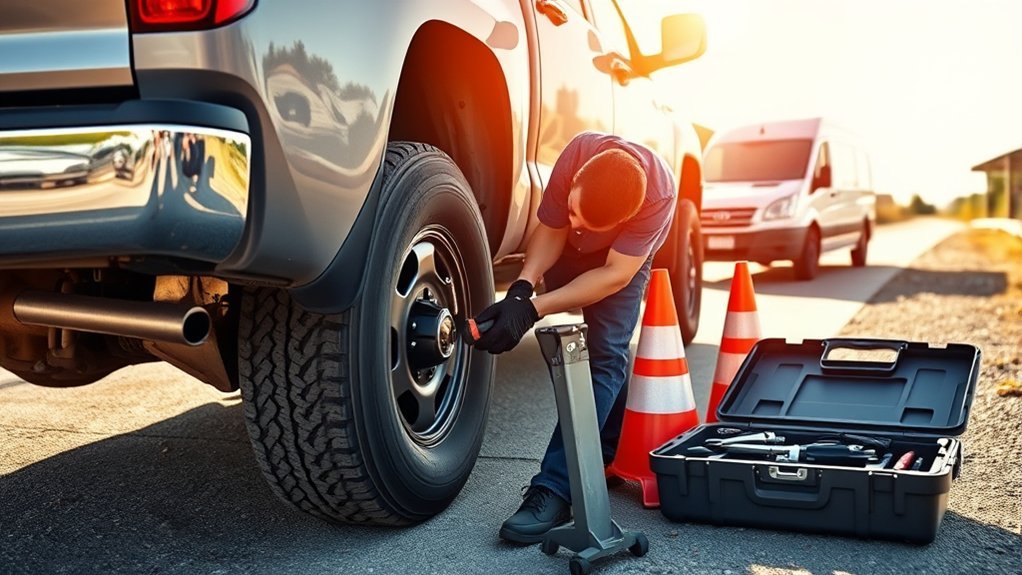
Safety comes first because a Toyota Tundra is heavy and roadside traffic can be more dangerous than the flat tire itself. Move as far away from traffic as you safely can. Choose a hard, flat surface such as a parking lot, driveway, or wide shoulder. Turn on the hazard lights, shift to Park, set the parking brake, and shut off the engine.
Place wheel chocks in front of and behind the tire diagonally opposite the flat tire. If the front tire is flat, chock a rear tire. If a rear tire is flat, chock a front tire. This helps keep the truck from rolling while you loosen the lug nuts and lift the vehicle.
Warning: Do not change the tire if the truck is in an active traffic lane, on a steep slope, on soft dirt, on gravel that shifts, or if the jack cannot sit firmly. Call roadside assistance instead.
Never place any part of your body under the Tundra while it is supported by the factory jack. The jack is for lifting the truck long enough to change the tire, not for working underneath the vehicle.
NHTSA reported 511 motor vehicle traffic fatalities in tire-related crashes in 2024, which is why tire pressure, spare-tire condition, and safe roadside behavior matter.
Find the Jack, Tools, and Lower the Spare Tire
Many Toyota Tundra models store the spare tire under the rear of the truck. The exact access point and tool layout can vary, so check your owner’s manual first. In many setups, you assemble the jack handle extensions and insert the tool through the rear access opening to engage the spare tire lowering mechanism.
Turn the tool as directed by your owner’s manual until the spare lowers to the ground. Slide the spare out from under the truck and remove the holding bracket or retainer. Inspect the spare before installing it. Do not use it if it is flat, badly cracked, severely rusted at the wheel, or visibly damaged.
Pro Tip: Practice lowering and raising the spare at home once. It is much easier to learn the spare carrier system in your driveway than on the shoulder of a road at night.
[Products Worth Considering]

Secure your trailer or RV tires with a scissor-style wheel chock stabilizer that applies opposing force to help prevent wheel shift. It fits tight wheel gaps from 3.5 inches up to 12 inches and works for travel trailers, campers, fifth wheels, toy haulers, and heavy-duty trucks. The surface uses new electrophoretic technology to help prevent rust for reliable travel use.

Camco Trailer Aid Plus tandem tire ramp lifts your trailer for quick, safe tire changes with ample clearance from its 5 1/2-inch lift. It helps you change a flat tire without unloading cargo, making roadside and routine maintenance more efficient. The heavy-duty, waterproof and rustproof polymer design supports up to 15,000 lb and is built for easy portability and storage.
Loosening Lug Nuts on Your Toyota Tundra
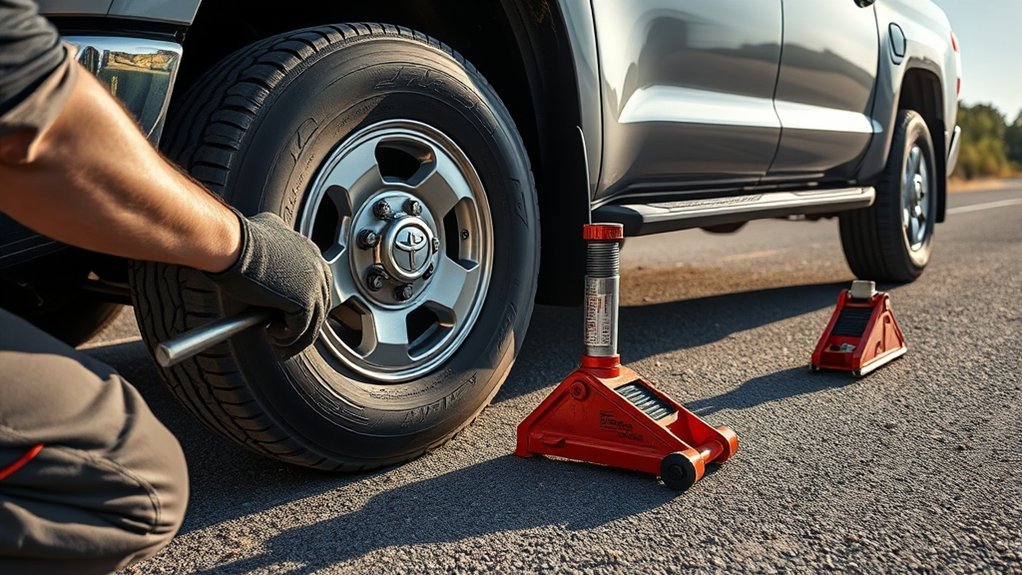
Loosen the lug nuts while the flat tire is still touching the ground. This keeps the wheel from spinning while you apply force. Fit the wheel nut wrench fully onto each lug nut and turn counterclockwise. Loosen each nut about 1/4 to 1/2 turn, but do not remove the nuts yet.
If a lug nut is tight, use steady pressure instead of jumping on the wrench. Jumping can slip the wrench off the nut or cause you to lose balance. If the nuts are seized, rounded, or too tight to loosen safely, stop and call for help.
Proper Tool Usage
Use the factory wheel nut wrench only when it fits securely on the lug nut. Keep the wrench straight and apply smooth pressure. If you have a breaker bar that fits correctly, it can provide extra leverage, but avoid using damaged tools or tools that do not seat fully.
Keep the lug nuts in a pocket, cup holder, or clean spot where they cannot roll away. Dirt or grit on the lug nut threads can make reinstalling them harder.
Loosening Techniques Explained
Work around the wheel in a star pattern instead of going in a circle. For a 5-lug wheel, move across the wheel from one lug nut to the opposite side. For a 6-lug wheel, alternate across the wheel. This pattern becomes even more important when tightening the spare because it helps the wheel seat evenly against the hub.
Using a Jack: Best Practices for Lifting Your Vehicle
Use only the approved jacking point listed in your Toyota Tundra owner’s manual. The correct point can vary depending on whether you are lifting the front or rear and can vary by model year. Place the jack on firm, level ground and make sure the jack head contacts the correct lift point before raising the truck.
Raise the Tundra slowly until the flat tire is off the ground. You only need enough clearance to remove the flat tire and install the spare. Because an inflated spare may be taller than a flat tire, lift the truck a little higher than the flat tire’s current height.
Warning: Never jack from the bumper, running board, suspension arm, differential, or any point not approved in the owner’s manual. The truck can slip, fall, or suffer damage.
Removing the Flat Tire: Key Steps to Follow
Once the tire is off the ground and the truck is stable, remove the loosened lug nuts completely. Pull the flat tire straight toward you. Tundra wheels can be heavy, so use both hands and keep your feet clear. If the wheel sticks to the hub, do not crawl under the truck or shake the vehicle hard. Lightly rock the tire from side to side while keeping your body out from under the truck.
Before installing the spare, look at the wheel hub and mounting surface. Remove obvious dirt, stones, or loose debris. A clean mounting surface helps the spare sit flush against the hub.
How to Install a Spare Tire Securely
Lift the spare tire onto the wheel studs and push it flat against the hub. Line up the holes carefully so the spare sits evenly. Start each lug nut by hand. If a lug nut does not turn easily by hand, back it off and start again so you do not cross-thread it.
Hand-tighten the lug nuts in a star pattern until the spare is snug against the hub. Do not fully tighten the lug nuts while the tire is still in the air because the wheel can turn.
Proper Alignment Techniques
The spare should sit flush against the hub with no gap, tilt, or wobble. If it does not sit evenly, lower it slightly, remove it, check for debris, and reinstall it. A wheel that is not seated correctly can loosen after you start driving.
Ensuring Tight Lug Nuts
Lower the Tundra until the spare just touches the ground and cannot spin. Tighten the lug nuts in a star pattern with the wheel nut wrench. Then lower the truck fully and tighten the lug nuts again in the same pattern.
If you have a torque wrench, tighten the lug nuts to the specification for your exact Tundra model year, wheel type, and spare-wheel setup. Do not guess the torque value. If you used only the factory wrench on the roadside, drive carefully to a tire shop or Toyota dealer and have the lug nuts checked with a torque wrench.
Tightening and Lowering Your Vehicle Safely
After the spare is installed and the lug nuts are tight, lower the jack completely and remove it from under the truck. Stow the jack, tools, and flat tire securely so they cannot move around while driving.
Before leaving, check the spare tire’s pressure with a gauge. Toyota’s Tundra manual guidance identifies temporary spares as emergency-use items and says to check temporary spare inflation pressure. Follow the pressure listed in your owner’s manual, on the tire placard, or on the spare tire label.
Note: A temporary spare may not have the same tire pressure warning sensor as the regular wheels. Do not rely on the dashboard warning light to confirm spare pressure; use a gauge.
Tips for Changing a Tire and Driving Safely on a Spare
After you install the spare, drive slowly and avoid hard braking, sudden acceleration, sharp turns, and heavy towing. If the spare is marked “TEMPORARY USE ONLY,” use it only to reach a safe place for tire repair or replacement. Follow the speed and distance limits printed on the spare tire and in your Toyota owner’s manual.
If your Tundra has a flat rear tire on snow or ice and your owner’s manual gives special instructions for temporary-spare placement, follow those instructions. Some Toyota Tundra manual guidance says to install the temporary spare on a front wheel in that situation, then move a front tire to the rear.
Include the spare in regular maintenance. The NHTSA tire safety checklist recommends checking tire pressure regularly, including the spare, and checking before long trips. The NTSB tire safety alert also reminds drivers that spare tires can degrade even when they are not being used.
What to Do If Something Goes Wrong
Stop and call for professional help if the spare carrier will not lower, the jack leans, the truck shifts, the lug nuts are rounded, the spare is flat, or the wheel will not seat flush. These are not problems to force on the side of the road.
If you notice vibration, wobbling, pulling, grinding, or a new warning light after installing the spare, slow down and stop in a safe place. Recheck the lug nuts only if you can do so safely. If anything still feels wrong, call roadside assistance or have the Tundra towed.
When to Seek Professional Help After a Tire Change?
Seek professional help after a tire change if the flat tire has sidewall damage, a large puncture, visible cords, a bent wheel, or damage from driving while flat. A tire shop can determine whether the tire can be repaired or must be replaced.
You should also get help if you could not torque the lug nuts to specification, if the spare tire is old or cracked, if the tire pressure warning light remains on, or if the truck handles differently after the spare is installed. A spare tire is meant to get you out of an emergency, not replace a proper repair.
Frequently Asked Questions
What safety precautions should be taken before starting the tire changing process?
Park on hard, level ground away from traffic, turn on the hazard lights, shift to Park, set the parking brake, chock the opposite wheel, and keep your body out from under the truck. If the location is unsafe, call roadside assistance.
Where is the spare tire on a Toyota Tundra?
On many Toyota Tundra models, the spare tire is mounted underneath the rear of the truck bed. The lowering method and tool access point can vary by model year, so check your owner’s manual before using the spare carrier.
Should I loosen the lug nuts before or after jacking up the Tundra?
Loosen the lug nuts before lifting the truck. The tire should still touch the ground when you break the lug nuts loose so the wheel does not spin.
Can I drive normally on a Toyota Tundra spare tire?
No. Drive carefully and follow the spare tire label and your Toyota owner’s manual. If the spare is marked “TEMPORARY USE ONLY,” use it only for emergency driving to reach a repair location.
Why is my tire pressure light still on after installing the spare?
A temporary spare may not be monitored the same way as the regular tires. Check the spare with a tire-pressure gauge and have the original tire repaired or replaced as soon as possible.
What if the lug nuts will not come loose?
Do not jump on the wrench or use unsafe force. If the lug nuts are seized, rounded, or too tight to remove with steady pressure, call roadside assistance or a professional tire service.
Conclusion
Changing a flat tire on a Toyota Tundra is manageable when you follow the correct order: secure the truck, lower the spare, loosen the lug nuts, jack only at the approved point, install the spare, tighten in a star pattern, check pressure, and drive carefully to a repair location. If the truck, jack, spare, or roadside area feels unsafe at any point, stop and get professional help.
Sources
- Toyota Owners — 2025 Tundra: If You Have a Flat Tire — backs up Toyota-specific flat tire and temporary-spare guidance.
- Toyota Owners — Manuals and Warranties — supports checking the exact owner’s manual for model-year instructions.
- NHTSA TireWise — backs up tire safety importance and tire-related crash data.
- NHTSA Tire Safety Checklist — backs up regular pressure checks, including the spare tire.
- NTSB Tire Safety Alert — backs up spare-tire maintenance and tire aging cautions.
Related Articles
Toyota Tundra Tire and Wheel Package: What to Consider Before Buying
Unlock the secrets to choosing the perfect tire and wheel package for your Toyota Tundra—essential tips await to enhance your ride.
Read More
Do Bigger Tires Void a Toyota Tundra Warranty? Magnuson-Moss Act Explained
Bigger tires might not void your Toyota Tundra warranty, but understanding the Magnuson-Moss Act is crucial—discover how to protect your investment effectively.
Read More
Toyota Tundra Tire Rack Setup: Garage Storage Ideas for Seasonal Sets
Better tire storage for your Toyota Tundra awaits—discover essential tips to maximize space and protect your seasonal sets in the garage!
Read More