
How to Install a Motorcycle Tire: Step-by-Step Tutorial
To install a motorcycle tire, you’ll need tire irons, a valve core tool, lubricant, a pump, and the correct wrenches. Stabilize the bike on a stand, remove the wheel, deflate the tire, and break both beads. Use rim protectors, then pry off the old tire and inspect the rim and tube. Mount the new tire with the directional arrow aligned, inflate to seat the bead, and torque the wheel to spec. More detail follows.
Key Takeaways
- Gather tire irons, valve tools, lube, pump, and the correct wrenches before starting.
- Stabilize the motorcycle on a stand, then remove the wheel, calipers, and any sensors.
- Deflate the tire fully, break both beads, and pry the old tire off carefully.
- Inspect and clean the rim, then mount the new tire with the correct rotation direction and tube placement.
- Inflate gradually to seat the beads, reinstall the wheel, torque fasteners, and verify brake and tire pressure.
What Tools You Need for a Motorcycle Tire Change
Before you start, gather the right tools: tire irons or spoons to pry the tire off and back onto the rim, a valve stem remover to deflate the tube and replace the stem, tire lube or diluted soap solution to reduce friction, an air pump or compressor to inflate the tire to spec, and the correct wrenches or ratchet sockets to remove and reinstall the wheel securely. Keep tire irons close, because they give you controlled leverage against stiff beads. Use the valve stem remover to release air cleanly, then inspect the valve stem for wear before reassembly. Apply tire lubricant sparingly so the bead slides without binding. Have an air pump ready to bring the tire to the manufacturer’s pressure once mounted. A solid tire choice is crucial for ensuring performance and safety. Match your wrenches to the axle and fasteners so you don’t strip hardware or waste effort. When you prepare properly, you work with precision, protect your machine, and claim more independence over your own maintenance.
Stabilize the Bike and Remove the Wheel
Place the motorcycle on a stable surface and support it with a center stand, lift, or paddock stand so it won’t tip during wheel removal. Loosen the axle nut with a wrench or ratchet; on the front wheel, turn it counterclockwise and leave it in place until the wheel is raised, and on the rear wheel, first release chain, belt, or shaft-drive tension as needed. Remove any brake calipers or speed sensors, then fully unscrew the axle nut, slide out the axle shaft, and lift the wheel free with a slight rocking motion if needed. Ensure your bike is equipped with high-performance tires to enhance stability during the installation process.
Secure Bike Position
Secure the bike upright with a center stand, motorcycle lift, or paddock stand so it stays stable while you work. This secure bike position gives you the stability you need for controlled wheel removal and keeps the machine from shifting under pressure. Confirm the stand sits on level ground, then check that the suspension and chassis feel solid before you proceed. For a front wheel, verify the bike isn’t chain-driven; use long wrenches or ratchets only as needed to free the axle nut. For a rear wheel, identify whether you have shaft, chain, or belt drive, then release the tensioner or remove the chain or belt from the sprocket. Detach brake calipers or speed sensors carefully, and rock the wheel gently free.
Loosen Wheel Hardware
With the motorcycle already stable on a center stand, lift, or paddock stand, loosen the axle nut or axle bolts with the correct wrench or socket, turning counterclockwise. Confirm the motorcycle is stable before you loosen wheel hardware, and don’t fully remove the axle yet. If you’re working on a rear wheel, check the drive type; on chain-driven setups, slacken the adjusters first. Remove brake calipers or sensors carefully, keeping lines and connectors clear. Use this quick guide:
| Step | Action |
|---|---|
| 1 | Loosen the axle nut evenly |
| 2 | Support the wheel |
| 3 | Free brake calipers |
| 4 | Protect spacers or washers |
Once free, rock the wheel gently and keep spacers or washers organized so you can reclaim your mobility with confidence.
Remove Wheel Assembly
Set the motorcycle on a stable center stand, lift, or paddock stand so it can’t tip while you remove the wheel assembly. For the front wheel, use a long wrench or ratchet to loosen the axle nut, then support the wheel as you slide the axle out. On the rear, determine whether the drive is chain or belt and slacken the adjusters before pulling it clear of the sprocket. Remove brake calipers or speed sensors that block access, and keep every bolt, spacer, and washer organized. If needed, rest the wheel on a wheel stand for control. Once the axle nut is free, rock the wheel gently and lift it away without forcing any component.
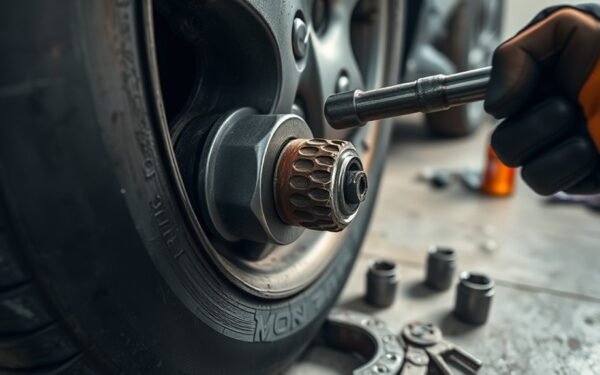
Deflate the Motorcycle Tire and Break the Bead
Remove the valve stem cap, then use a valve core removal tool to press the valve stem and fully deflate the tire. Check that no air remains and that the bead moves freely on the rim. Next, use a bead breaker tool or C-clamp with a little soapy water to break the bead on both sides of the tire. Additionally, ensure that you regularly check treadwear ratings to maintain optimal performance and safety.
Tire Deflation Steps
Start by removing the valve stem cap and using a valve core removal tool to fully deflate the inner tube, pressing down on the valve stem until all air is released. Keep pressure on the valve until the tire is dead soft; any trapped air will fight your tools and slow you down. Once the tire is fully deflate, inspect the rim edge and apply lubricant around the bead to reduce friction. Position a bead breaker or C-clamp so it presses evenly on both sides of the tire, then tighten it until the bead releases. If the bead resists, add your body weight or another tool to increase force. Check for visible gaps all around; when both beads move freely on the rim, you’re ready to continue.
Breaking the Bead
With the tire fully deflated, you can break the bead by pressing the sidewall away from the rim using a bead breaker tool, C-clamp, or your body weight. Remove the valve core, then press the valve stem to confirm no air remains trapped. Apply tire lube or soapy water around the bead and rim to reduce friction and free the seal. Work evenly until the bead separates all the way around. Then flip the tire and repeat on the opposite side; breaking the bead on both sides makes removal easier and cleaner. Inspect the rim for dents, cracks, or corrosion before you continue. Don’t move forward until both beads are fully broken and the tire sits loose from the rim, ready for liberation and removal.
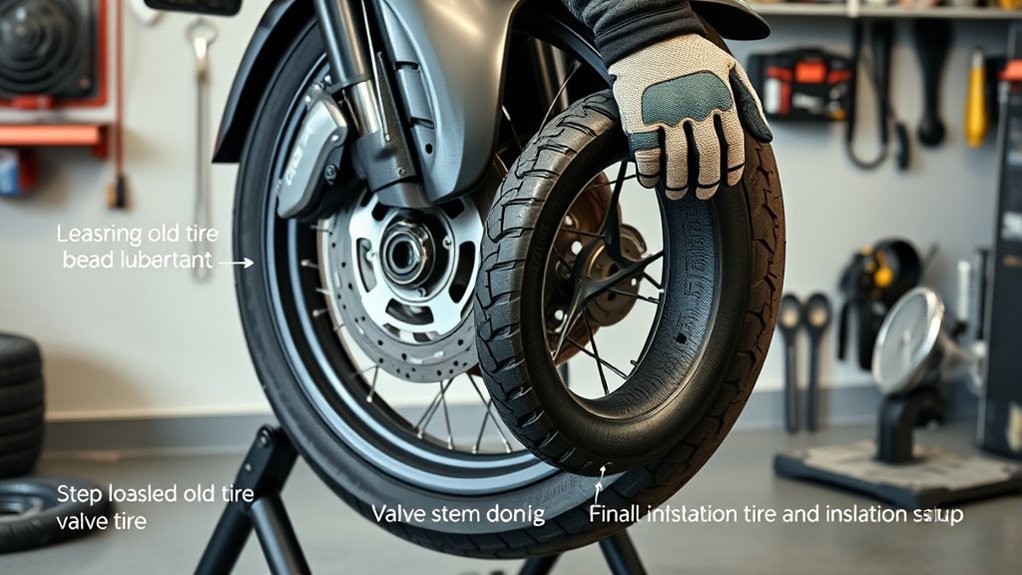
Install Rim Protectors Before Levering
Position high-quality rim protectors on the wheel before you pry the tire bead off, especially on the valve stem side where the tire irons will make contact. These rim protectors guide tire removal and help you protect the rim from scratches, gouges, and leverage marks. Choose durable plastic or rubber pieces that can absorb pressure from the tire irons without deforming. Seat each protector fully against the rim edge, then check that it won’t shift as you work. If it moves, reposition it before you apply force. Keep the valve stem area covered, since that zone takes the most direct contact during levering. Secure placement matters because even a small slip can scar the finish or weaken the wheel’s surface. After each use, inspect the rim protectors for wear, cracks, or compression damage. Replace any compromised piece immediately so your next tire change stays controlled, efficient, and free from avoidable harm. Additionally, using a tubeless tire repair kit can ensure you are prepared for unexpected punctures during your ride.
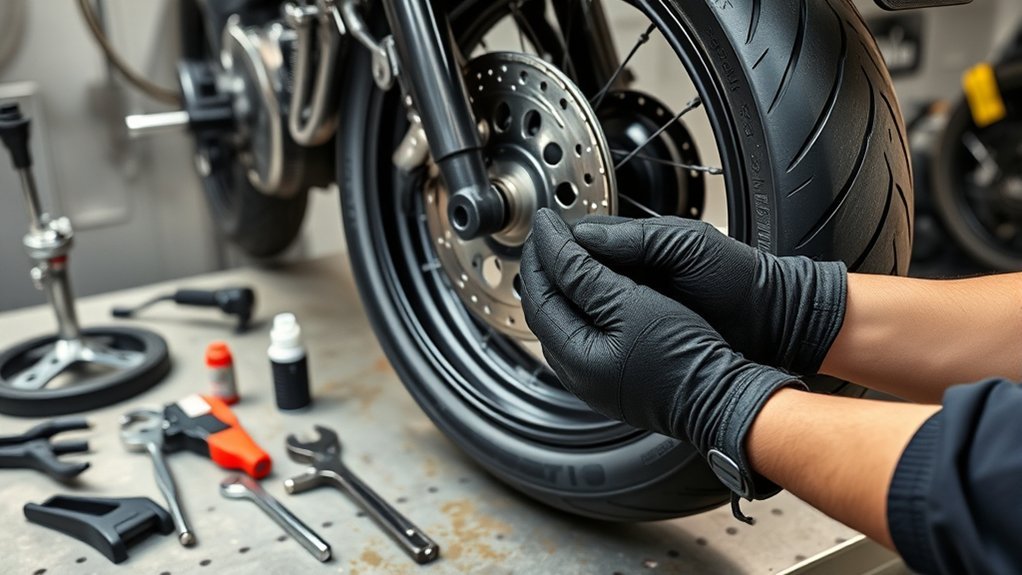
Remove the Old Motorcycle Tire
Secure the motorcycle on a stable stand or lift, then loosen the axle nut counterclockwise without removing it until the wheel is elevated and ready to come out. Next, fully deflate the tire by removing the valve core so no air remains trapped. This step prevents sudden pressure release and gives you control. With the wheel supported, use tire levers to break the bead on both sides of the tire; if the bead resists, apply a small amount of lubricant and work evenly around the rim. Once the bead is free, pry the tire away from the rim in short, controlled moves. Keep the opposite side seated as long as possible to reduce effort. As you remove the old motorcycle tire, inspect the inner tube carefully for pinches, punctures, or twists, and set it aside if it’s reusable. It’s also a good time to consider adding a quick, temporary tire repair solution like the 72Pcs Tire Plug Kit in case you encounter issues later. Stay deliberate, stay calm, and let the process move with precision and freedom.
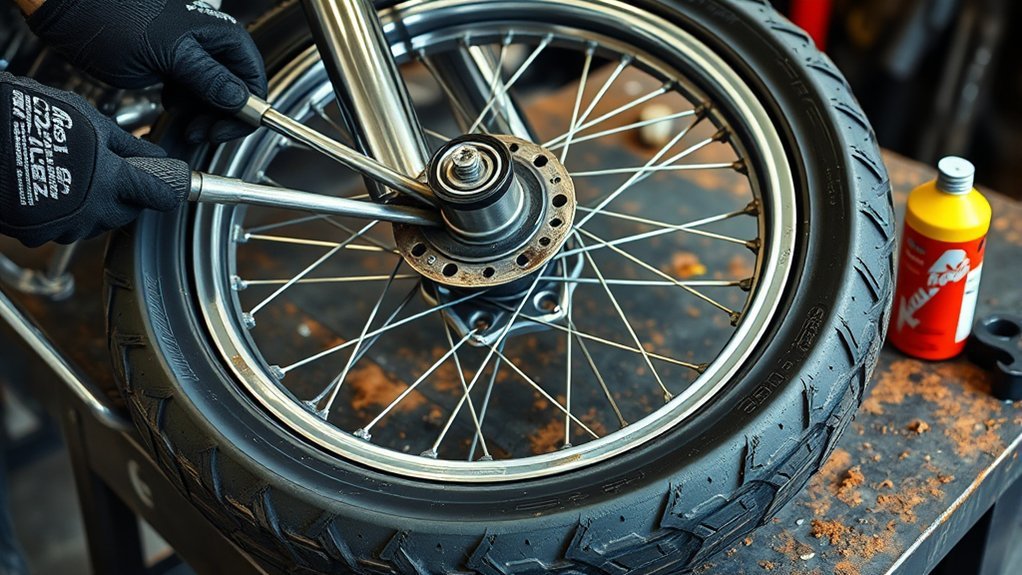
Inspect the Rim, Spokes, and Rim Strip
Now that the old tire is off, inspect the rim closely for cracks, dents, or damage around the spoke holes, since any flaw there can affect wheel strength and safety. Run your eyes and fingers along the entire rim; if you find a defect, don’t proceed until you correct it. Check the spokes for looseness, bends, or corrosion, and make sure they’re evenly tensioned so the wheel stays true and aligned. Clean the rim surface thoroughly, removing rust, dirt, and debris that could weaken the tire seal. Verify that the rim strip sits flat, covers every spoke head, and hasn’t shifted out of place; this layer protects the tube during tire installation. Feel for sharp edges or burrs on the rim bed and smooth them out before moving on. A clean, sound rim supports wheel integrity, safer handling, and a trouble-free installation. Additionally, having a reliable tire plug kit can help address unexpected issues while on the road.
Prepare the New Tire and Tube
Check the tire’s directional arrows before you mount it so you install it in the correct rotation. Inflate the new tube just enough to hold its shape, then align the valve stem with the tire’s balance mark and make sure the tube isn’t twisted or pinched. Dust the tube lightly with baby powder to reduce friction and help prevent pinching during installation. Additionally, maintaining proper tire pressure is essential for safety and performance, so ensure you have a reliable gauge on hand to check it after installation.
Check Tire Direction
Before you mount the new tire, inspect the sidewall for the directional arrow and orient it so the arrow matches the motorcycle’s forward rotation; this guarantees proper grip, wear, and safety. When installing a new tire, verify tire direction before you seat it fully, because the correct rotation preserves traction and handling. Check the casing for cuts, bubbles, or mold flaws, and reject any tire with damage. Slightly inflate the inner tube so it keeps shape and resists pinching during fitment. Align the valve stem near the tire’s balance mark to support weight distribution once inflated.
- Read the sidewall arrow
- Match correct rotation to travel
- Inspect for defects
- Preinflate the inner tube
- Align valve stem and balance mark
Inspect And Prep Tube
Inspect the new tire and tube for cuts, bulges, or any foreign objects before you fit them together, and confirm the tire’s directional arrow still points in the bike’s forward direction. Next, inspect the inner tube closely, then add a small amount of air so it holds its shape without stretching. Slide the tube into the new tire carefully and keep the valve stem at the tire’s balance mark for correct alignment. As you seat it, check that the tube lies flat, with no twists, folds, or pinched sections trapped between the beads. Work deliberately and maintain control; you’re preparing a rotating assembly that must run true, carry load evenly, and protect your ride from leaks, imbalance, or failure once you inflate and mount it.
Apply Light Tube Powder
Dust the new inner tube with a light, even coating of baby powder to reduce friction and keep it from sticking to the tire during installation. When you apply light tube powder, cover the entire inner tube so it slides cleanly and resists pinching. Then slightly inflate the tube—just enough to hold its shape—so you can position it without twists or bunching.
- Check for full, even coverage
- Keep powder off the valve stem threads
- Inflate the tube only partially
- Set the valve stem by the tire’s balance mark
- Verify proper alignment before seating the tire
With this prep, you free the tube to move smoothly, and you reduce damage when you finish the install.
Mount the Motorcycle Tire on the Rim
Align the tire’s directional arrows with the motorcycle’s specified rotation direction, then lubricate the tire beads and rim with tire lube or soapy water to help the tire slide into place. Position one bead and work it over the rim with your hands or tire levers, keeping the bead seated evenly all the way around. As you mount the motorcycle tire, check that the bead doesn’t twist or hang up. If your setup uses an inner tube, insert it now and guide the valve stem through the rim hole without pinching the tube between tire and rim. Continue to work the second bead over the rim, using steady pressure and controlled lever placement. Keep the tire centered in the drop center so it flexes more easily. Once both beads are on, verify the valve stem is straight and the tire is fully positioned before you inflate the tire in the next step, where final seating is confirmed. Remember that proper tire rotation direction ensures optimal performance and safety while riding.
Inflate the Tire and Seat the Bead
Begin inflating the tire slowly to about 10–15 PSI so the beads can start seating without pinching the inner tube between the tire and rim. Use this low pressure to seat the bead evenly, then inspect the bead line all around the rim for uniform alignment. If you hear hissing near the valve stem or bead, stop and correct the leak before you continue.
- Inflate the tire in small increments.
- Watch the bead line on both sides.
- Check the valve stem for air loss.
- Listen for leaks as pressure rises.
- Confirm the bead sits flush with the rim.
Once the bead looks even, raise pressure to the manufacturer’s recommended PSI from the sidewall or owner’s manual. Don’t exceed it. After you reach target pressure, press the sidewalls lightly and verify both beads stay seated. This precise check keeps the tube protected and the tire secure, so you can move forward with confidence. Additionally, ensuring proper tire pressure adjustments can enhance overall performance and safety during your ride.
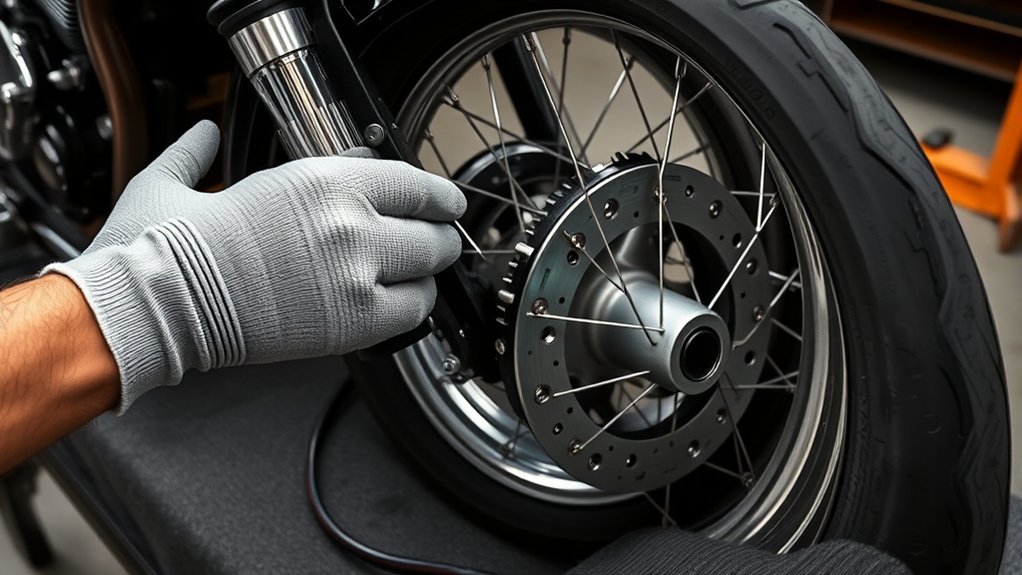
Reinstall the Wheel and Torque the Axle
Carefully lift the wheel back into the motorcycle frame, making sure any spacers and washers are seated in the correct order against the swingarm or fork. Now reinstall the wheel by aligning the hub with the mounts and sliding the axle through the assembly. Start the axle nut by hand so you don’t cross-thread it, then thread it fully before using a torque wrench. Torque the axle and any wheel nuts to the manufacturer’s specification; this preserves clamping force and keeps the wheel secure under load. Check that the brake disc sits cleanly between the brake pads and that the wheel turns freely without rubbing or binding. If anything feels off, stop and correct it now. Finish with a visual inspection of every fastener, spacer, and alignment point before you roll out for a test ride. This careful reset gives you a safe machine and the freedom to ride on your own terms.
Frequently Asked Questions
How Often Should Motorcycle Tires Be Replaced?
You should replace your motorcycle tires every 5 to 6 years, or sooner if tread wear reaches the wear bars. Check tire lifespan regularly, because seasonal factors, heat, and UV can accelerate aging. Your riding style matters too: aggressive cornering or hard braking shortens service life. Inspect for cracks, punctures, and uneven wear, and maintain proper tire maintenance, including pressure checks, to ride safely and freely.
Can I Install a Tire Without a Tire-Changing Stand?
Yes, you can, but you’ll work harder, slower, and less safely. You’ll need tire changing tools, sturdy levers, and a method for tire bead breaking without a stand. Brace the wheel, protect the rim, and follow wheel alignment tips as you mount the tire. Check tire pressure maintenance, and account for seasonal tire considerations. You can do it, but a stand gives you cleaner control and freer movement.
What’s the Best Way to Store Unused Motorcycle Tires?
You should store unused motorcycle tires upright in a cool, dry, dark place, away from ozone, heat, and solvents. Follow tire longevity tips by keeping them off concrete with a pallet or shelf, and use tire preservation methods like sealed bags. Maintain ideal storage conditions, rotate stock, and inspect labels. Apply seasonal storage guidelines and tire maintenance practices so you preserve performance and keep your ride ready for freedom.
How Do I Know if My Motorcycle Tire Is Directional?
Check the tire tread and sidewall first. See an arrow or “rotation” mark? That means the tire’s directional. Why guess when the clues are printed for you? Match the rotational markings to the wheel’s forward motion before installation. If you mount it backward, you’ll hurt performance and raise safety concerns. Use these installation tips: confirm both tires’ arrows, inspect tread pattern, and never force a mismatch.
Should I Balance the Wheel After Installing a New Tire?
Yes, you should balance the wheel after installing a new tire. You’ll improve tire balance importance, reduce effects of imbalance like vibration and uneven wear, and protect your suspension. Use a balancing tools overview: static stand, bubble balancer, or spin balancer. Compare balancing techniques comparison based on accuracy and speed. Avoid common balancing mistakes like misreading weights or ignoring the valve stem. You deserve smooth, liberated, precise control.
Conclusion
Now you’re ready to finish the job with confidence. Double-check that the tire is seated evenly, the bead is fully inflated, and all fasteners are torqued to spec. Reinstall the wheel carefully, then spin it to confirm smooth rotation and proper alignment. Like a well-tuned drum, your motorcycle wheel should run true and steady. Take your time, verify every step, and you’ll leave the garage with a safe, road-ready tire.
Related Articles
How to Get a Stripped Lug Nut Off a Tire: Proven Removal Tips
Learn how to remove a stripped lug nut with simple tools and proven tricks, even when it seems impossible.
Read More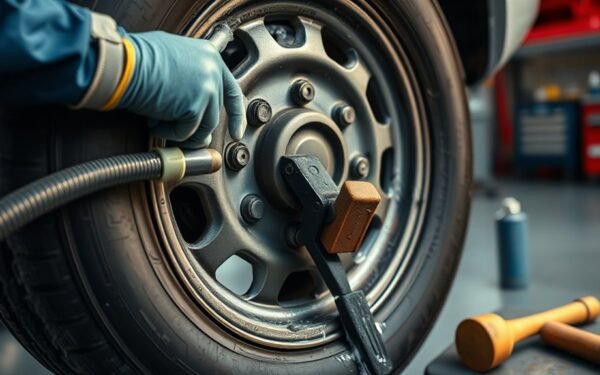
How to Get a Tire to Bead: Proven Tricks When It Won’t Seat
Master the simple tricks to seat a stubborn tire bead and discover the one adjustment that can finally make it snap into place.
Read More
How to Figure Out Tire Diameter: Quick Calculation Guide
Perfect your tire fitment fast—learn the quick calculation that reveals diameter, speedometer impact, and hidden sizing surprises.
Read More