
How to Inflate a Presta Valve: 9 Easy Steps
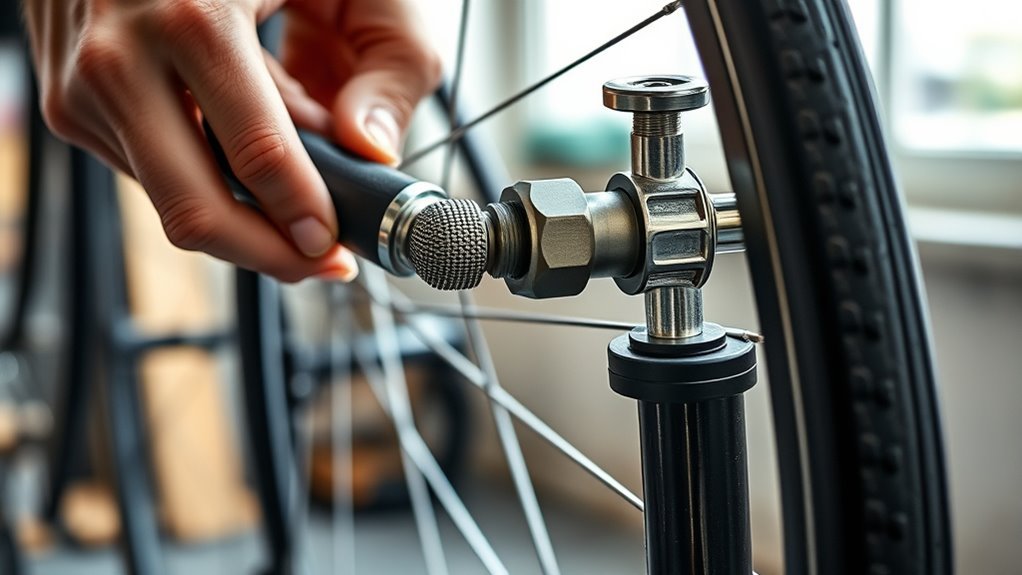
A Presta valve can feel awkward the first time you use one, especially if your pump keeps hissing or slipping off. The fix is simple: open the tiny locknut, attach the right pump head, and inflate to the pressure printed on your tire. This guide shows you how to inflate a Presta valve, choose the right tools, avoid leaks, and troubleshoot common problems.
Quick Answer
To inflate a Presta valve, remove the cap, loosen the small locknut, and press the valve tip once to release a quick puff of air. Attach a Presta-compatible pump head, inflate to the recommended PSI on your tire sidewall, then remove the pump smoothly. Tighten the locknut and replace the cap when you’re done.
Key Takeaways
- Loosen the Presta locknut before pumping so air can flow into the tube or tire.
- Use a Presta-compatible pump head or a Presta-to-Schrader adapter for a tight seal.
- Check the tire sidewall for the recommended PSI before you inflate.
- Remove the pump head straight and smoothly to reduce air loss.
- Clean and inspect the valve if you hear hissing or the tire won’t hold pressure.
What a Presta Valve Is and Why It’s Different
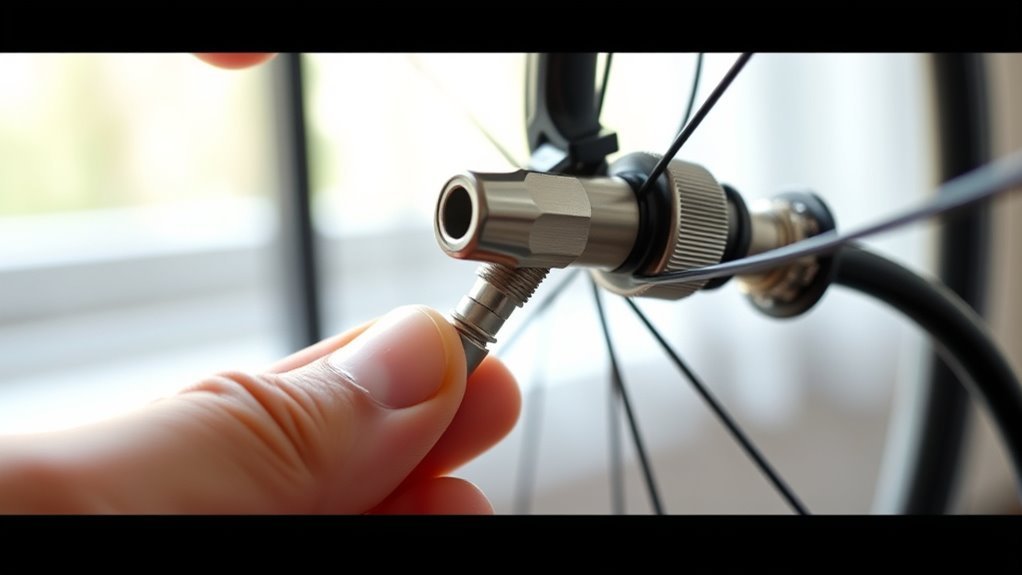
A Presta valve is a slim bicycle tire valve often found on road bikes, gravel bikes, and some mountain bikes. It has a narrow stem and a small threaded locknut at the tip. You loosen that locknut before adding air, then tighten it again after inflation.
Presta valves fit narrow rim holes, which helps preserve rim strength on lightweight wheels. Many Presta valves also include a removable core, which helps when you need to add tubeless sealant or replace a damaged core.
Unlike Schrader valves, Presta valves need either a Presta pump head or a small adapter. Check your pump before you start so you don’t damage the valve or lose air.
How to Inflate a Presta Valve: Quick Steps
Follow these steps when you need a fast, reliable inflation. Use the pressure range printed on your tire sidewall as your main guide.
Estimated total time: 2 to 5 minutes.
- Remove the valve cap and set it aside.
- Loosen the small locknut by turning it counterclockwise until it stops.
- Press the valve tip once to confirm air can flow.
- Attach the pump head firmly and keep it straight on the valve.
- Lock the pump head if your pump uses a lever.
- Inflate with steady strokes while watching the gauge.
- Stop when the tire reaches the recommended PSI on the sidewall.
- Remove the pump head smoothly while keeping it aligned.
- Tighten the locknut clockwise, then replace the valve cap.
Warning: Don’t inflate beyond the maximum PSI printed on the tire sidewall.
Tools and Target PSI by Bike Type
You’ll need a pump that fits Presta valves. A floor pump with a gauge works best at home, while a mini pump helps during rides. Carry a Presta-to-Schrader adapter if your backup pump does not fit Presta stems.
Check your bike’s recommended PSI before inflating. Tire width, rider weight, terrain, tubes, and tubeless setup can all affect the best pressure.
[Products Worth Considering]

This 4-pack kit converts Presta bike valves to standard Schrader valves so you can inflate with any regular pump or air compressor. The solid brass adapters include an O-ring for a tight, leak-proof seal and provide a simple screw-on setup. Compatible with road bikes, mountain bikes, e-bikes, and e-scooters, it’s designed for convenient, everyday carry readiness.

Convert Presta bicycle valves to accept standard Schrader pump nozzles for fast, hassle-free inflation. This kit includes durable brass adapters with leak-resistant connections, plus sports inflation needles and protective valve caps for convenient use on bikes and ball sports equipment.

Tiakia’s mini high-pressure frame pump delivers up to 260 PSI for faster, more efficient inflations with an optimized intake volume. It features a double-head valve design compatible with Schrader and Presta, plus a conversion for Donlop, making it versatile for bikes and many inflatables. The lightweight anodized aluminum build includes a mounting bracket for convenient carry, while the flexible high-pressure hose and IPX4 waterproof body support outdoor use.
Required Tools Overview
Use a pump head or adapter that fits Presta stems, plus a reliable pressure gauge. Before you start, check the pump seal, lever, and gasket. A worn pump head can hiss, slip, or give a poor reading.
Use a floor pump when accuracy matters. Use a mini pump for roadside inflation, then fine-tune the pressure later with a gauge.
- Use a floor pump with a gauge for regular inflation.
- Carry a mini pump for flats during rides.
- Keep a Presta-to-Schrader adapter in your repair kit.
- Use a separate gauge if your pump gauge seems inaccurate.
Target PSI by Bike Type
Match your tire pressure to your bike, tire size, load, and riding surface. The numbers below give broad starting ranges, but your tire sidewall range should guide your final choice.
- Road bikes: 80–120 PSI for many narrow tires, unless the sidewall says otherwise.
- Hybrid and commuter bikes: 50–70 PSI for a mix of comfort and road efficiency.
- Mountain bikes: 25–45 PSI for grip and shock absorption on trails.
- Fat-tire bikes and some e-bikes: 5–30 PSI for traction on soft surfaces.
Adjust within these ranges based on rider weight, cargo, weather, and terrain. Lower pressure can improve grip, but too little pressure can cause rim strikes or pinch flats.
Check the Tire and Valve Before You Start
Before you pump, check the tire sidewall for the recommended PSI range. Scan the tread and casing for cuts, embedded debris, or bulges. Rotate the wheel so the Presta valve sits where you can reach it with the pump.
Examine the valve stem for dirt, bends, or damage that could cause leaks. Loosen the tiny locking nut at the valve tip only when you’re ready to inflate.
[Products Worth Considering]

Upgrade your tire inflating setup with this 12-inch hose adapter featuring a brass locking quick-connect chuck for secure, leak-proof attachment. The extended, flexible design helps reach hard-to-access valve stems, while the self-locking mechanism enables hands-free inflation with no pressure loss. It’s compatible with most portable air compressors and inflators, making it ideal for cars, trucks, motorcycles, and bicycles.

This EVOULTES 2-way air chuck set includes a dual head closed flow air chuck and a ball head chuck for versatile tire inflation. It connects easily to air lines, inflator gauges, and compressors using 1/4" NPT threads and includes two 1/4" male quick plugs for fast coupling. Built with durable metal construction and sealed threads using Teflon tape to help prevent air leaks, it’s ideal for inflating Schrader valve tires across cars, bikes, and motorcycles.

COMFORTABLE HANDLE because of ergonomically designed air pump for bike handle.
Inspect Tire Surface
A quick visual check helps you catch many tire problems before you pump. Look for cuts, bulges, or sharp debris on the tread and sidewall. Run your fingers lightly over the tire to feel for glass, thorns, or soft spots.
- Scan the tread and sidewall for cuts or bulges.
- Remove embedded debris with pliers or a pick.
- Wipe the valve stem clean before pumping.
- Rotate the wheel for easy pump access.
Examine Valve Stem
Inspect the valve stem closely for cracks, bent threads, or debris that could block airflow. Remove the valve cap so you can see the stem clearly. If the valve core feels loose, tighten it with a valve core tool.
Good valve care helps prevent leaks during and after inflation.
| Item inspected | What to look for | Action |
|---|---|---|
| Valve stem | Cracks, bent threads | Replace if damaged |
| Valve core | Loose core | Tighten securely |
| Inside stem | Dirt, debris | Clean gently |
| Tire | Cuts, bulges | Repair or replace |
Open the Valve and Attach the Pump: Step-by-Step
Unscrew the knurled locknut at the Presta tip counterclockwise until it stops. Press the tip once to break the seal and release a quick puff of air. This confirms the valve can move freely.
Press the pump nozzle firmly onto the valve and keep it straight. If the pump has a lever, flip it to lock the head in place. A snug, aligned fit helps prevent hissing and air loss.
- Confirm that the pump or adapter fits Presta valves.
- Place the nozzle straight on the valve stem.
- Lock the pump lever securely if your pump has one.
- Remove the pump smoothly, then tighten and cap the valve.
Pro tip: Hold the valve stem with one hand while attaching the pump to reduce bending stress.
Pump to the Right Pressure: Technique and Targets
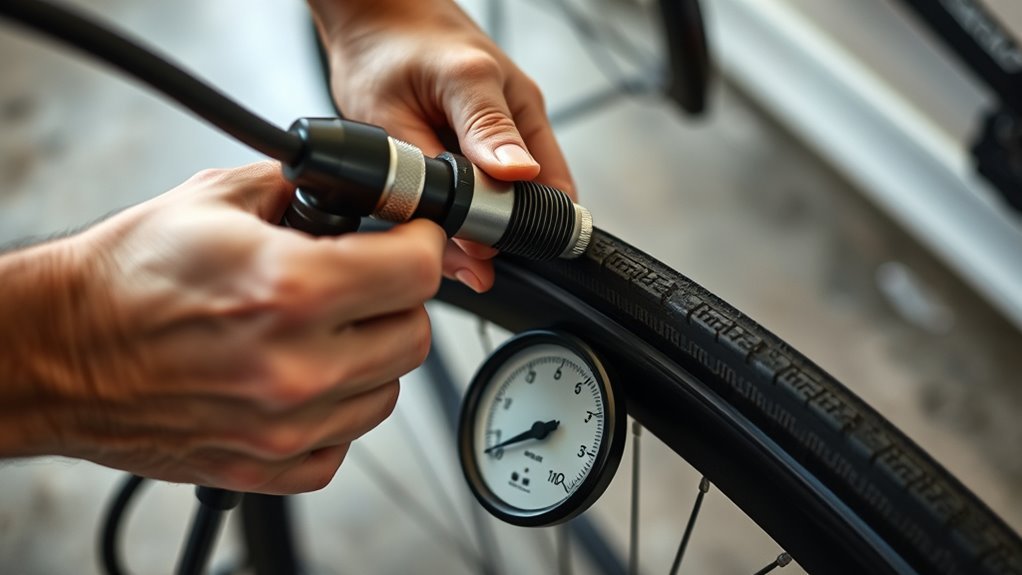
Before you pump, check the tire sidewall for the recommended PSI range. Set a target based on your bike, tire size, load, and terrain. Use a reliable gauge so you don’t guess by feel.
Pump with steady strokes, pause, and read the gauge. Stop before the tire exceeds the sidewall maximum.
| Step | Action | Checkpoint |
|---|---|---|
| 1 | Set target PSI | Sidewall range |
| 2 | Attach pump | Secure fit |
| 3 | Inflate gradually | Gauge reading |
| 4 | Fine-tune pressure | Target PSI |
Check tire pressure often if you ride regularly. Tires lose air over time, even when nothing appears damaged.
Remove the Pump Without Losing Air
When you hit your target pressure, release the pump lever gently if your pump uses one. Keep the pump head aligned with the valve as you pull it off. Avoid twisting or yanking the hose.
Listen for hissing after you remove the pump. If you hear air escaping, tighten the Presta locknut clockwise right away. Replace the valve cap to help keep dirt out.
Ease the pump head off slowly, keep it aligned, listen for hissing, then tighten the Presta locknut and cap.
- Confirm the pump head fits snugly before inflating.
- Release the lever slowly and avoid pulling the hose sideways.
- Tighten the valve locknut right after removal.
- Reattach the pump if air keeps leaking while you remove it.
Troubleshooting Presta Valve Problems and Maintenance
If your Presta valve leaks or won’t inflate, start with the simplest causes. Make sure you loosened the locknut, opened the valve tip, and attached the pump head straight. A poor seal often causes hissing at the pump head.
Next, inspect the valve core. Dirt, damage, or a loose core can block airflow or let air escape. Clean the valve gently and tighten the core with a valve core tool if needed.
If the tire loses air after you inflate it, check for a puncture, damaged valve stem, or loose tubeless valve nut. Replace worn valve parts instead of forcing the pump onto a damaged stem.
| Problem | Likely cause | Fix |
|---|---|---|
| Pump hisses | Loose pump head | Reseat and lock the head |
| No air enters | Closed valve tip | Loosen and press the tip |
| Air leaks after pumping | Loose core or puncture | Tighten core or repair tire |
| Valve bends | Sideways pump force | Hold stem and align pump |
[Products Worth Considering]

A small, handy tool designed to remove and install Schrader and Presta valve cores

Valve Core Removal Tool: Quickly and easily remove cores. Suitable for Tightening or removing valve cores on bicycles, cars, luggage and any other pneumatic tires.

【Package Include】1 x blue valve core removal tool, 1 x brass presta valve adaptor, 1 x presta valve core remover, 10 x presta valve cores, 10 x valve stem caps.
Common Mistakes to Avoid When Inflating a Presta Valve
Most Presta valve problems come from rushing the setup. Don’t skip the locknut, don’t force the pump head, and don’t rely on feel alone for tire pressure. A gauge gives you a safer and more consistent result.
- Don’t forget to loosen the Presta locknut before pumping.
- Don’t attach a Schrader-only pump without an adapter.
- Don’t bend the valve by pulling the pump sideways.
- Don’t exceed the maximum PSI printed on the tire.
- Don’t leave dirt around the valve stem or core.
Frequently Asked Questions
Can You Pump a Presta Valve With a Normal Pump?
Yes, you can use a normal pump if it has a Presta setting or a dual-head design. If your pump only fits Schrader valves, use a Presta-to-Schrader adapter.
Why Is My Presta Valve Not Inflating?
Your Presta valve may not inflate because the locknut is still closed, the pump head does not seal, or the valve core is blocked or loose. Open the valve tip, reseat the pump head, and check the core if air still won’t flow.
Do You Need to Press the Presta Valve Before Pumping?
Yes, press the loosened valve tip once before attaching the pump. This quick puff of air confirms the valve has opened and helps the pump push air in smoothly.
How Often Should You Check Presta Valve Tire Pressure?
Check tire pressure before long rides and at least weekly if you ride often. Narrow, high-pressure tires can lose noticeable air faster than wider, lower-pressure tires.
Conclusion
Inflating a Presta valve comes down to one key habit: open the valve fully before you attach the pump. Check the tire sidewall, use the right pump or adapter, and inflate with a gauge instead of guessing. After you remove the pump, tighten the locknut and replace the cap. Practice once at home, and you’ll handle Presta valves with confidence on any ride.

Related Articles

Are Premium Tires Worth the Extra Money?
Worth the extra money? Premium tires promise more grip, comfort, and longevity—but the real tradeoff may surprise you.
Read More
What Are OE Tires? Original Equipment Explained
Discover what OE tires really mean and why choosing the right replacement could change everything for your car’s ride, handling, and safety.
Read More
305 Tire Size Explained: How Big Is It?
I explain how big a 305 tire really is—and why the exact fit can surprise you.
Read More