
How to Get a Nail Out of a Tire: Safe Removal Steps
If you find a nail in your tire, keep driving to a minimum and check pressure first. Inspect the tread for leaks with a gauge or soapy water, and don’t pull the nail unless you’re ready to plug the hole. Use pliers to grip it close to the tread and pull straight out in one smooth motion. Then plug or patch the puncture promptly, or have a tire shop assess whether the tire’s still safe.
Key Takeaways
- Check tire pressure first; if the tire holds air, short driving to a shop may be safe.
- Inspect the puncture in good lighting and confirm it is in the tread, not the sidewall.
- Use pliers or a claw hammer to grip the nail close to the tread.
- Pull the nail straight out slowly to avoid enlarging the hole, expecting a brief air hiss.
- Plug the hole immediately after removal, or visit a tire shop promptly for repair.
Can You Drive With a Nail in Your Tire?
Yes, you can drive a short distance with a nail in your tire if it still holds air, but only as a temporary measure. You need to assess the nail in your tire before moving the vehicle. If the puncture sits in the tread and you don’t see fast pressure loss, you can usually drive to a nearby repair shop. Keep your speed low and avoid hard braking, sharp turns, and heavy loads. Check tire pressure first; if it’s considerably low, inflate it enough to prevent sidewall damage and loss of control. Don’t pull the nail out yourself, because it may be sealing the hole and stopping more air from escaping. Treat the drive as a controlled transfer, not normal travel. Your goal is freedom from preventable failure, so get the tire inspected and repaired promptly. Long-term driving risks permanent damage, unsafe handling, and a tire that can’t be saved. Additionally, consult a tire shop to ensure proper fitment and safety after repair.
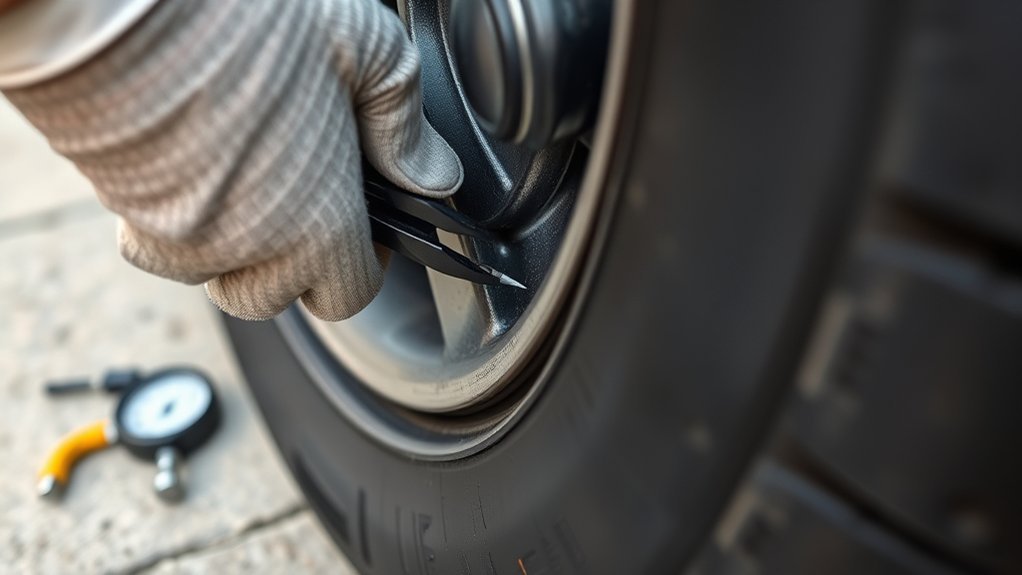
Find the Nail in the Tire
Start by inspecting the tire closely in good lighting, with your focus on the tread where nails and screws most often puncture. You need to find the nail in the tire by scanning the entire tread surface for shiny metal, tiny cuts, or dark spots that suggest embedded debris. Rotate the wheel slowly and examine every section, including areas that may hide a small screw head flush with the rubber. If the puncture isn’t obvious, spray a bubbly solution, such as window cleaner, over the suspected area and watch for bubbles forming around the leak. That response marks the puncture site with precision. Inflate the tire to the recommended pressure only if needed for inspection, then observe the surface closely for bubbling. Keep your hands clear of sharp edges, and don’t drive on the tire while you’re evaluating it. Careful inspection gives you control and lets you act before the damage grows. Additionally, ensuring proper tire maintenance can help prevent future punctures and extend the life of your tires.
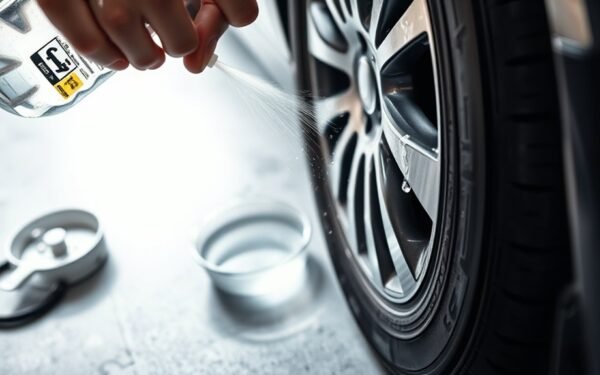
Check Tire Pressure for Leaks
Use a tire pressure gauge to check the tire’s current PSI and compare it with the recommended pressure listed on the driver-side door jamb or in your vehicle’s manual. If the reading’s low, you’ve got evidence of a leak, and you can act before the tire’s integrity drops further. Look and listen for hissing, sidewall bulges, or other visible signs of air escape. To pinpoint the leak, spray a bubbly solution, like window cleaner and water, over the puncture area; bubbles will form where air’s getting out. If pressure is considerably below spec, inflate the tire temporarily so you can protect the casing while you arrange repair. This check helps you decide when to remove the nail without wasting time or risking more damage. Make this inspection routine: regular pressure checks catch leaks early, improve tire life, and keep you moving with more control and less dependence on avoidable roadside trouble. Additionally, maintaining proper tire pressure enhances overall tire ratings, ensuring better performance and safety on the road.
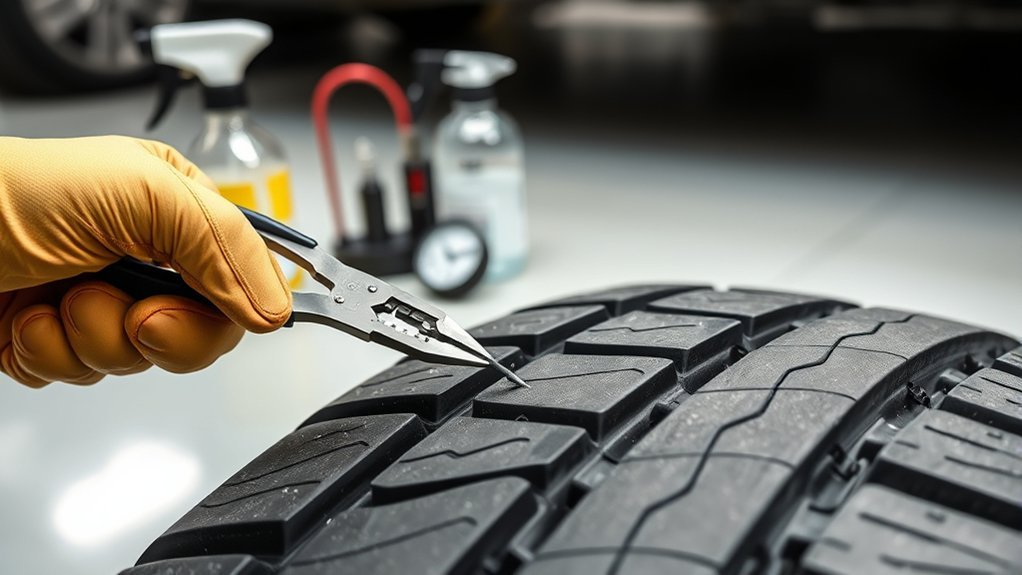
Remove the Nail Safely
Before you pull the nail, assess the puncture to make sure the tire is still safe enough to move or repair on the spot. If you see minimal air loss, don’t remove a nail yet; it may be sealing the hole and buying you time to reach a professional. If air is escaping fast, or the sidewall is damaged, stop driving and call roadside assistance.
Before you pull the nail, check for minimal air loss; it may be sealing the puncture for now.
To remove a nail safely, grip it close to the tread and pull straight out with pliers, claw hammer, or vice grips. Keep the motion smooth and controlled; a sudden yank can enlarge the puncture. Expect a short hiss as air escapes.
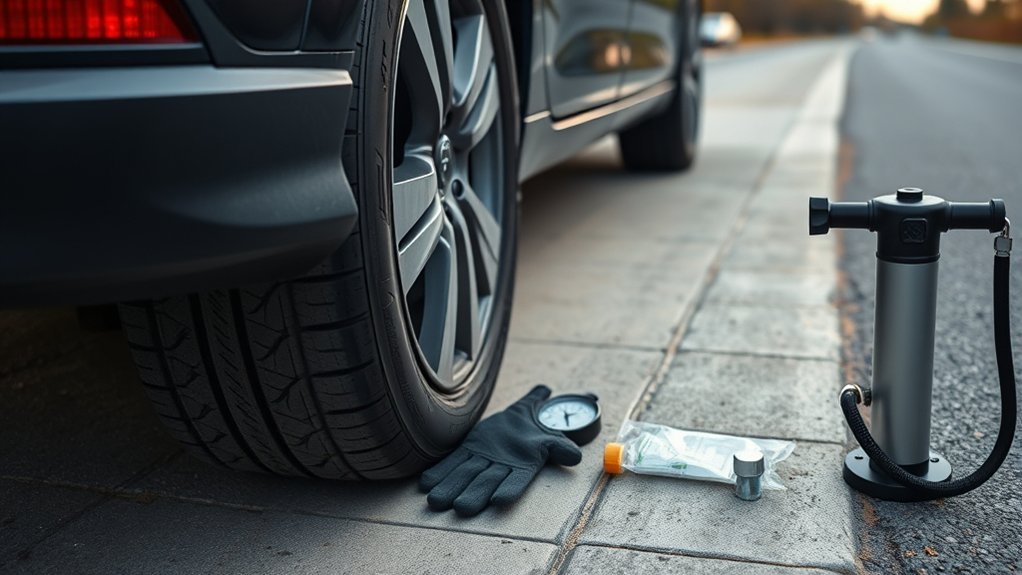
- Park on level ground and secure the vehicle.
- Use the right tool to grip the nail firmly.
- Pull steadily, then prep to plug the hole immediately.
Once the nail’s out, act fast. Have a tire repair kit ready so you can seal the puncture and stay mobile without risking further damage. Additionally, consider using a tire sealant to ensure effective sealing of any punctures after removal.
Plug a Nail Hole in the Tire
Locate the puncture, then use the reaming tool from your tire plug kit to clean and roughen the hole’s inner walls for better plug adhesion. Next, insert the plug into the insertion tool and push it firmly into the hole until only a small amount remains visible. Trim the excess flush with the tread, then check for leaks to confirm a secure seal. This process can help maintain adequate all-season traction and extend the life of your tire.
Locate and Prep Hole
If the tire still has air in it, inspect the tread for the nail or screw and any obvious damage, then spray the area with a bubbly solution such as window cleaner to pinpoint the leak as bubbles form around the puncture. Use this check tire step to locate and prep hole with confidence, not guesswork. Ream the puncture with the plug kit tool to roughen the channel and clear debris so the plug can bond tightly. Keep the tire inflated enough to expose small leaks, but don’t overdo it. Work methodically and stay in control.
- Find the leak by watching for bubbles.
- Mark the puncture so you don’t lose it.
- Ream the hole for clean plug adhesion.
Insert and Trim Plug
Thread the tire plug onto the insertion tool and make sure it’s seated securely. Use the reaming tool from your plug kit to roughen the hole so the rubber grips better. Keep your motion straight, then insert and trim plug in one controlled sequence: push the tool firmly into the puncture until only a short tail shows above the tread. Pull the insertion tool out cleanly, leaving the plug anchored in the casing. With scissors or a sharp cutting tool, trim the excess flush with the tire surface so it won’t rub the road or snag debris. Let the plug cure for the time your kit recommends before you drive fast or carry heavy loads. That delay protects the repair and keeps you moving with confidence.
Decide Between Repair and Replacement
You should first assess the puncture’s severity and location: tread damage under 1/4 inch in diameter is usually repairable, but sidewall punctures aren’t. If the tire’s lost air quickly, was driven on while flat, or has already had multiple repairs, you’ll likely need to replace it. Compare the repair cost with a new tire, but always confirm the decision with a professional inspection. Additionally, consider the benefits of having a reliable spare tire kit to assist in managing unexpected tire issues.
Assess Puncture Severity
Inspect the tire closely to judge whether the puncture is repairable or whether replacement is safer. To assess puncture severity, check exactly where the nail entered.
- If it’s in the tread, you may have options.
- If it’s in the sidewall, replacement is usually the safe call.
Measure the hole too; punctures under 1/4 inch can often be repaired, while larger damage often ends the tire’s service. Watch for rapid air loss. If pressure drops fast, don’t keep driving—stop and get help. Inspect tread wear and any prior repairs, because a tired tire won’t forgive more stress. You deserve control, but safety comes first, so consult a tire professional to confirm the best path for your specific wheel and road freedom.
Repairable Tread Damage
When the nail sits in the tread and the puncture is under 1/4 inch in diameter, a repair is often possible; larger holes, sidewall damage, or a tire with prior repairs usually tip the decision toward replacement. You should treat the tread as the only repairable zone and keep the tire under professional review. A technician can judge whether the nail path stayed straight, whether the liner stayed intact, and whether another repair would weaken the casing. If the tire qualifies, repair is usually cheaper than replacement, with external kits around Rs. 240 and internal mushroom kits around Rs. 600. Don’t keep driving on a damaged tire while you decide; continued use can turn a fixable puncture into permanent damage and raise accident risk.
When To Replace
Replacement becomes the safer call if the puncture is larger than 1/4 inch, if the nail damaged the sidewall, or if the tire already has repair history that limits another fix. After removing a Nail, inspect the tread and inner liner before you drive again. You need a replacement when the damage threatens structural integrity, because a compromised tire can fail without warning.
- Measure the hole: tread punctures under 1/4 inch may qualify for repair.
- Check location: sidewall or shoulder damage usually means replacement.
- Review history: repeated repairs call for a pro evaluation and often a new tire.
Don’t gamble with a weakened casing. External fixes may cost around Rs. 240, but safety outranks savings. If you’re unsure, stop and replace.
When to Visit a Tire Shop
If the tire is holding air and the nail is not causing a rapid leak, you can usually drive a short distance to a tire shop for service. Don’t pull the nail out first; it may be plugging the puncture and slowing air loss. Before you leave, check pressure with a gauge. If it’s low, add enough air to reach the tire shop safely, but don’t overinflate.
Visit a tire shop when the puncture sits in the tread and measures under 1/4 inch; technicians can often patch or plug it correctly. If the damage is in the sidewall, or the hole is larger, stop and get professional evaluation right away. Those conditions often require replacement, not repair. Additionally, ensure your tire has adequate tread depth to maintain traction and safety.
Act quickly, keep driving limited, and let the shop assess the tire before the damage spreads.
Frequently Asked Questions
How to Safely Remove a Nail From a Tire?
To safely remove a nail from a tire, you should first inspect the puncture and check Tire Safety. If the tire still holds air, drive only a short distance to a repair shop. Use pliers to pull the nail straight out, and expect air to escape. Then measure the hole: if it’s under 1/4 inch and in the tread, it may be repairable. Recheck pressure, and don’t drive on a damaged sidewall.
What Is the 3 Tire Rule?
The 3 Tire Rule is a bright line in Tire Maintenance: if three or more tires need replacement, you should replace all four. You’ll keep tread depth matched, preserve handling, and reduce drivetrain strain, especially on AWD vehicles. This practical rule helps you avoid instability and uneven wear, so you can drive with confidence and freedom, not compromise. Many manufacturers recommend it for balanced traction in wet or wintry conditions.
What Tool Is Used to Pull a Nail Out of a Tire?
A claw hammer’s claw end is the usual tool you’ll use for Nail Extraction from a tire. You can hook the nail head, then pull with steady leverage. If the nail’s buried deeper, pliers or vice grips can grip it better. You’ll want controlled force, since slipping can tear the tread or injure you. For screws, use a screwdriver, not a hammer.
How to Remove a Nail With No Head From a Tire?
You’ll use vice grips for Nail Extraction on a headless nail, and roughly 1 in 5 tire punctures can be repaired if you act fast. First, deflate the tire so you’ve got control. Grip the exposed metal firmly and pull straight out slowly, minimizing tear growth and air loss. If it’s deeply set, carefully drill a tiny relief hole beside it, then inspect the puncture and repair or replace as needed.
Conclusion
If you catch a nail early, you can often avoid a dangerous blowout. I once saw a driver limp in after a slow leak turned a simple puncture into a ruined sidewall—one small nail became a $200 mistake. That’s why you should inspect, check pressure, and remove the nail only after you’ve confirmed the tire’s stability. If the hole’s in the sidewall or the damage’s severe, don’t risk it—get the tire repaired or replaced at a shop.
Related Articles
How to Check a Tire for Leaks: 3 Easy Methods at Home
Now learn three simple at-home leak tests to spot hidden tire problems fast before a small issue leaves you stranded.
Read More
How Long Does Tire Shine Last? Complete Lifespan Guide
Usually lasting from days to months, tire shine depends on product and prep—uncover what really makes it fade or stay.
Read More
How Long Does It Take to Get a Tire Changed? Time Guide by Vehicle
Fast tire-change times vary by vehicle and service, but hidden delays can stretch the wait—discover what really affects yours.
Read More