
How to Check a Tire for Leaks: 3 Easy Methods at Home

Start by inspecting the tire and rim for nails, cuts, cracks, bead gaps, bent valve stems, or corrosion. Next, mix dish soap and water, spray it over the tire, bead, and valve stem, and watch for bubbles that show escaping air. For stubborn leaks, submerge the inflated tire in water and look for fine bubbles. Mark any leak spots right away, and you’ll see the next steps for fixing them.
Key Takeaways
- Inspect the tire, rim, valve stem, and bead for nails, cuts, cracks, corrosion, or visible damage.
- Mix dish soap and water, spray the tire, and watch for bubbles that reveal air escaping.
- Inflate the tire slightly above normal pressure, then submerge it in water to spot slow leaks.
- Mark any bubbling spots immediately so you can repair or monitor the leak accurately.
- Recheck tire pressure regularly to catch leaks early and maintain safe, reliable driving.
Inspect the Tire and Rim First
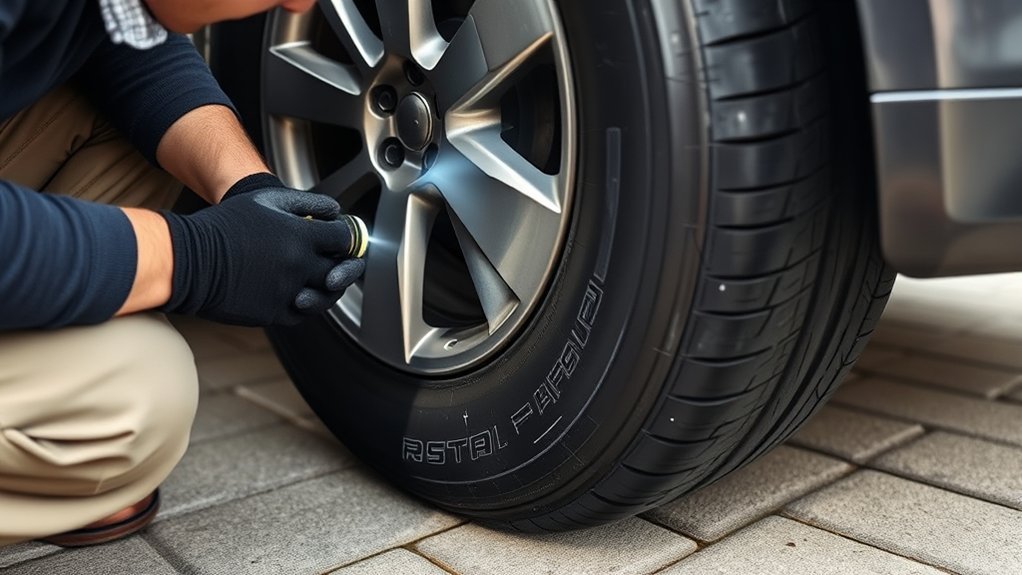
Start with a careful visual inspection of the tire and rim. You inspect the tire tread and sidewalls for nails, screws, cuts, or other foreign objects that could point to a puncture. Check the rim for splits, corrosion, or porosity, especially on alloy wheels, because damage there can create air leaks and a slow leak you can’t ignore. Look closely at the tire bead where it seats against the rim; impacts from potholes often break that seal. Also examine the valve stem for cracks, bends, or blockage, since a bad stem can bleed air. If you notice a hiss or a visible gap, mark the spot and keep the wheel under watch. This first pass helps you isolate obvious faults fast, so you can act with confidence and keep your mobility under your control. Additionally, consider the all-season tire performance as it can impact your driving safety and efficiency.
Use Soapy Water to Find the Leak
Mix dishwashing liquid with water at about a 20–30:1 ratio, then apply the solution generously across the tire, with extra attention to the bead, valve stem, and any spot that looked suspicious in your visual check. Keep the coat even and thorough, because soapy water only works well when you wet the surface fully. Watch for bubbles; they mark escaping air and can reveal a new or slow tire leak. If you see a cluster, you’ve found the small leak that’s causing low tire pressure. Rotate the wheel and recheck each section so you don’t miss a leak on the opposite side. This method helps you check tire condition fast without tools or guesswork. Use it as proactive maintenance whenever pressure drops or after you mount a tire. It’s a simple, practical way to spot trouble early, keep control over your vehicle, and stay free from preventable roadside hassles. Using a tire repair plug kit can provide an effective temporary solution for small punctures found during your inspection.
Test Hard-to-Find Leaks in Water
If soapy water still doesn’t reveal the leak, submerge the inflated tire in a tub of water and watch for bubbles. Inflate it above normal pressure, but stay below the max rating, so air escapes more clearly. Look closely at the tread, sidewall, and wheel rim. A slow leak often shows up as a trail of fine bubbles. Cover the bead area while you submerge the tire, because that tire-rim interface is a common failure point. If you applied soapy water first, leave the foam on the surface; it can amplify bubble formation and make a hidden leak easier to spot. Rotate the tire slowly in the water and inspect every section, since one angle won’t reveal everything. Mark each bubbling spot immediately, then remove the tire and repair the defect. This method gives you direct evidence, so you can act with precision and reclaim dependable pressure. Additionally, using a tire plug kit can help you address any punctures you discover during this inspection.
Frequently Asked Questions
How to Check for Tire Leak at Home?
You can check for a tire leak at home by monitoring tire pressure, then doing a visual inspection for tread wear, punctures, and rim damage. Spray soapy water over the tire, especially the valve stem, tread, and bead; bubbles show air loss. If needed, submerge the inflated tire in water for confirmation. Once you find the leak, compare repair options and decide on a safe, independent fix.
What Is the 3 Tire Rule?
The 3 tire rule means you don’t ignore one leaking tire; you check the other three for matching damage, wear, or pressure loss. You’ll improve Tire maintenance, Leak prevention, and Pressure monitoring by doing Seasonal checks, a Visual inspection, and measuring Tread depth. Look for punctures, cracks, and Air loss so you can keep your vehicle balanced, safe, and under your control without surprise failures.
What Are the Two Methods for Finding a Leak in a Tire?
You use two methods: a soapy-water bubble test and a tub submersion test. With leak detection tools, you spray the tire, bead, and valve stem, then watch for bubbles; that’s one of the best tire repair techniques. You also submerge the inflated tire and check for escaping air. Keep air pressure monitoring steady, use visual inspection tips, and note common leak locations during seasonal tire maintenance with sound identification methods.
Can You Use Windex to Find a Tire Leak?
Yes, you can use Windex to find a tire leak, but don’t expect perfect results. Its Windex effectiveness is okay for quick DIY leak detection, especially with the bubble test technique on valve stems or beads. You’ll often spot common tire issues, yet soapy water works better. Use these tire maintenance tips and leak prevention methods, then check Windex alternatives if the leak persists, and get the tire repaired promptly.
Conclusion
A tire leak can feel like a slow drip in your day, but catching it early keeps you moving safely. By inspecting the tire and rim, using soapy water, and testing stubborn leaks in water, you give yourself a clear path to the source. Think of each bubble as a small alarm—proof that pressure is escaping. When you find the leak, you can patch the problem before it drains your time, money, and confidence.
Related Articles

How Long Does Tire Shine Last? Complete Lifespan Guide
Usually lasting from days to months, tire shine depends on product and prep—uncover what really makes it fade or stay.
Read More
How Long Does It Take to Get a Tire Changed? Time Guide by Vehicle
Fast tire-change times vary by vehicle and service, but hidden delays can stretch the wait—discover what really affects yours.
Read More
Don’t Tire Yourself Out: Smart Ways to Manage Energy & Avoid Burnout
Carefully manage your energy to avoid burnout and stay productive, with simple habits that may change how you work.
Read More